
BLOG

Automate Your Hustle CRM Updates - AUGUST 11, 2023
Welcome back! We're excited to share the latest updates from the week of August 5th to 11th, 2023.
For any inquiries about these updates or any aspect of your Automate Your Hustle CRM account, or if you have questions before choosing our service, feel free to contact our dedicated team at [email protected]. We're here to support you every step of the way! 💻
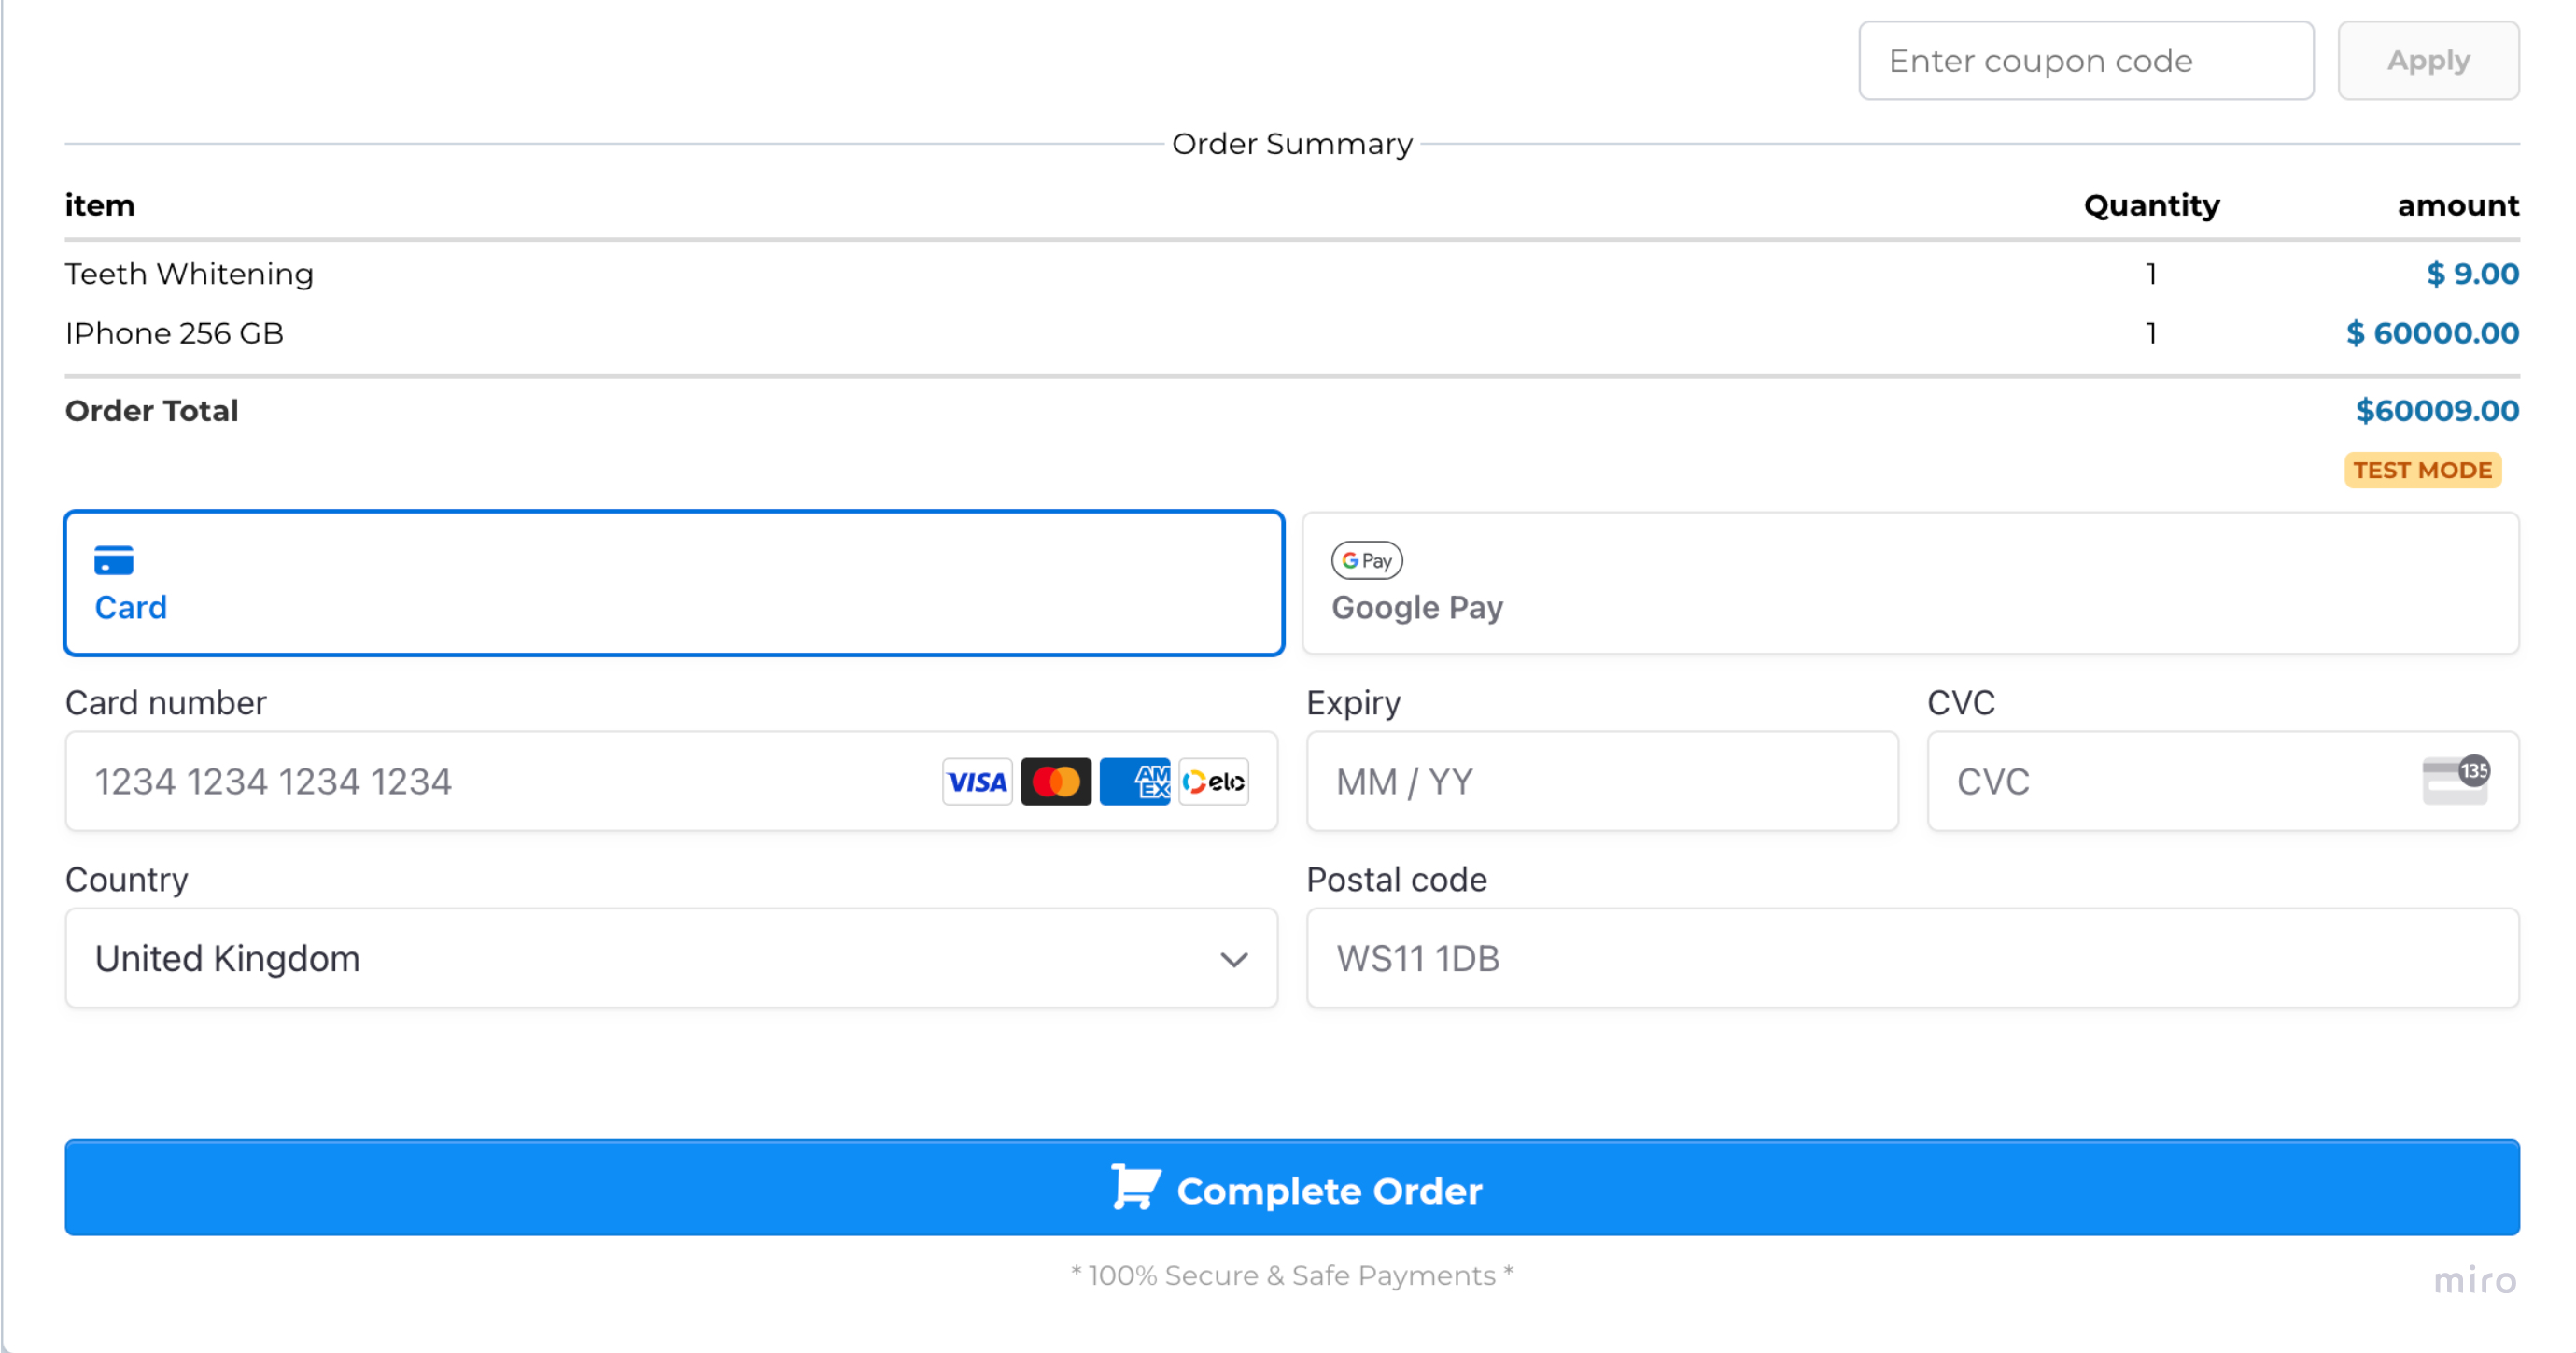
Removal of Stripe terms getting automatically displayed
Legal terms that Stripe used to show automatically, and that businesses couldn't change, have been taken away.
This applies to payments on order forms, invoices, and Text2Pay links
Additional Filters supported in Contact Smartlists
New filters added to smartlists :
Created By Filter:
Search for contacts based on the user responsible for creating a particular contact record.
Last Updated By Filter:
Find contacts based on the user that made the most recent updates to a contact record.
Inbound DND Settings Filter:
Filter contacts based on their “DND” status for inbound communications.
DND Settings Filter:
TSearch for contacts with channel-wise “DND” preferences for outbound communications.
Website Filter:
Filter contacts based on the website associated with them.
Instagram ID Filter:
This filter enables users to filter contacts having Instagram ID field available or blank
Facebook ID Filter:
With this filter, users can search for contacts having Facebook ID field available or blank
Country Filter:
Filter contacts based on country.
Timezone Filter:
This filter allows users to find contacts based on timezone field value. It’s valuable for scheduling communication based on the contact’s timezone.
Google ID Filter:
With this filter, users can search for contacts having Google ID field available or not
Additional Email Filter:
Now existing email filter will search contacts based on primary email as well as additional emails.
Last Activity Time:
Users can now search contacts based on last activity time.
Valid Email:
This filter allows users to search contacts based email validation status.
Source Type:
Users can now filter contacts based on their “Source Type” field value.
Along with these new filters we have added additional phones, additional emails, timezone, country & website columns to smartlist table/columns and contacts export.
Increased Product purchase limit in Order forms 🌟
the product purchase limit has gone up. Now, instead of only being able to buy up to 10 items, you can buy up to 999.
🎉 What's New?
Increased Product Limit:
The maximum product purchase limit in funnel products has been raised to 999. This change will be reflected in the order forms.
Updated User Interface:
We've improved the user interface for updating the quantity of product in order forms for a better user experience.
🕐 Old Behavior
Previously, customers could only purchase a maximum quantity of 10 for each product.
🙌 New Behavior
Now, customers can purchase up to 999 units of each product in a single order!
🤔 How It Works
To set the new limit,
navigate to Funnel products
click 'edit' on any product
in Additional options change the limit and save.
After saving the funnel, go to the order form page. There, you'll find the updated order form that now has a new quantity dropdown.
➕ Pain Point Addressed
This new feature lets people buy as many as 999 items at once. This makes it easier to place big orders.
So, make the most of this great change and let customers have more choices when buying
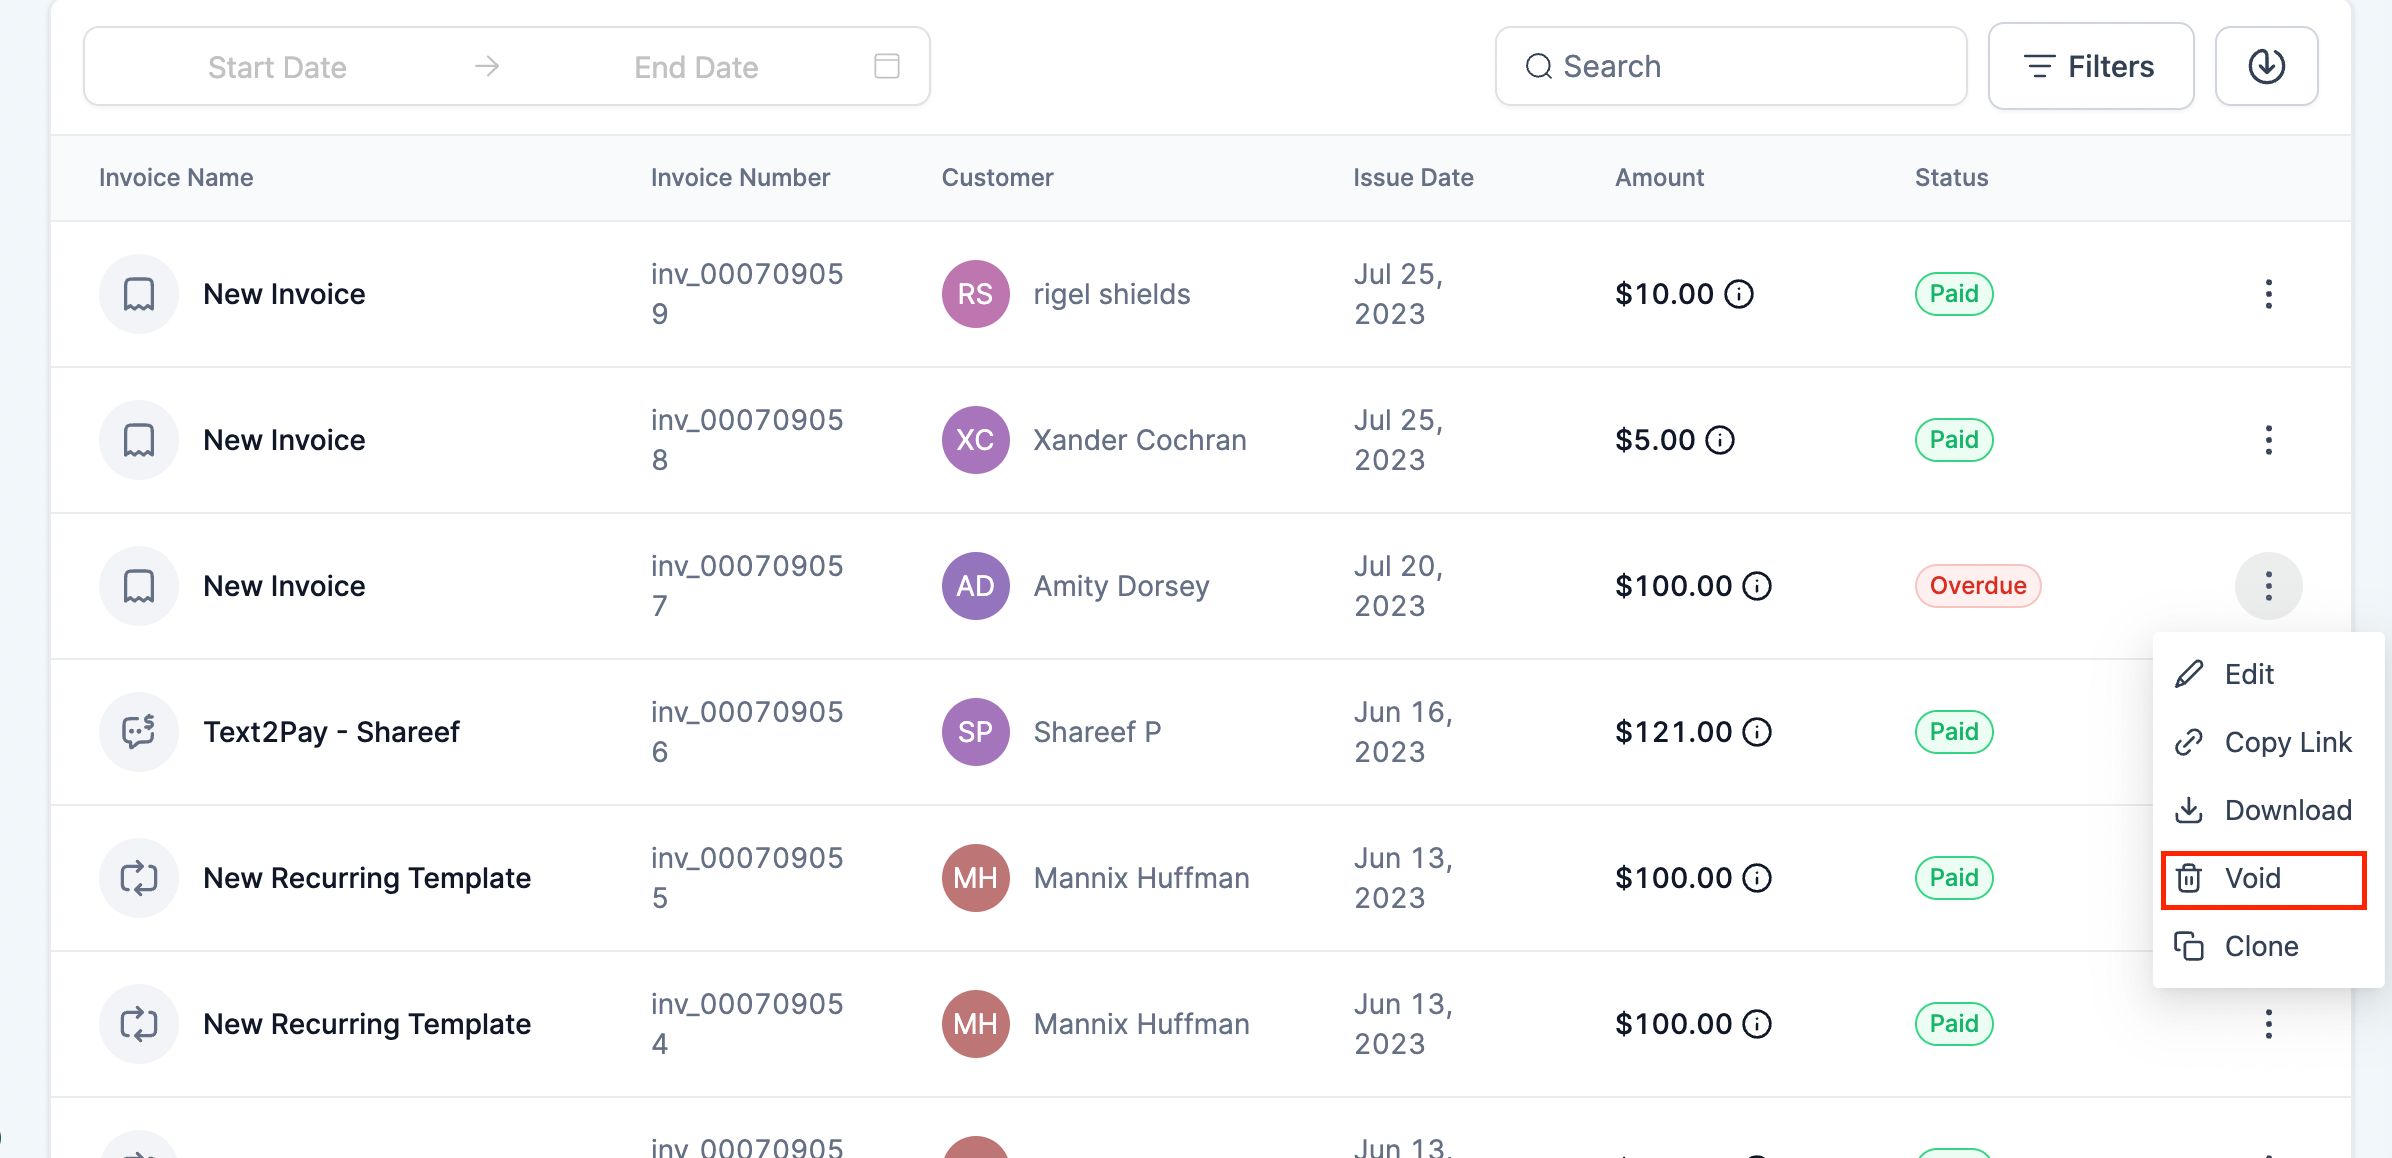
Void Sent/Overdue/Paid Invoices || Refunds for manual payments
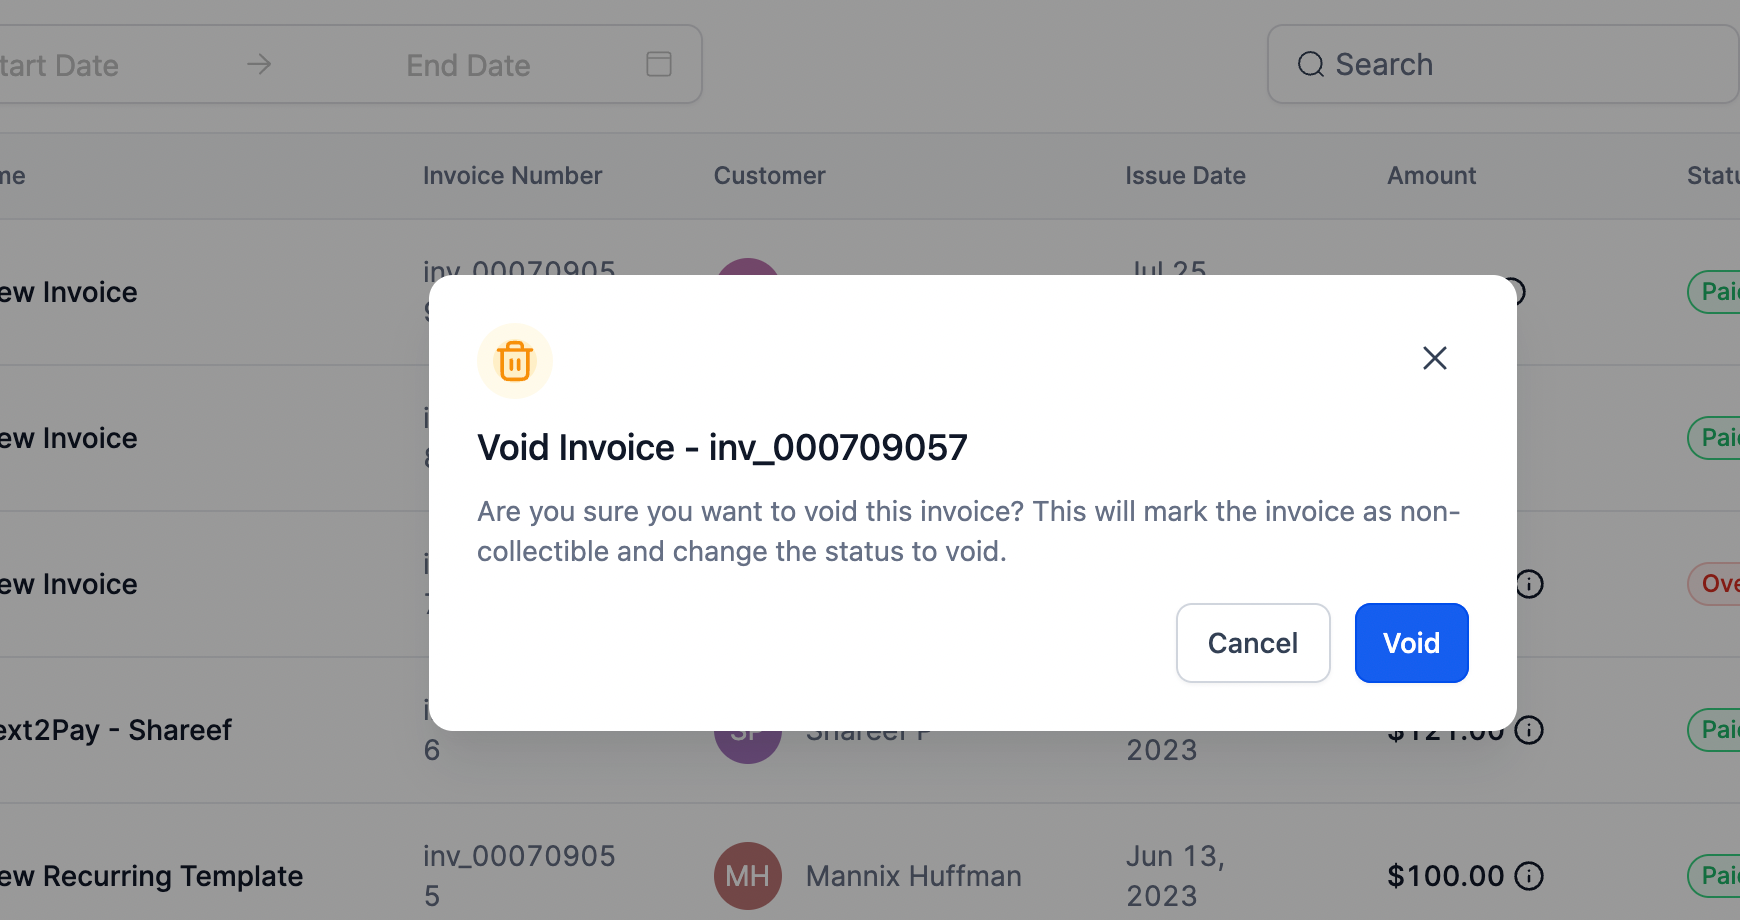
Businesses will now be able to void a sent/overdue/paid invoice
This fixes a big problem when a customer cancels while they have regular appointments and unpaid bills. Canceling a bill makes it easier to handle these unpaid amounts, which can't be collected anymore and mess up the overall payment records.
If the invoice was paid (card payments or recorded manually), the associated transaction needs to be fully refunded first to void the paid invoice
Businesses also have the option now to fully/partially refund manual payments recorded on invoices
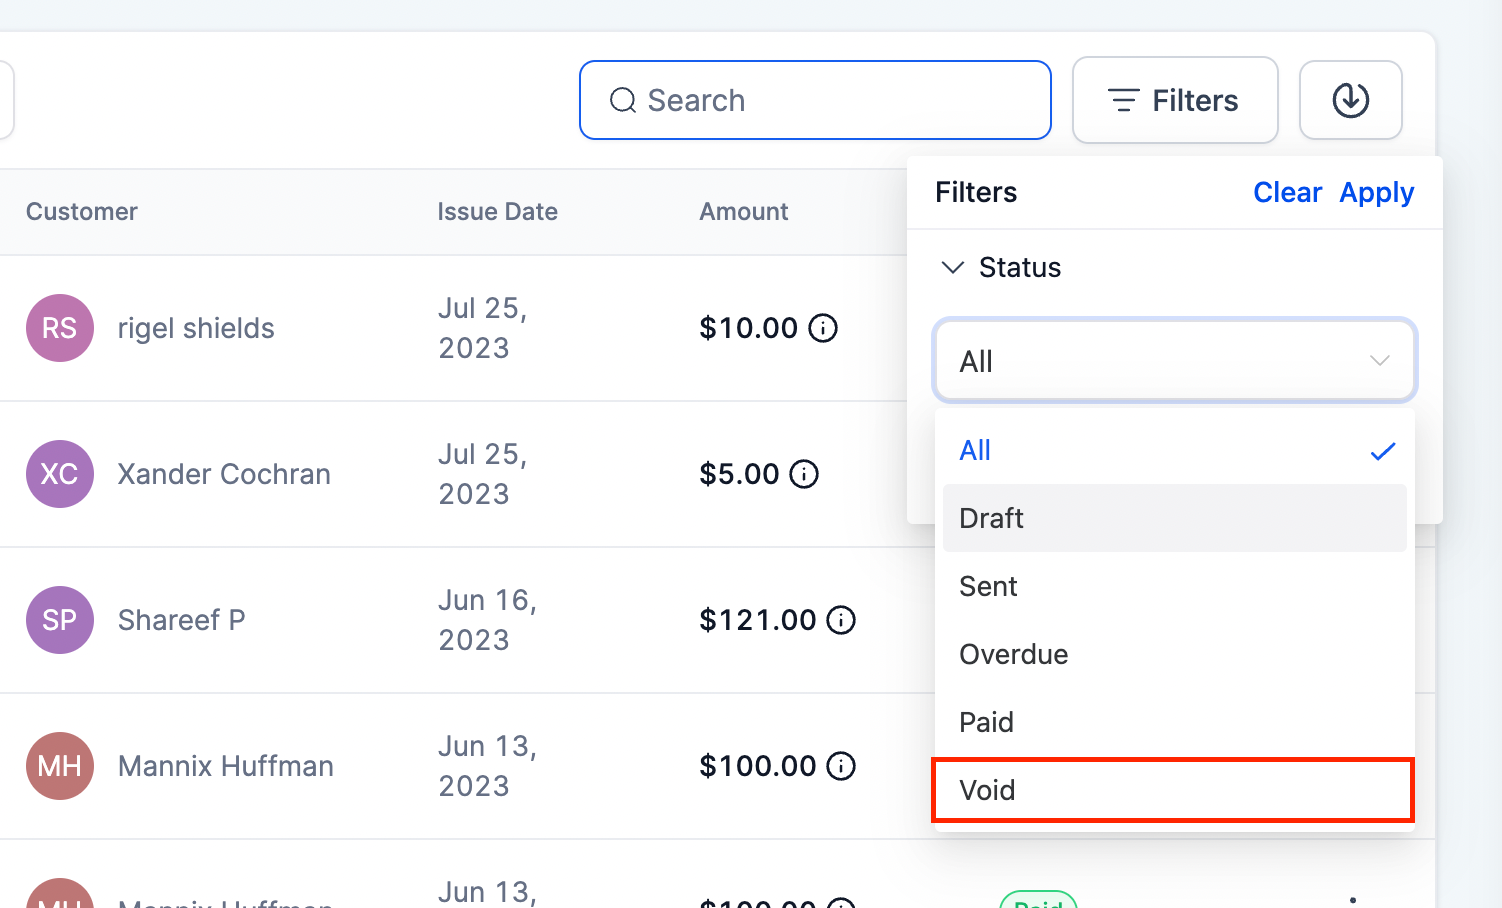
Voided invoices will not be visible in the list view by default, but can be specifically filtered using the Void filter
If an invoice is voided, it will not affect the invoice statistics displayed on the Invoices list page
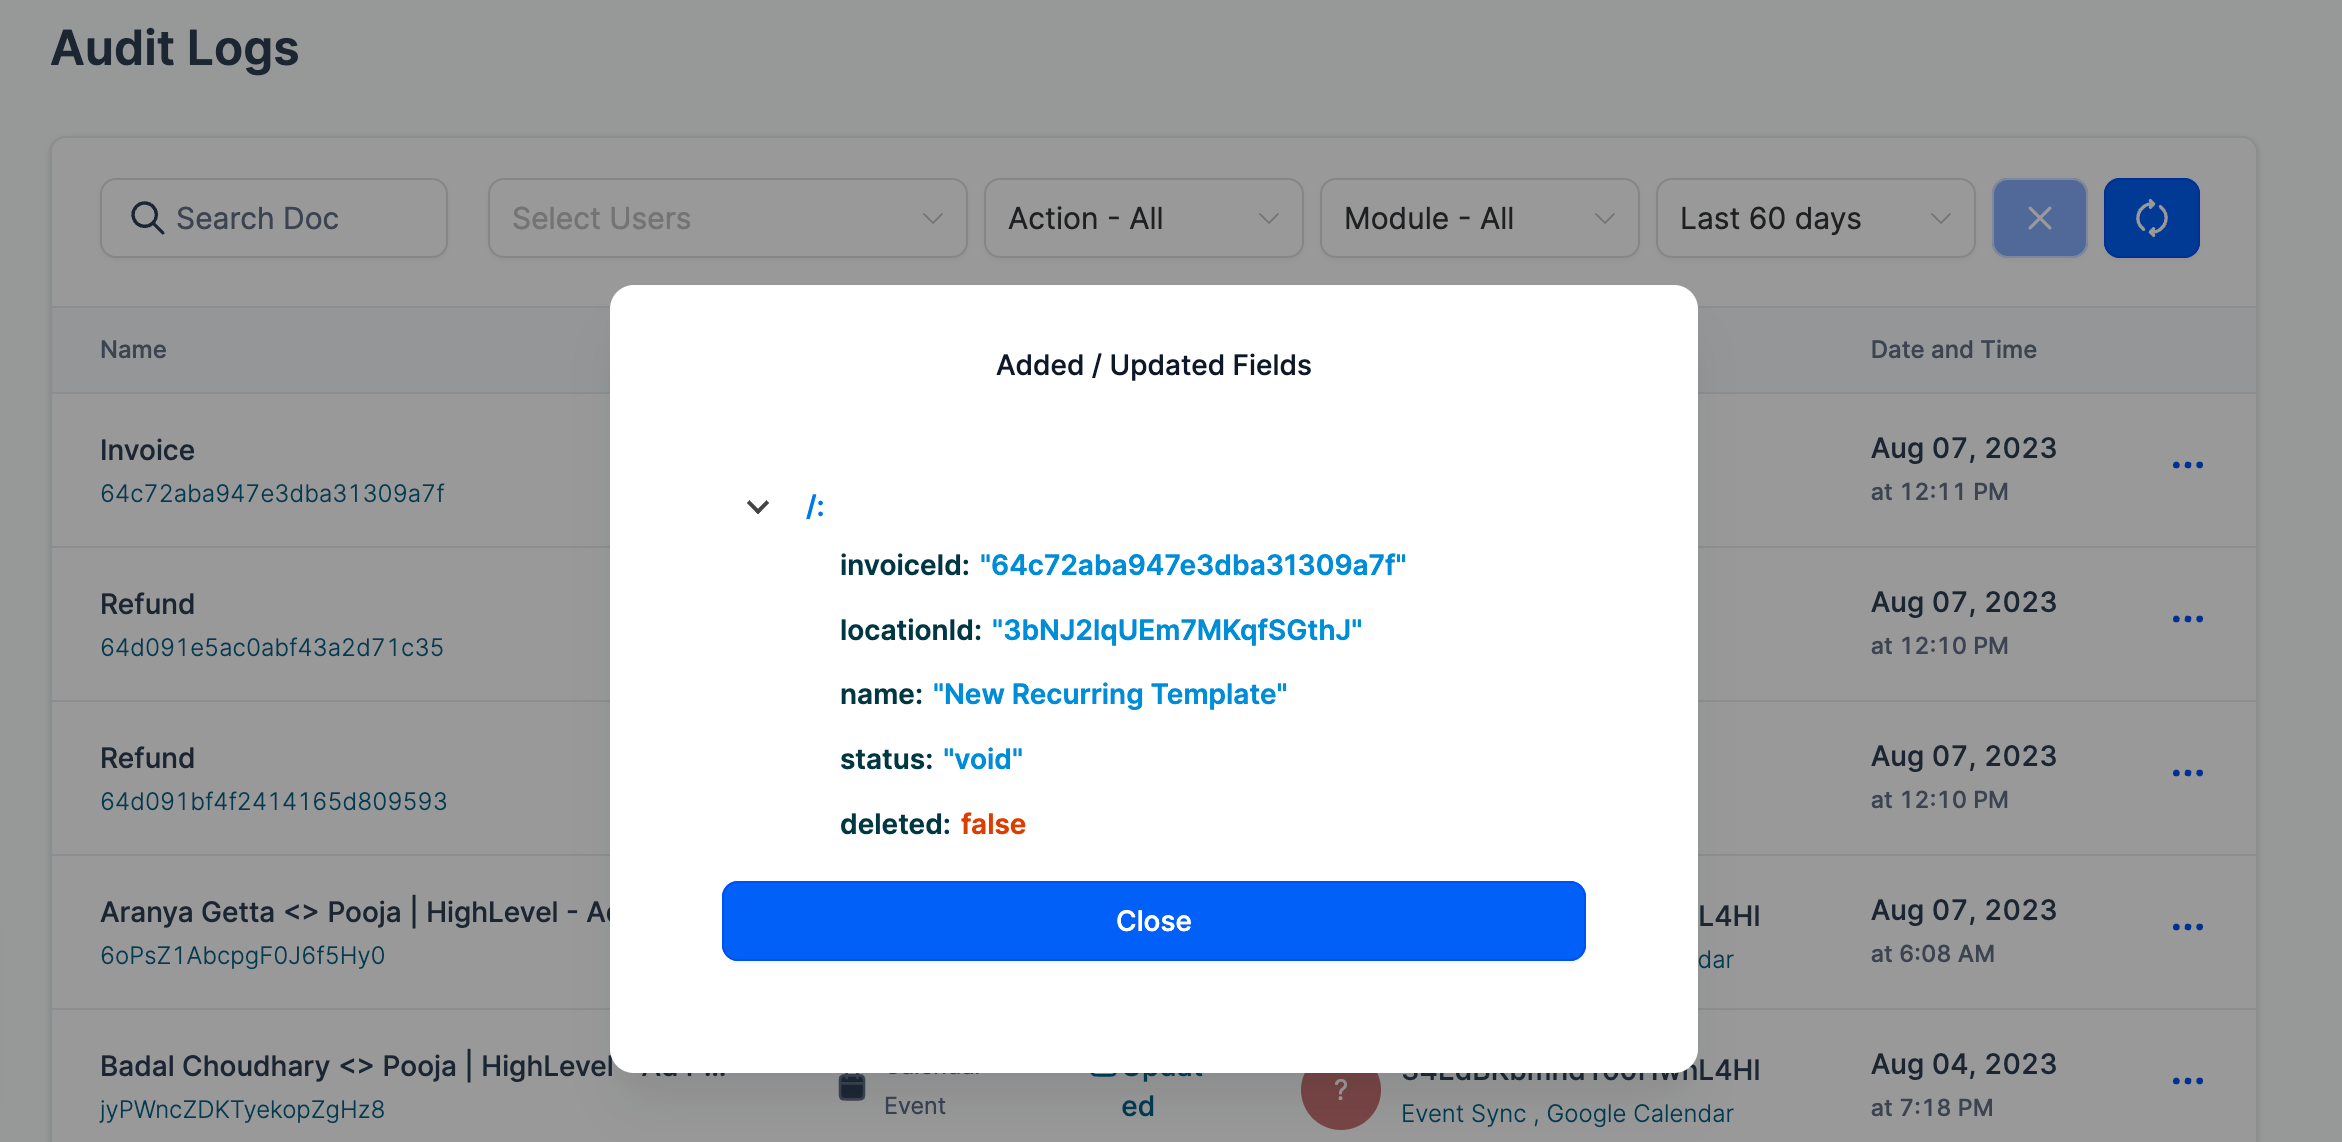
Audit logs will be maintained for all the void, delete and refund actions performed
Beta Release: Introducing the New and Improved Agency Billing Page 🚀
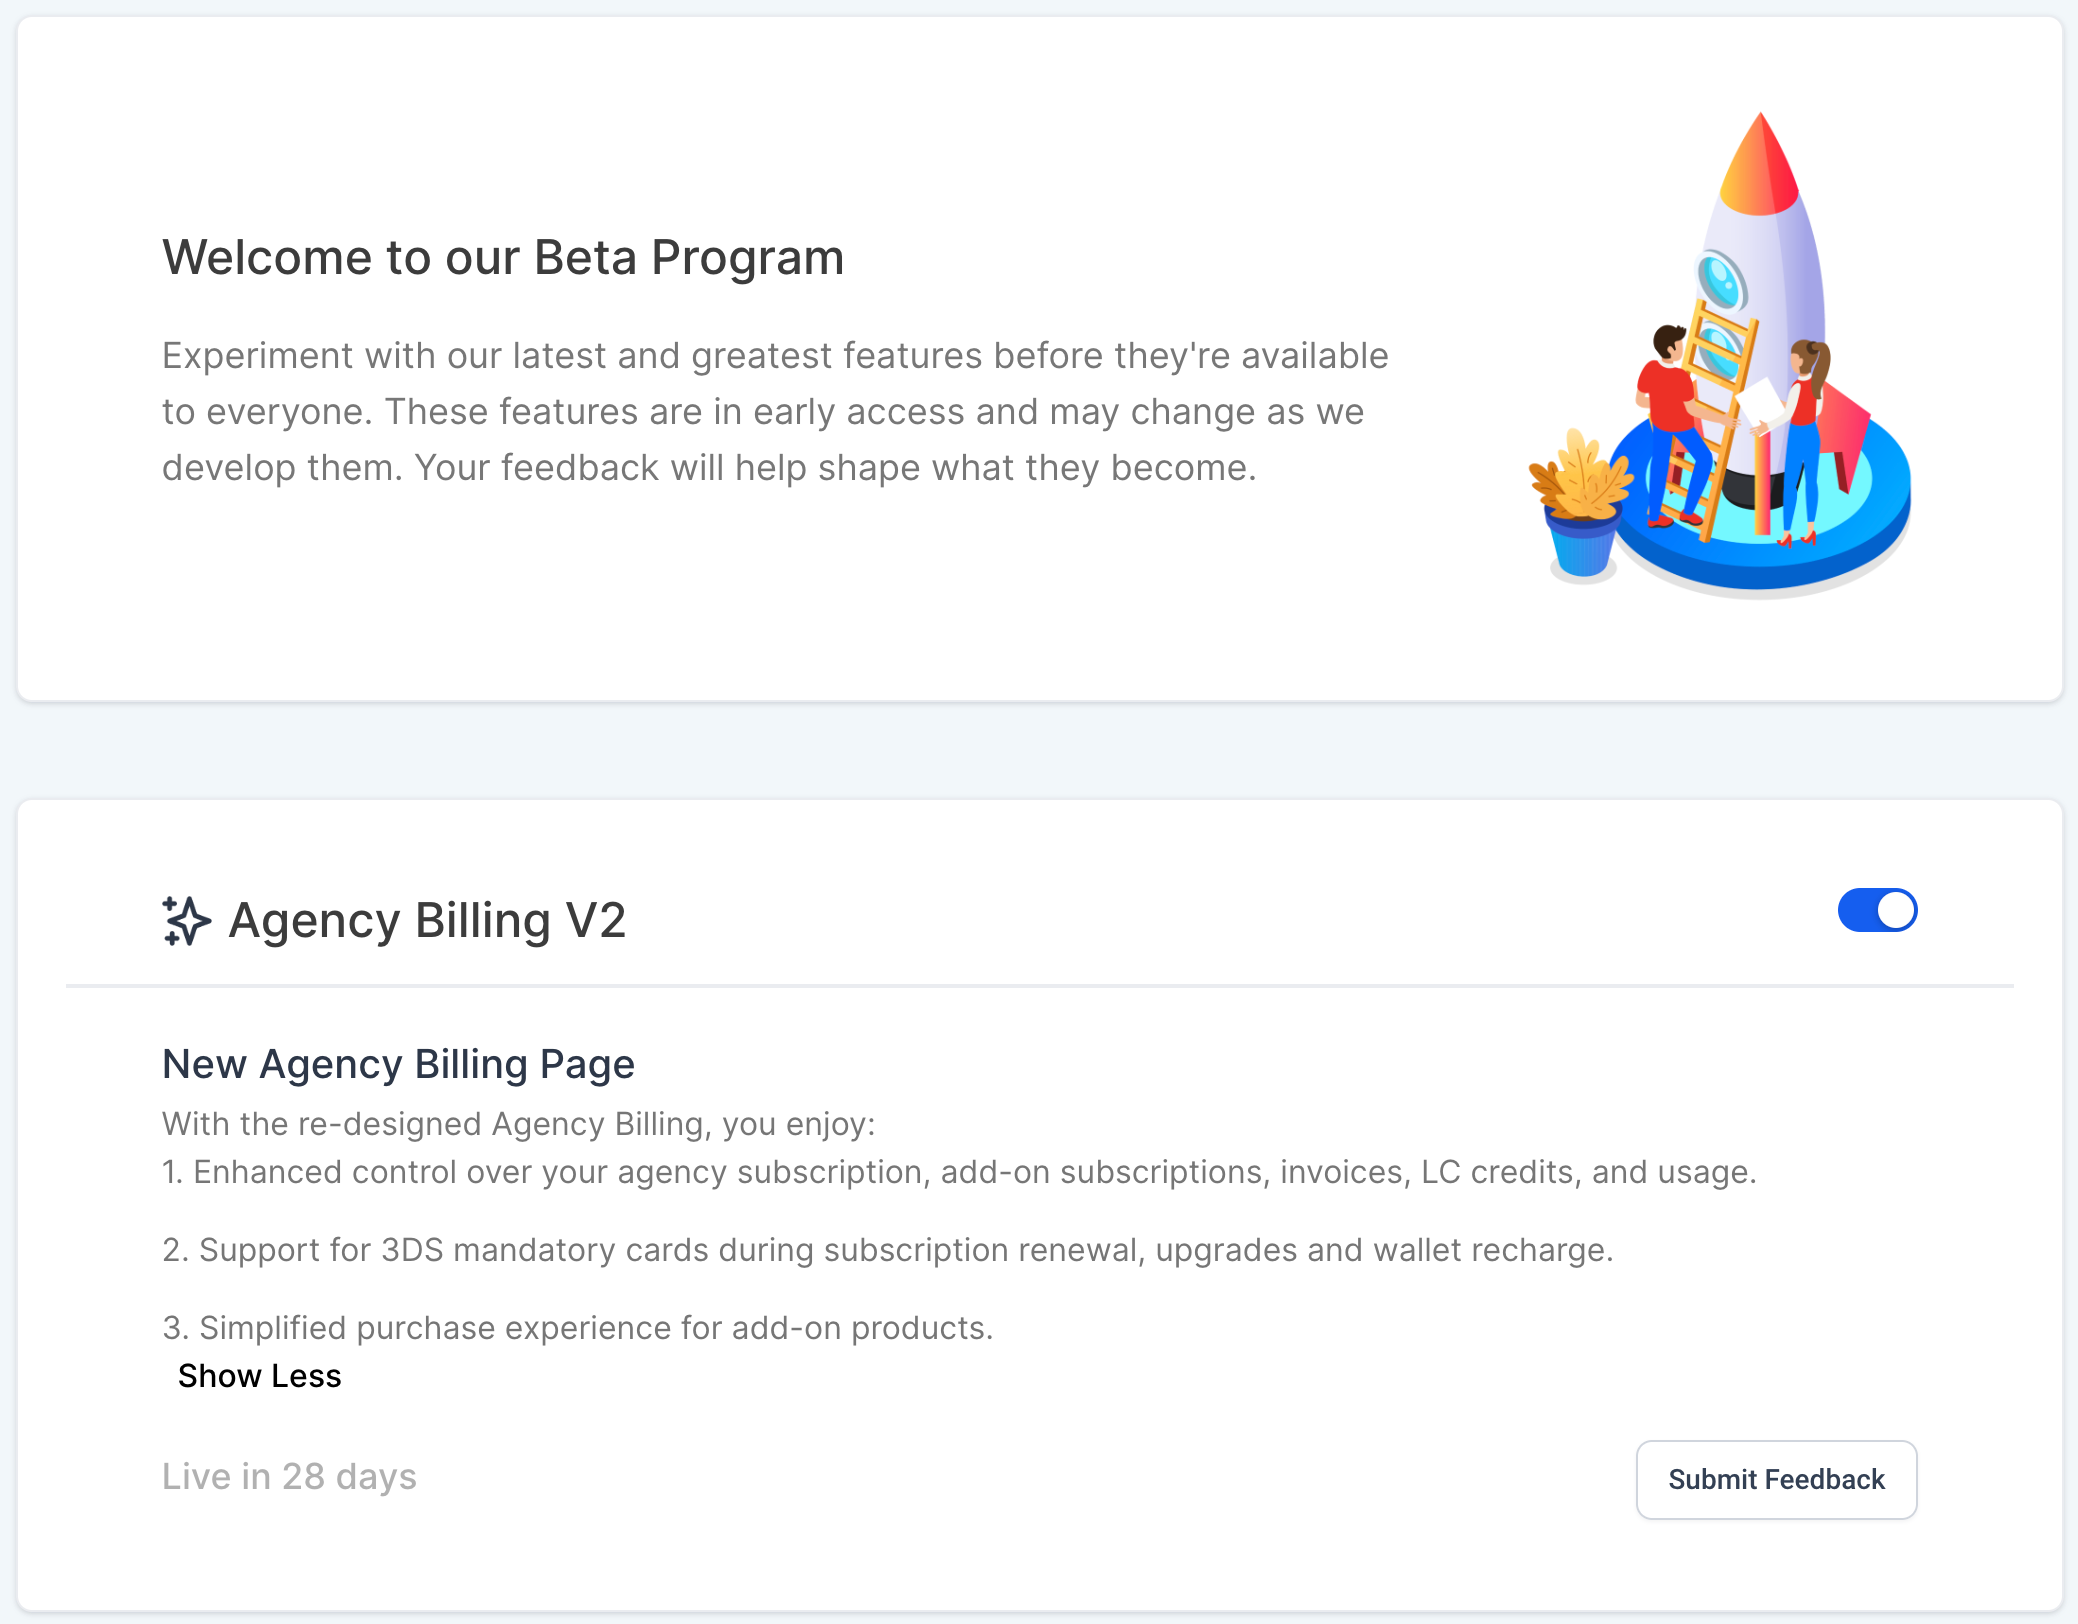
the test version of an improved Agency Billing Page is here. It has a new design, more capabilities, and cool new features!
New Feature Highlights:
3DS Mandated Cards Support:
Now you can add 3DS mandated cards, which are supported for subscription renewal, upgrades, and manual wallet recharge.
Detailed Transaction View:
Easily view transactions for specific sub-accounts ✨, and filter them by each transaction type.
Separate Charges and Invoices:
Both charges and invoices are now displayed separately, along with their statuses.
Accurate Refund Charges Display:
Refund charges are now presented accurately, ensuring clarity.
Independent Billing Address:
The billing address is now treated separately from the company address, providing better organization.
🚀 How to Enable
To explore this powerful new billing experience,
Navigate to Agency Settings
Labs
toggle Agency Billing V2.
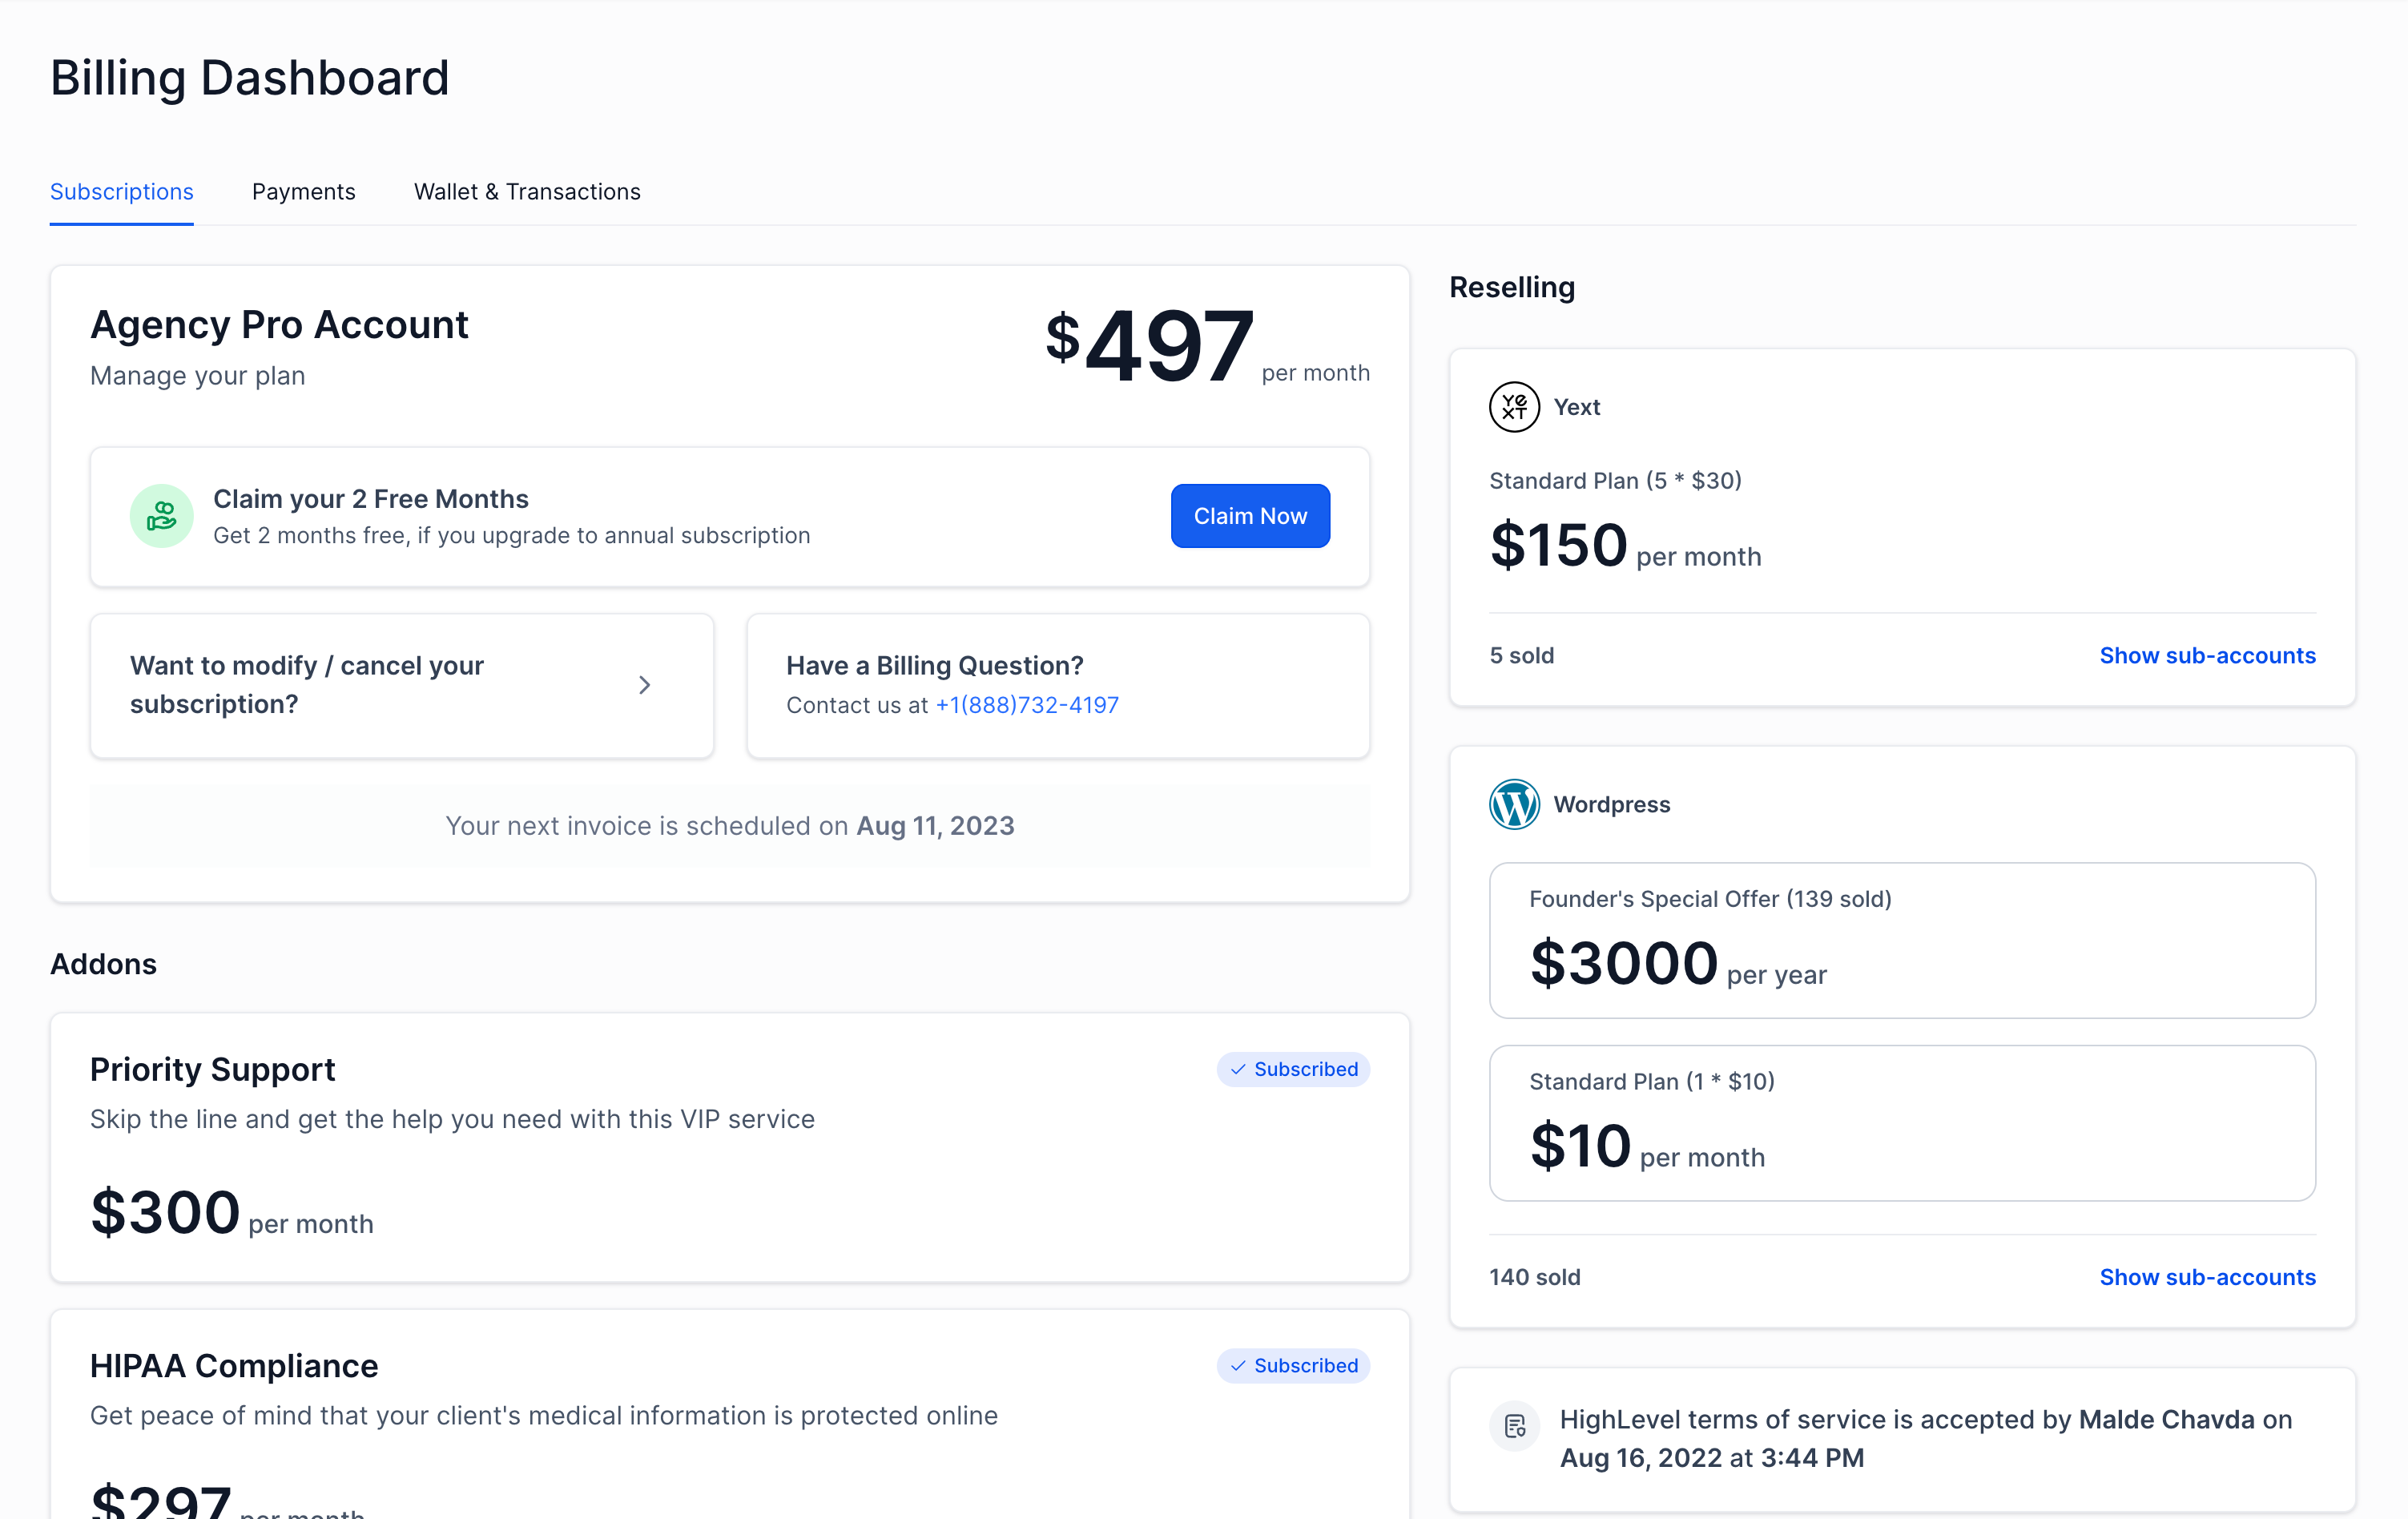
👀 sneak peek
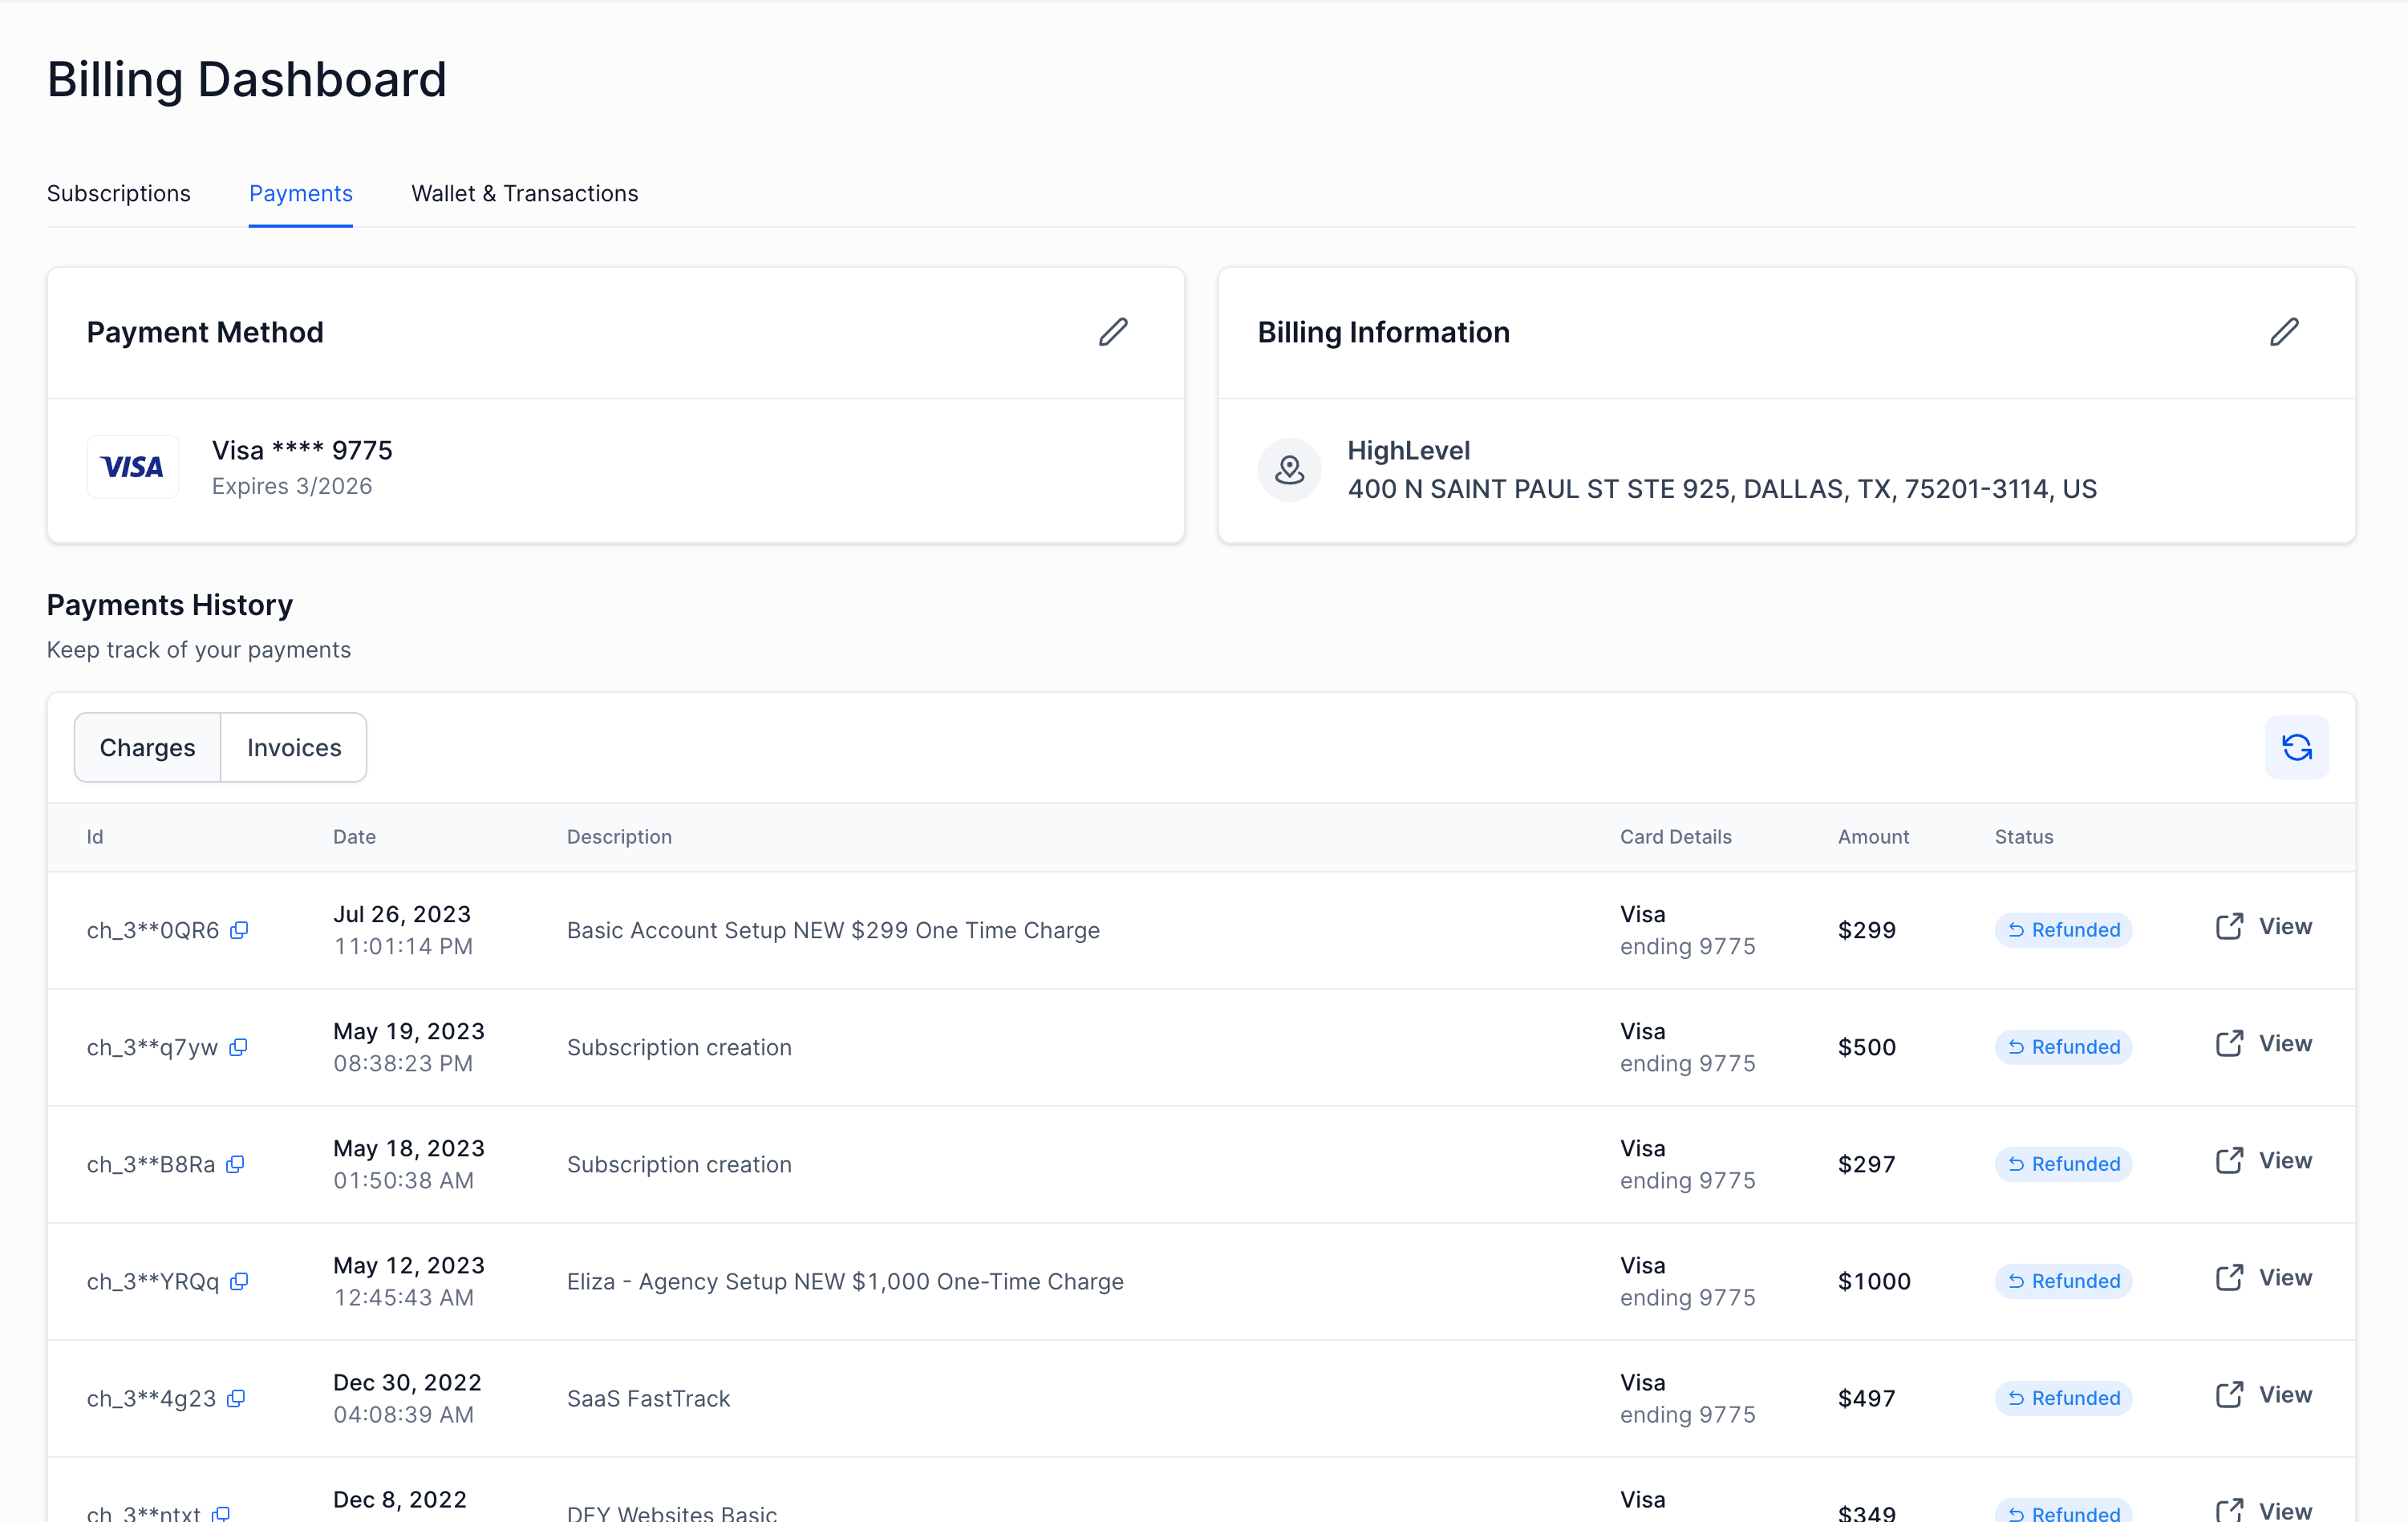
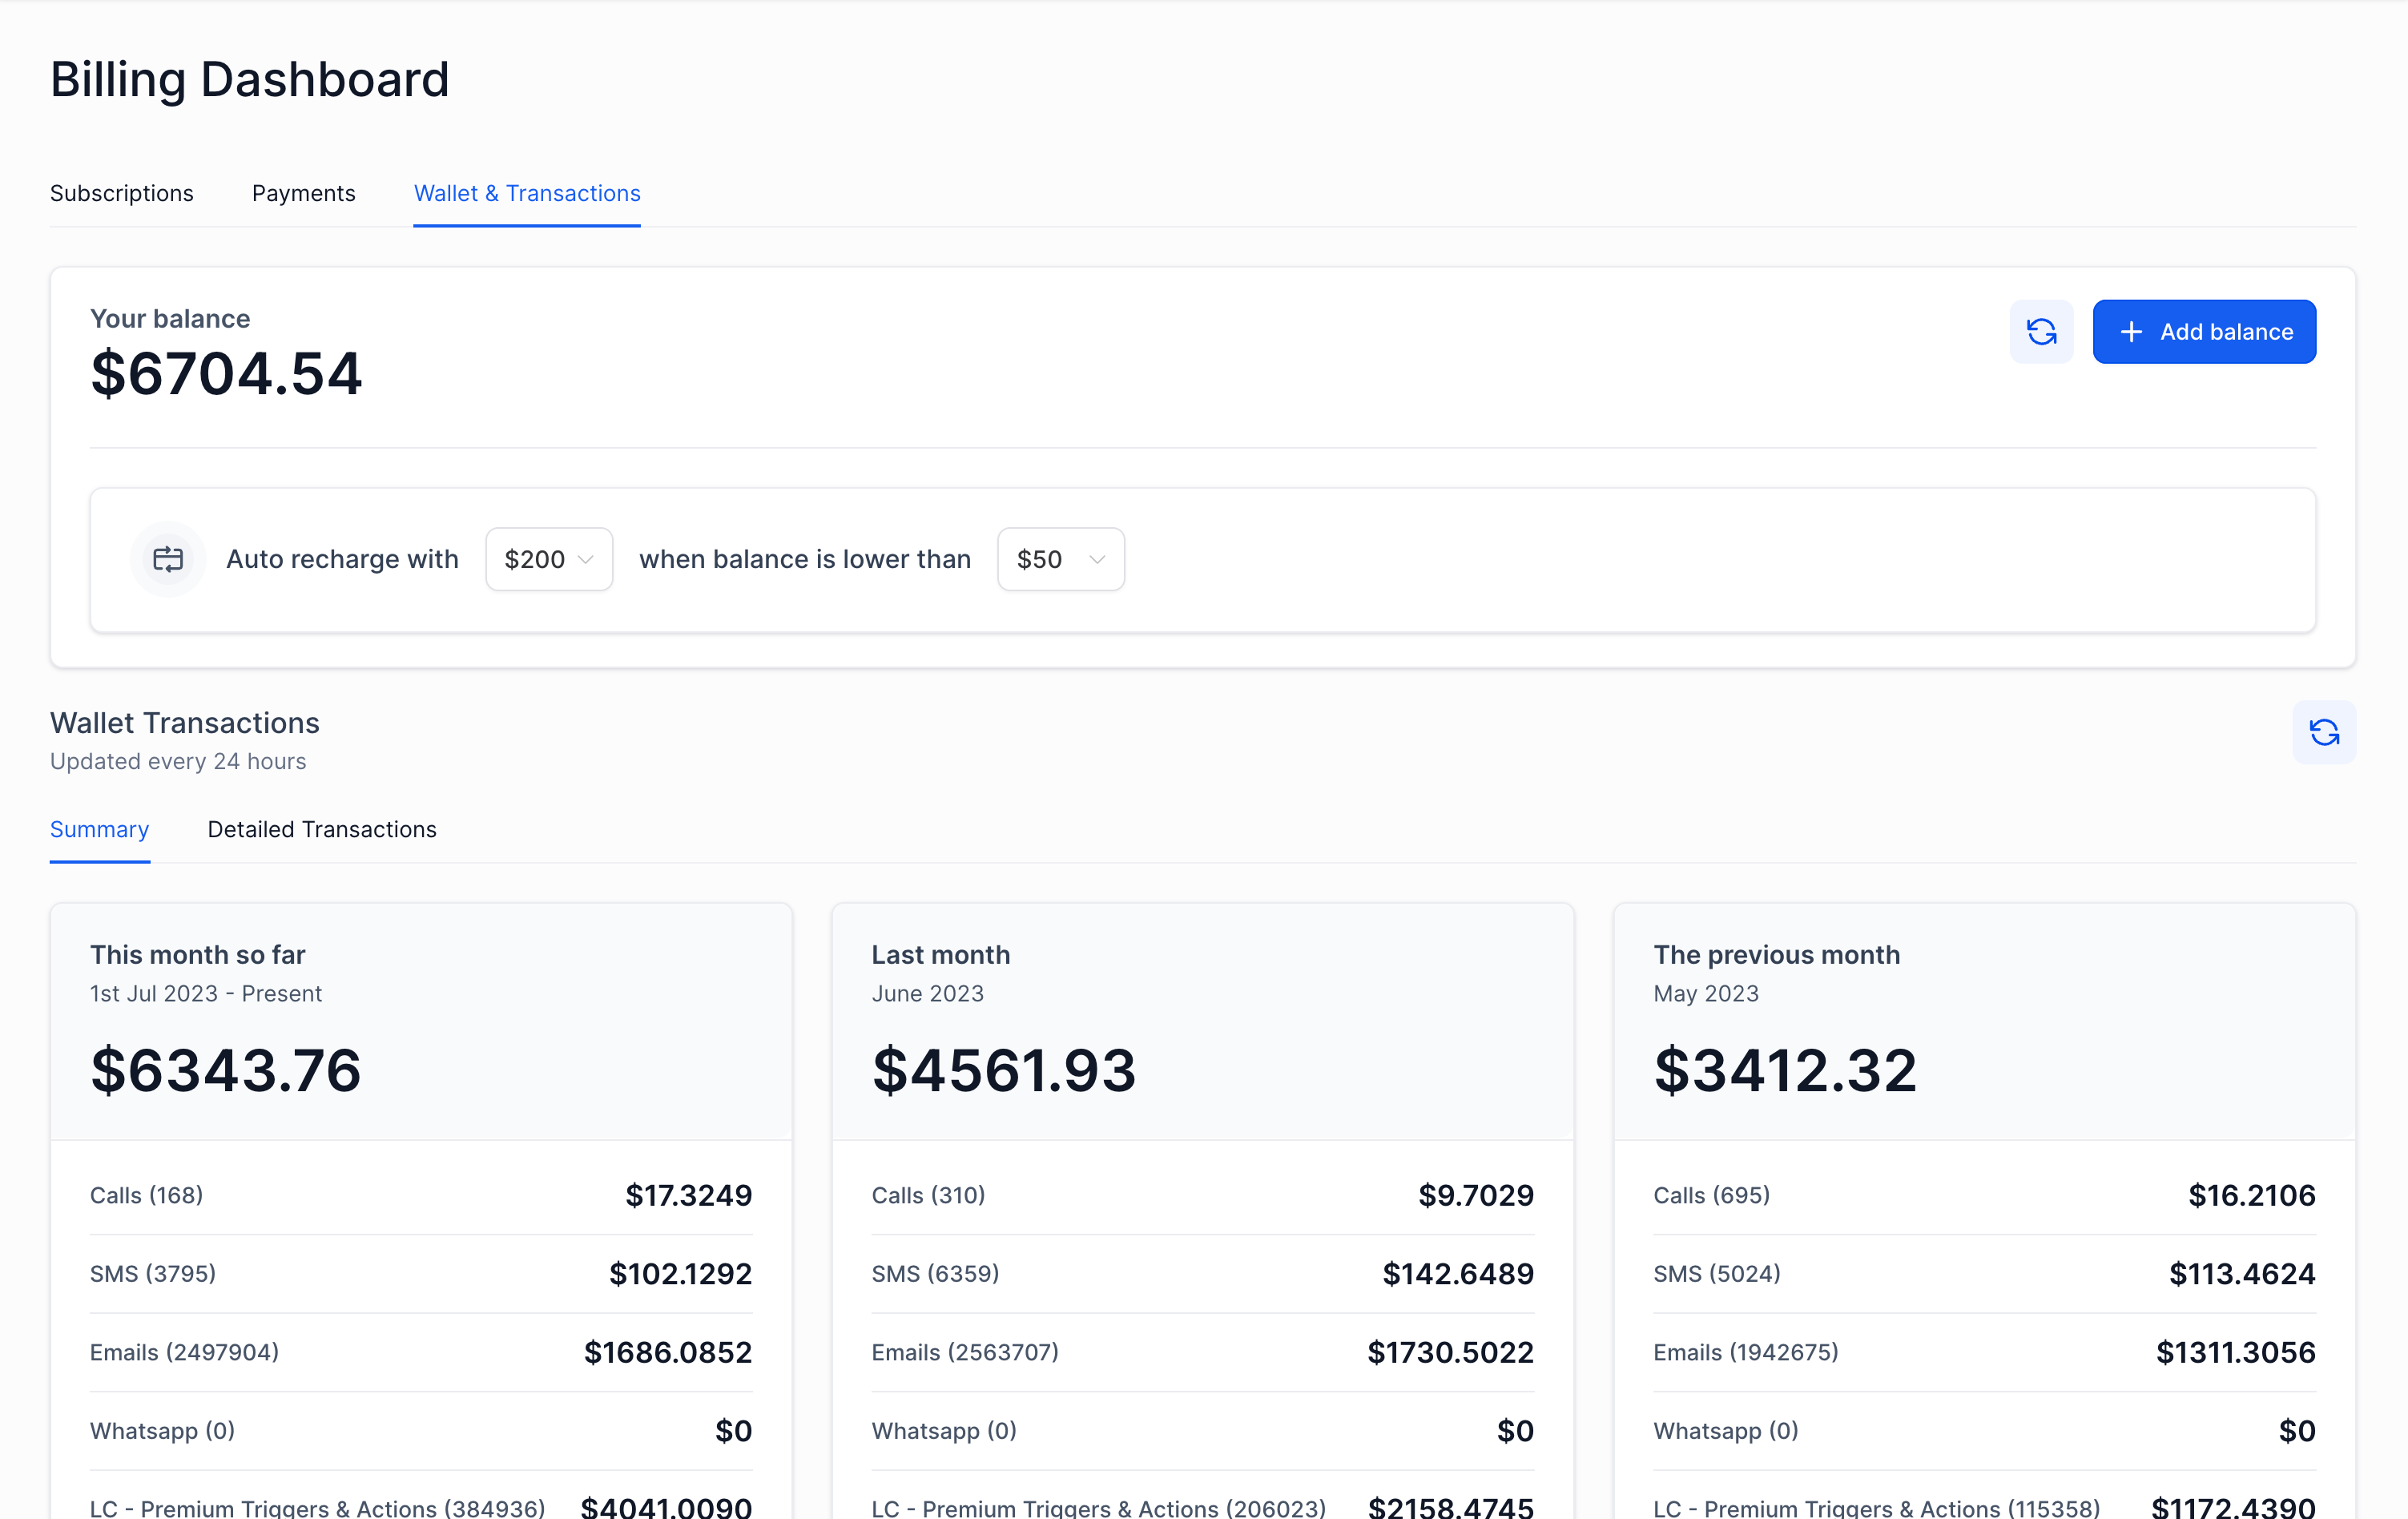
The updated Billing Page makes it easier for you to handle and understand billing. It's user-friendly and smooth.
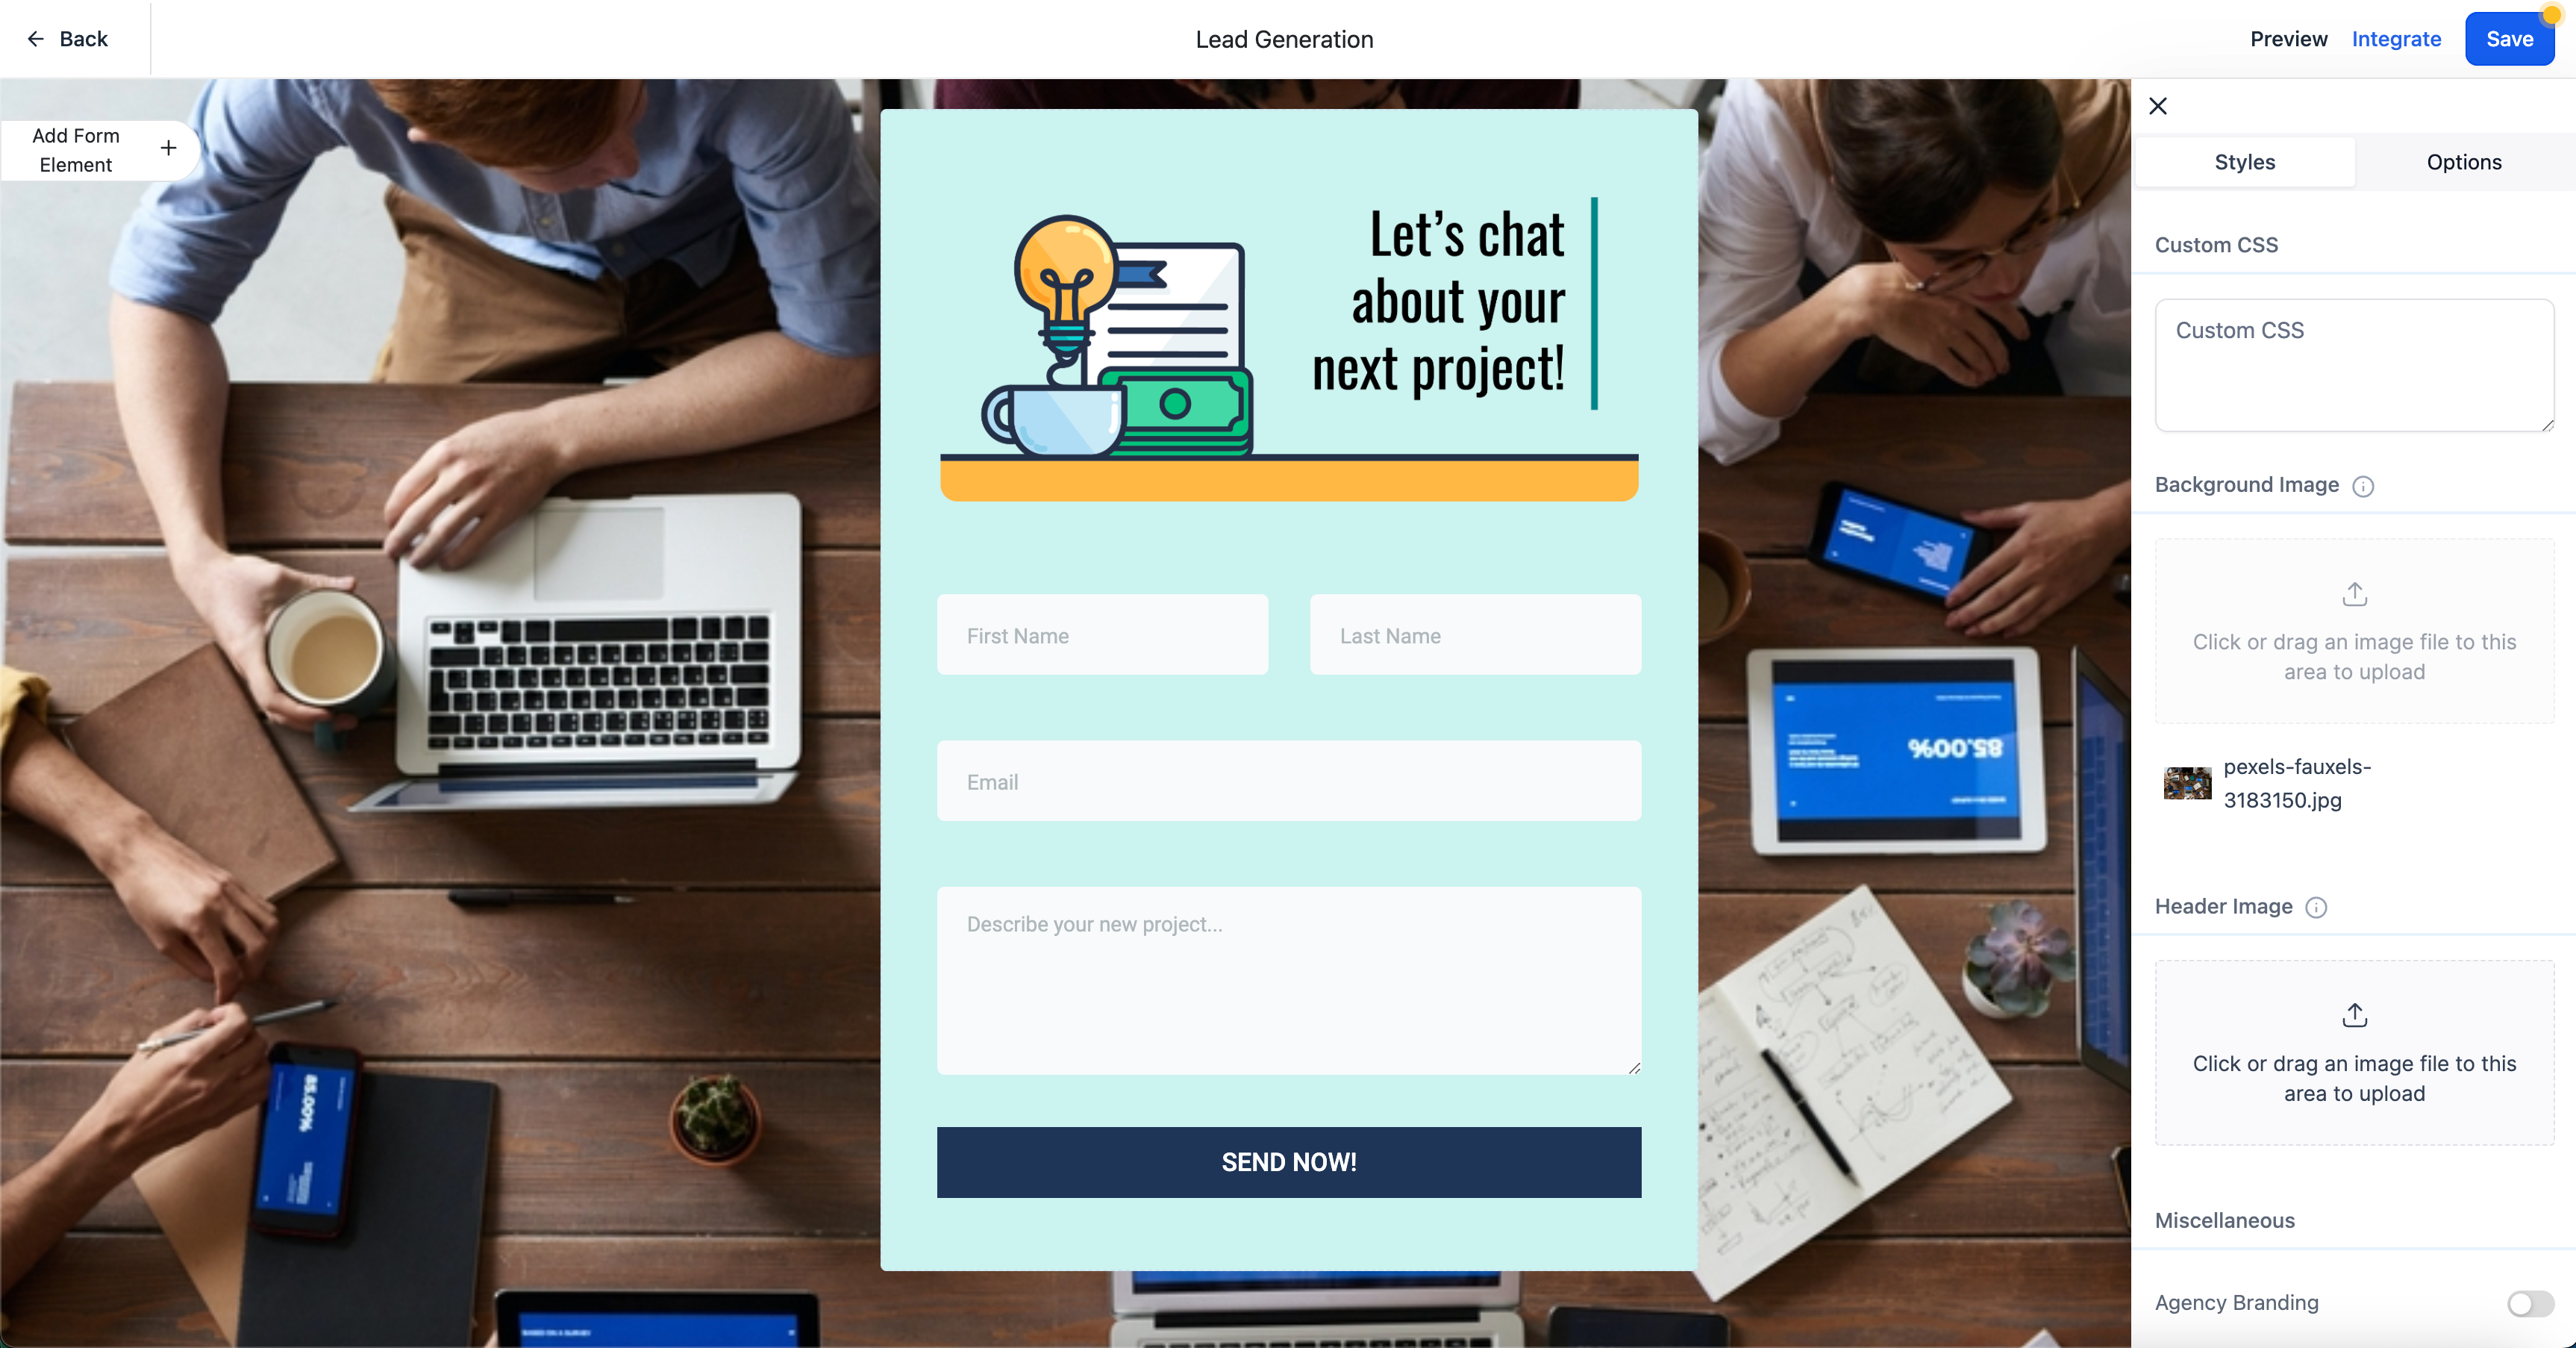
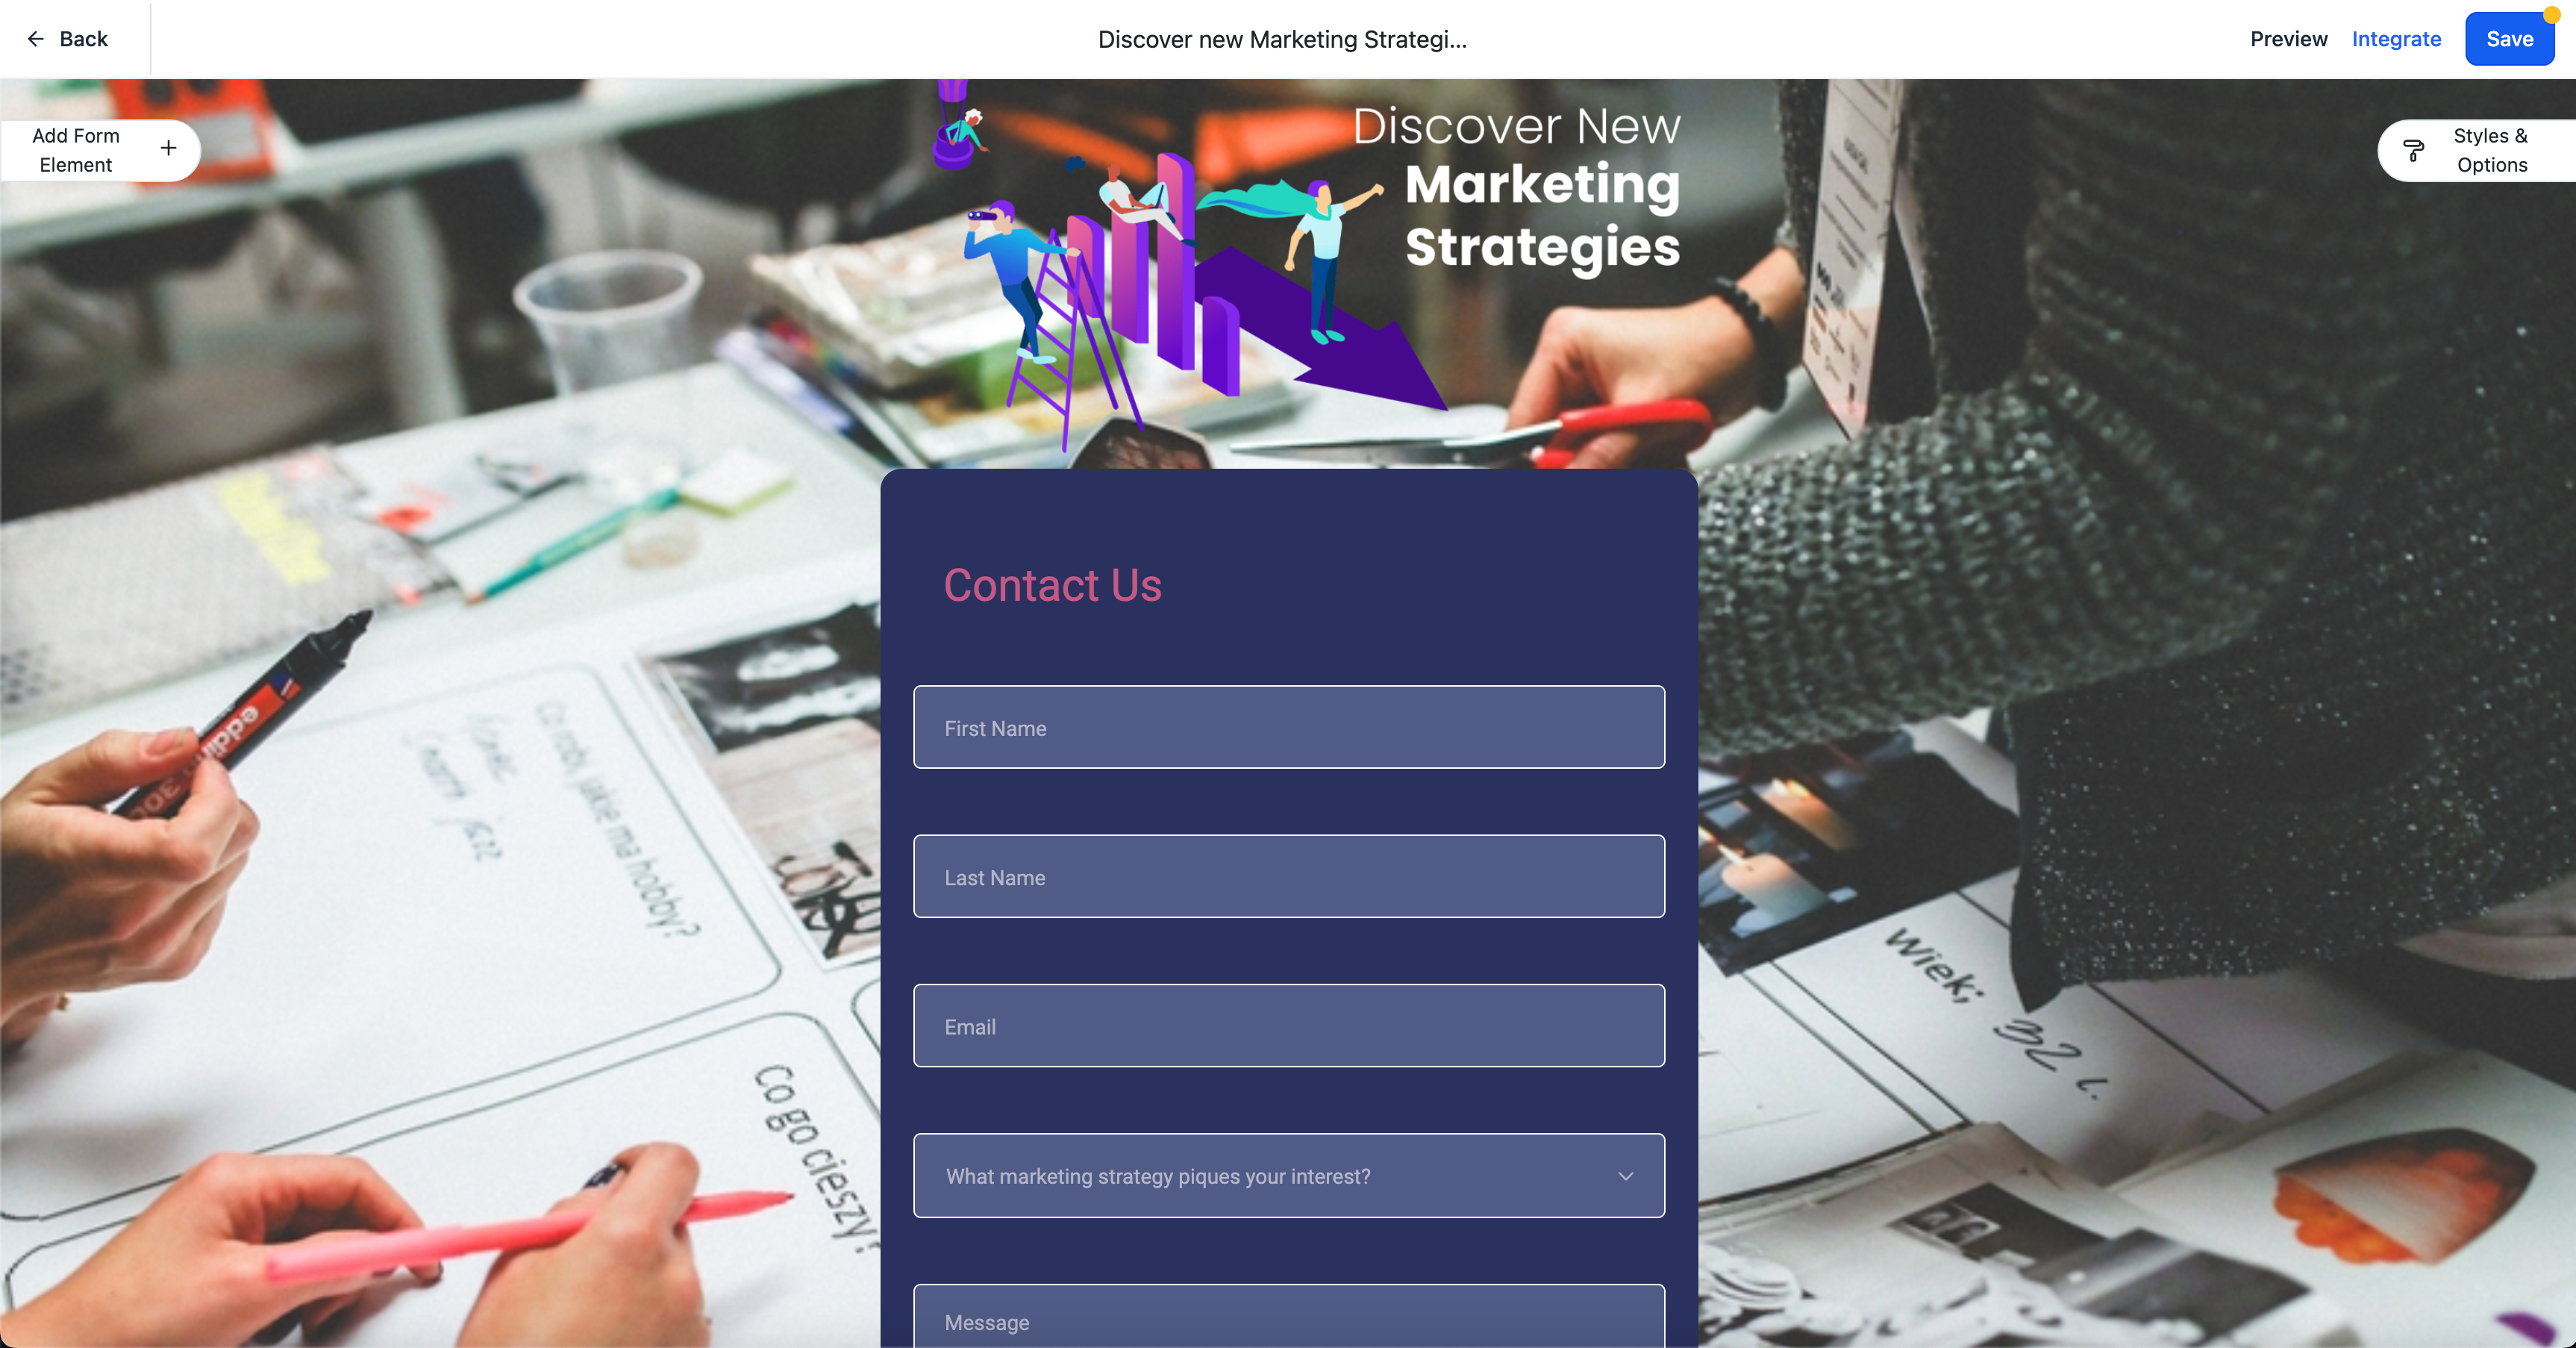
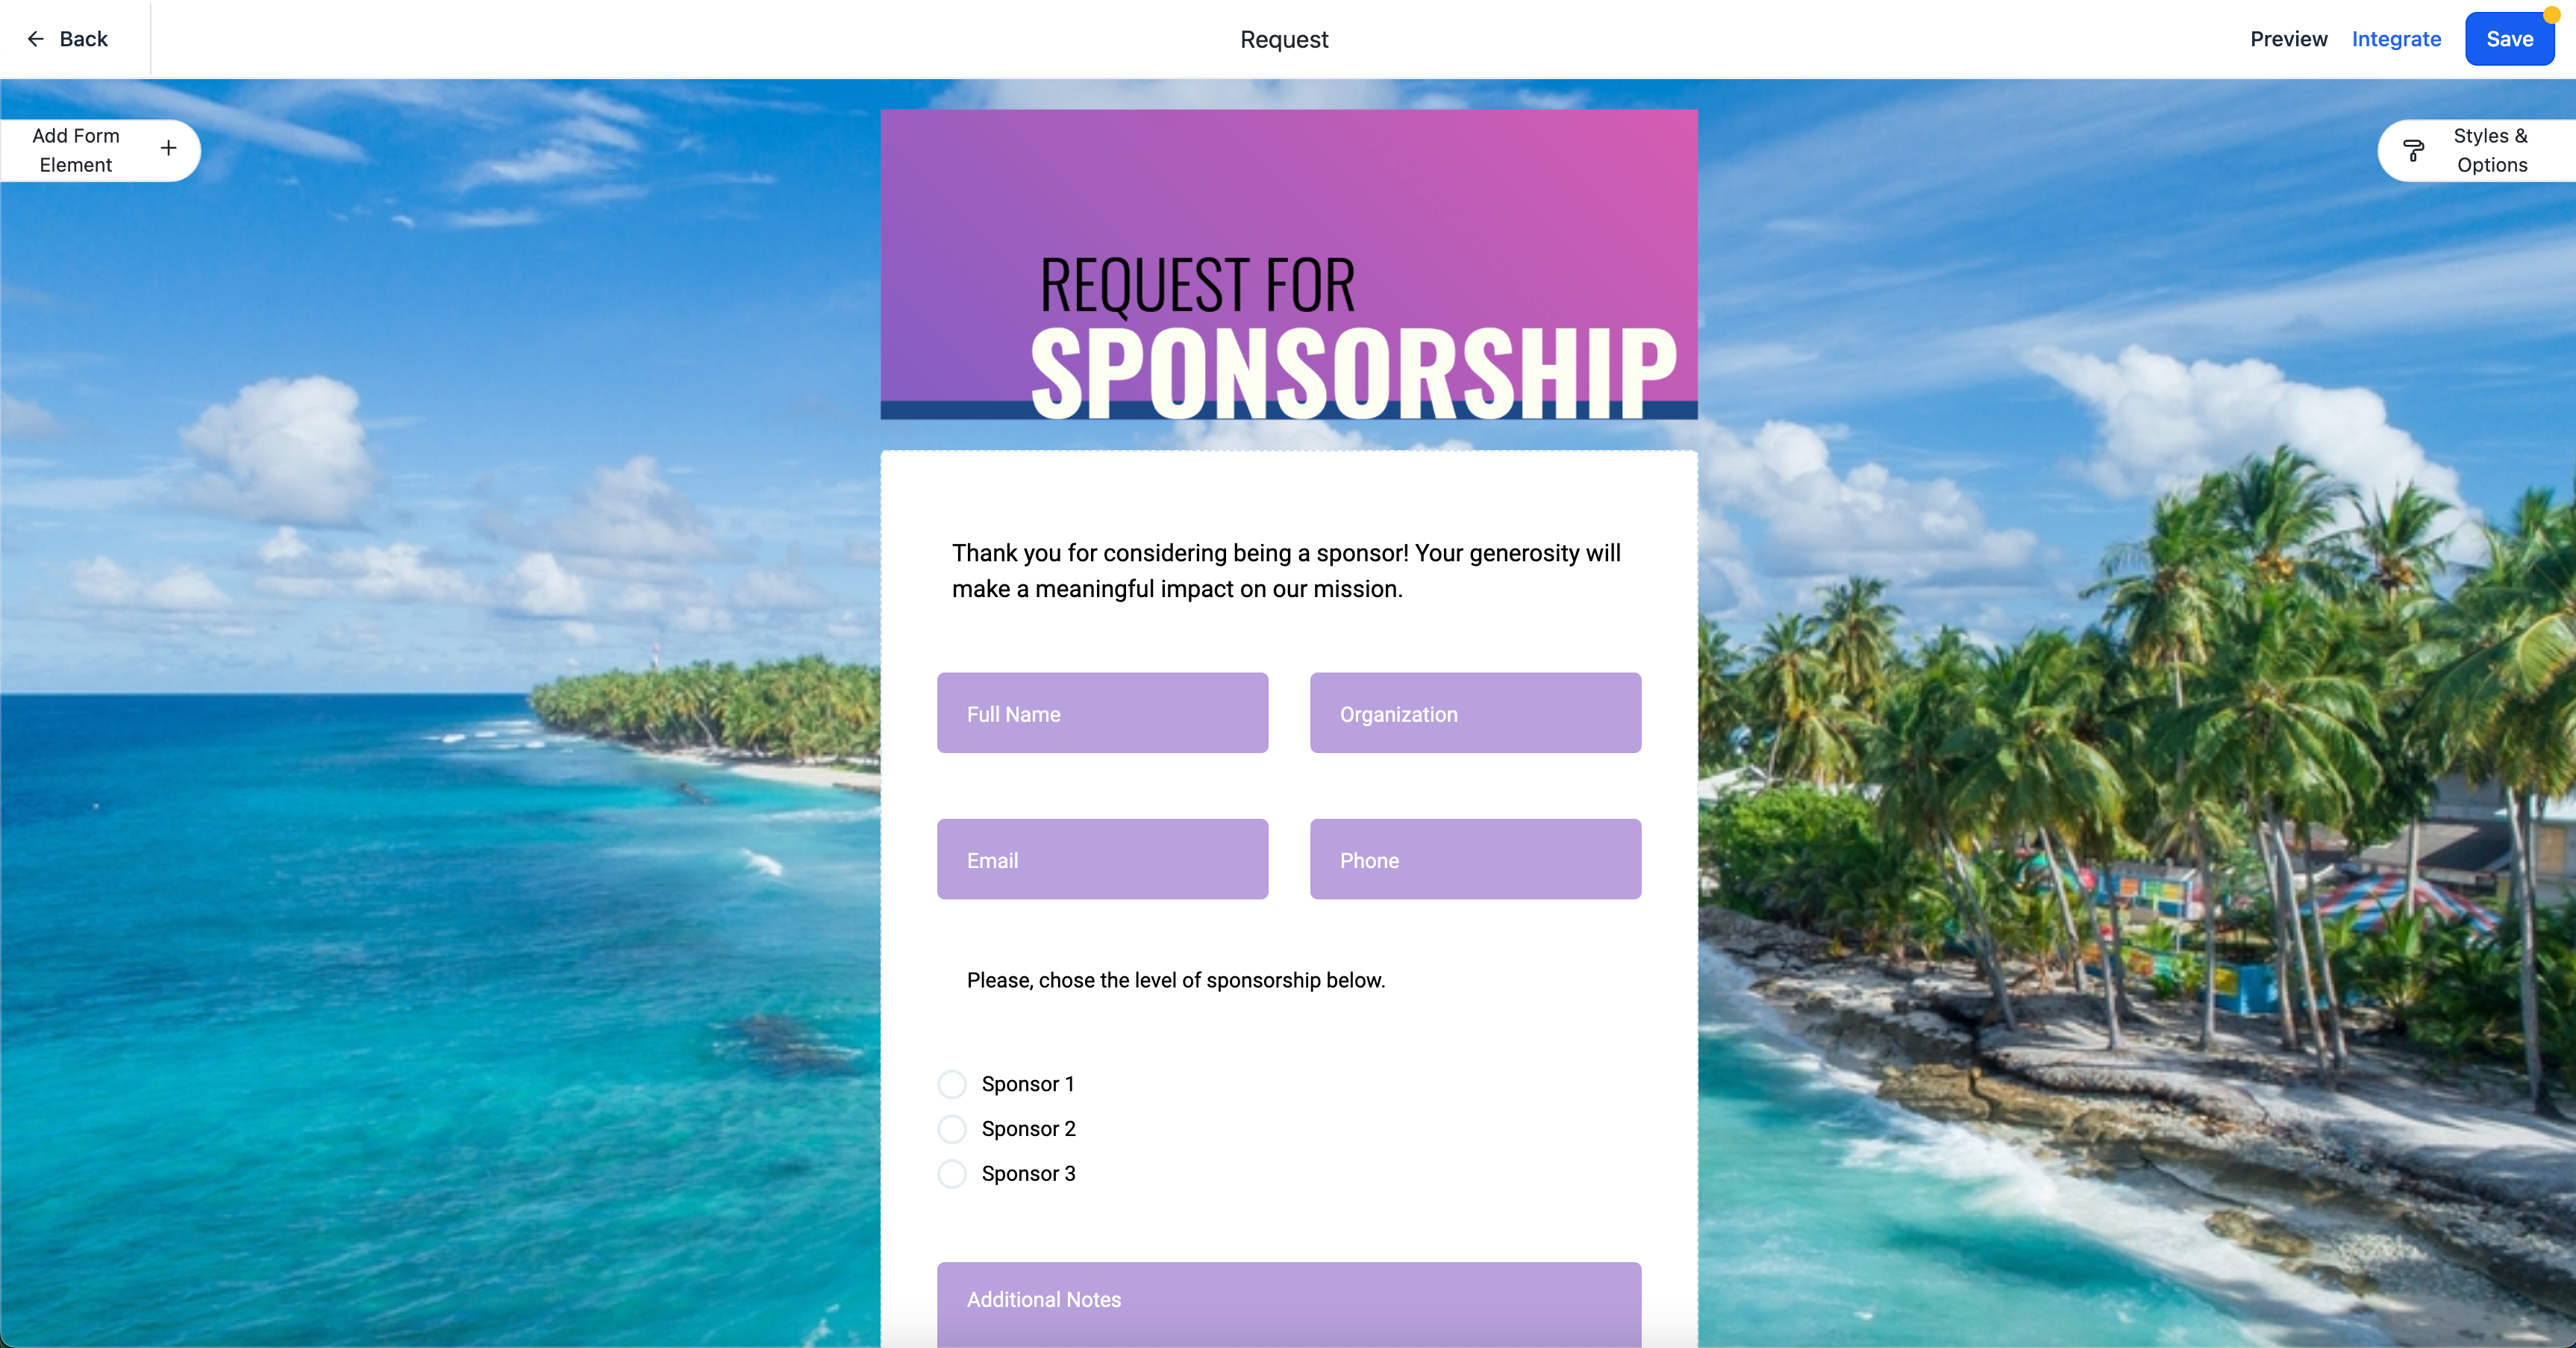
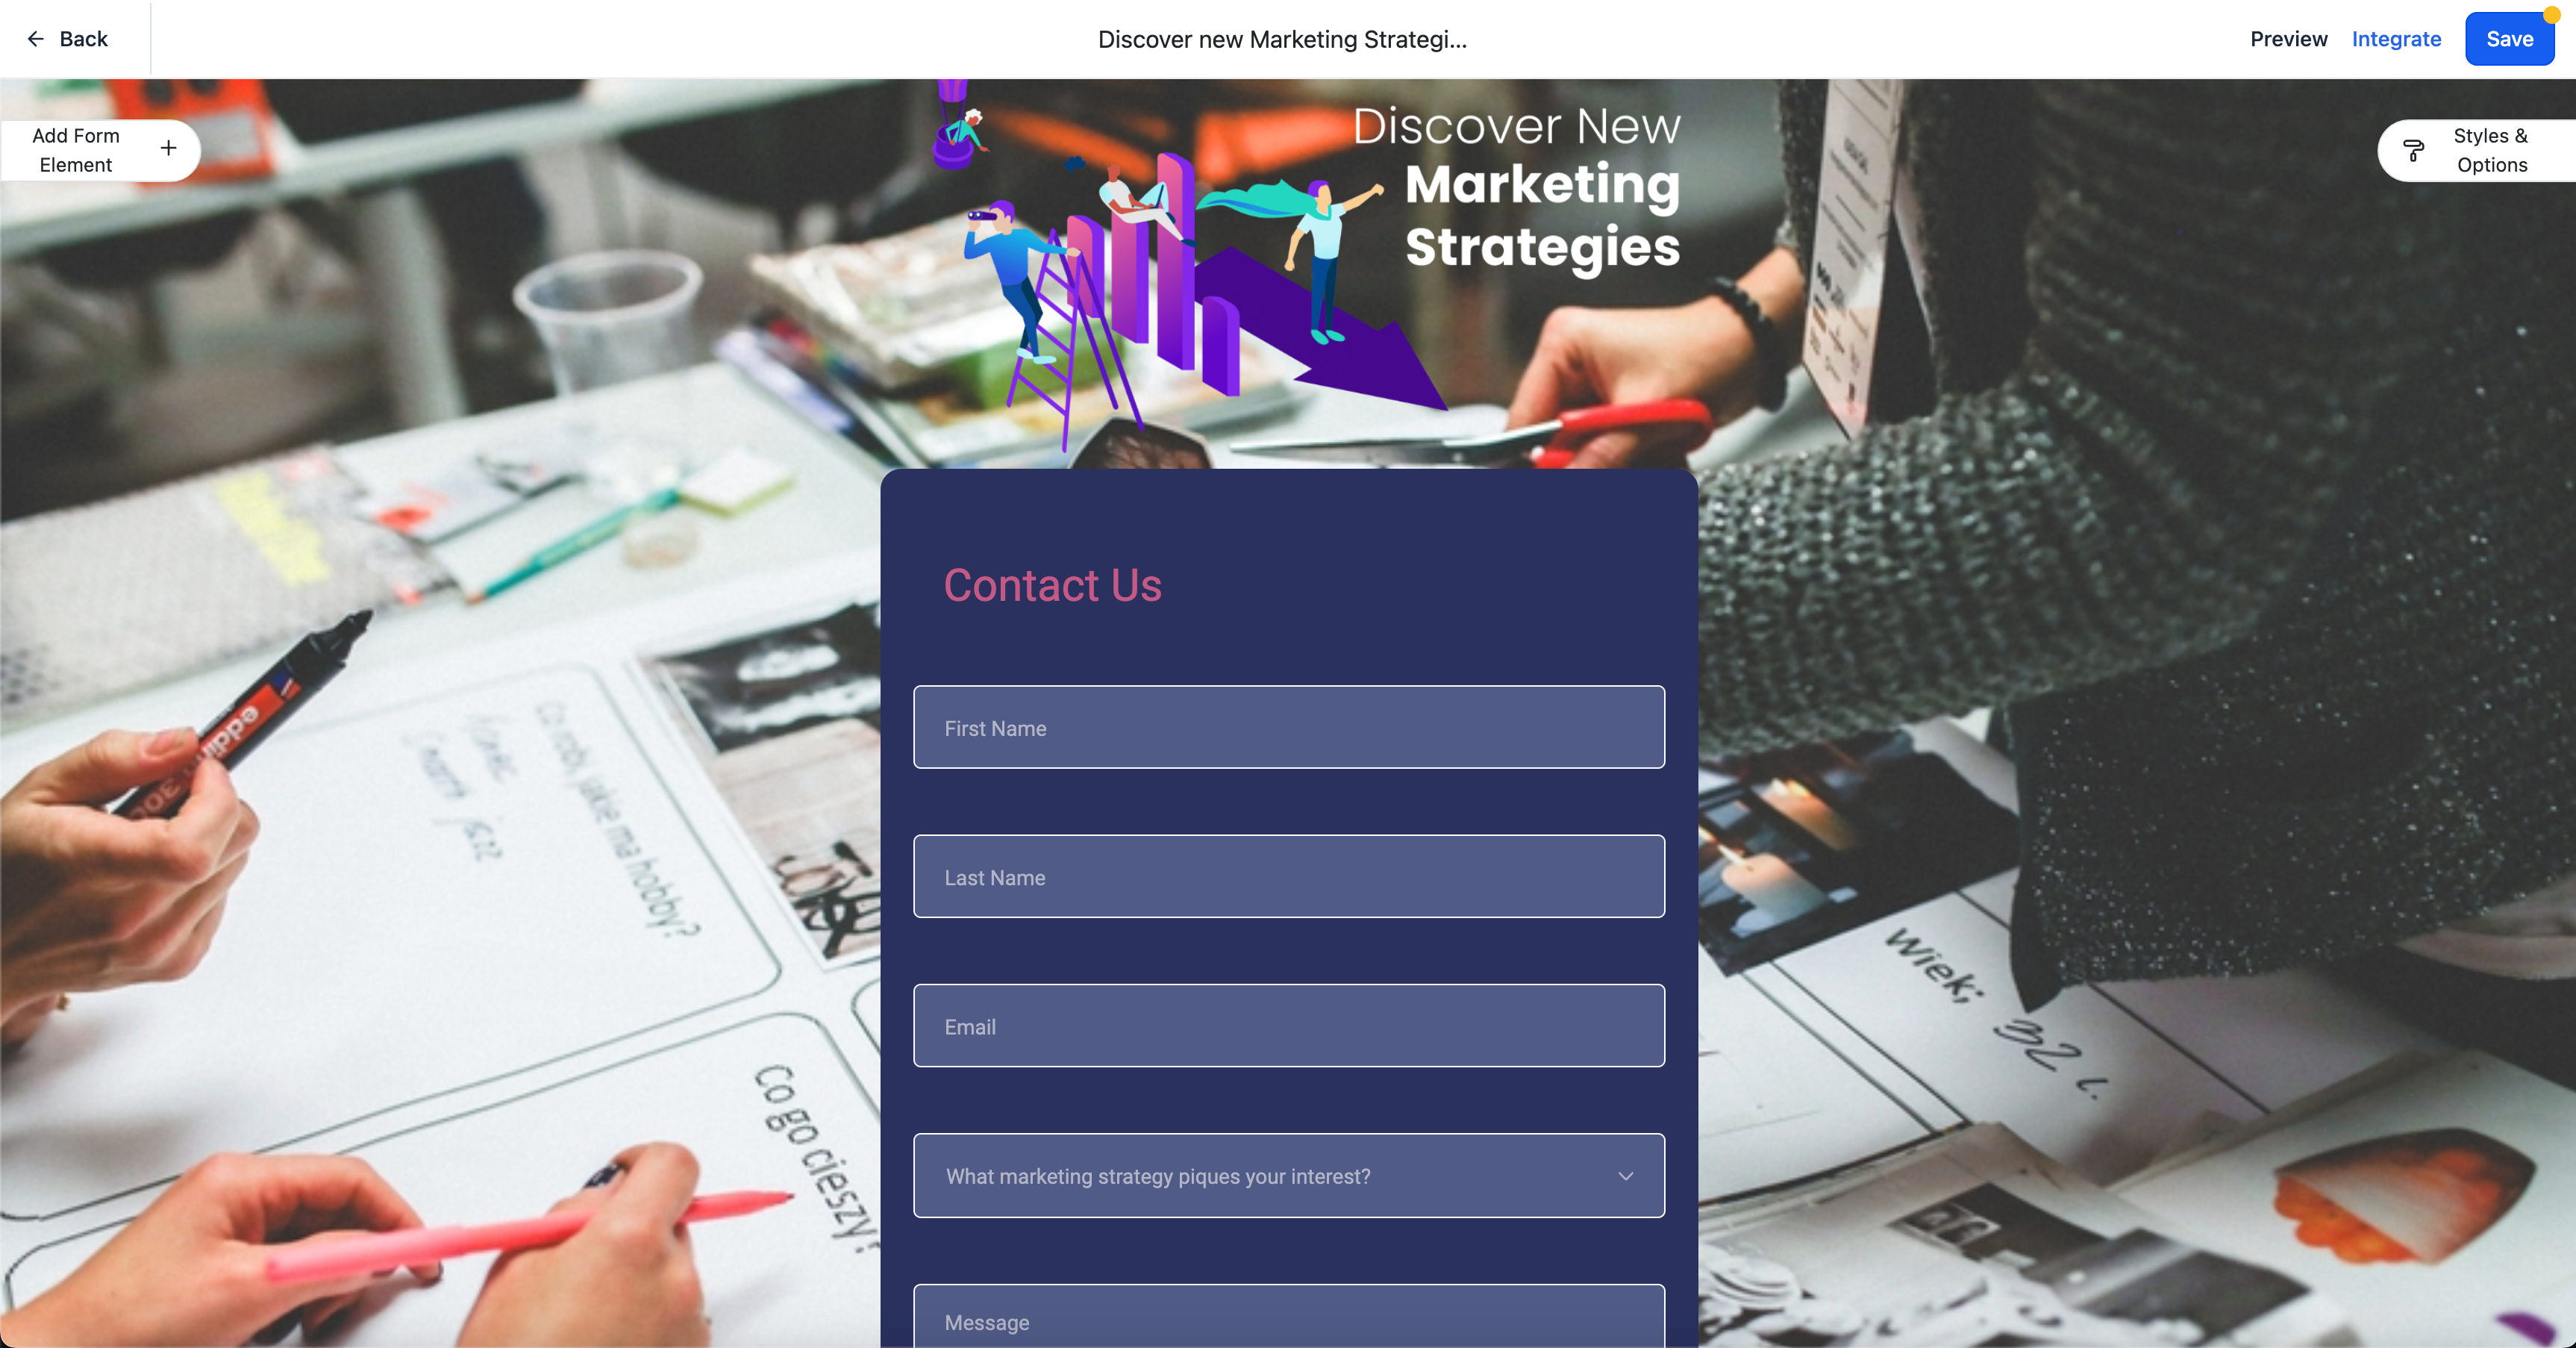
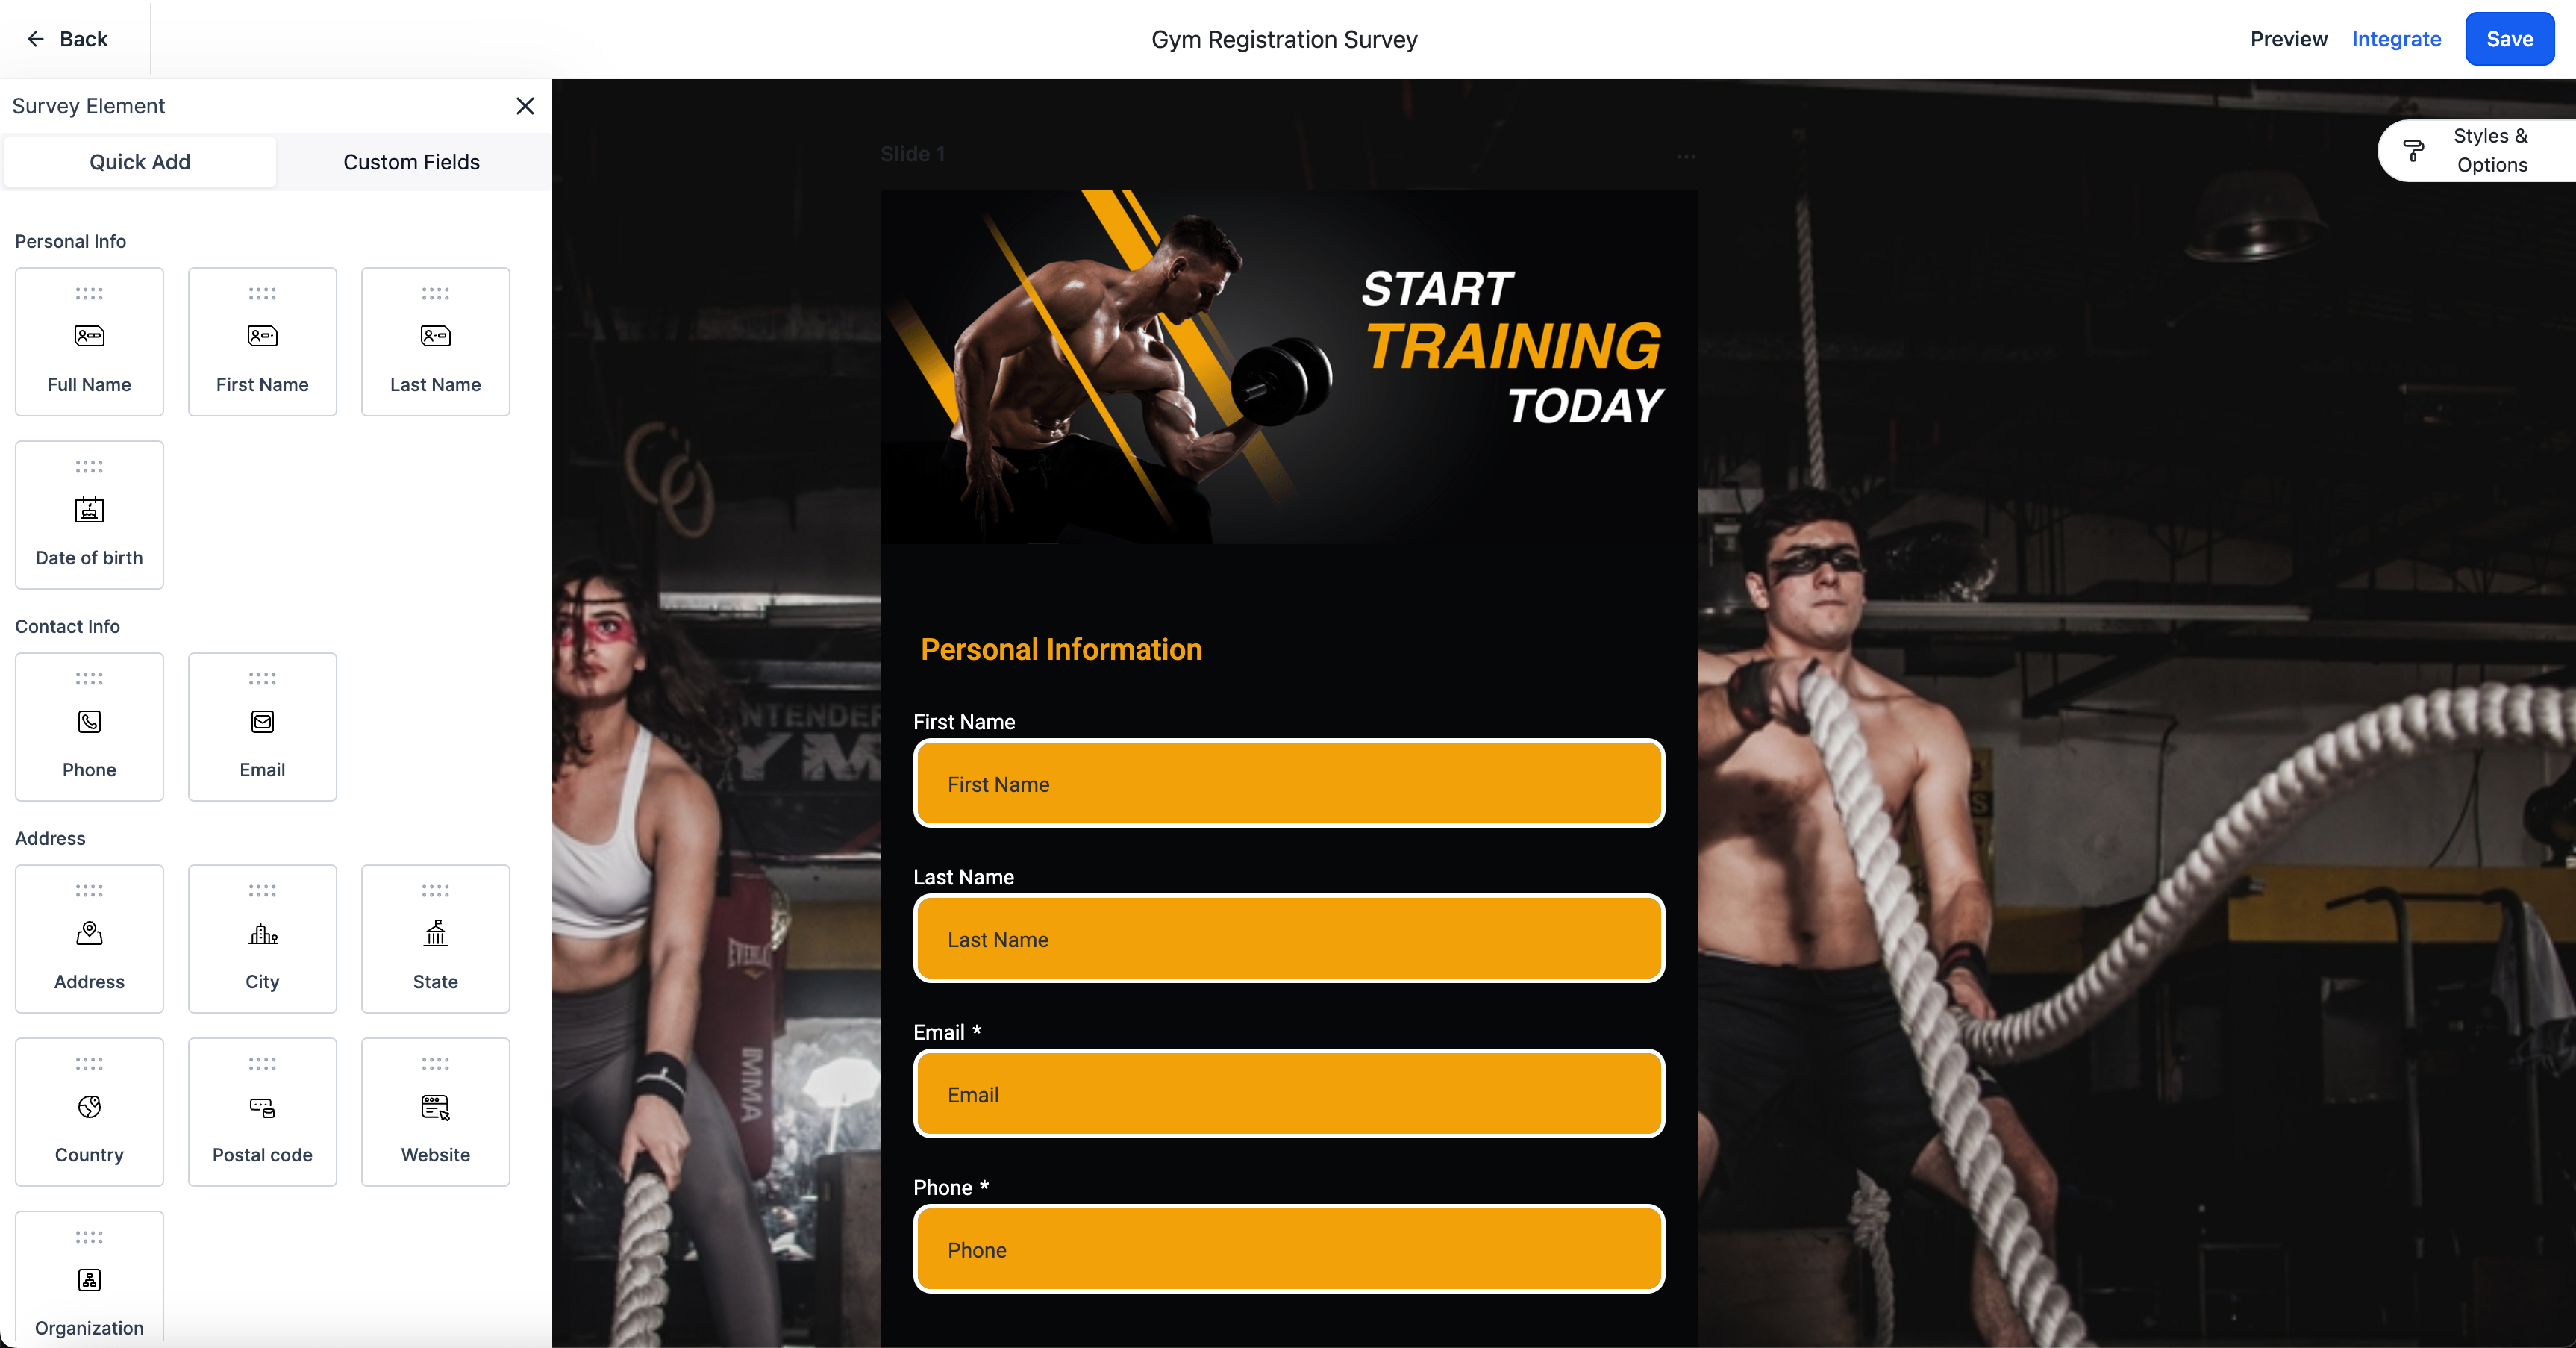
Background & Header Image rendering within New Form and Survey Builders 🚀
The New Form and Survey Builder now includes Background and Header Image features.
😎 What’s new with this update?
The "header" and "background image" rendering features in a builder play crucial roles in shaping the visual appearance and branding of a Form and Survey builder.
When Customer upload header and background image it will be rendered in Form & Survey Builder.
It will be building block for our most awaited feature "Themes"
🌟 How it Help Our Customers
This tool in the builder makes it simple to improve the look and feel of forms, making them more attractive to customers and highlighting the beauty of the form and survey directly in the builder, without needing to check the preview.
It will save plenty of time.
No juggling between builder and preview
Get visual Appel right away hence helping in visualising the form and Survey
🔥 How can I use it ?
Go to Location Settings and then go to Labs
You should be able to see "UI Revamp of Form Builder".
Turn on the Toggle switch for the form builder.
Go to your form builder and you will be able to use the new builder.
Add Header and Background image
Some Examples:
Fresh Look: Reputation Management UI Enhancements 🚀
There are updates to the Reputation Management feature. These changes make it easier to use and include a new look for the Reviews and Requests pages.
🪄 What's New?
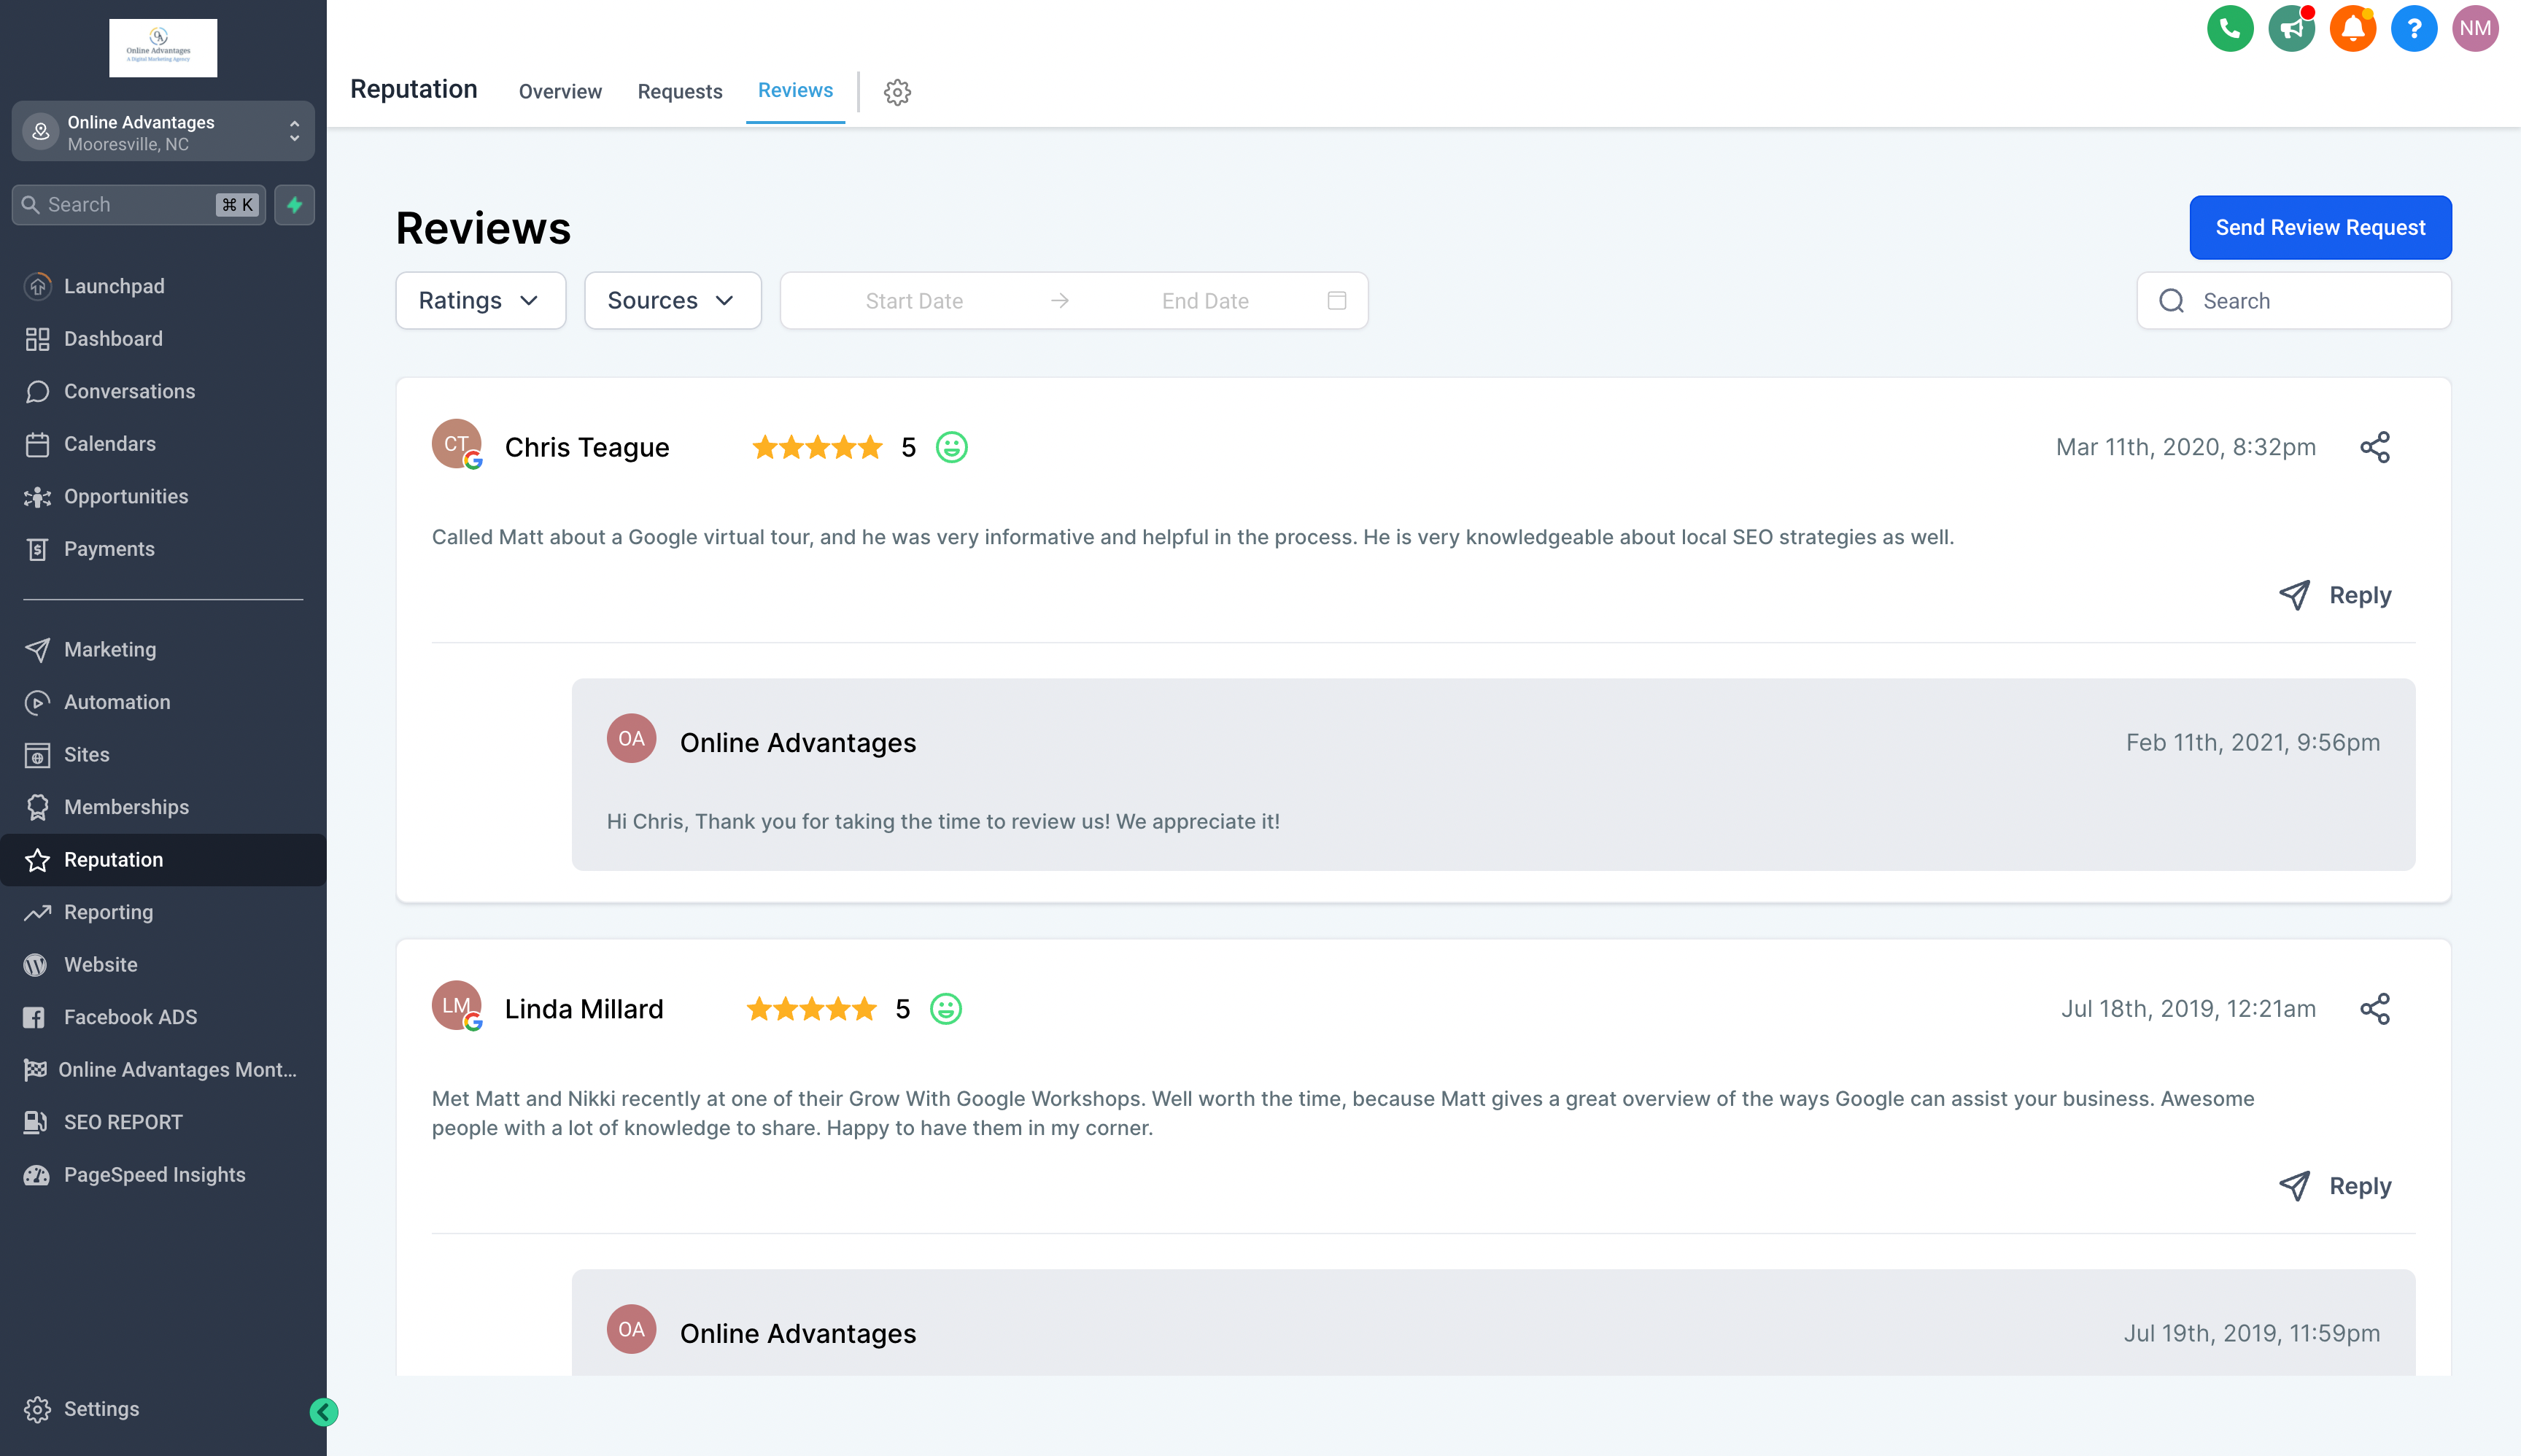
Redesigned Reviews Page:
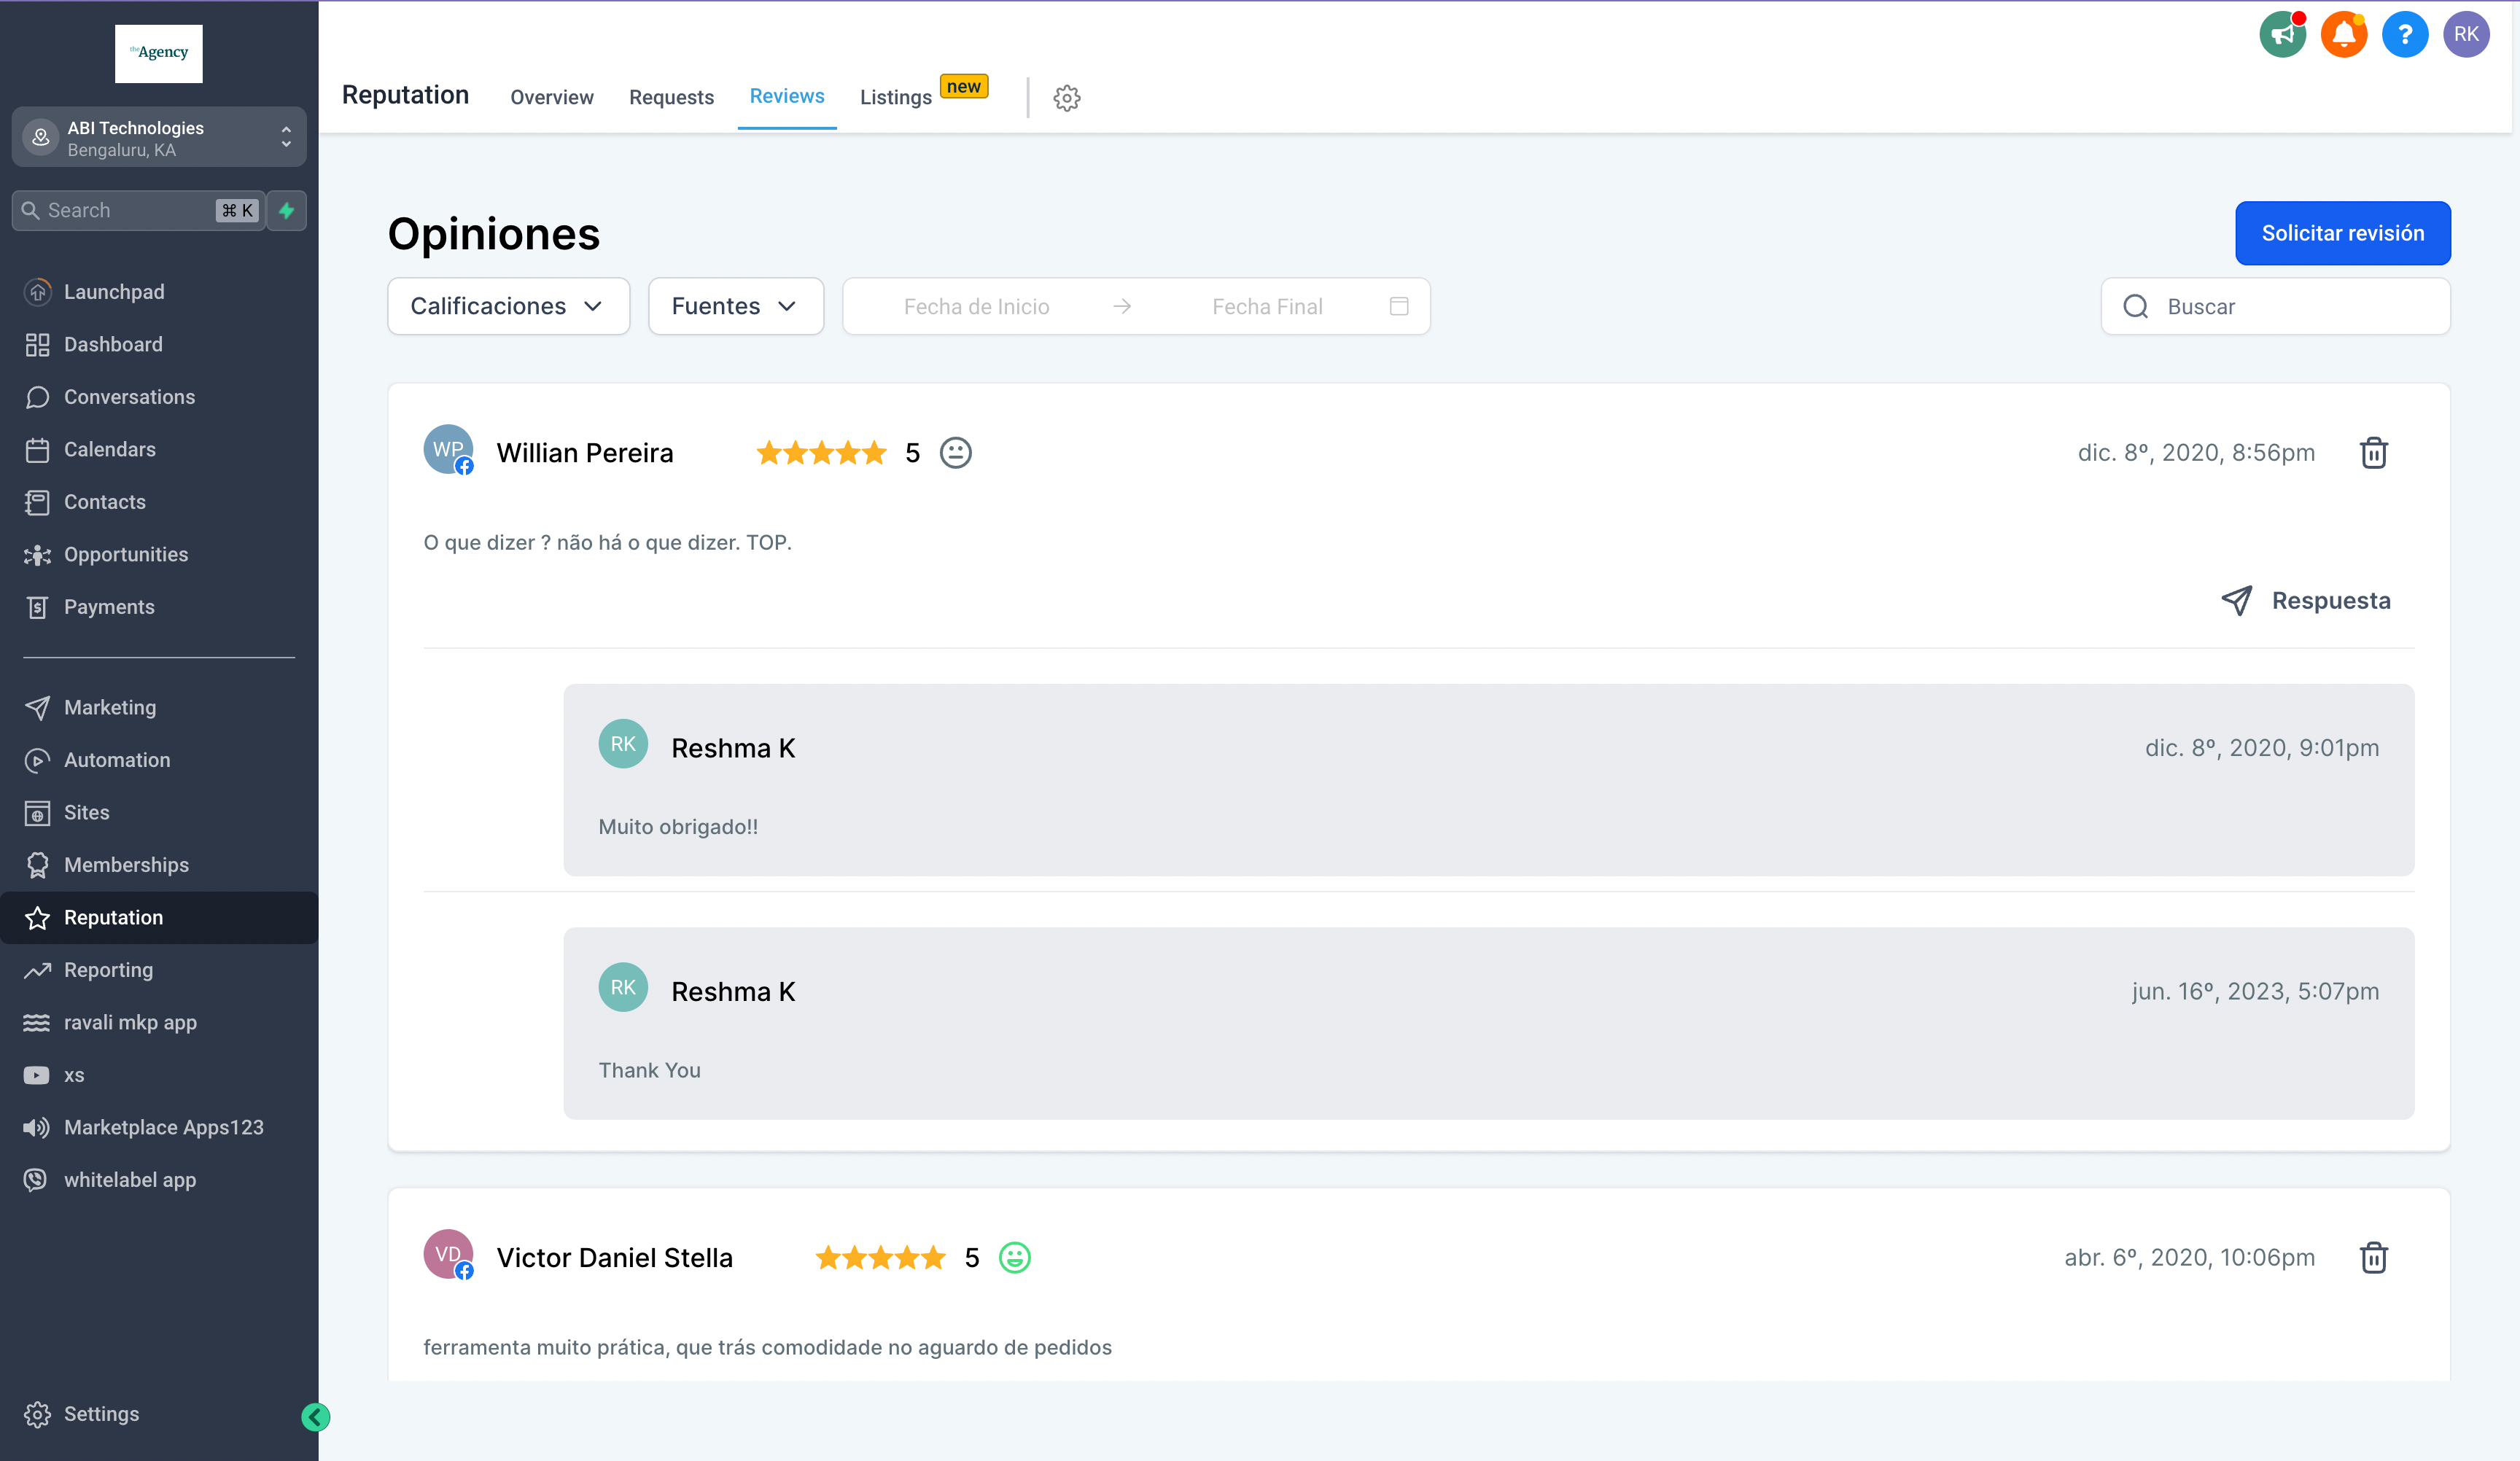
The Reviews page has a new, easy-to-use design. Now, clients can handle and reply to reviews more quickly.
Improved Requests Page:
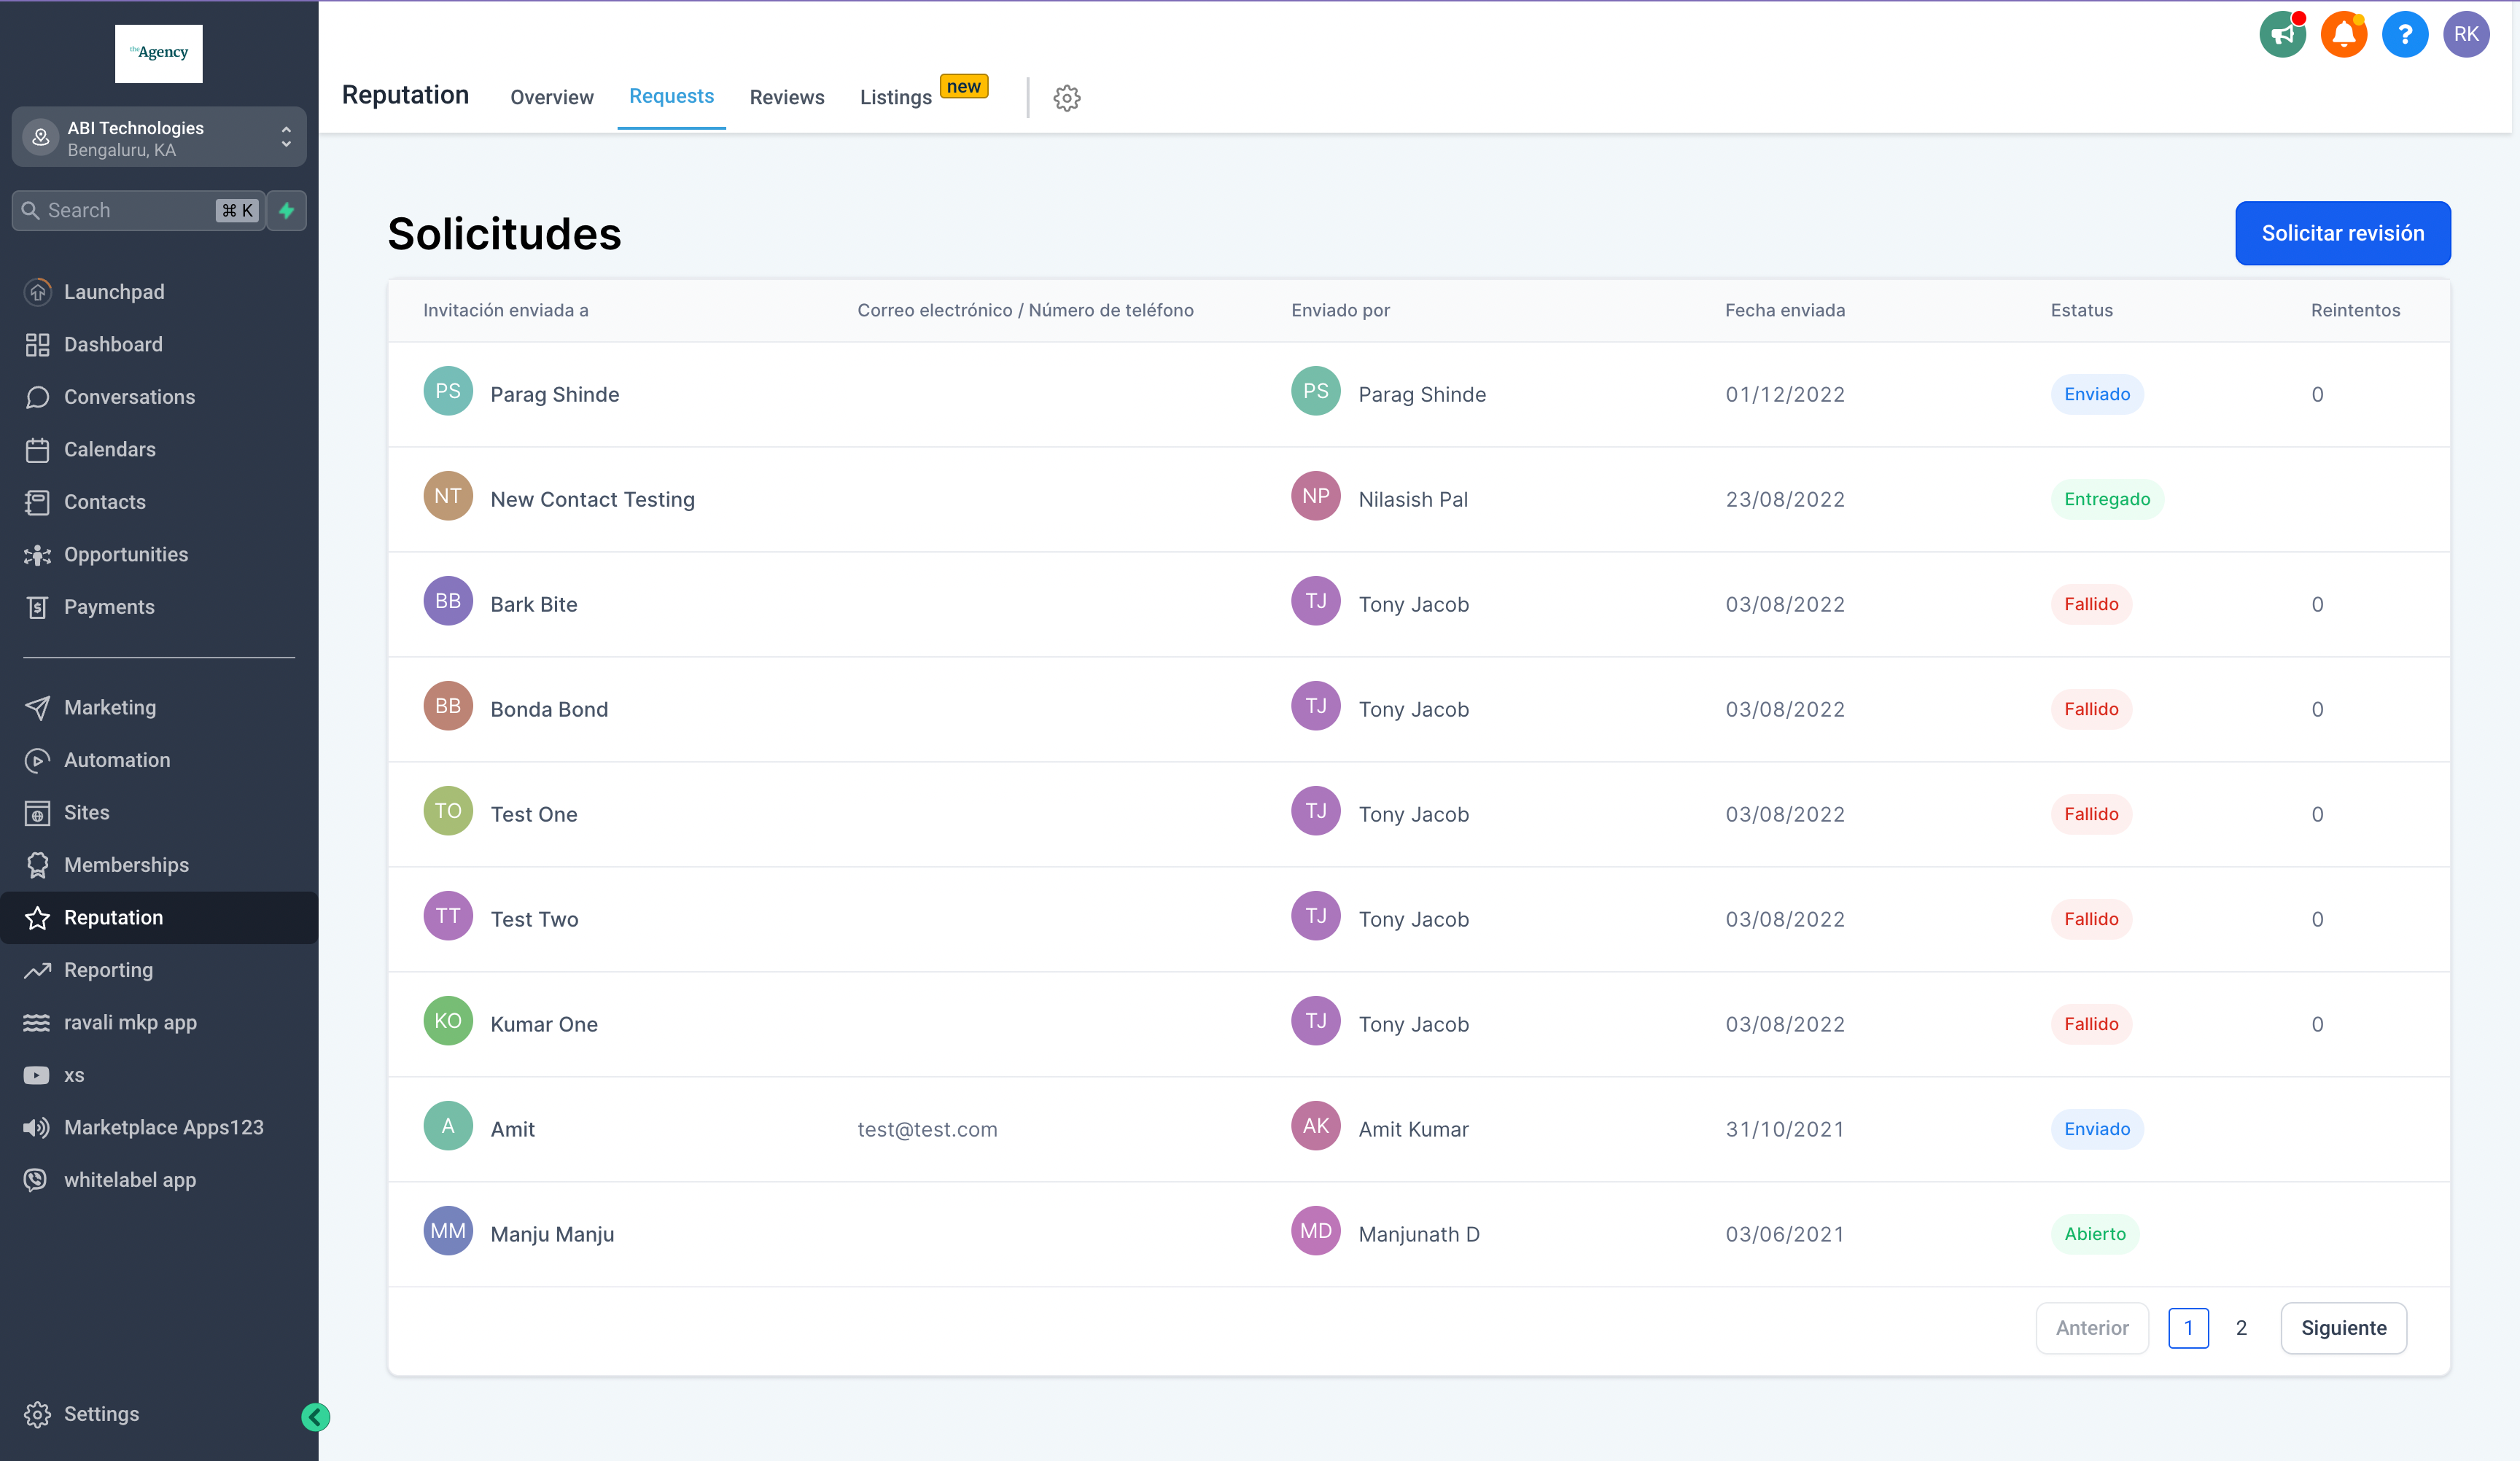
The Requests page has also undergone a facelift, making it easier than ever to handle reputation management requests.
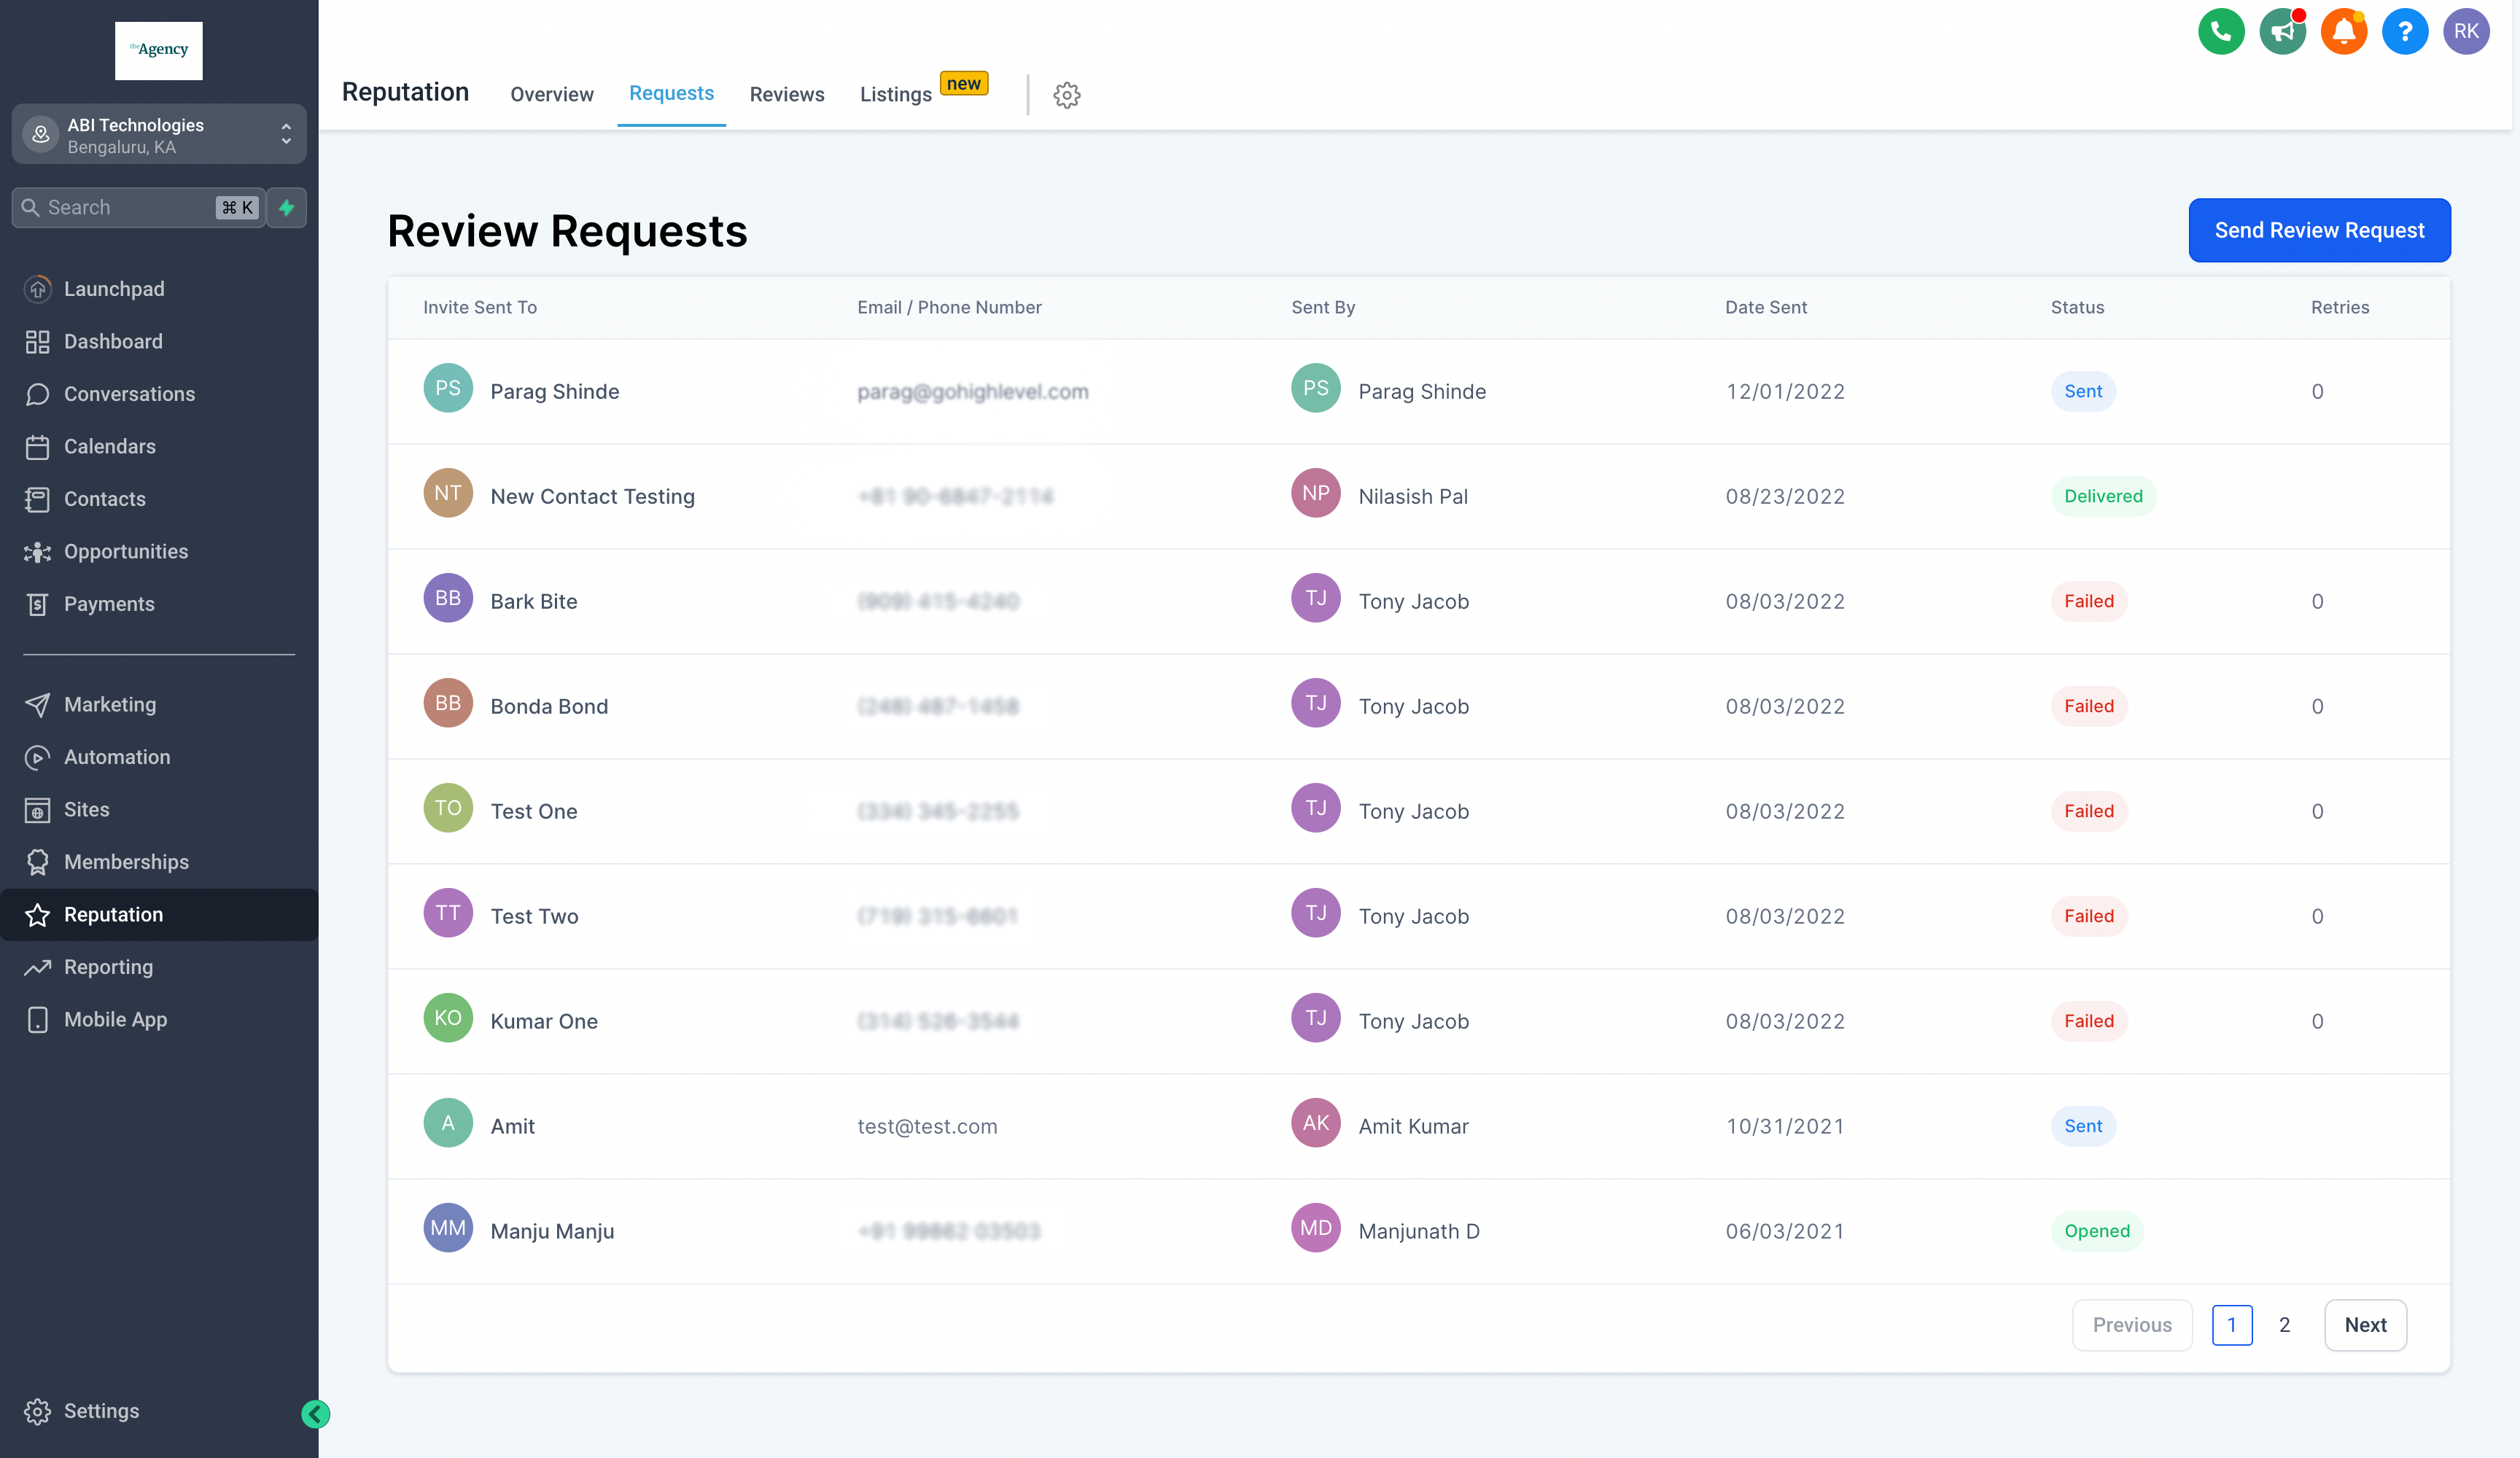
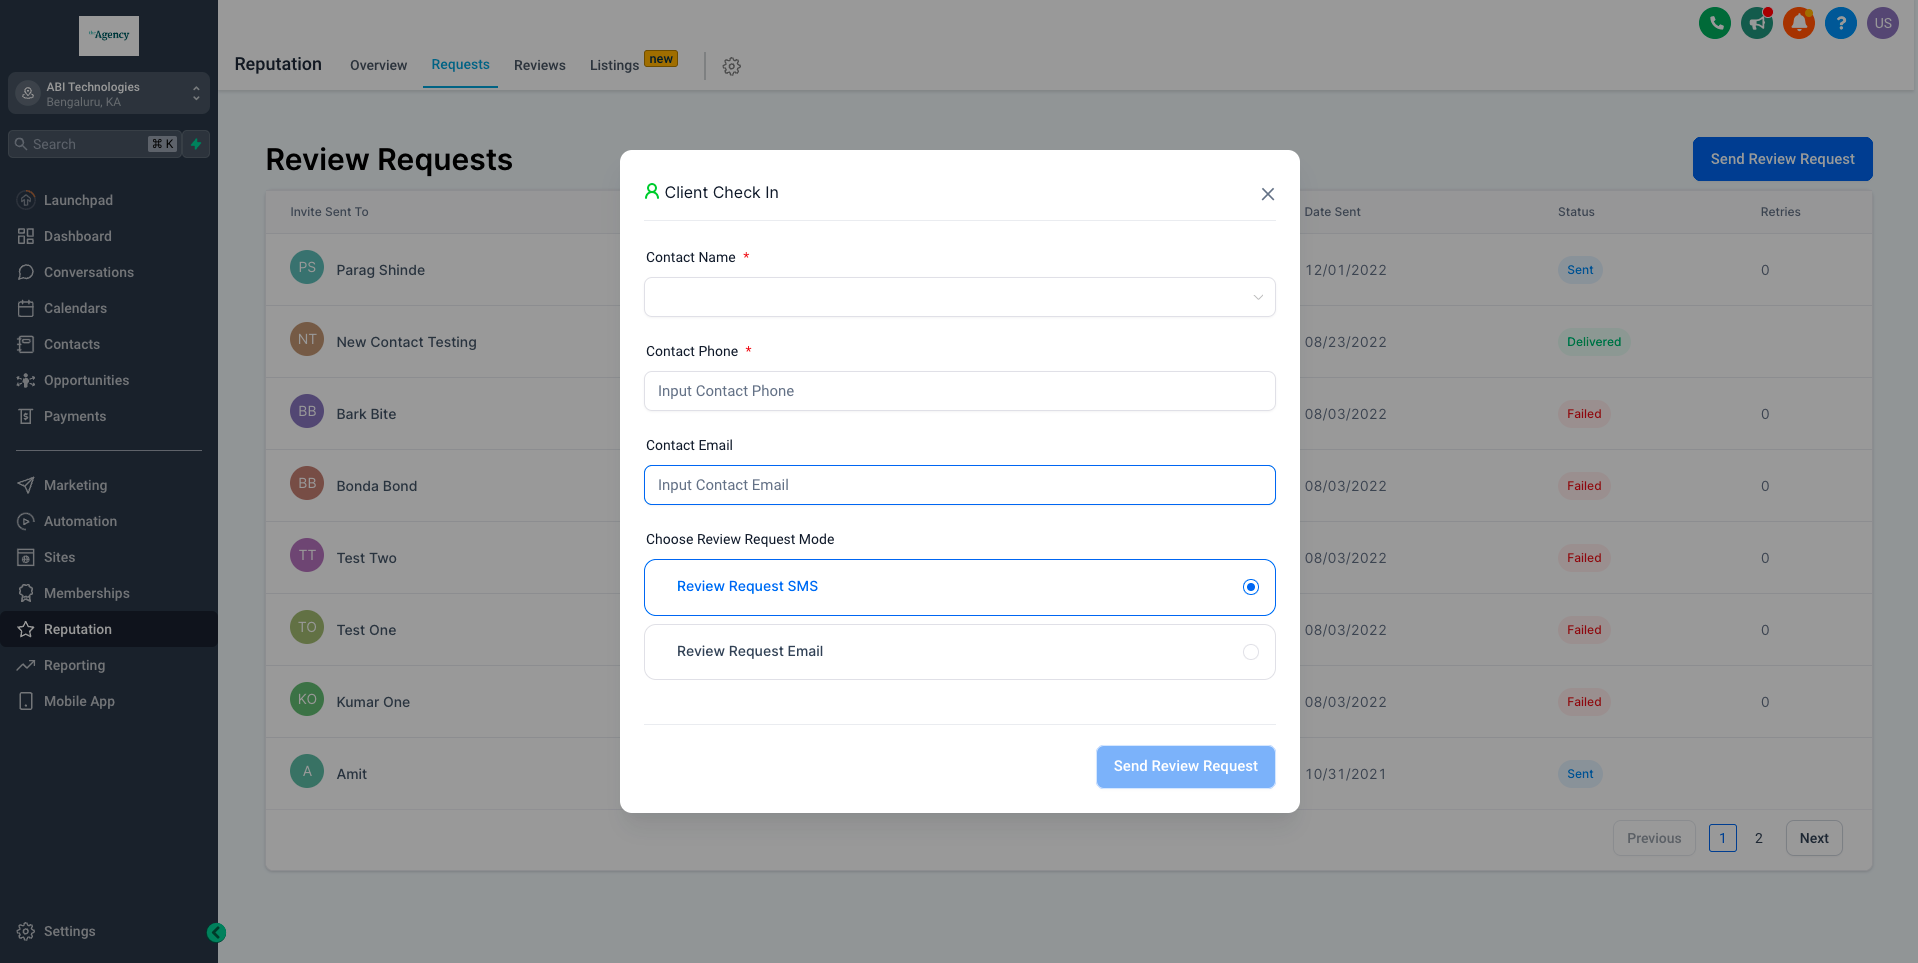
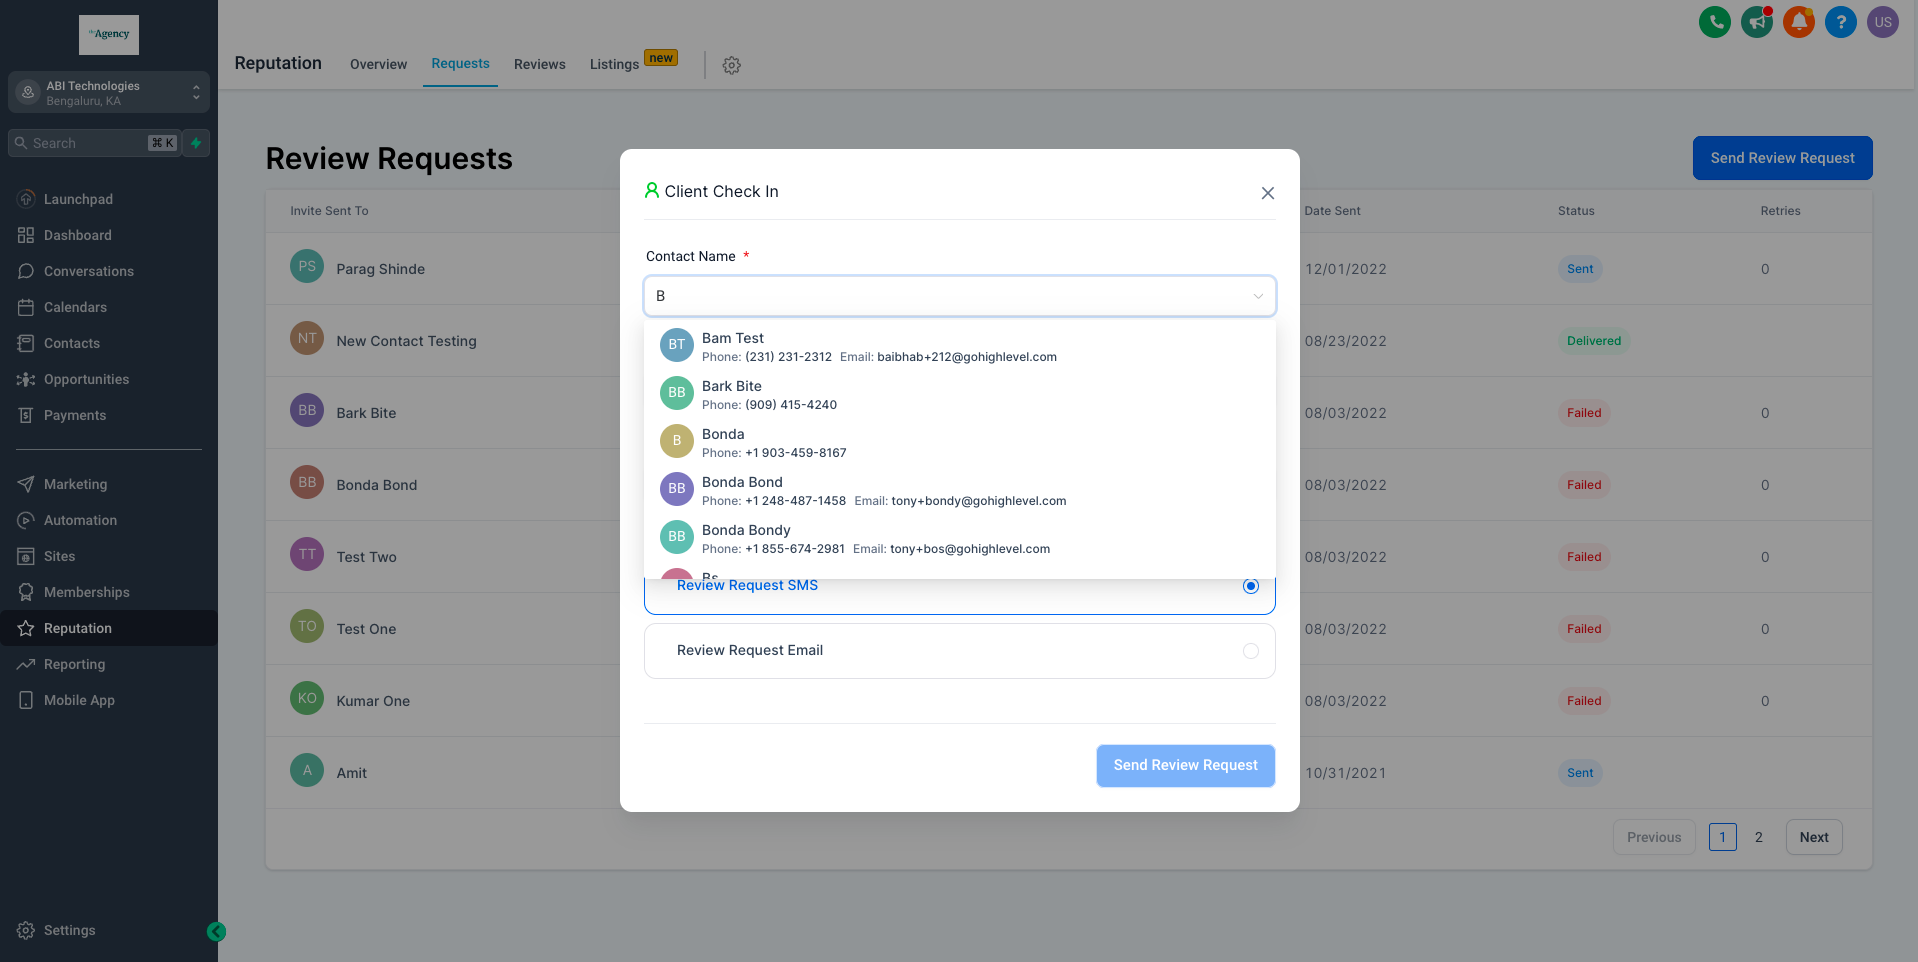
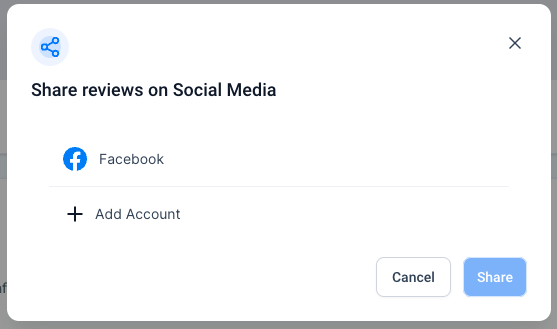
The updates make it easier and faster to handle reviews.
Enhancements to Email Builder 🚀
There are some great updates to Email Builder for an easier and more personalized experience.
🪄 What's New?
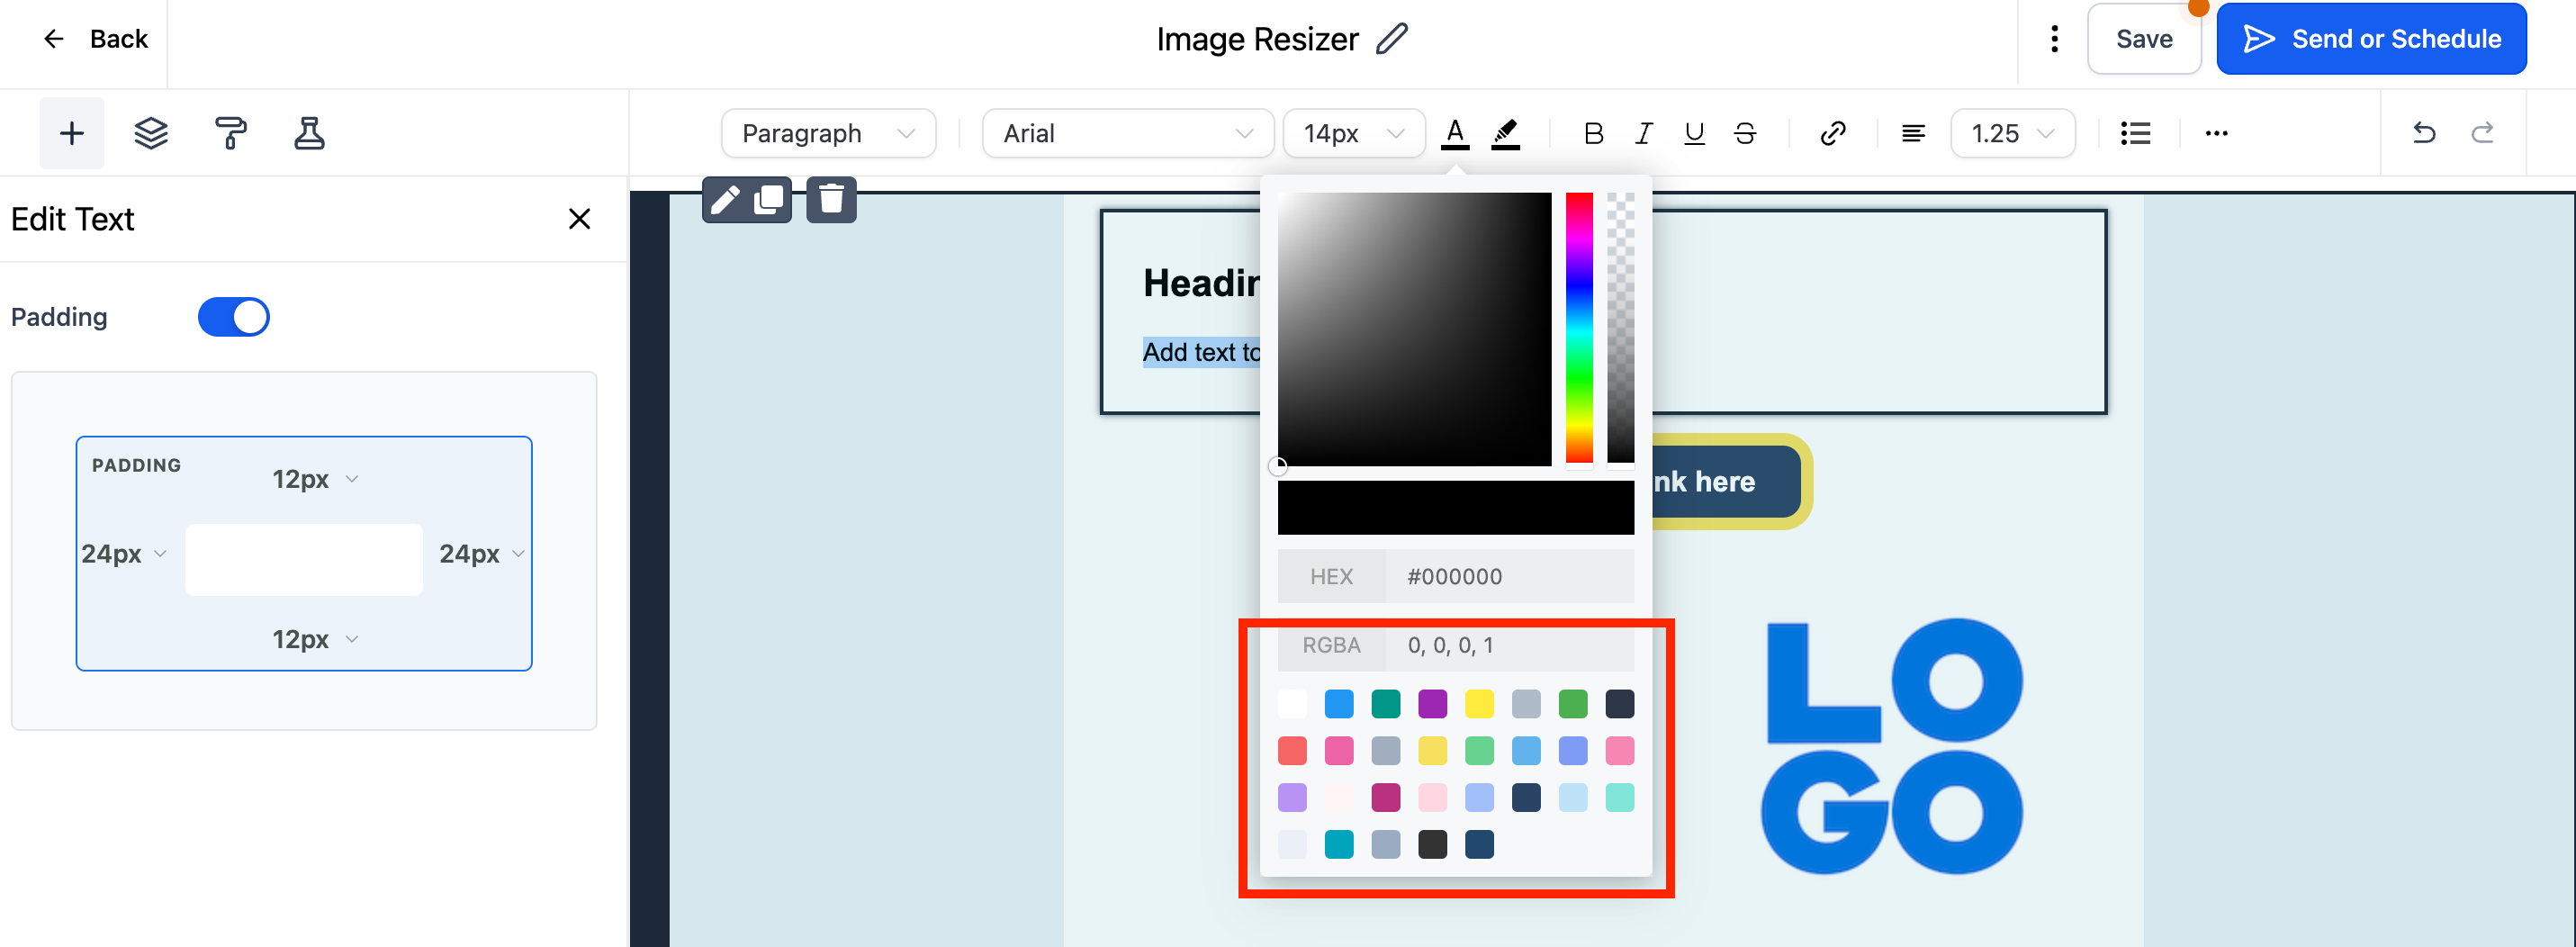
Color Picker Swatches:
Color samples are now in the Text Editor for choosing colors. This lets users pick set colors fast, making emails look the same and saving time.
These improvements aim to make building emails easy and effective.
Enhanced Opportunity Modal 🚀
Excited to share new updates that make it easier to create opportunities and connect with other platforms.
🪄 What's New?
New Opportunity Modal:
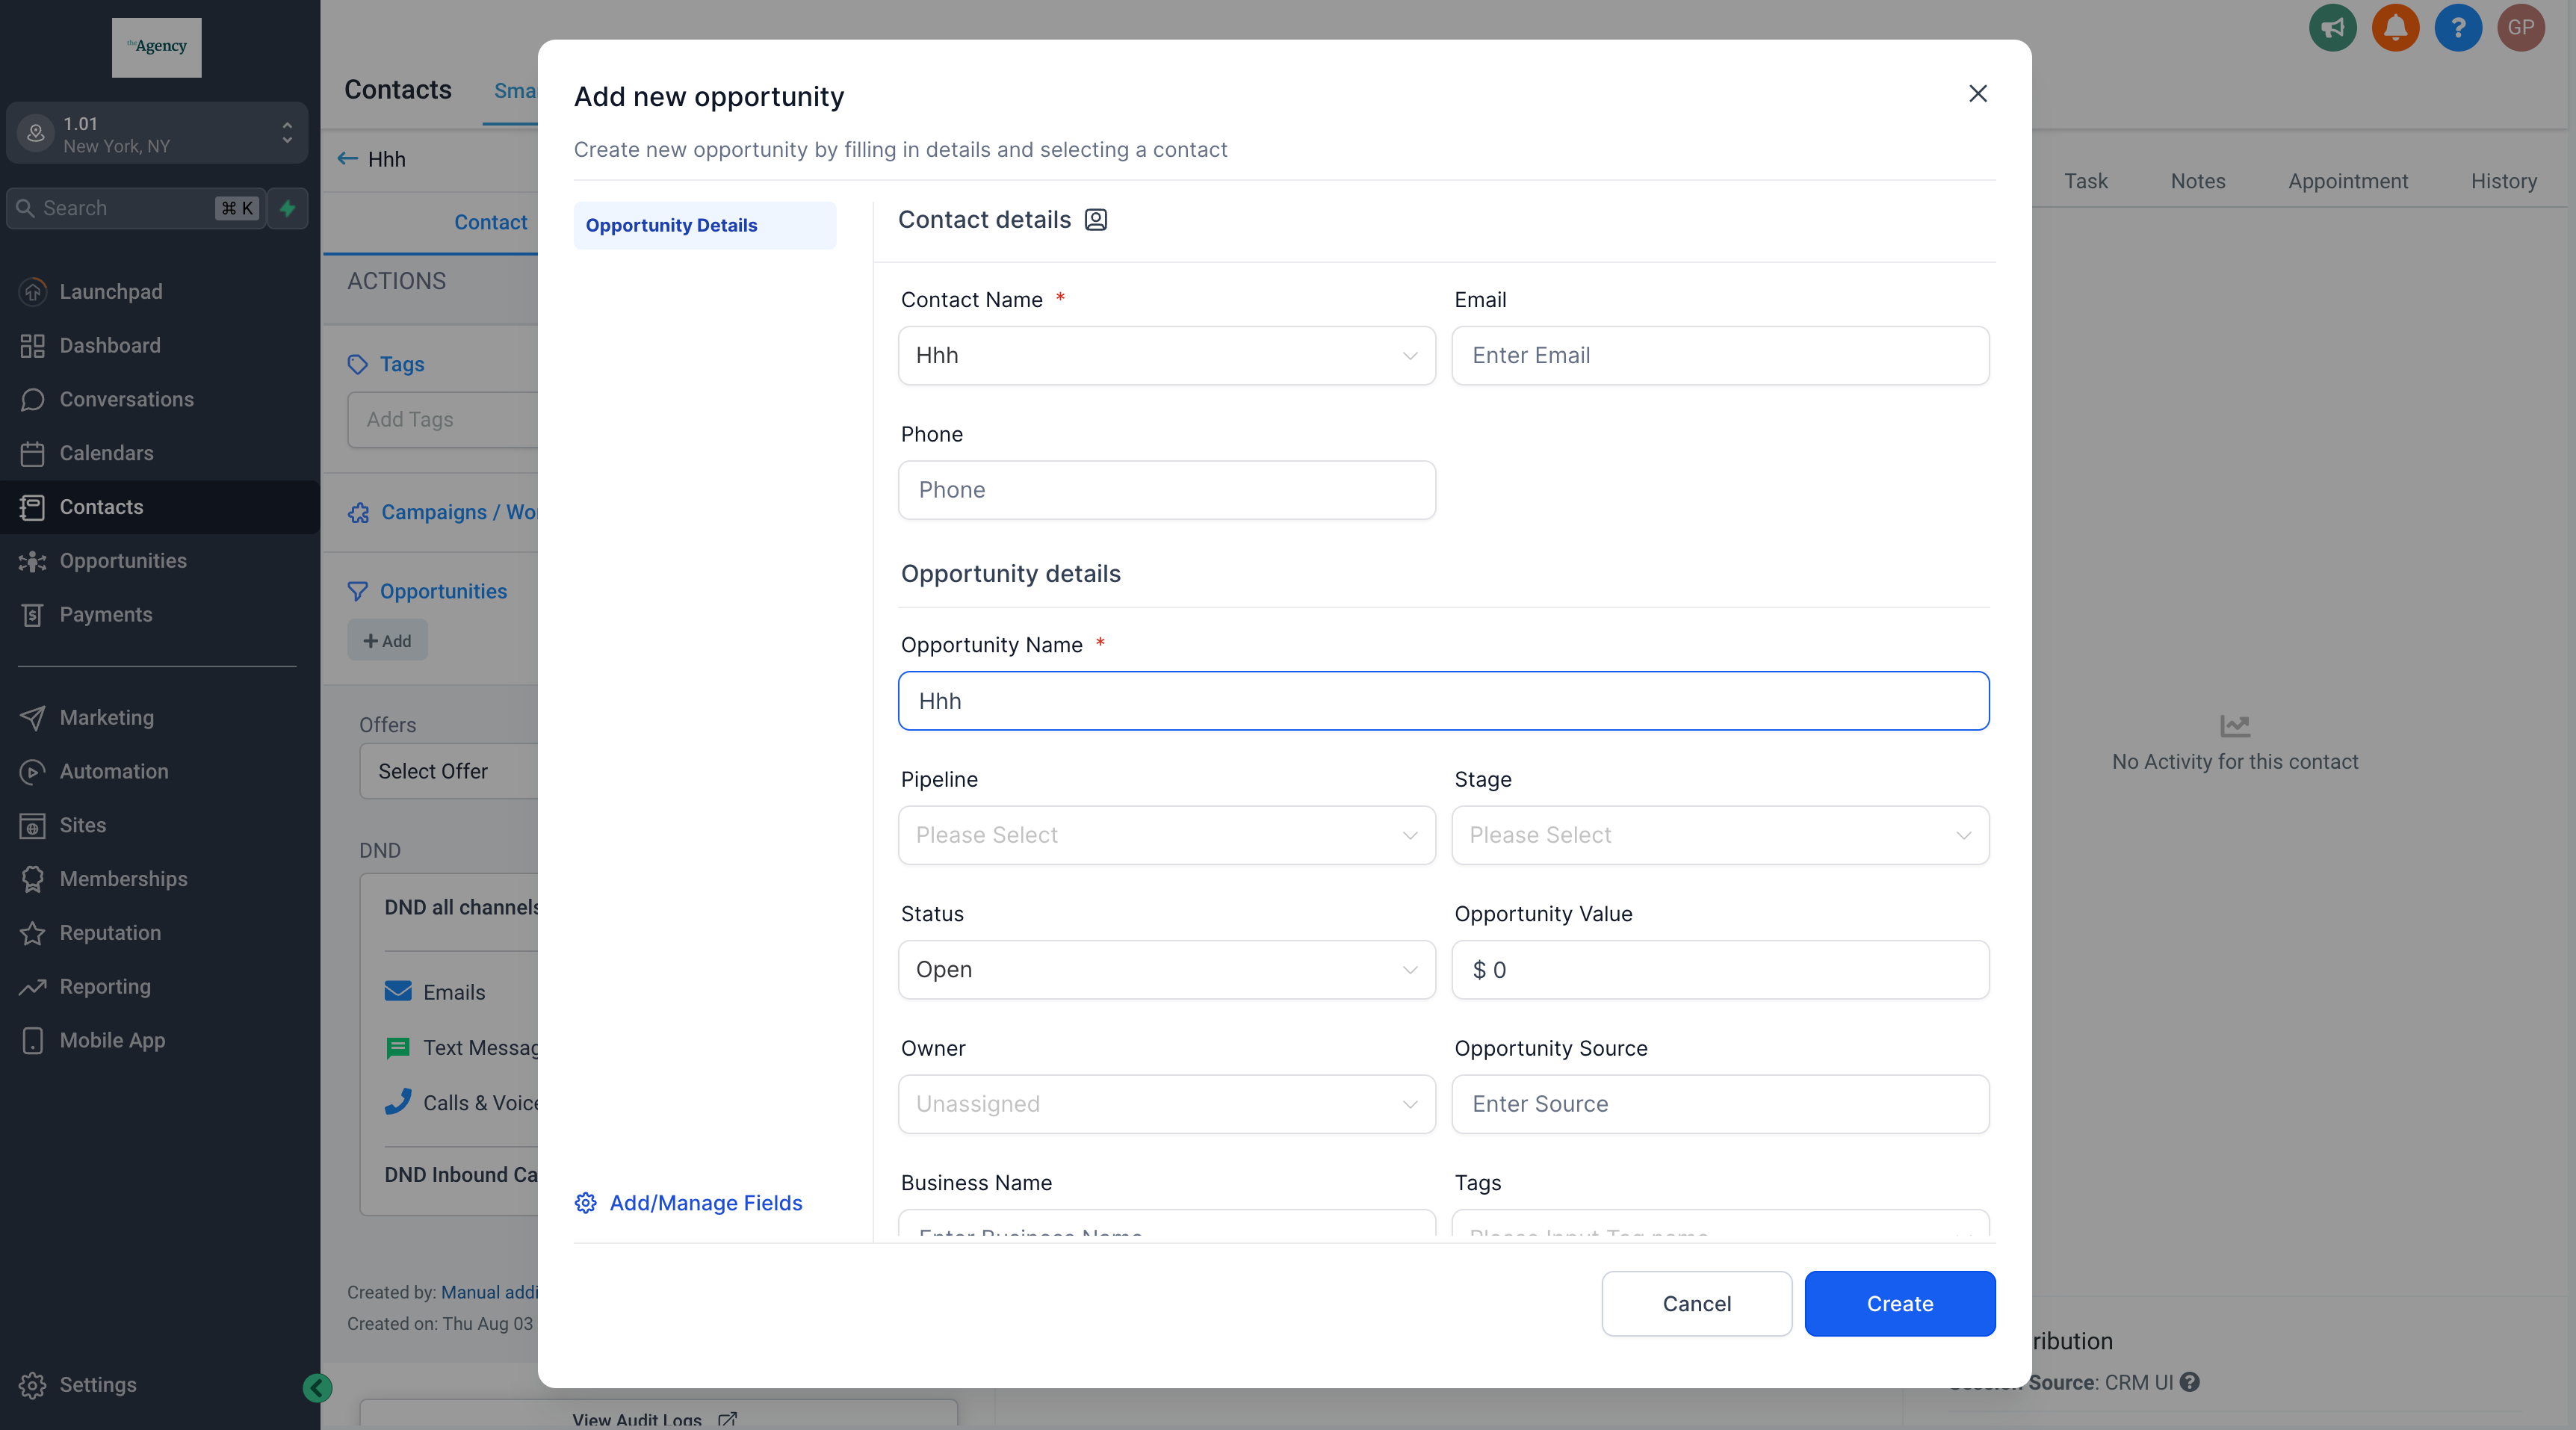
Now, if you make a new opportunity from the Contact Detail or Smart List page, the contact details will fill in by themselves. This makes things easier and quicker.
Hope these changes make using the platform easier and more efficient.
Enhanced Add Guest Feature 📅🚀
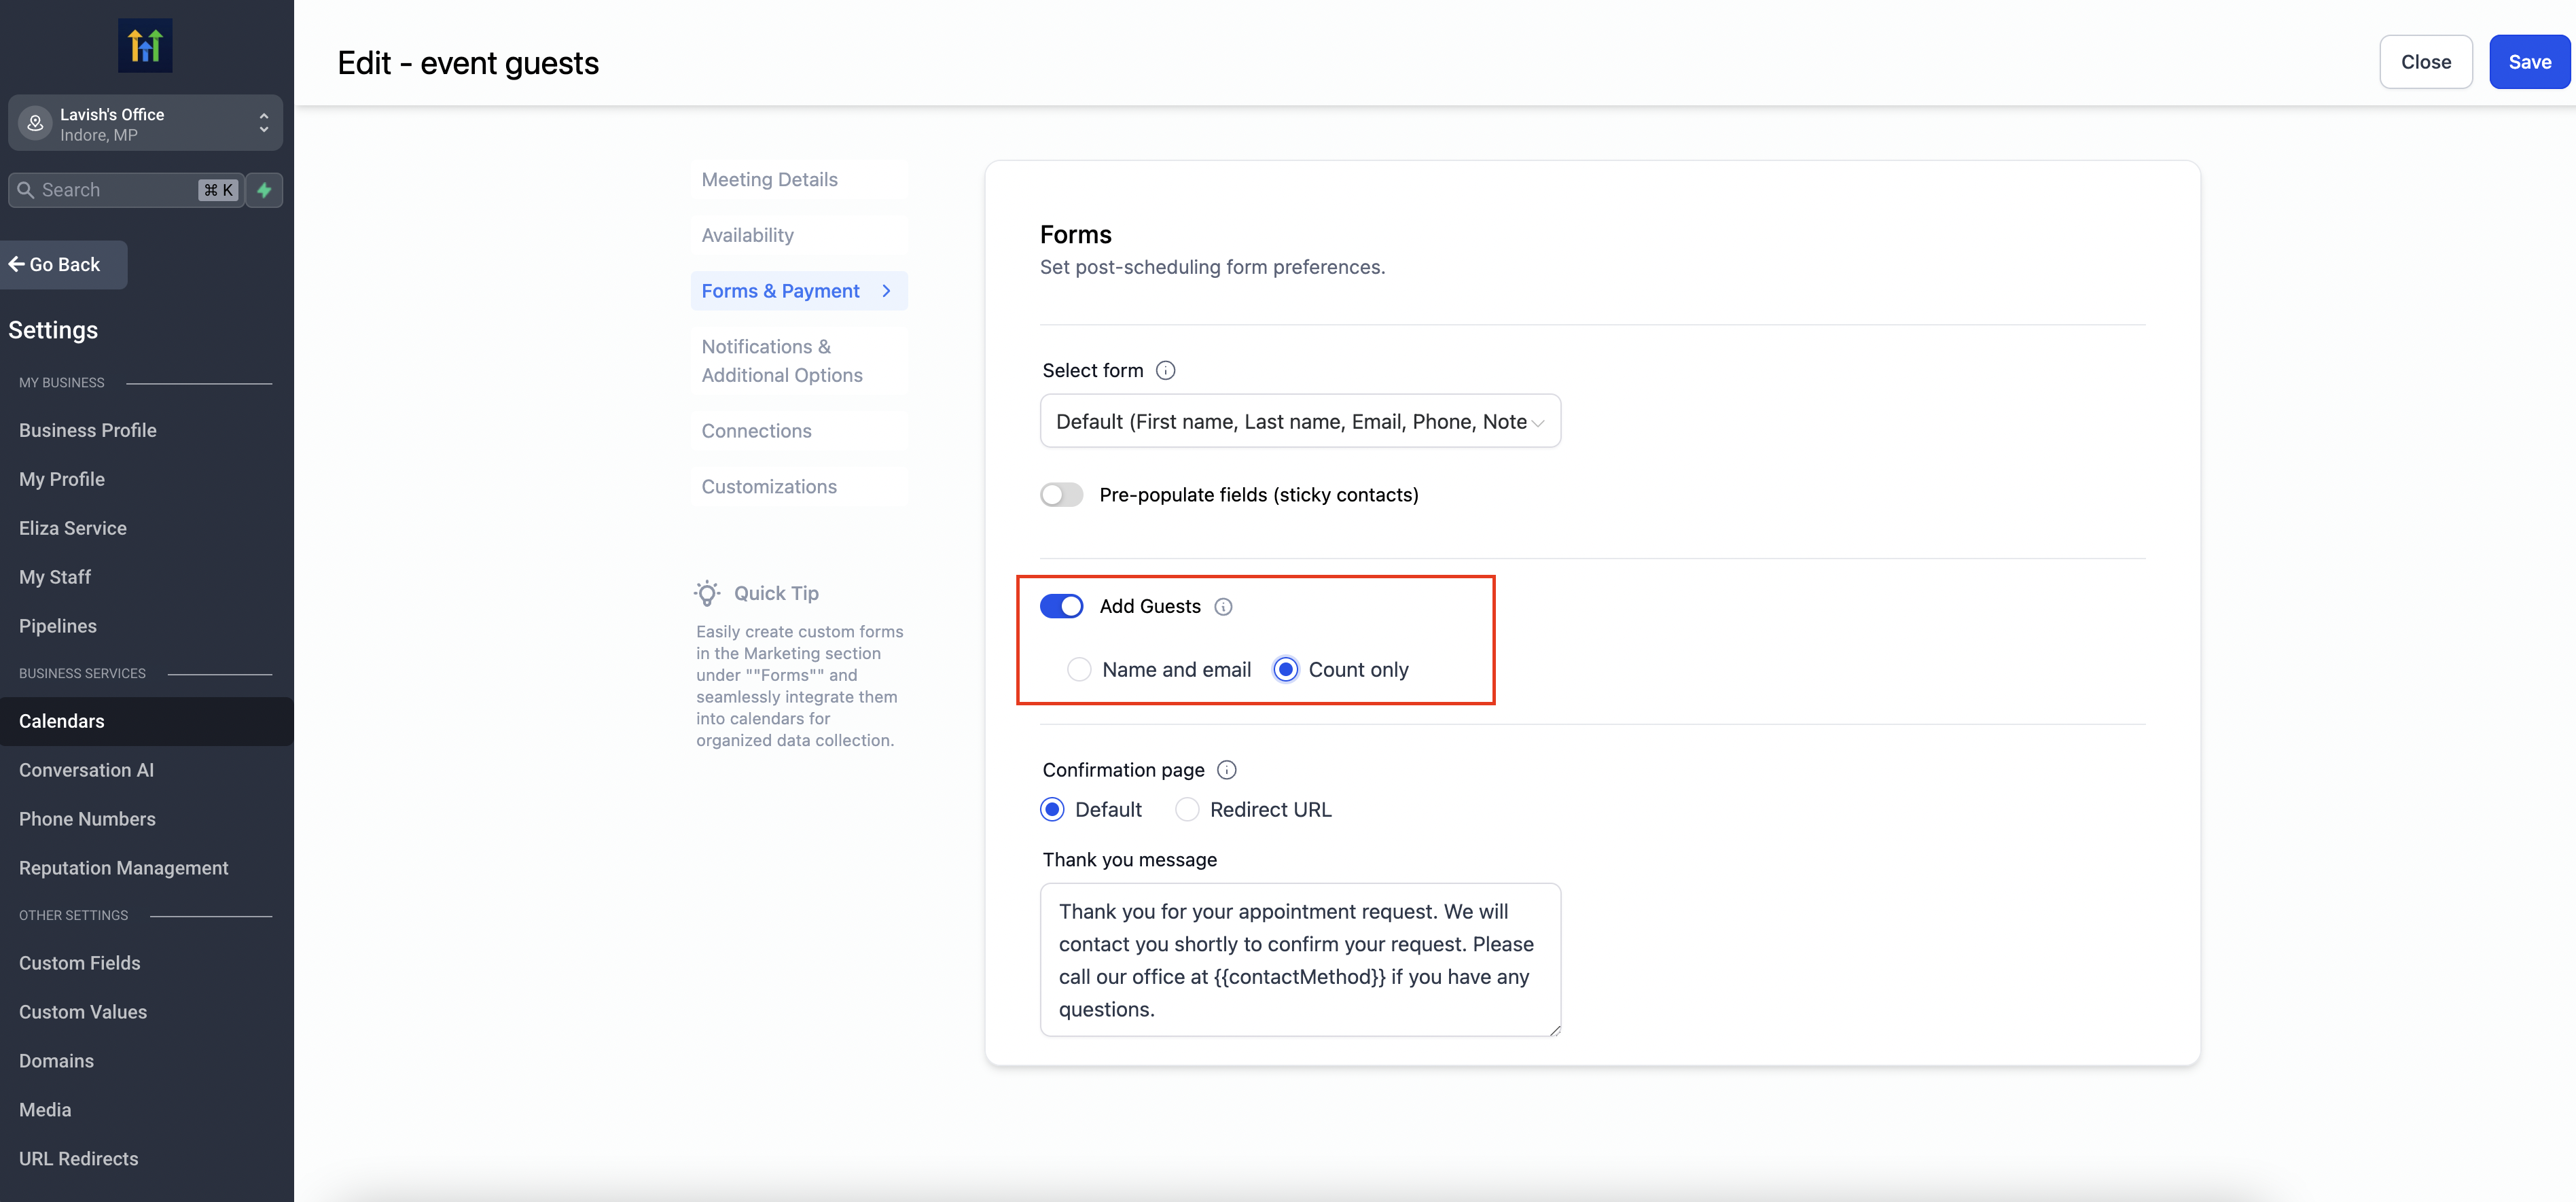
There is a new update for the calendar feature. This update lets users pick a new choice in "Add Guest." Now, attendees can either add guests by giving names and emails or just choose a number.
🪄 What's New?
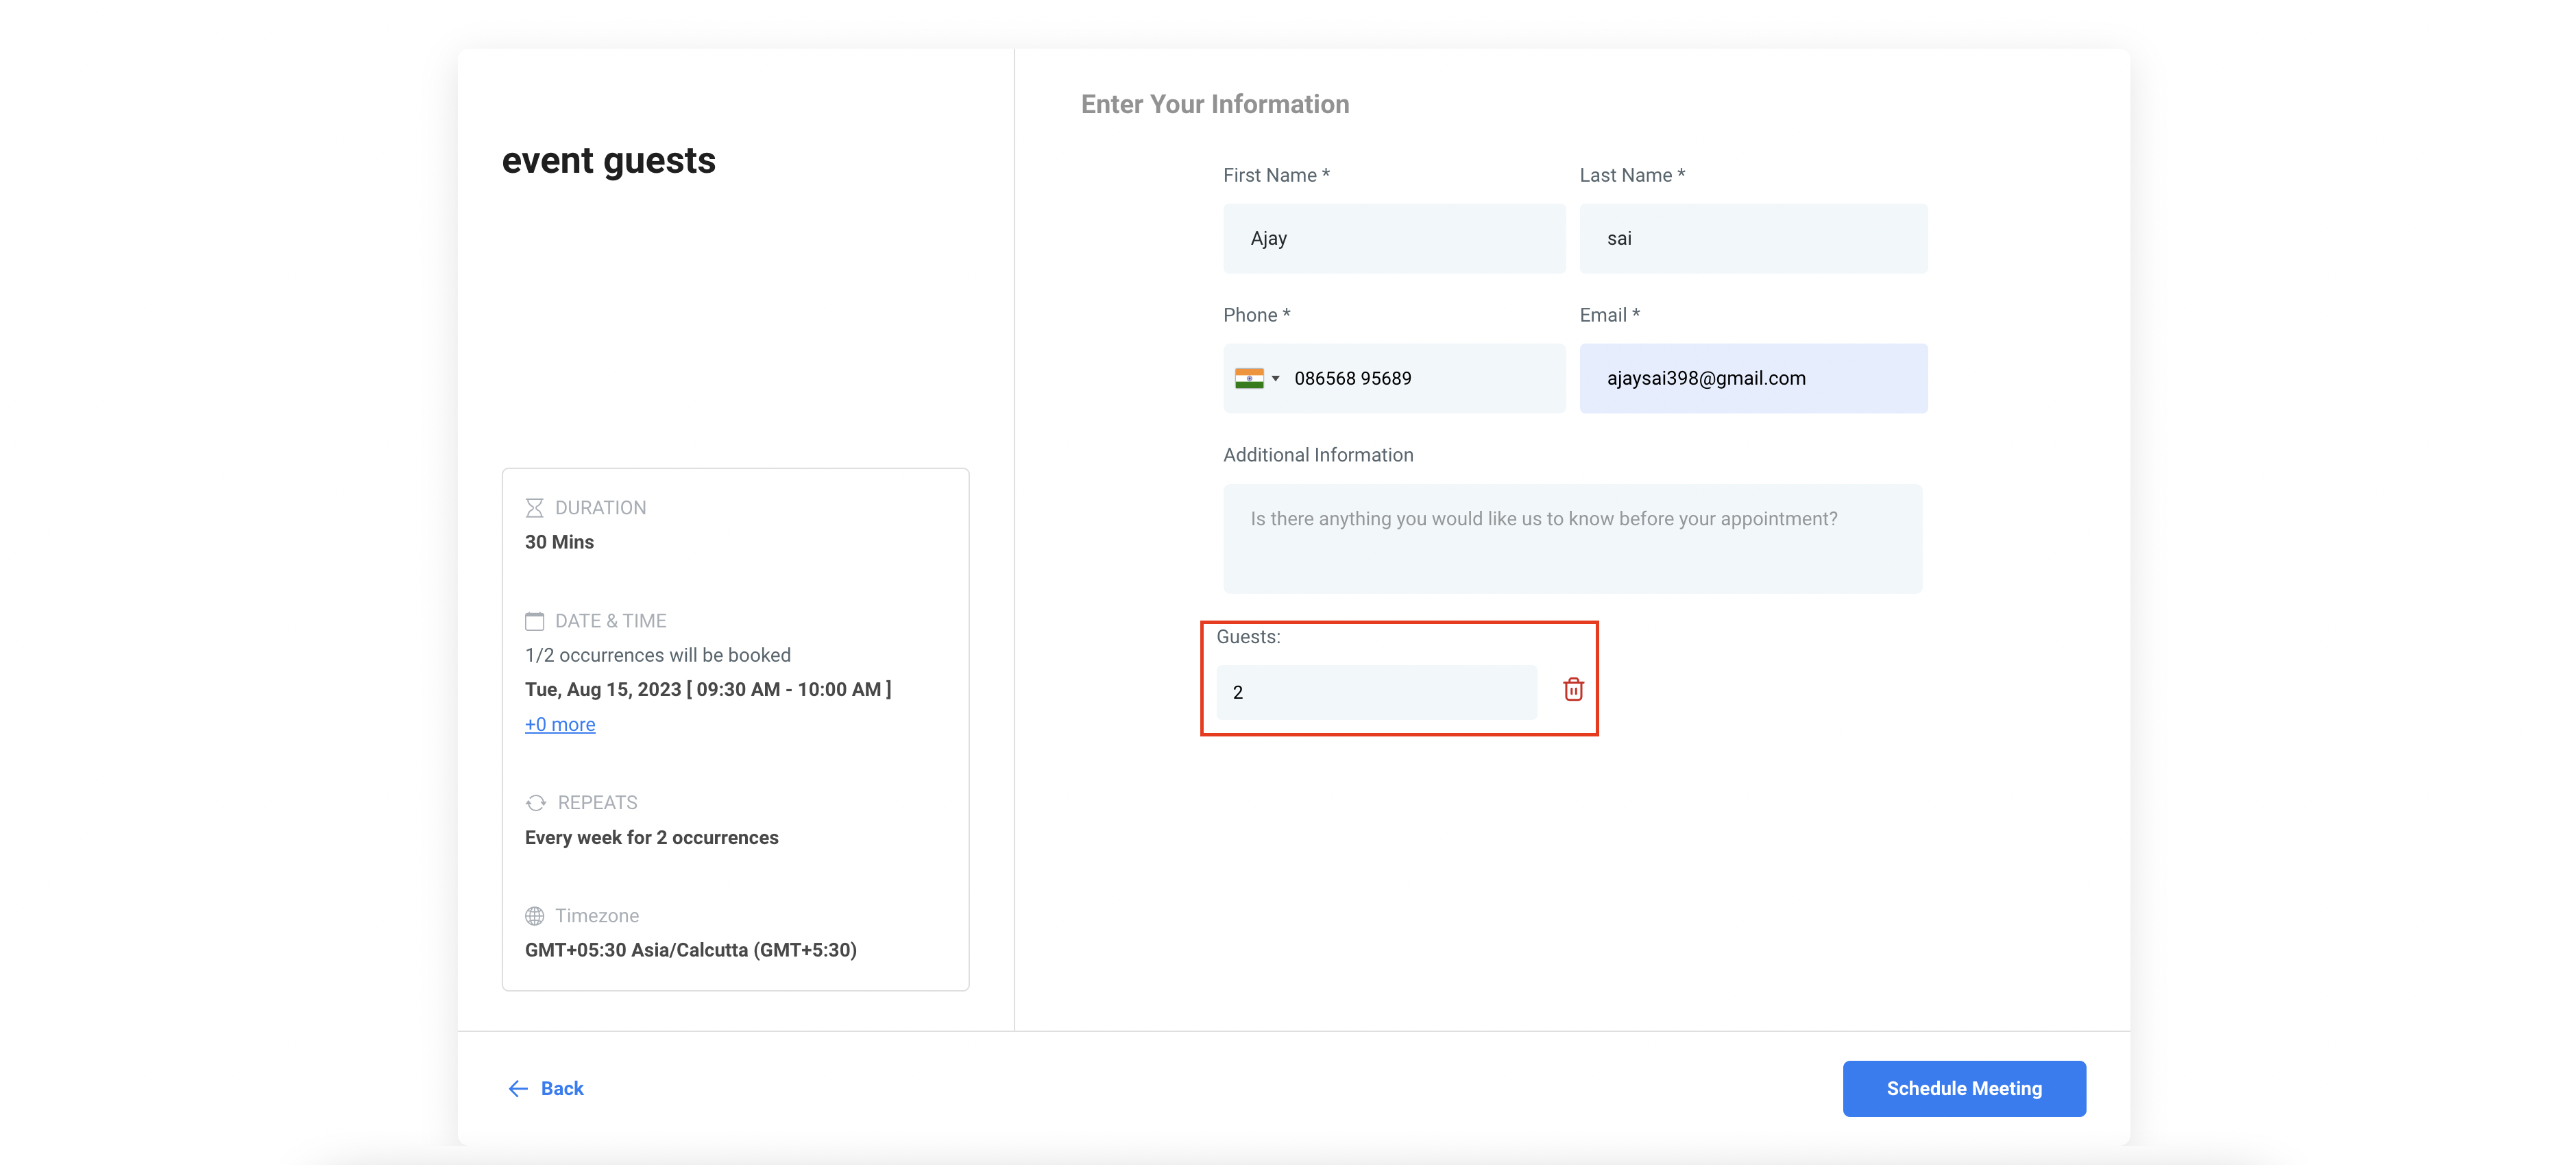
1️⃣ Count Option for Adding Guests: This helps when the main person going doesn't have the email addresses of the other people they want to invite, but still wants to include them in the scheduled meeting.
2️⃣ Custom Form in the Email to Guests: Often, people need to give details before a meeting. This helps the person offering the service prepare for the meeting.Examples include:
Tour Services:
They may require a passport number, passport expiry, and other financial details.
Medical Appointment:
This could be allergies, any genetic ailments, past medical issues, etc.
Please Note:
The special form for guests only functions if the main person going to the event includes the guests' names and emails. It won't work if you simply choose to indicate the number of guests. In the Calendar settings, you can pick either to input 'Name and Email' or just the number of guests, depending on what you need.
ℹ️ Explore more about the feature here
Yext Listings is now available in Canada 🇨🇦 🤩
Yext is now in Canada and supports more than 55 active listings.
Popular Listings Supported in Canada:
Amazon Alexa
Apple
Bing
DoorDash
Uber Eats
Yelp
Facebook
FourSquare
Google Business Profile
NextDoor
OpenTable
SnapChat
TripAdvisor
TrustPilot
All the listings supported in Canada are shown below:
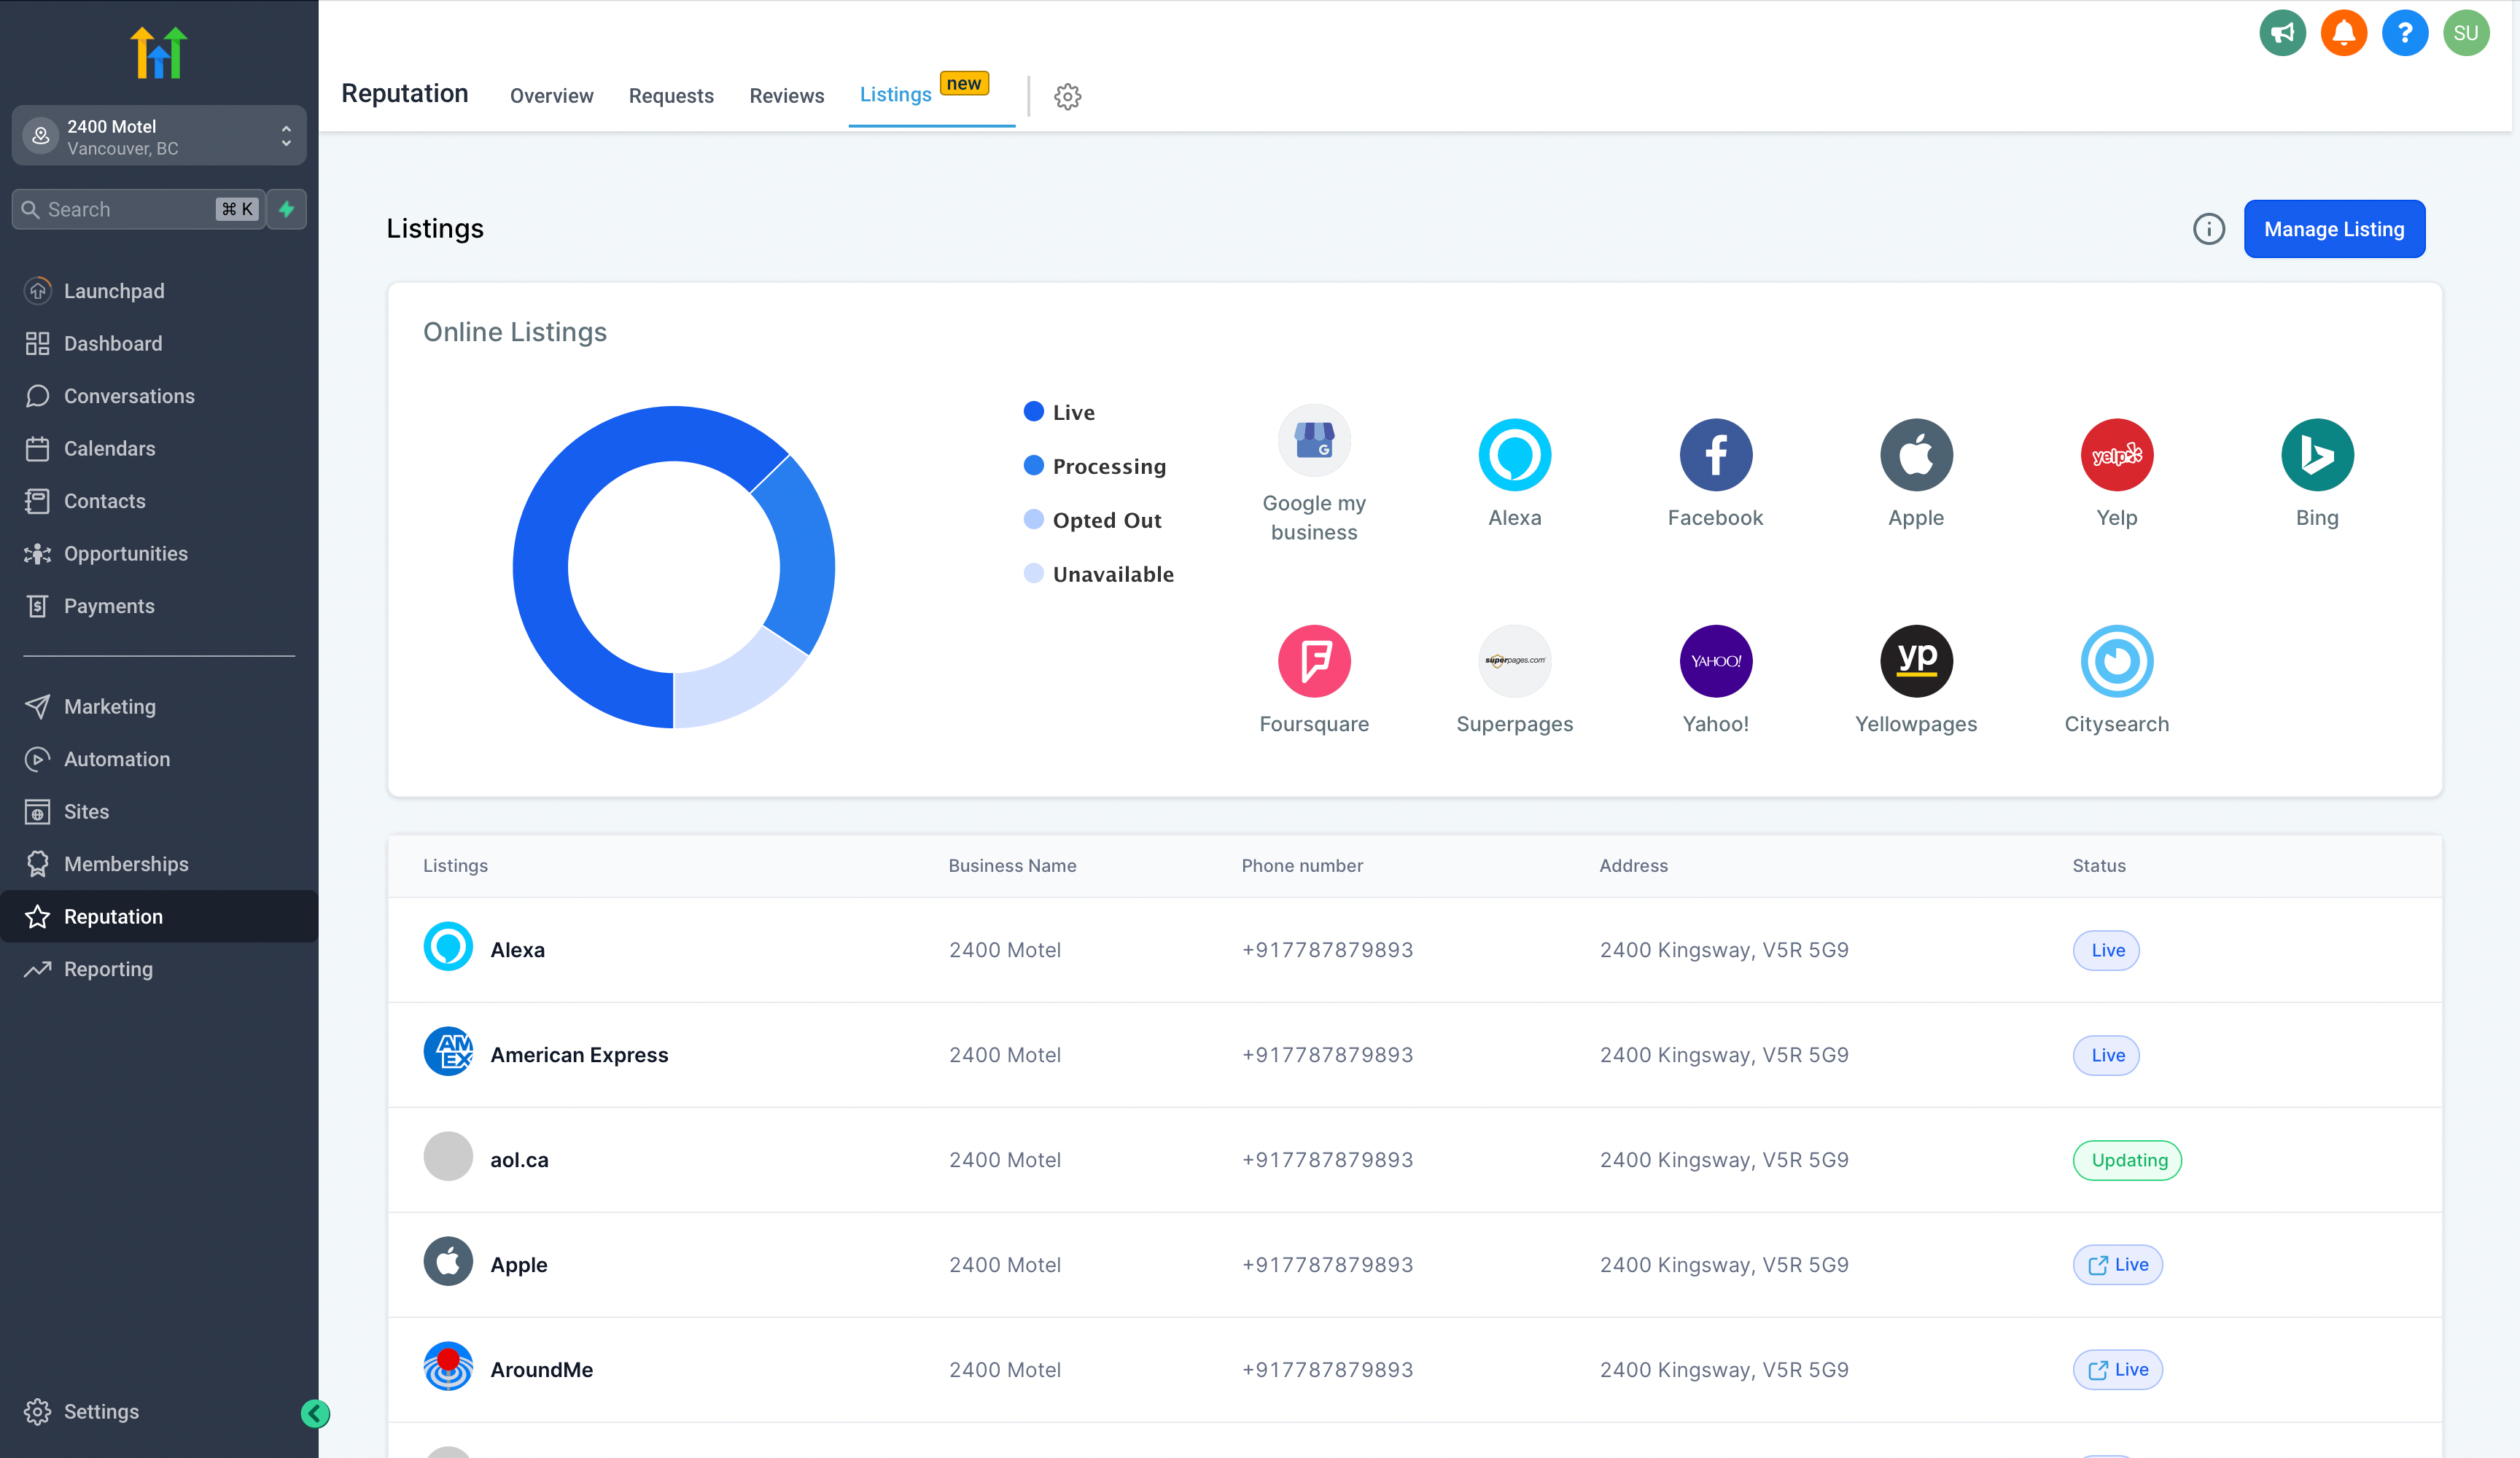
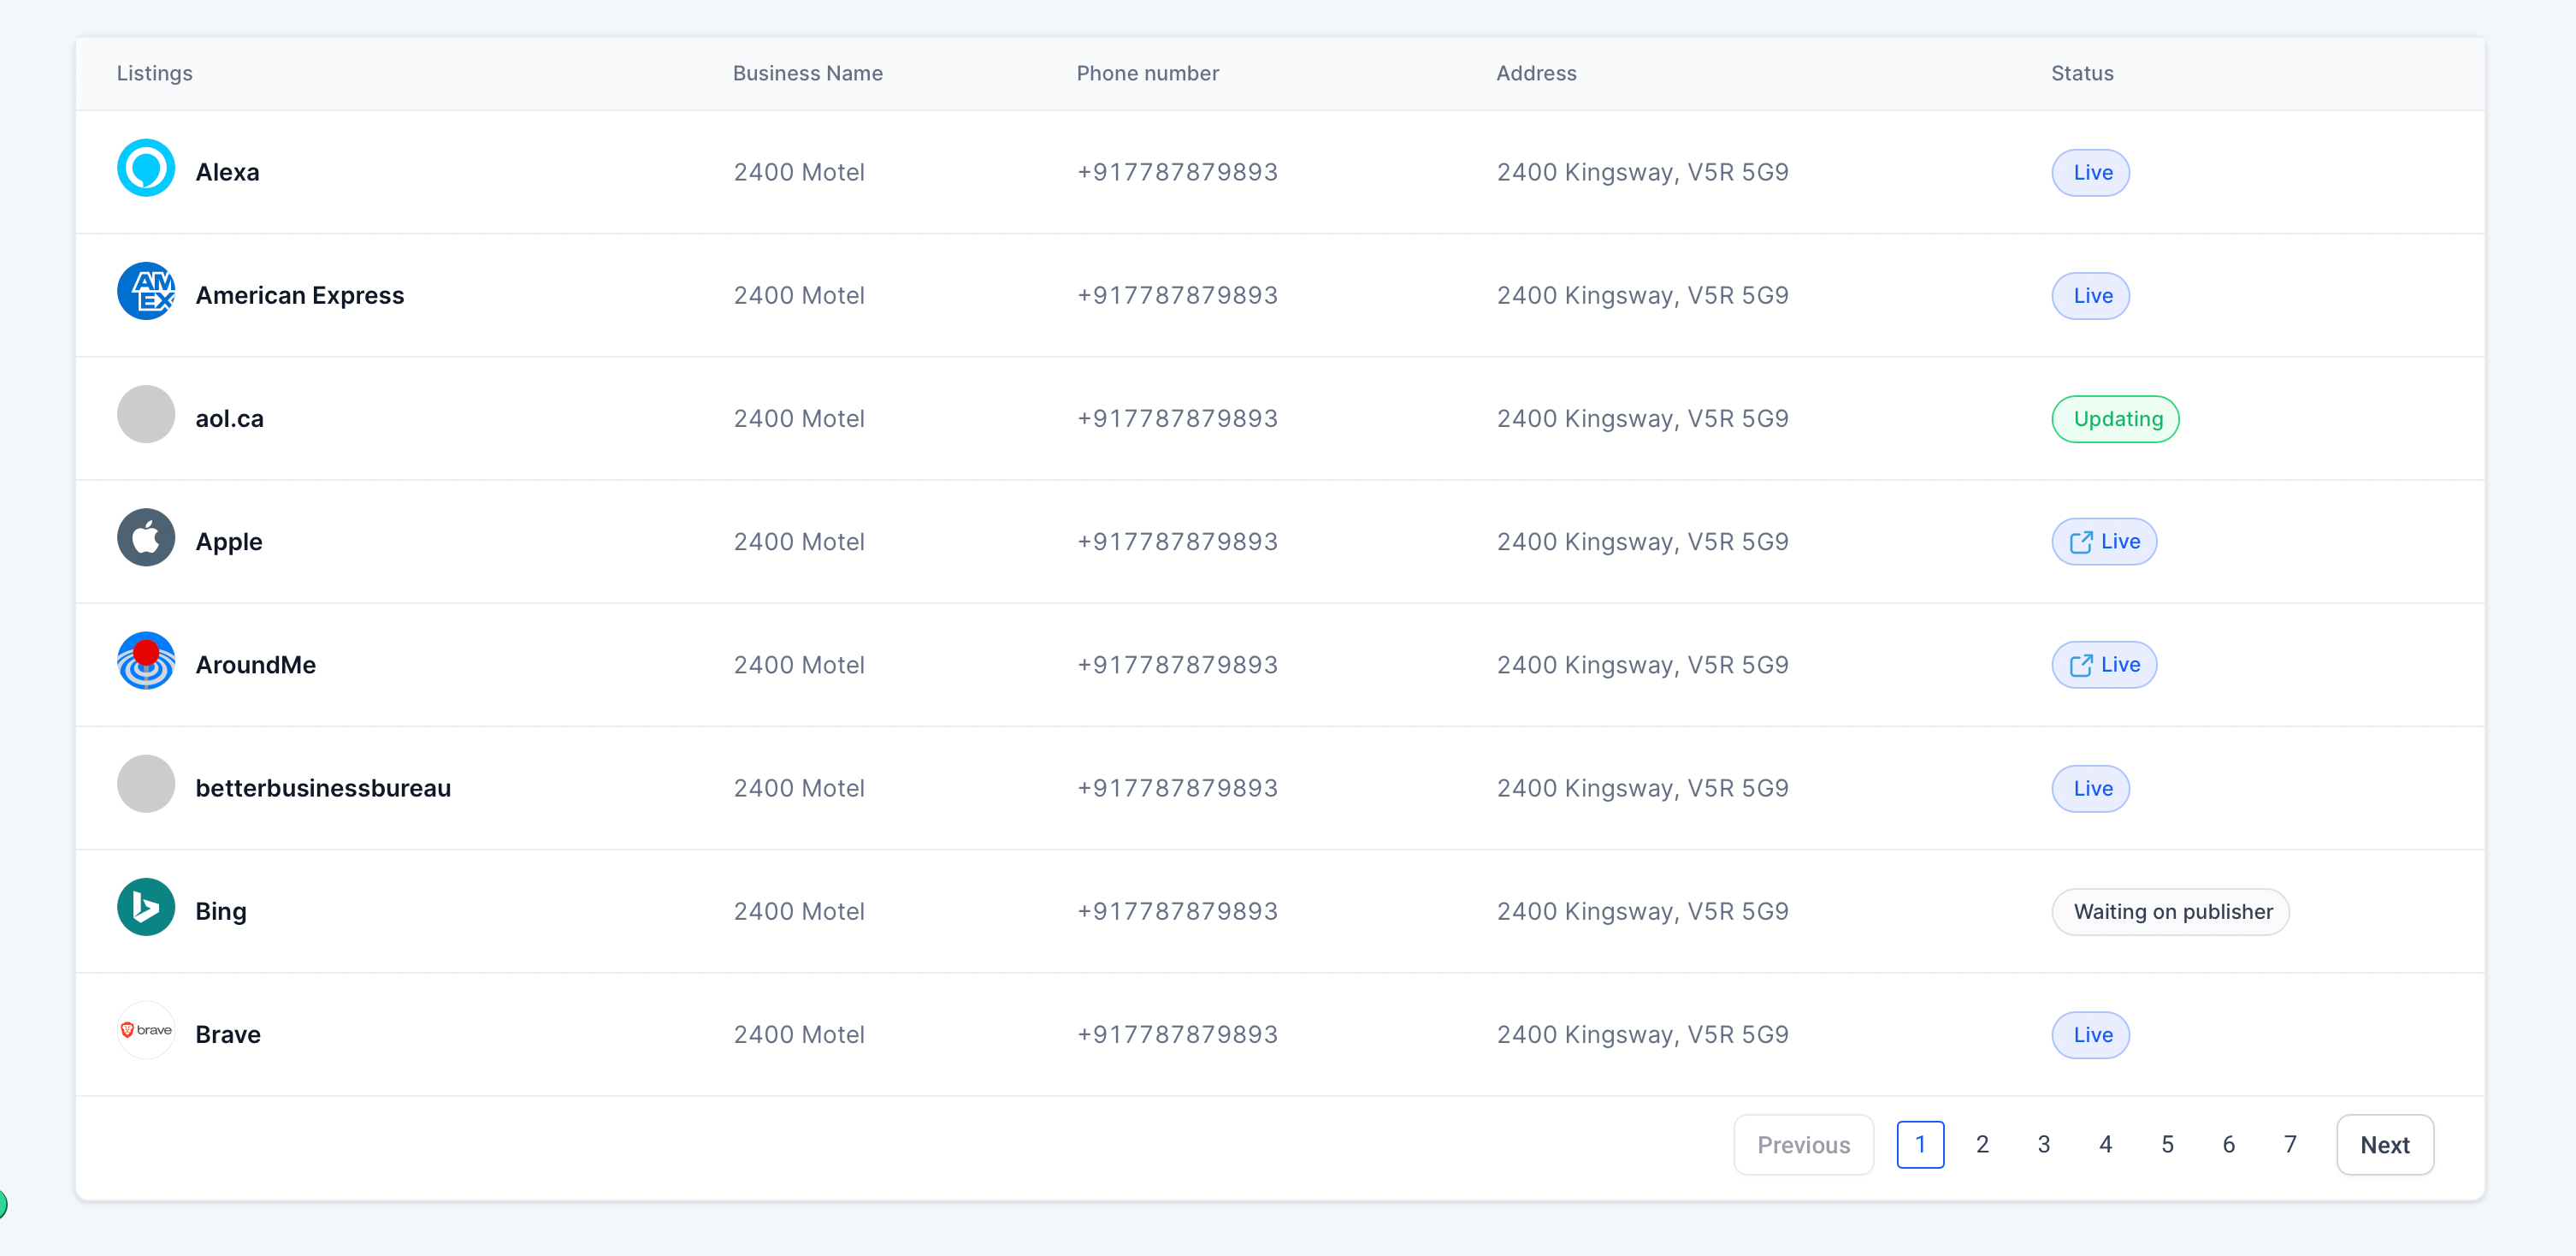
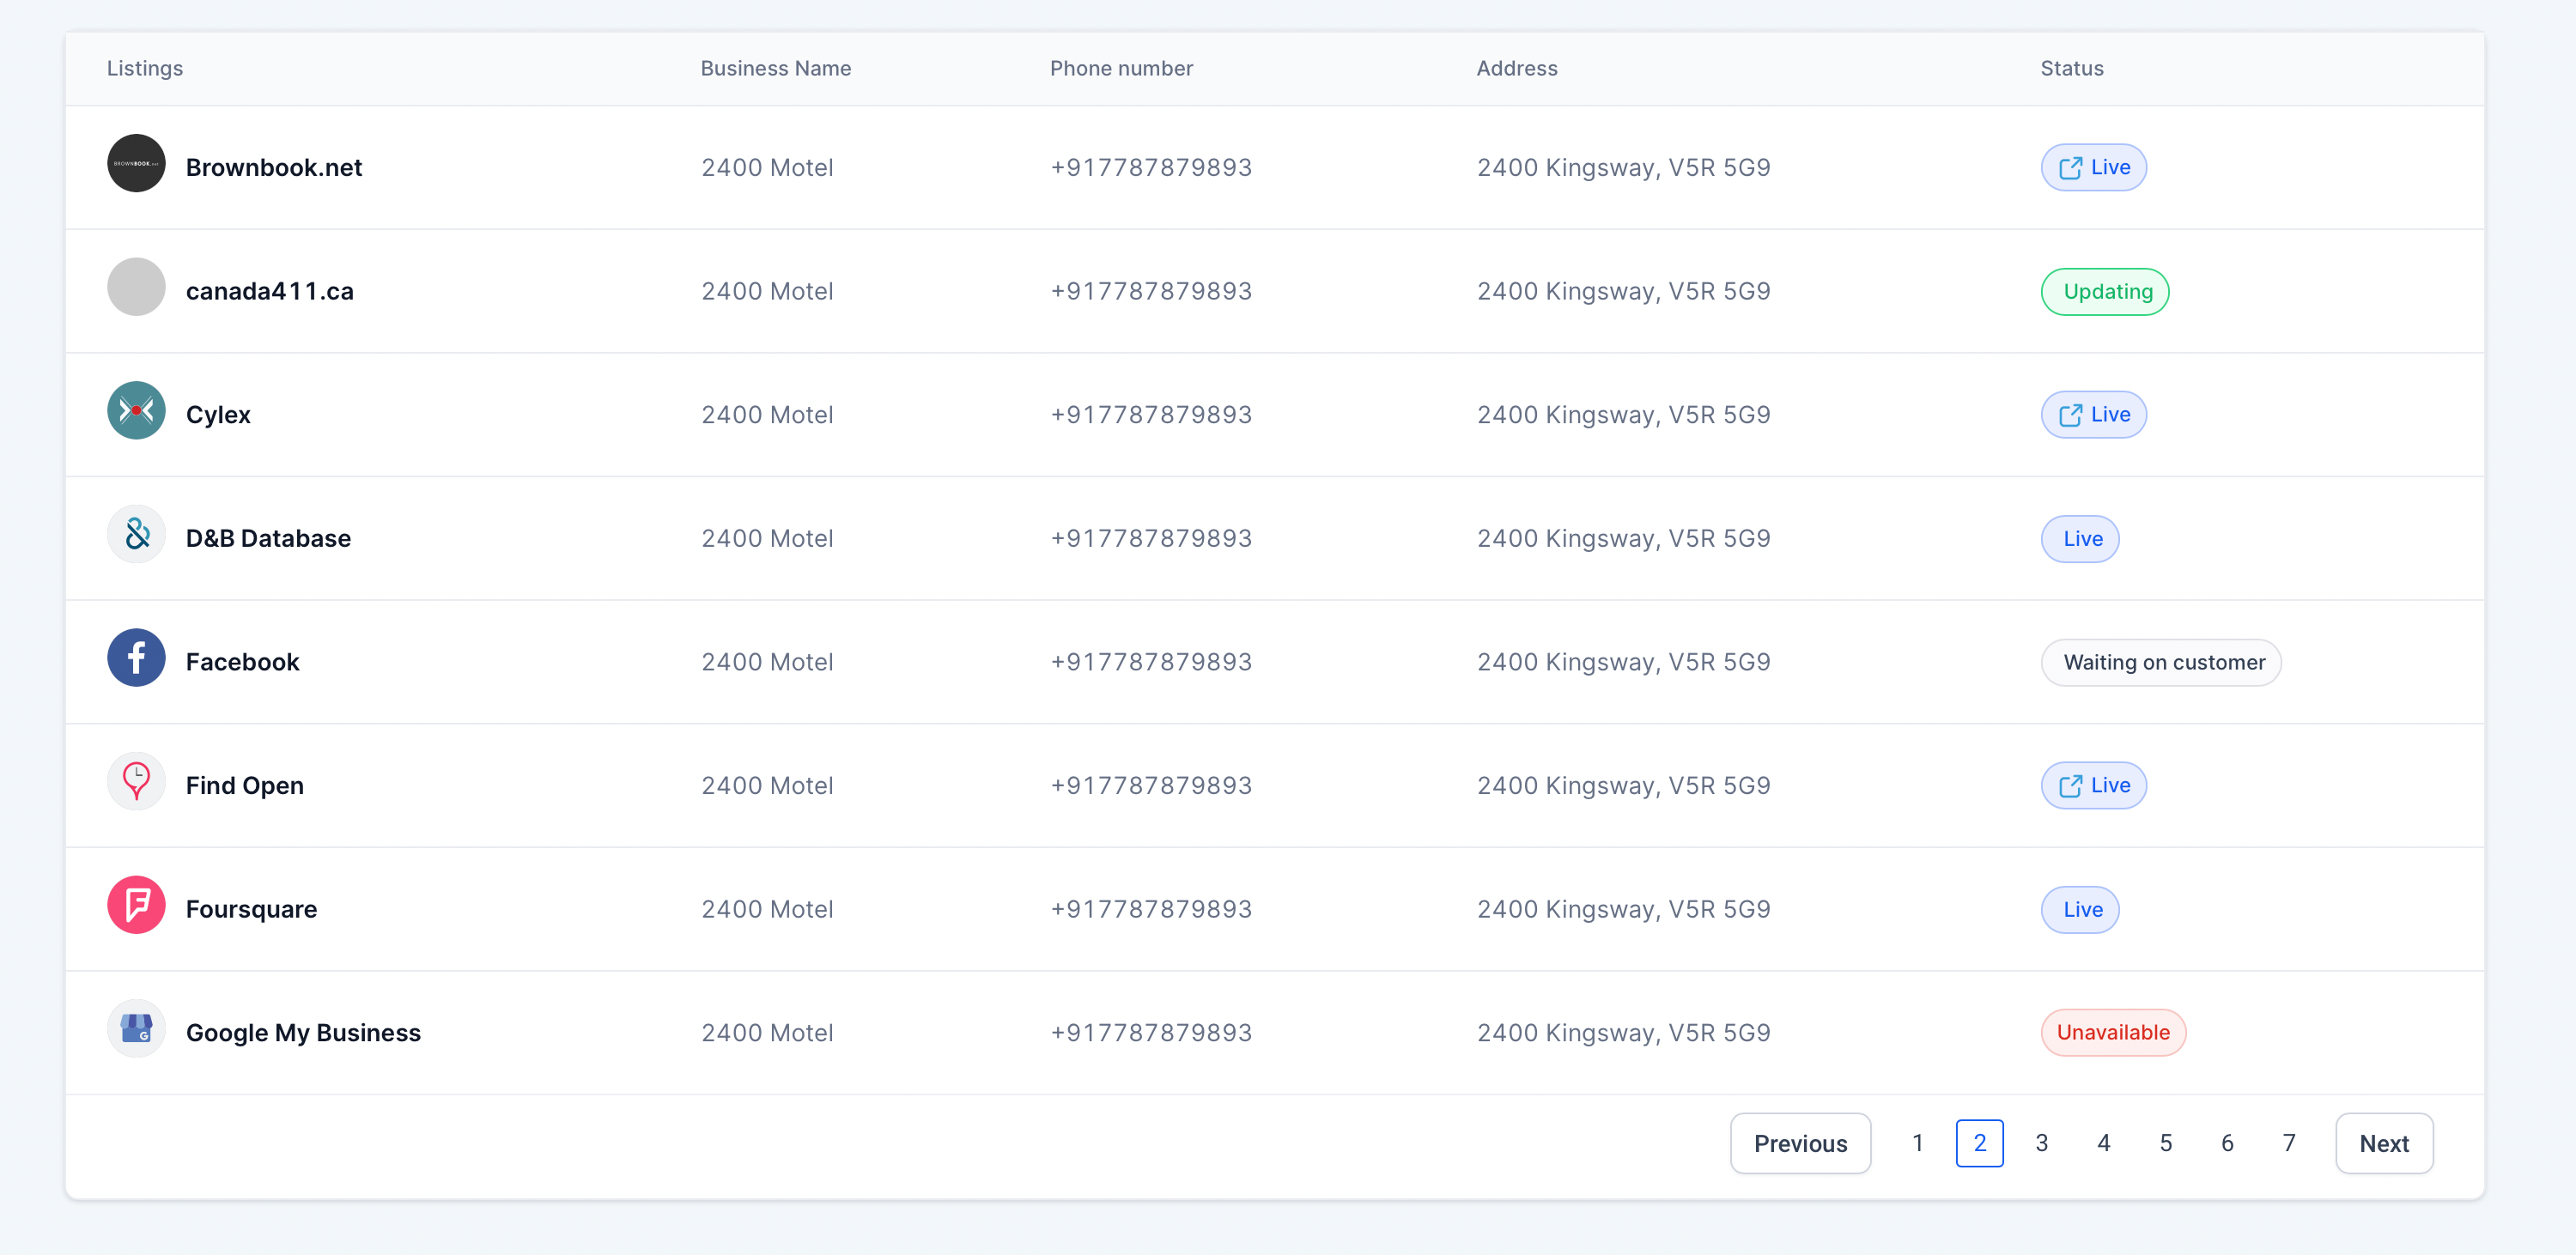
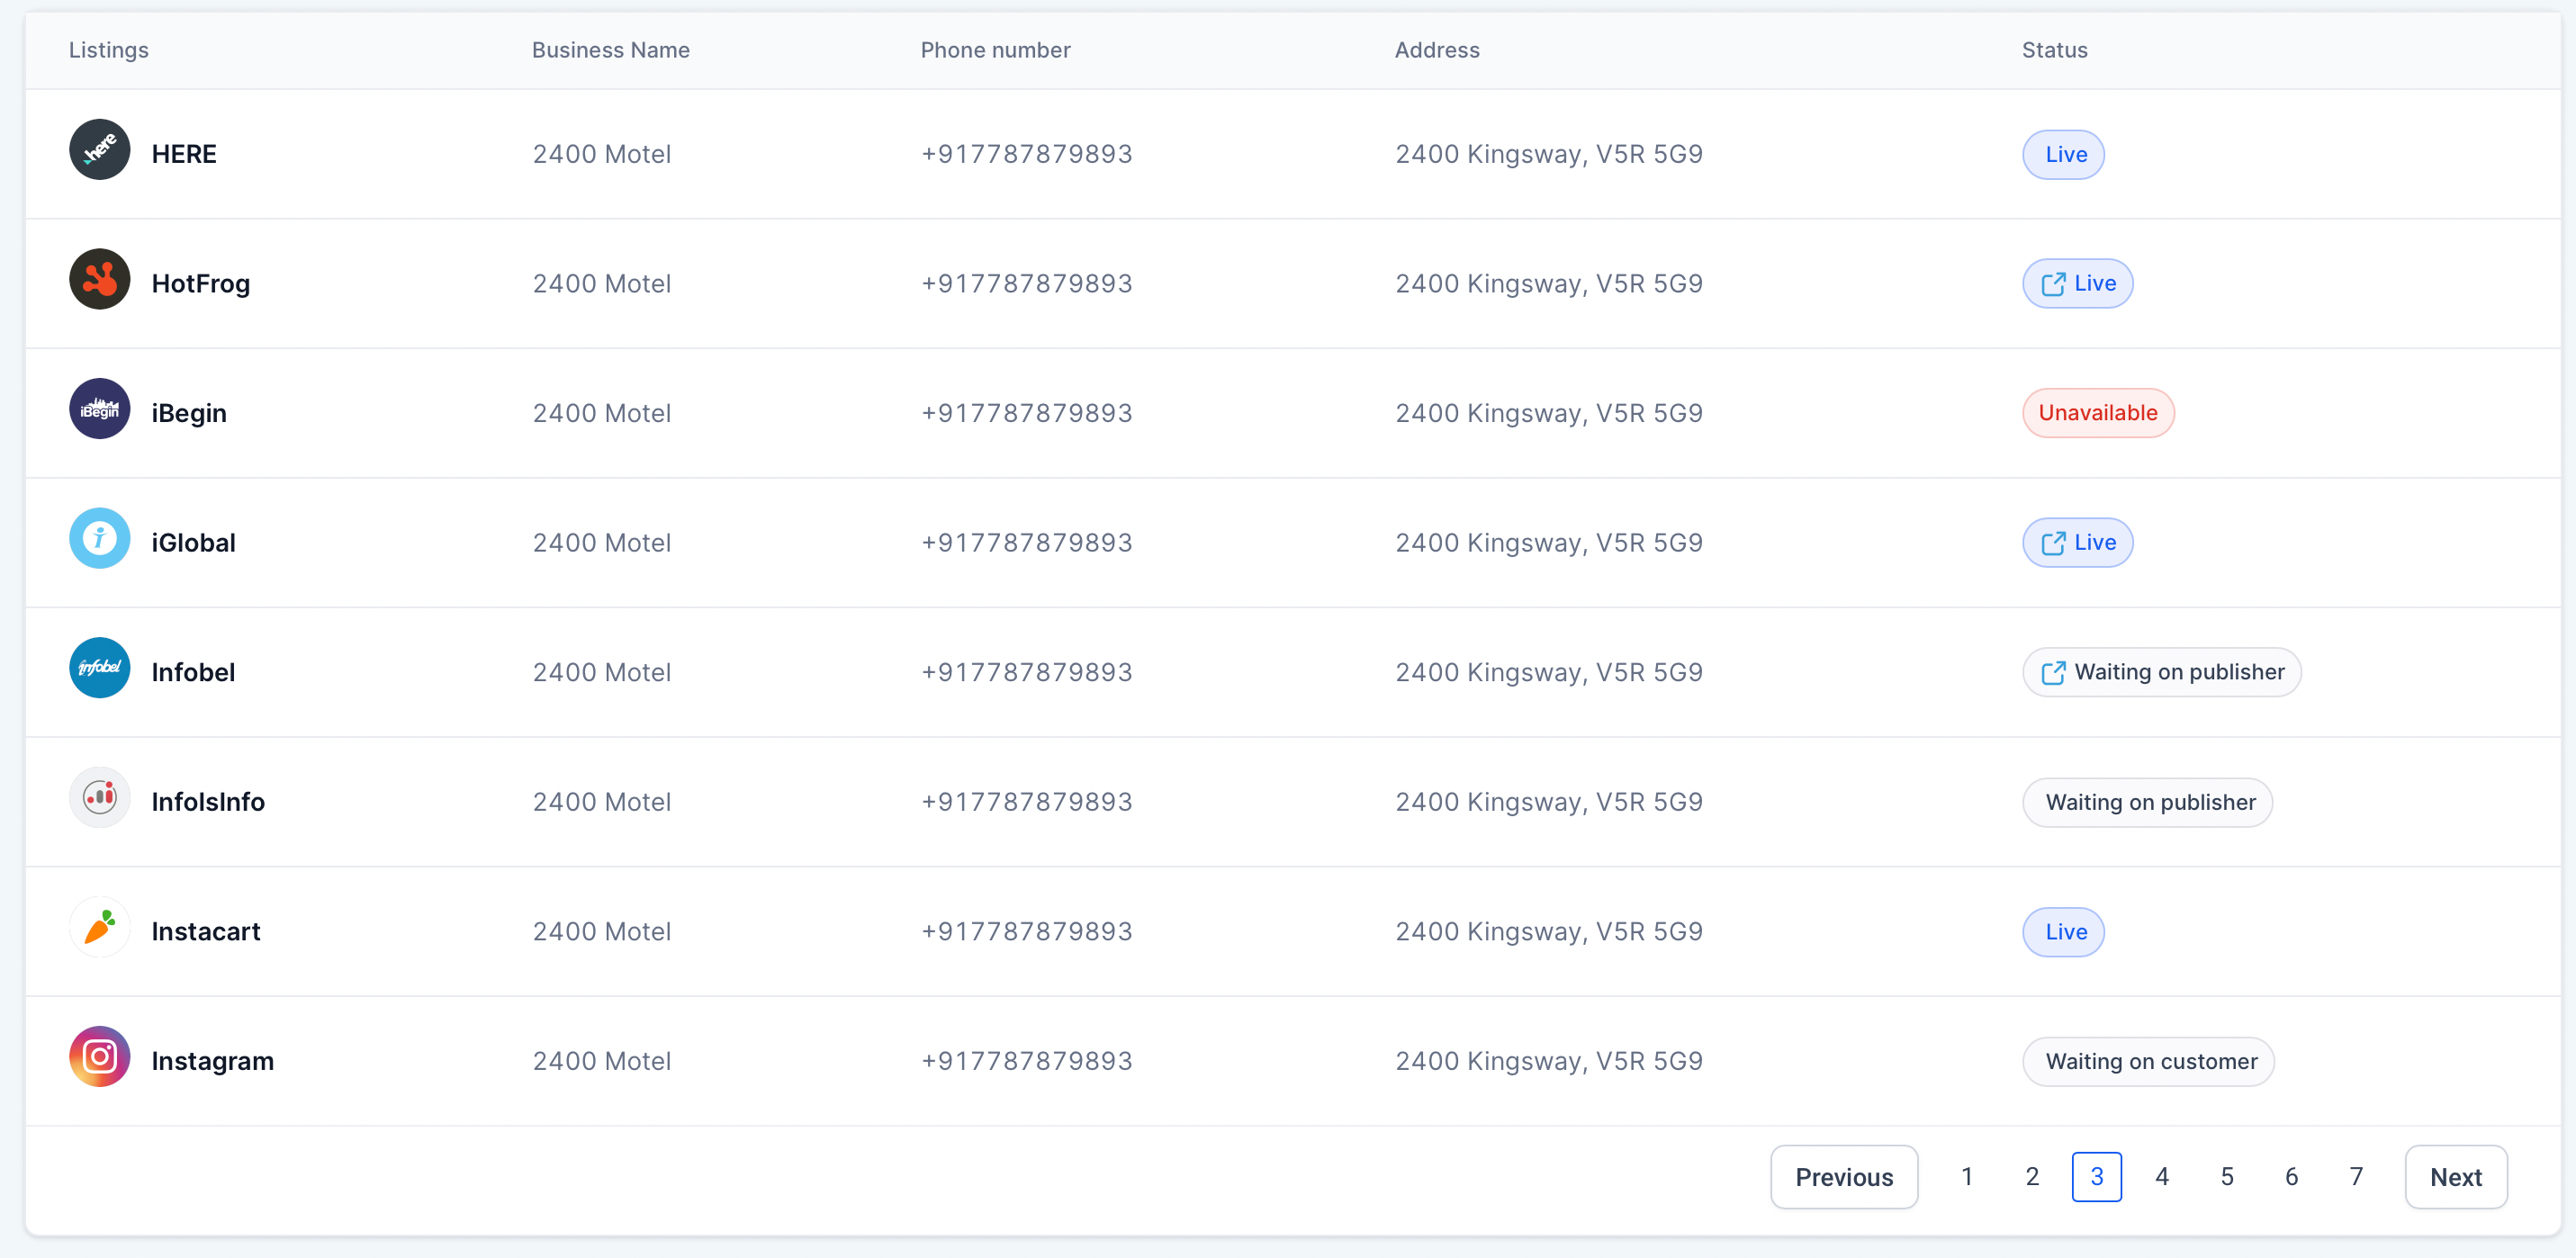
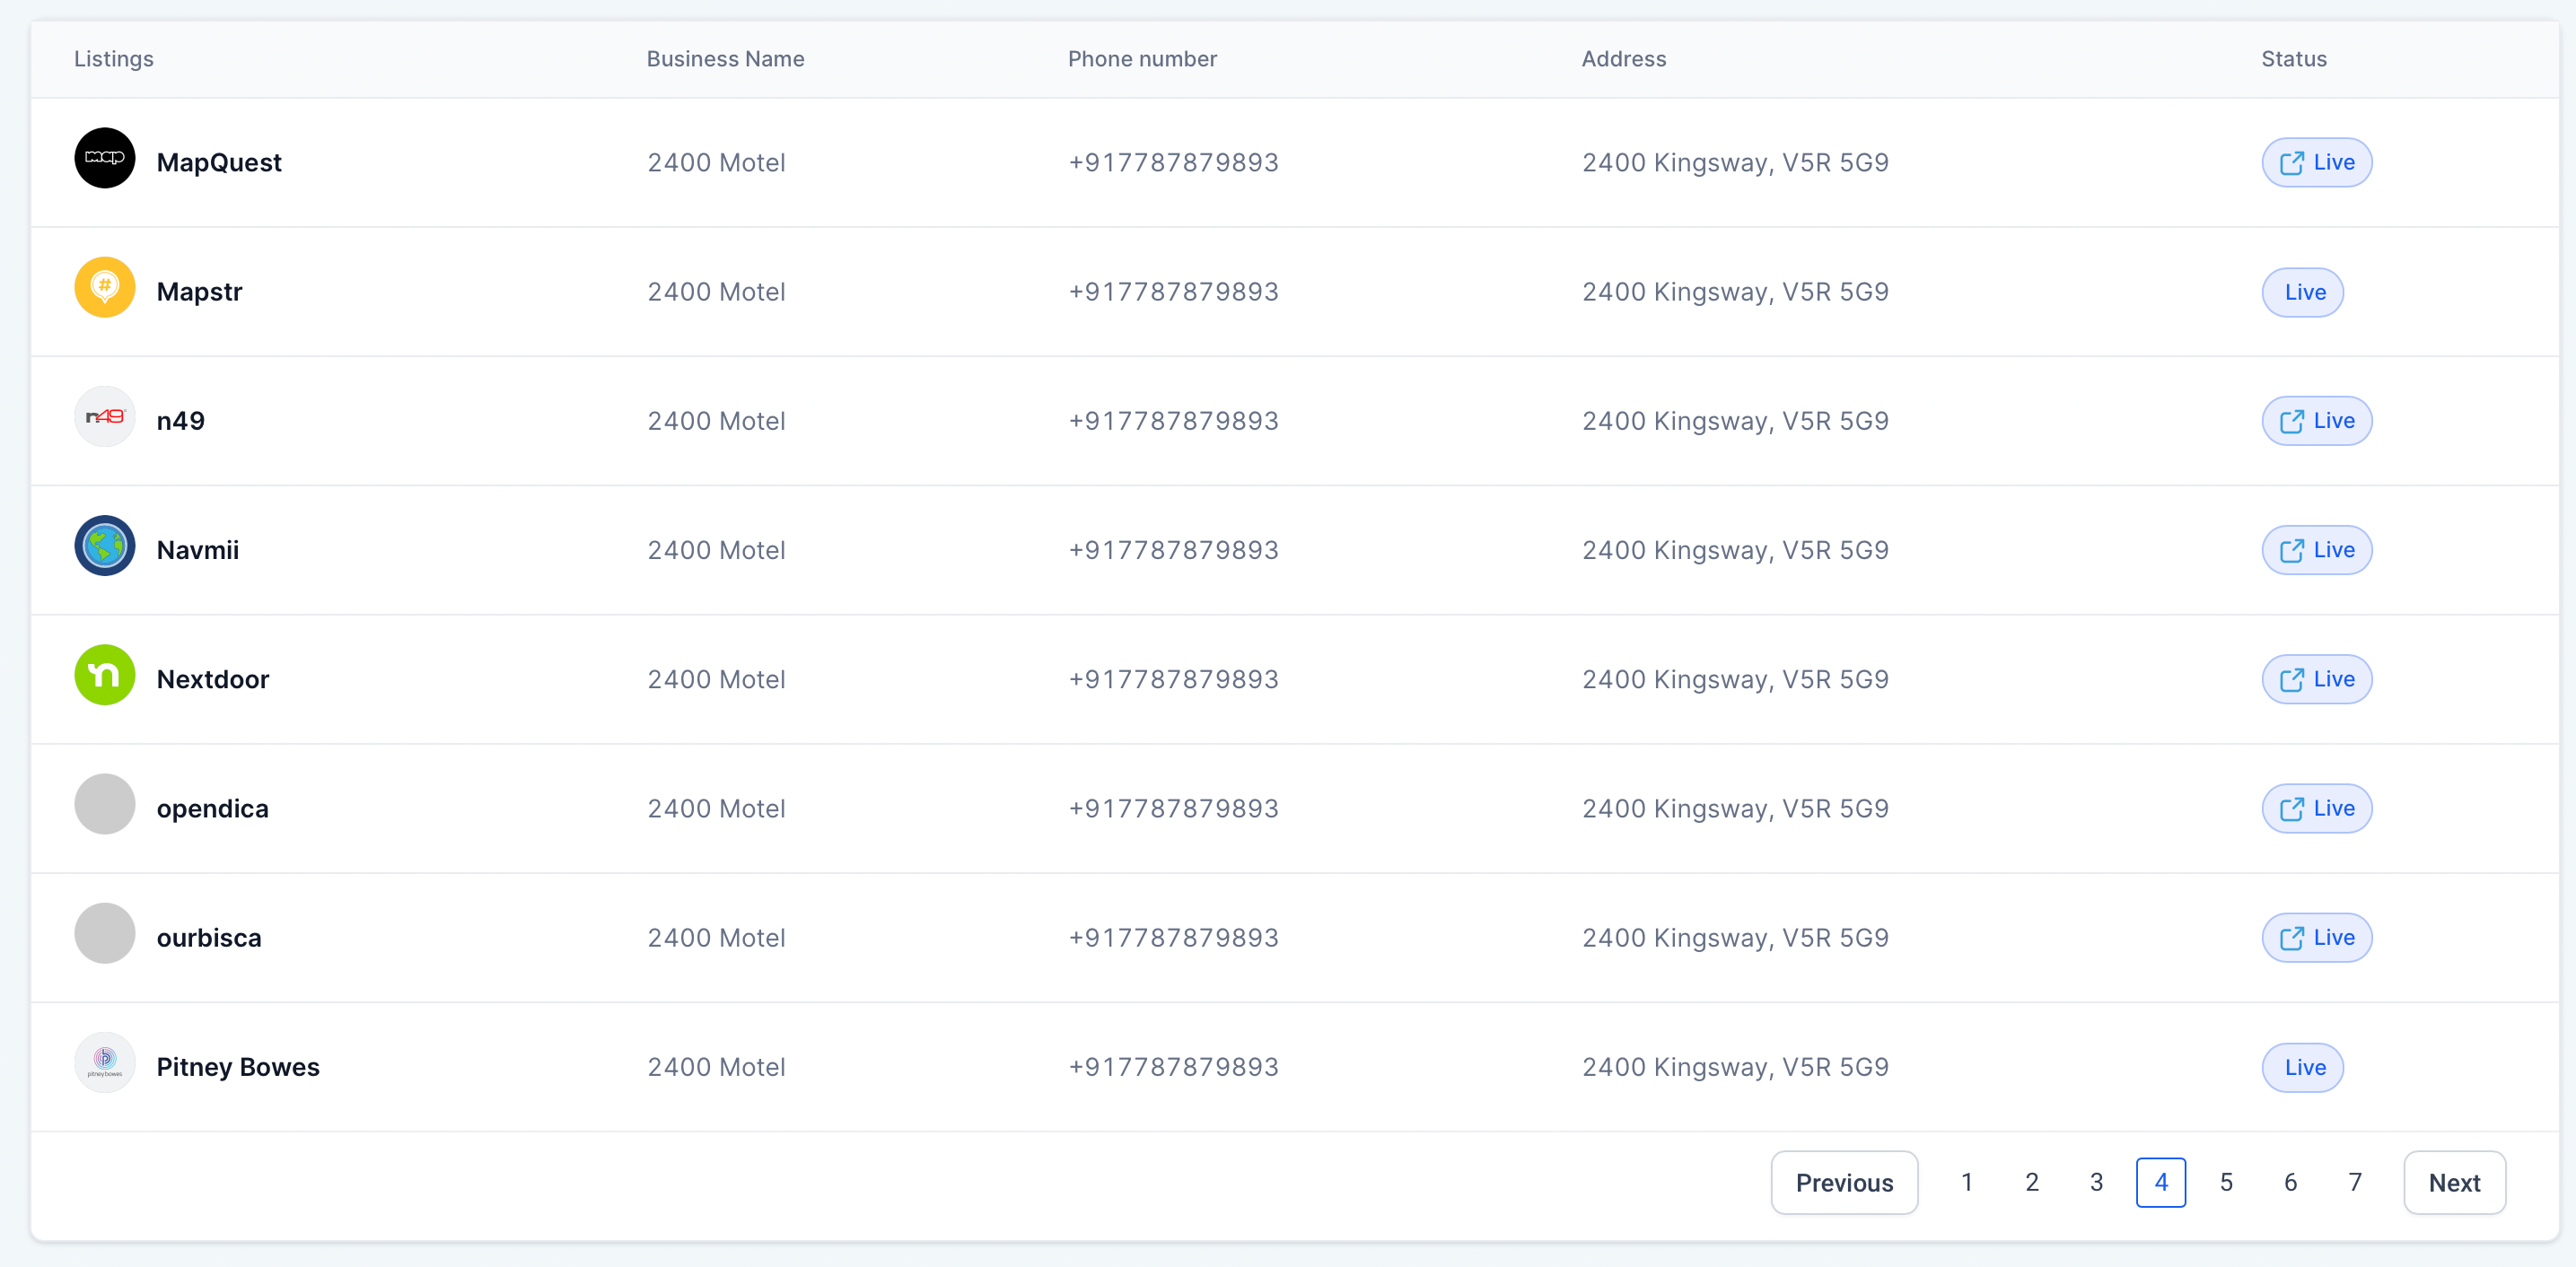
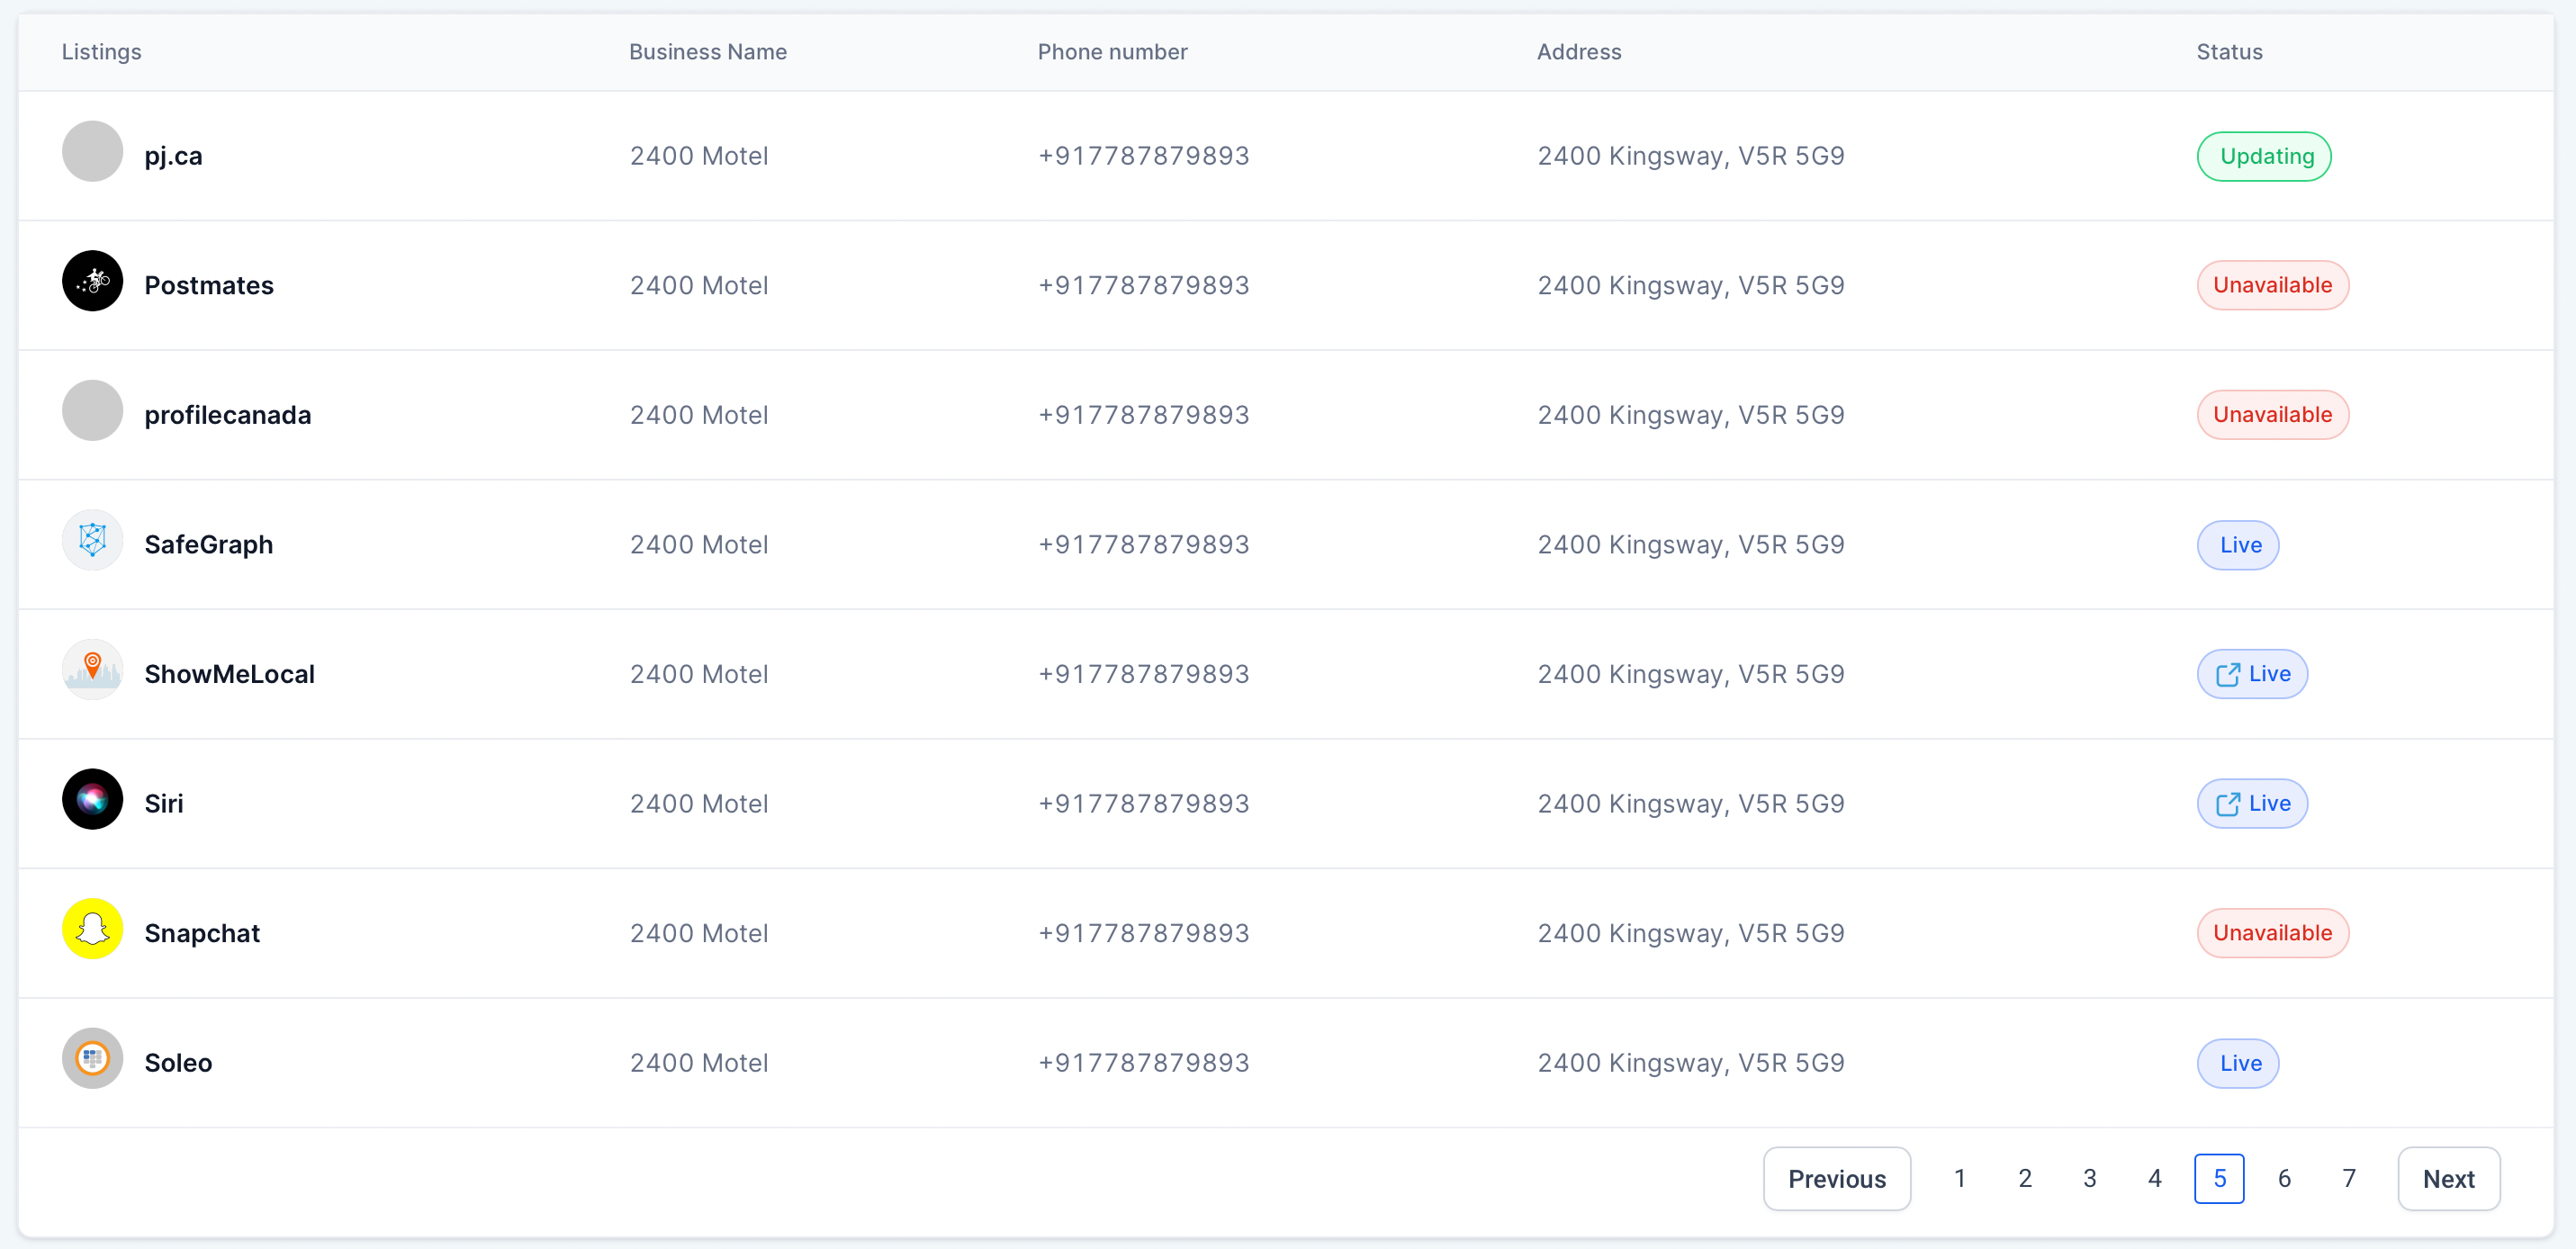
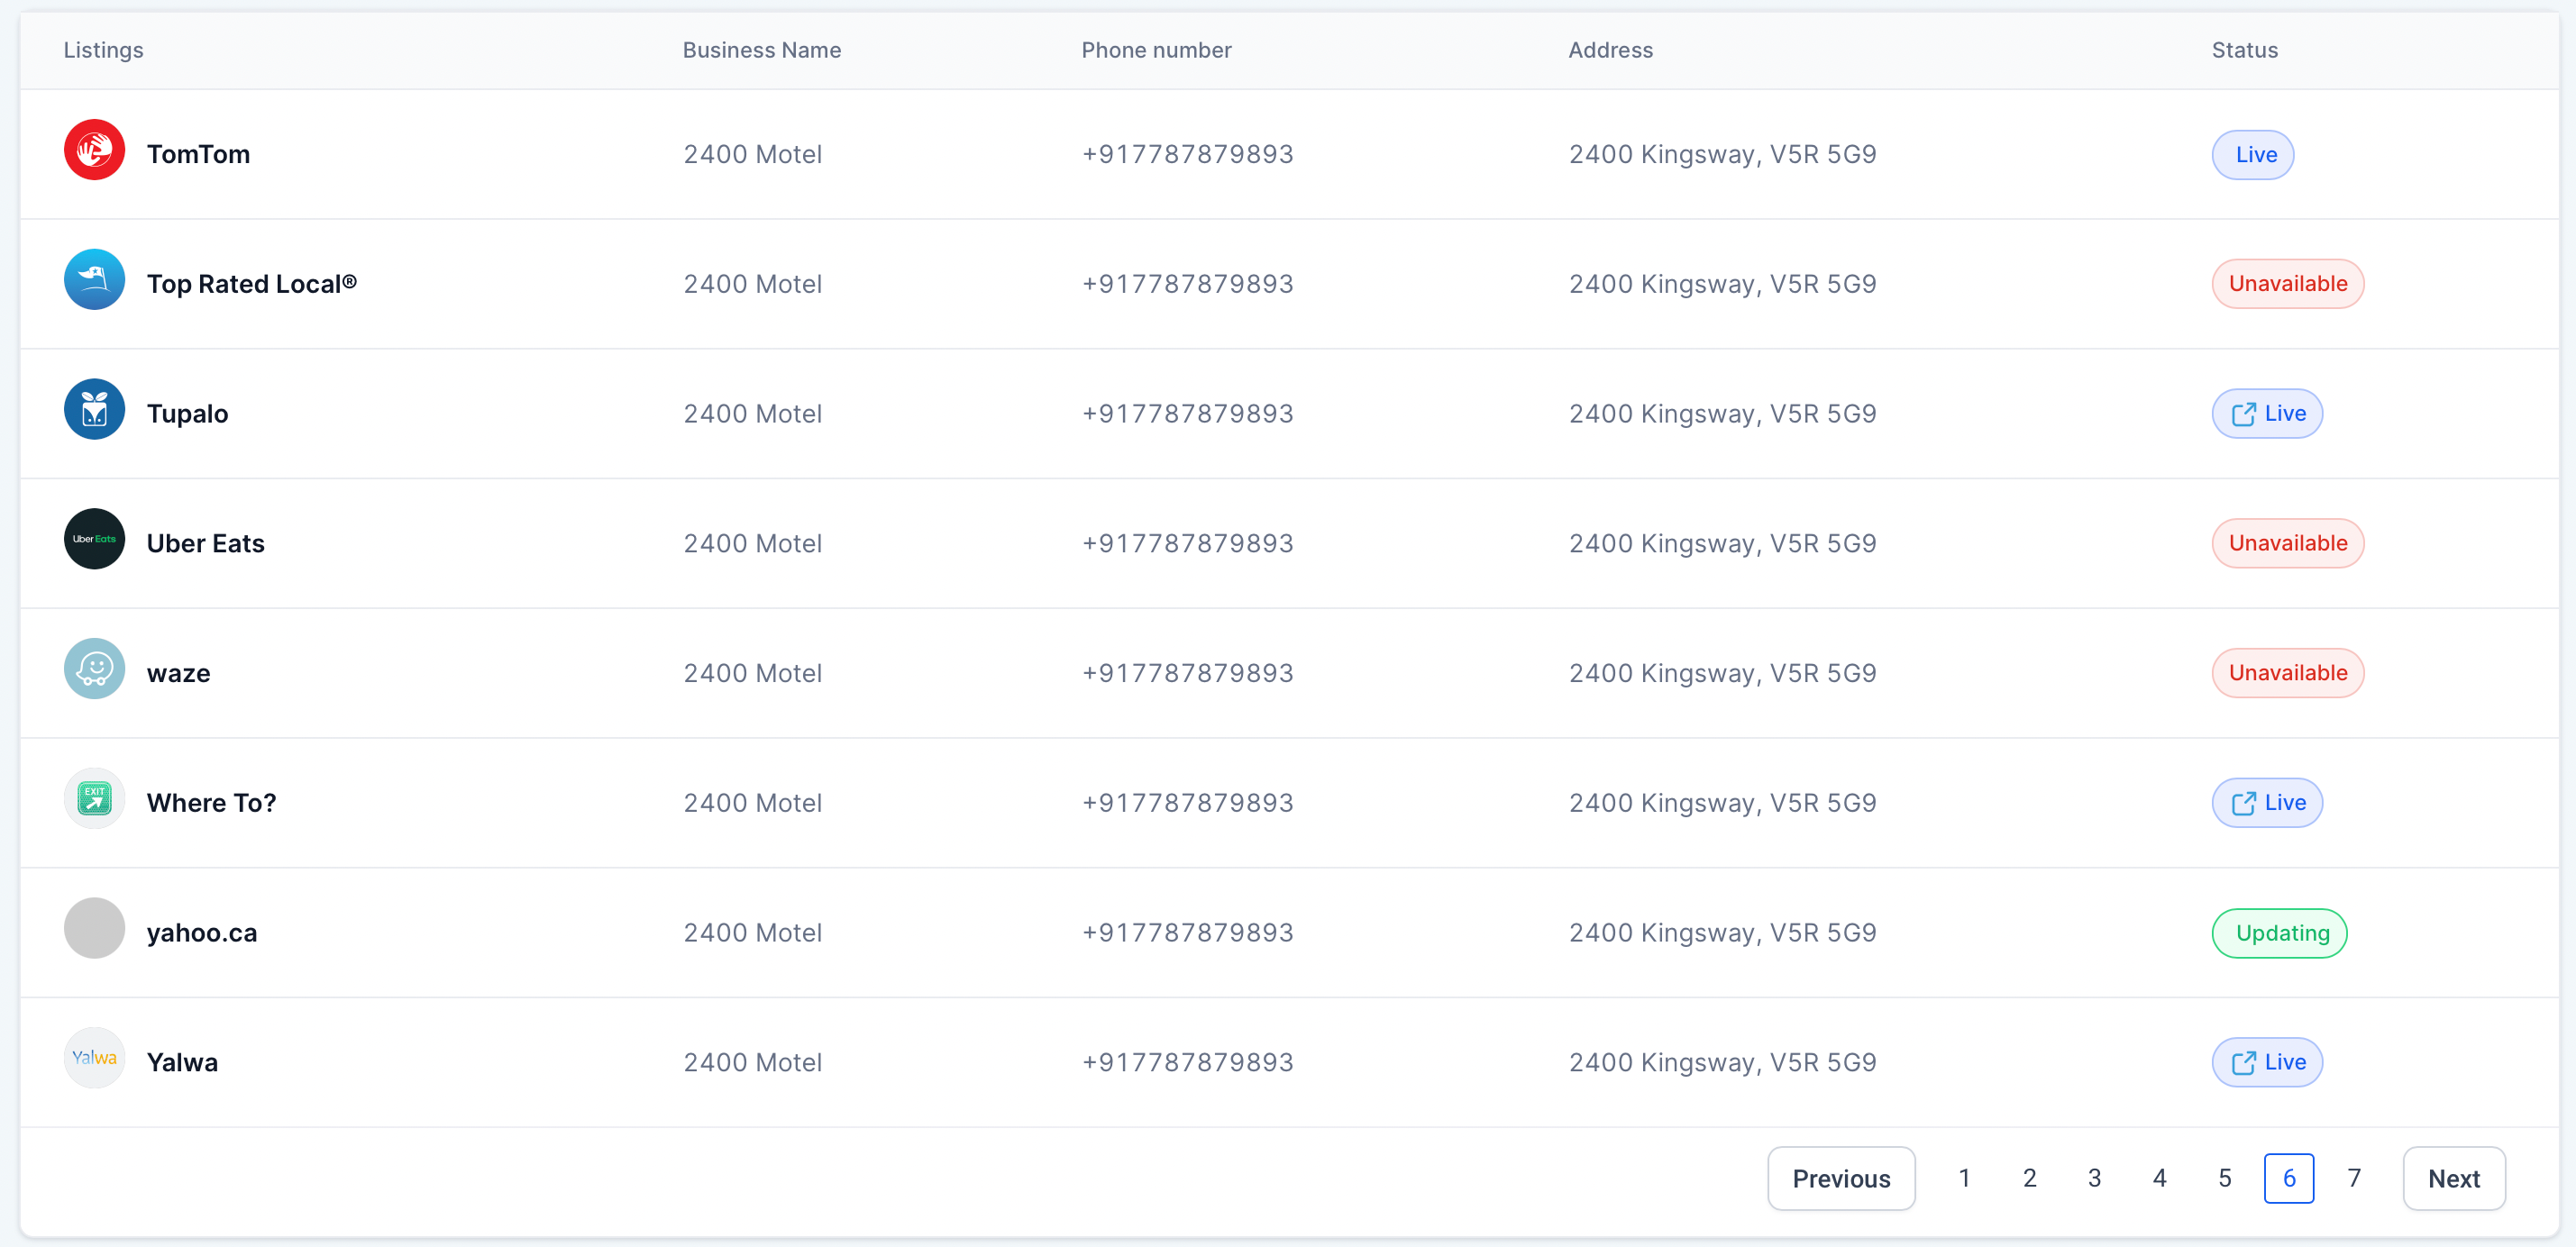

Expanding Yext to Canada and adding support for popular listings makes it easier for businesses to manage their online information. This helps keep their details correct and the same on all platforms. It also improves how easily they can be found and interact with customers in Canada.
To know more about Yext and how u can resell it to your clients, click here 👈🏻
[Workflow] Opportunity Updates
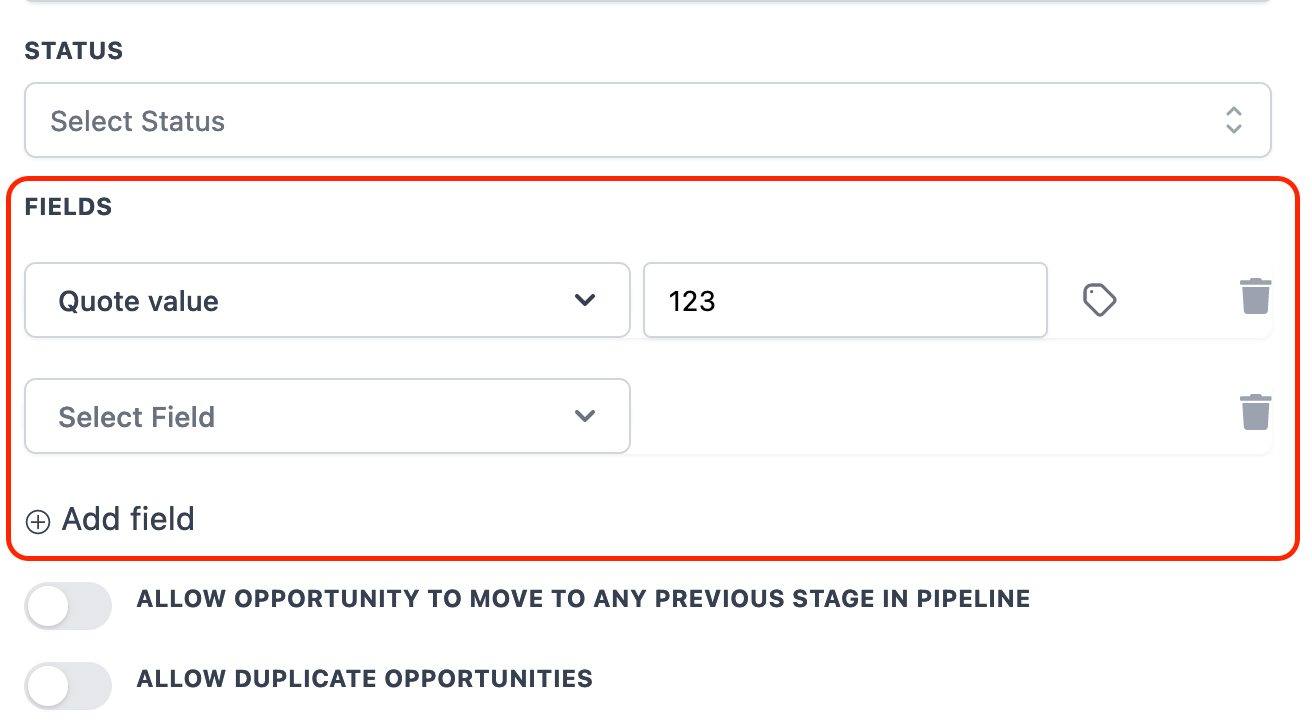
Opportunity Custom fields now available in Create/Update Opportunity action
Trigger Updates
Assigned to and Lead value filters are added to Opportunity Status Changed trigger
Status, Assigned to and Lead value filters are added to Pipeline Stage Changed and Stale Opportunity triggers
If/Else and Custom Variables
Opportunity Name, Opportunity Status and Opportunity custom fields are now available in Custom variables and If/Else condition
🤩 User Flow Optimisation for Template Library
Template Library provides ease of building quality designs and serve as starting point in building meaningful conversion templates for Funnels, Website, Blogs, Social Planner and Email Marketing. 🤩
😓 What issues in the flow of Template Library
Template Library was asking for confirmation popup which is an extra step in user journey.
Once the template is added in any product area, after the confirmation it was landing on the list view and sometimes it asked to refresh the page to see the template.
Template Library was not opening the builders directly once the Templates were selected.
😍What's New
Choose a template in Funnels, Websites, Social Planner, Email Marketing, Forms, or Survey to directly access the Builder.
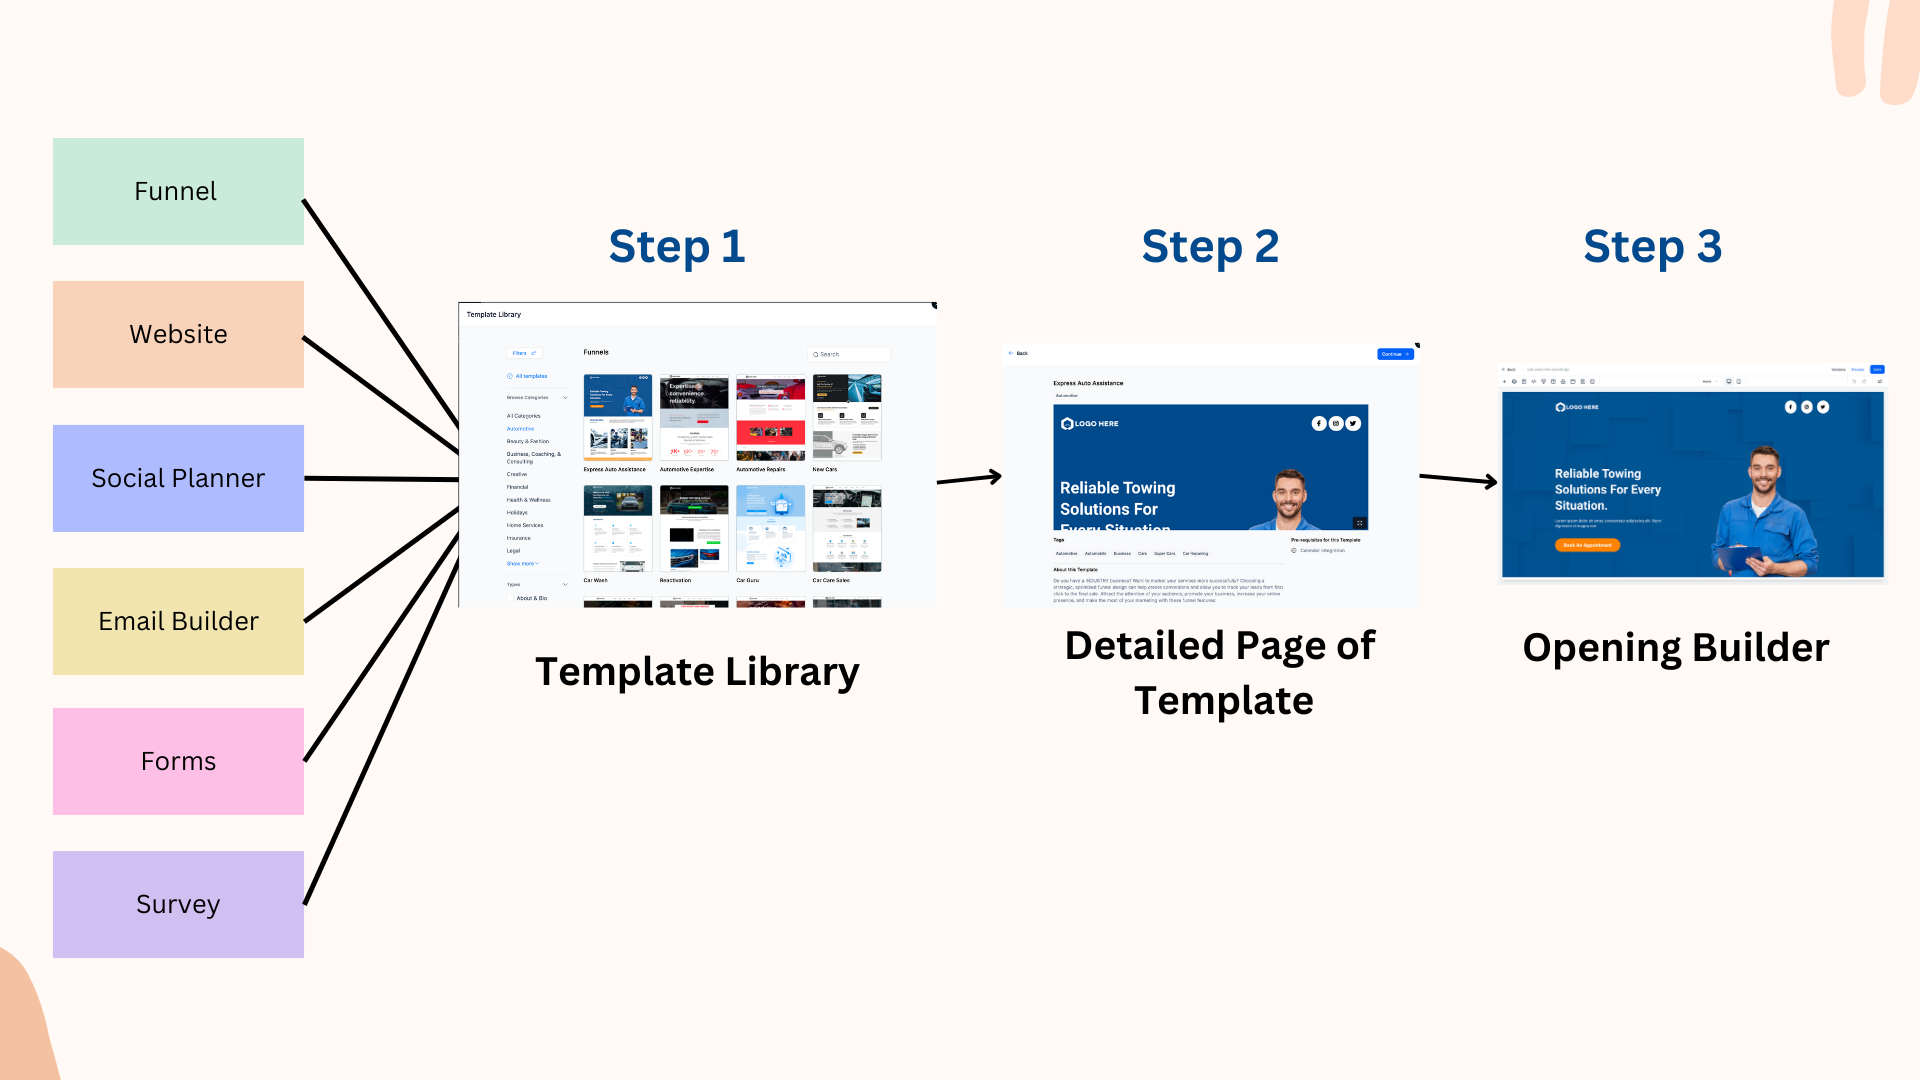
We have added cool 💃 new loader to enhance the templating behaviour.
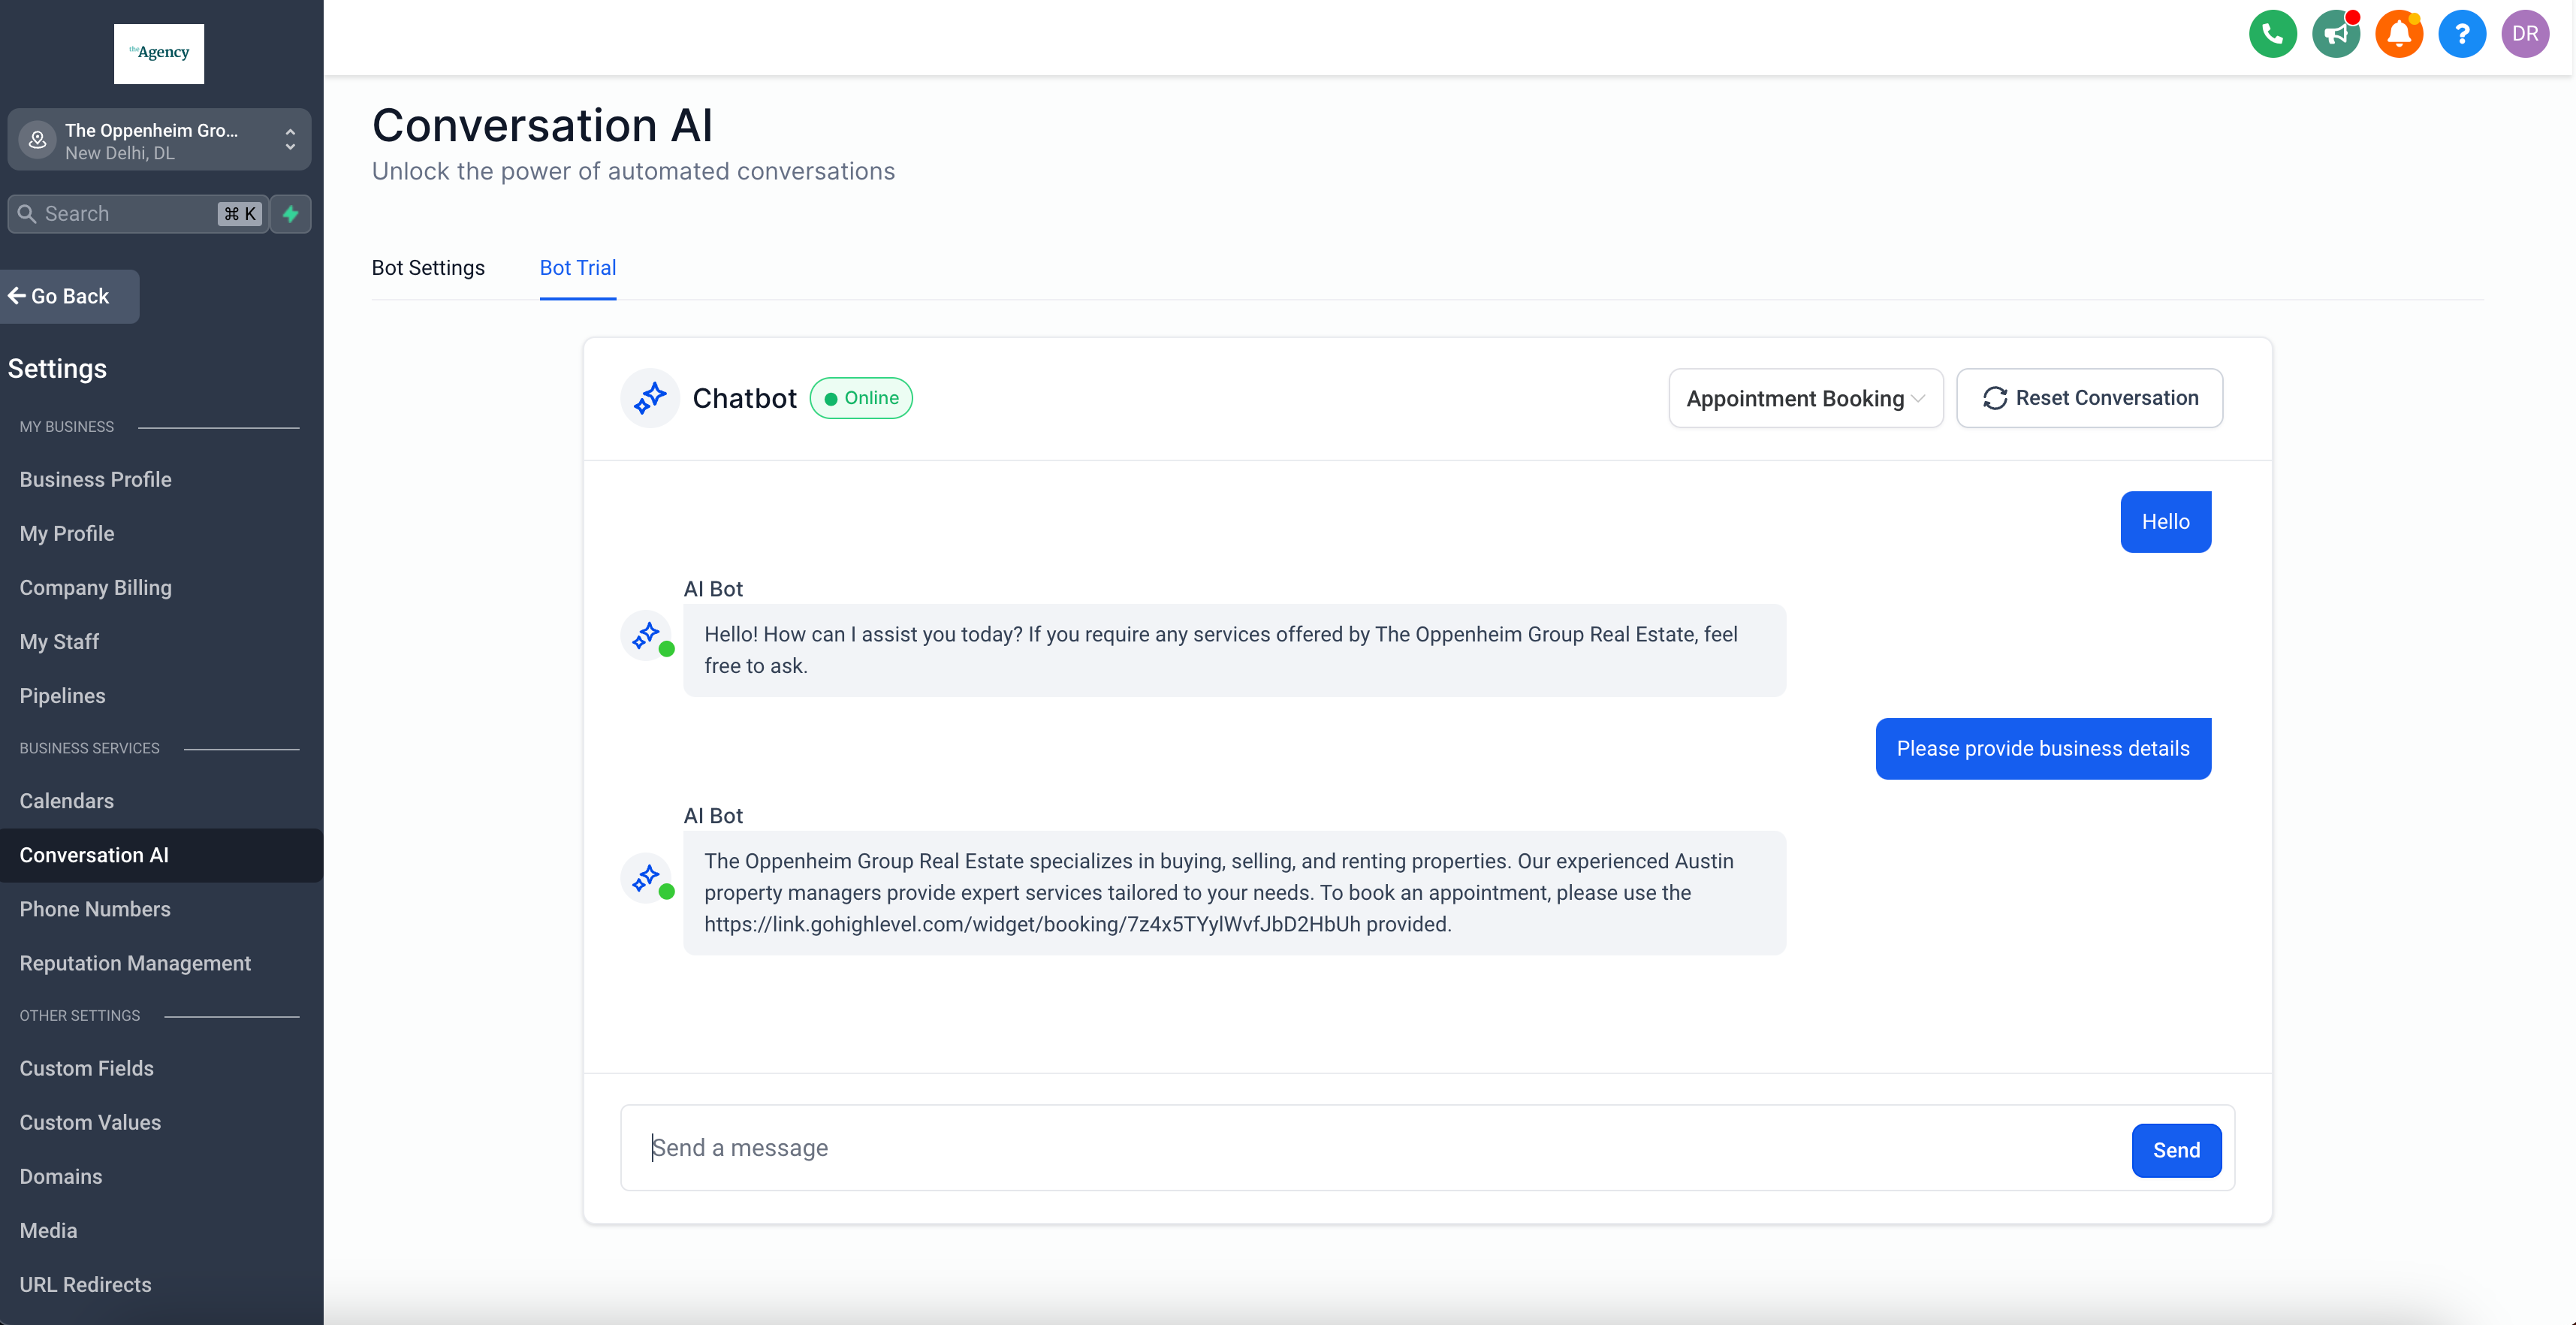
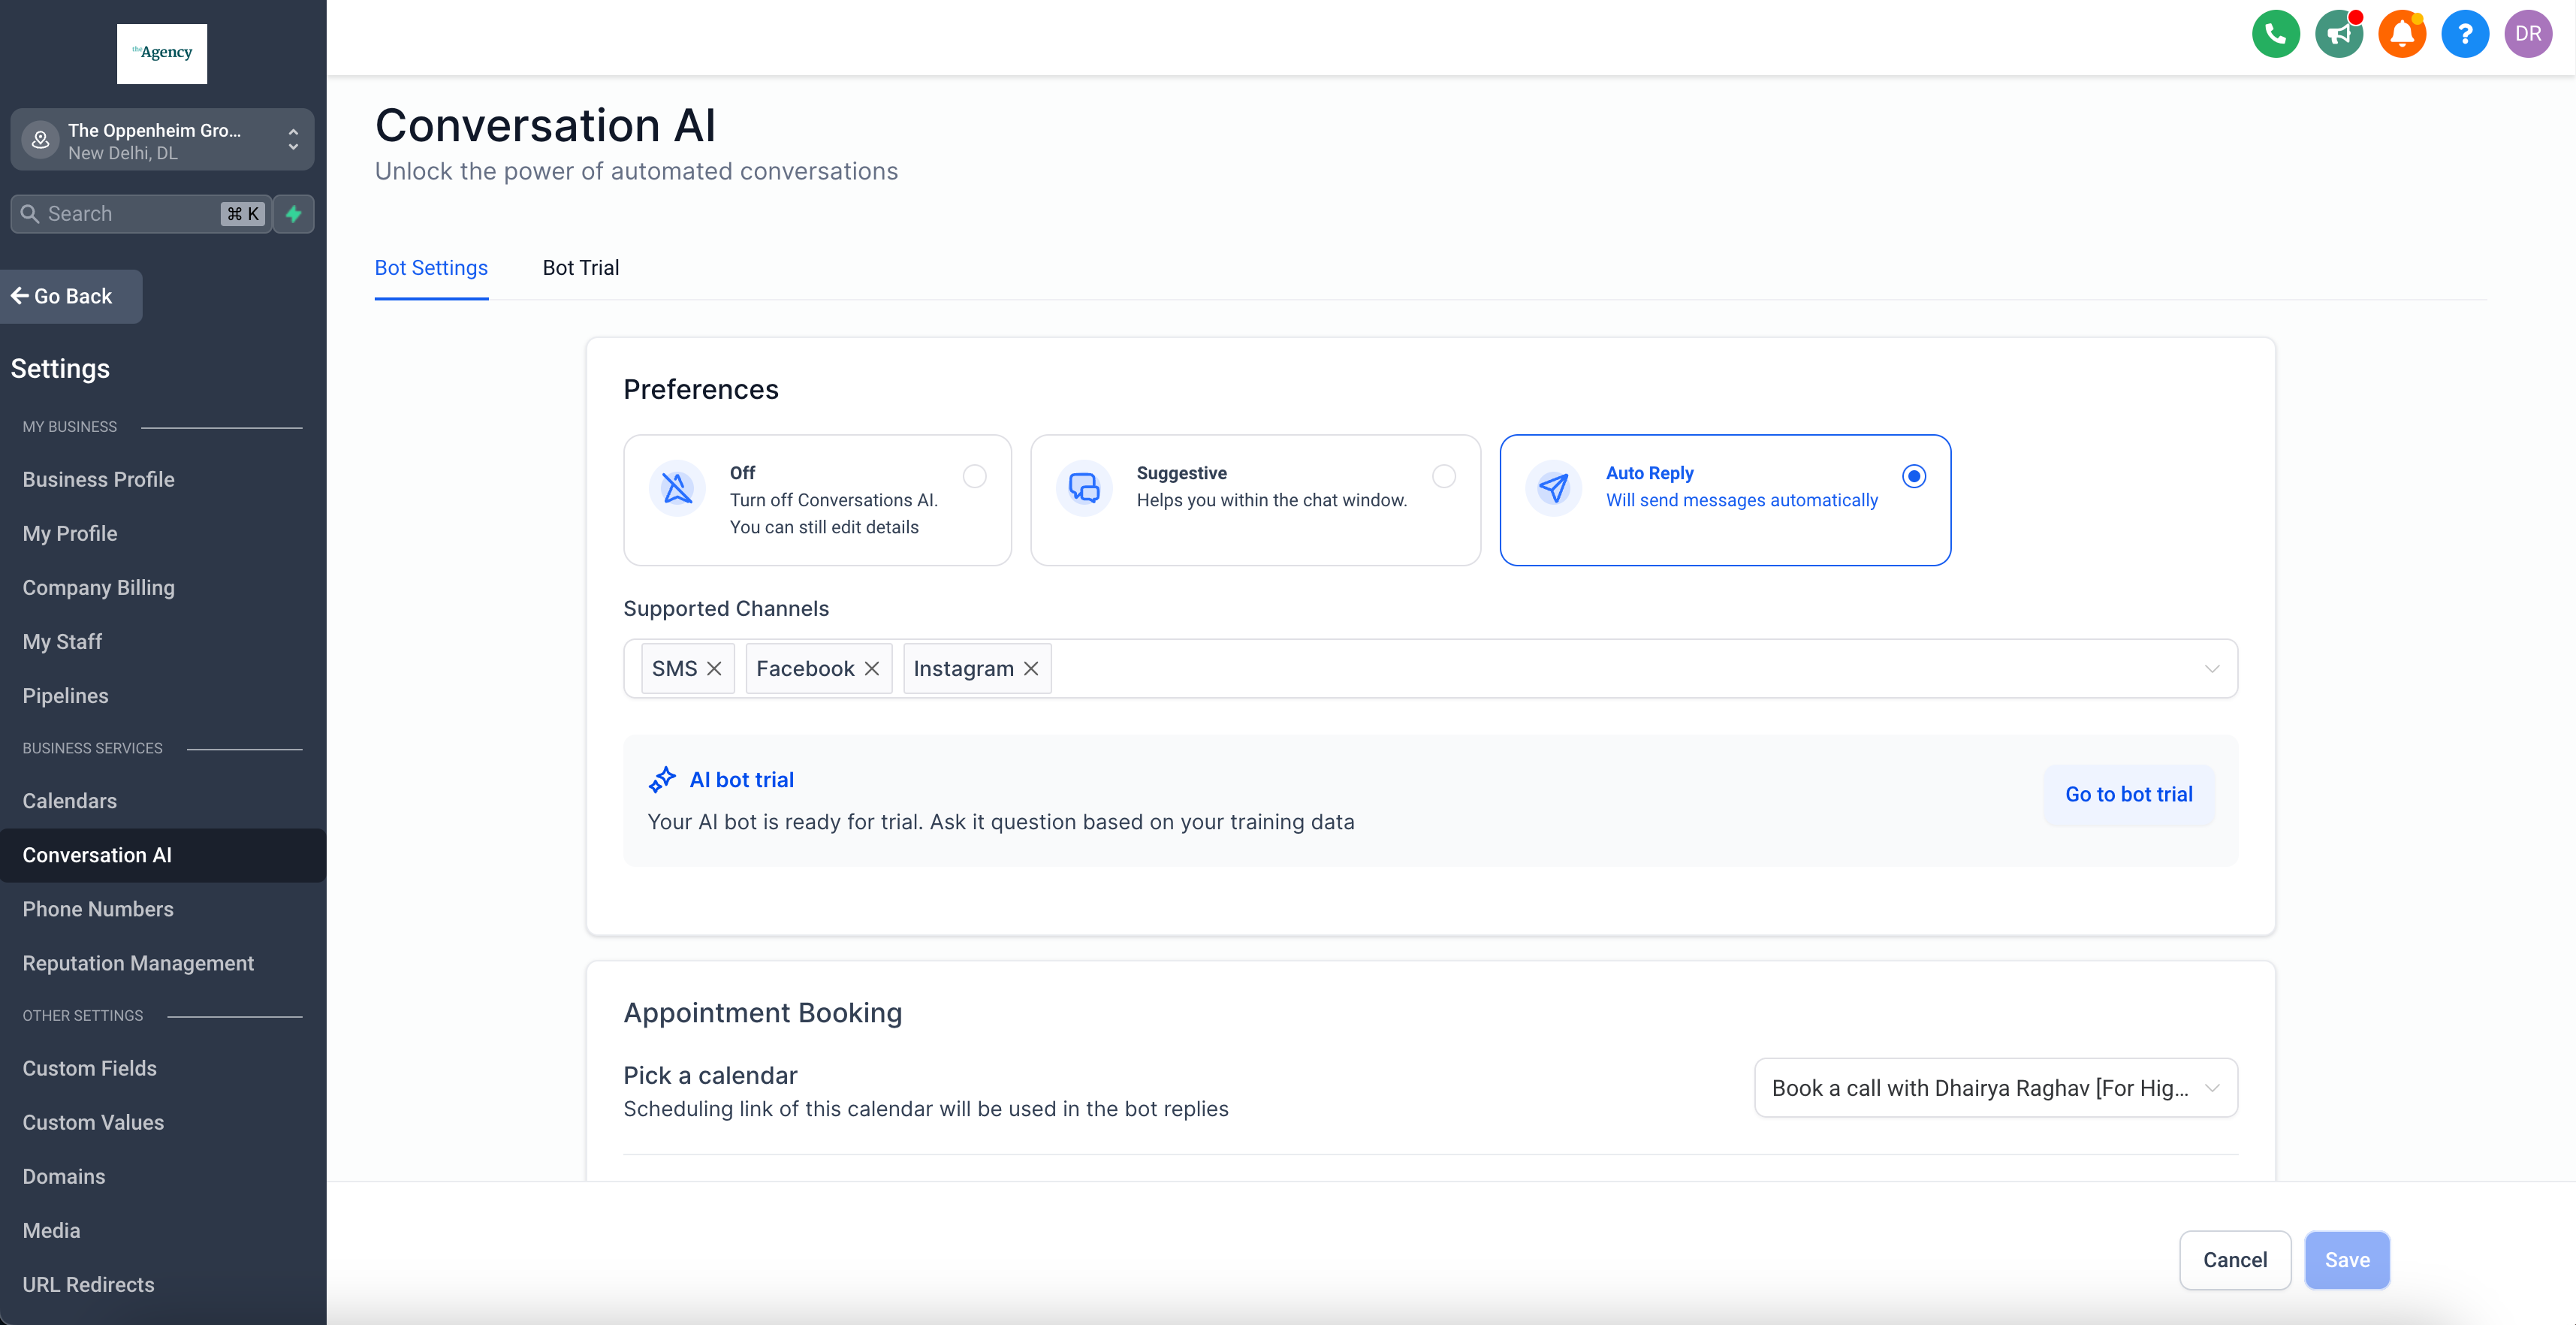
Conversation AI Trial Bot SandBox
The Trial Bot tool is built to easily fit into what you're already doing. It gives you a quick and interactive way to test talking with an AI.
Key Features:
Dynamic Conversations in realtime
Try a new way to test the chatbot. With Bot Trial, you can chat directly on your screen even when it's "OFF." Test the bot fully before using it live.
Wonder how the bot performs in real-world scenarios?
The Bot Trial lets you try out the bot's special autopilot feature, which is still being tested. See how smart and flexible the bot is when it answers like it's in autopilot mode. You can also add frequently asked questions where the bot doesn't know what to say.
Reset Conversation with Ease -
The "Reset Conversation" button in the small box quickly erases everything. Start over, make changes, and discover many options.
Huge speed improvement in Funnel & Websites 🚀
✨ New Updates
Eliminating a few render-blocking css
Preloading icon links
Eager loading images above the fold
Render popup elements only when the popup is opened
Reduced initial payload size
🔥 What's Improved?
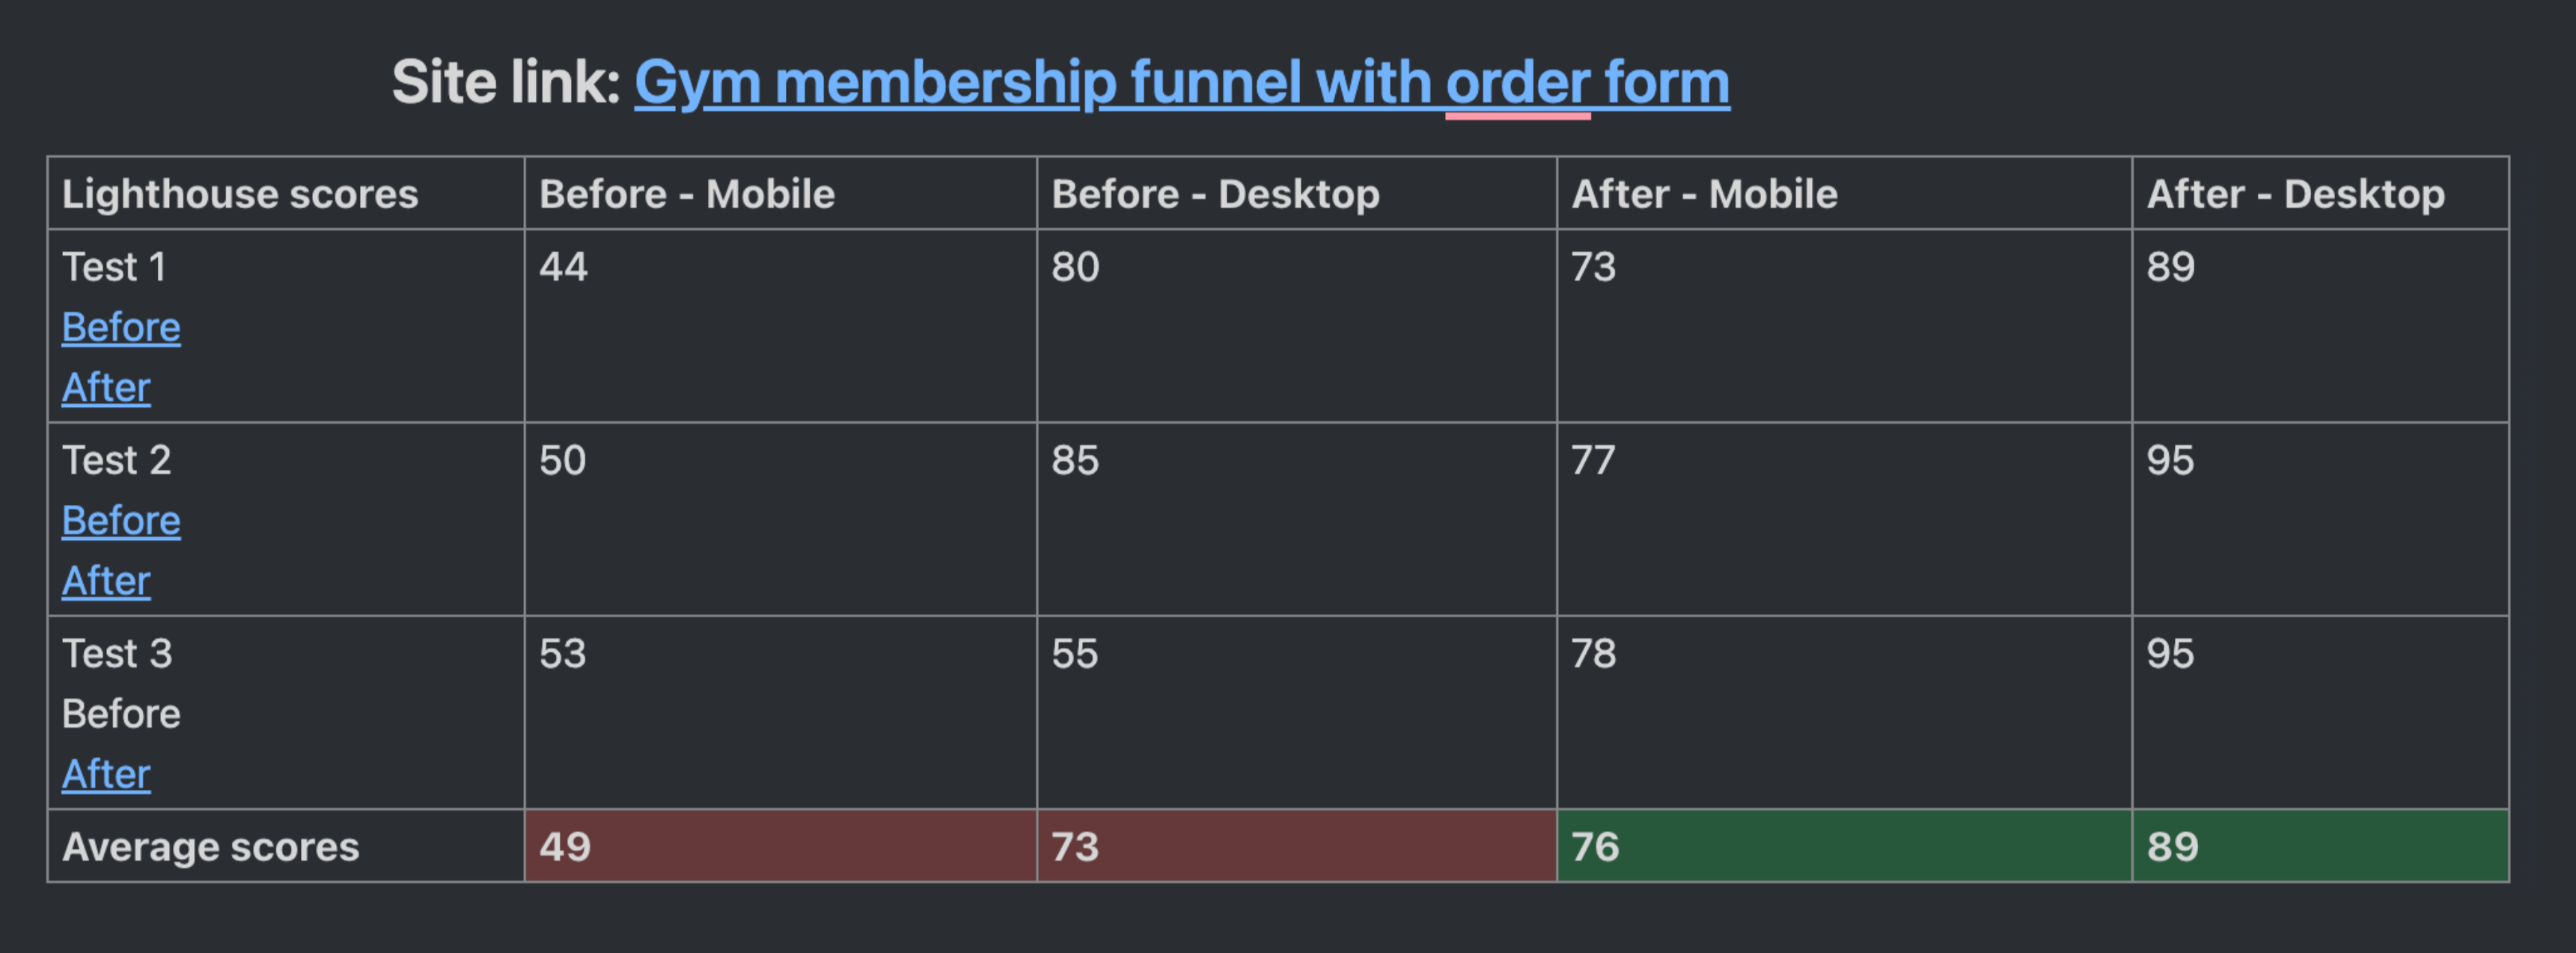
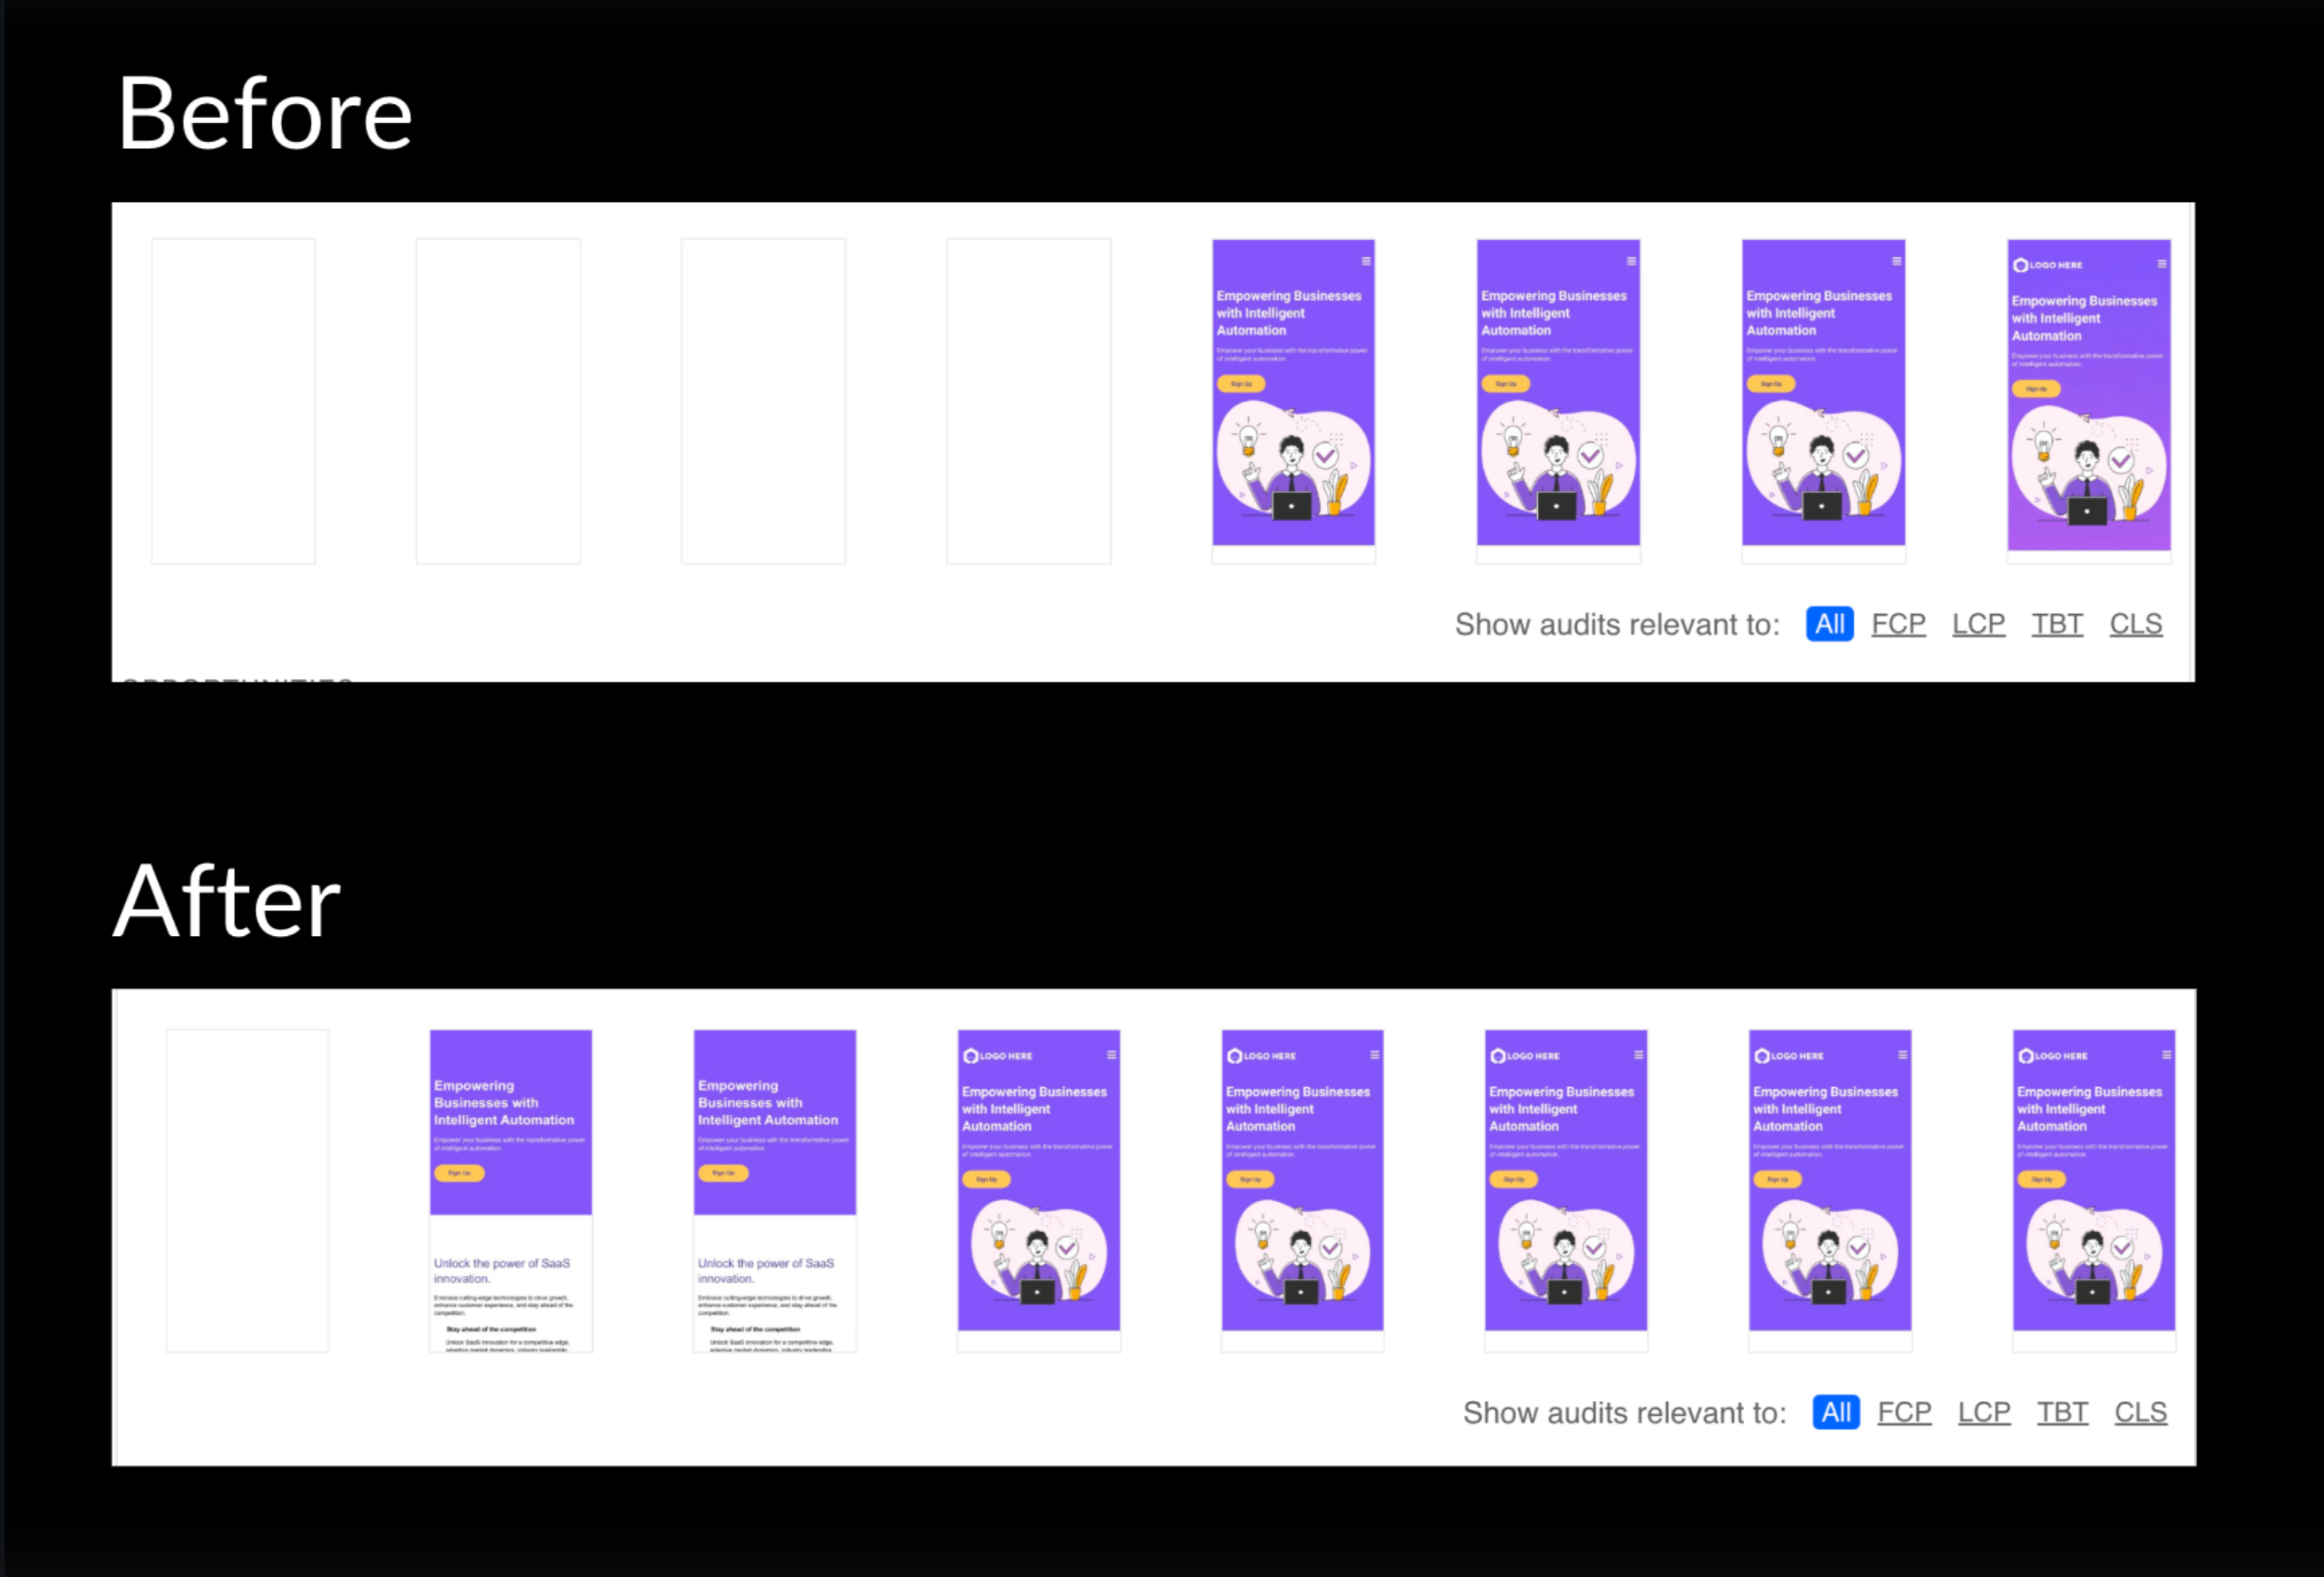
Significant improvement in pagespeed scores
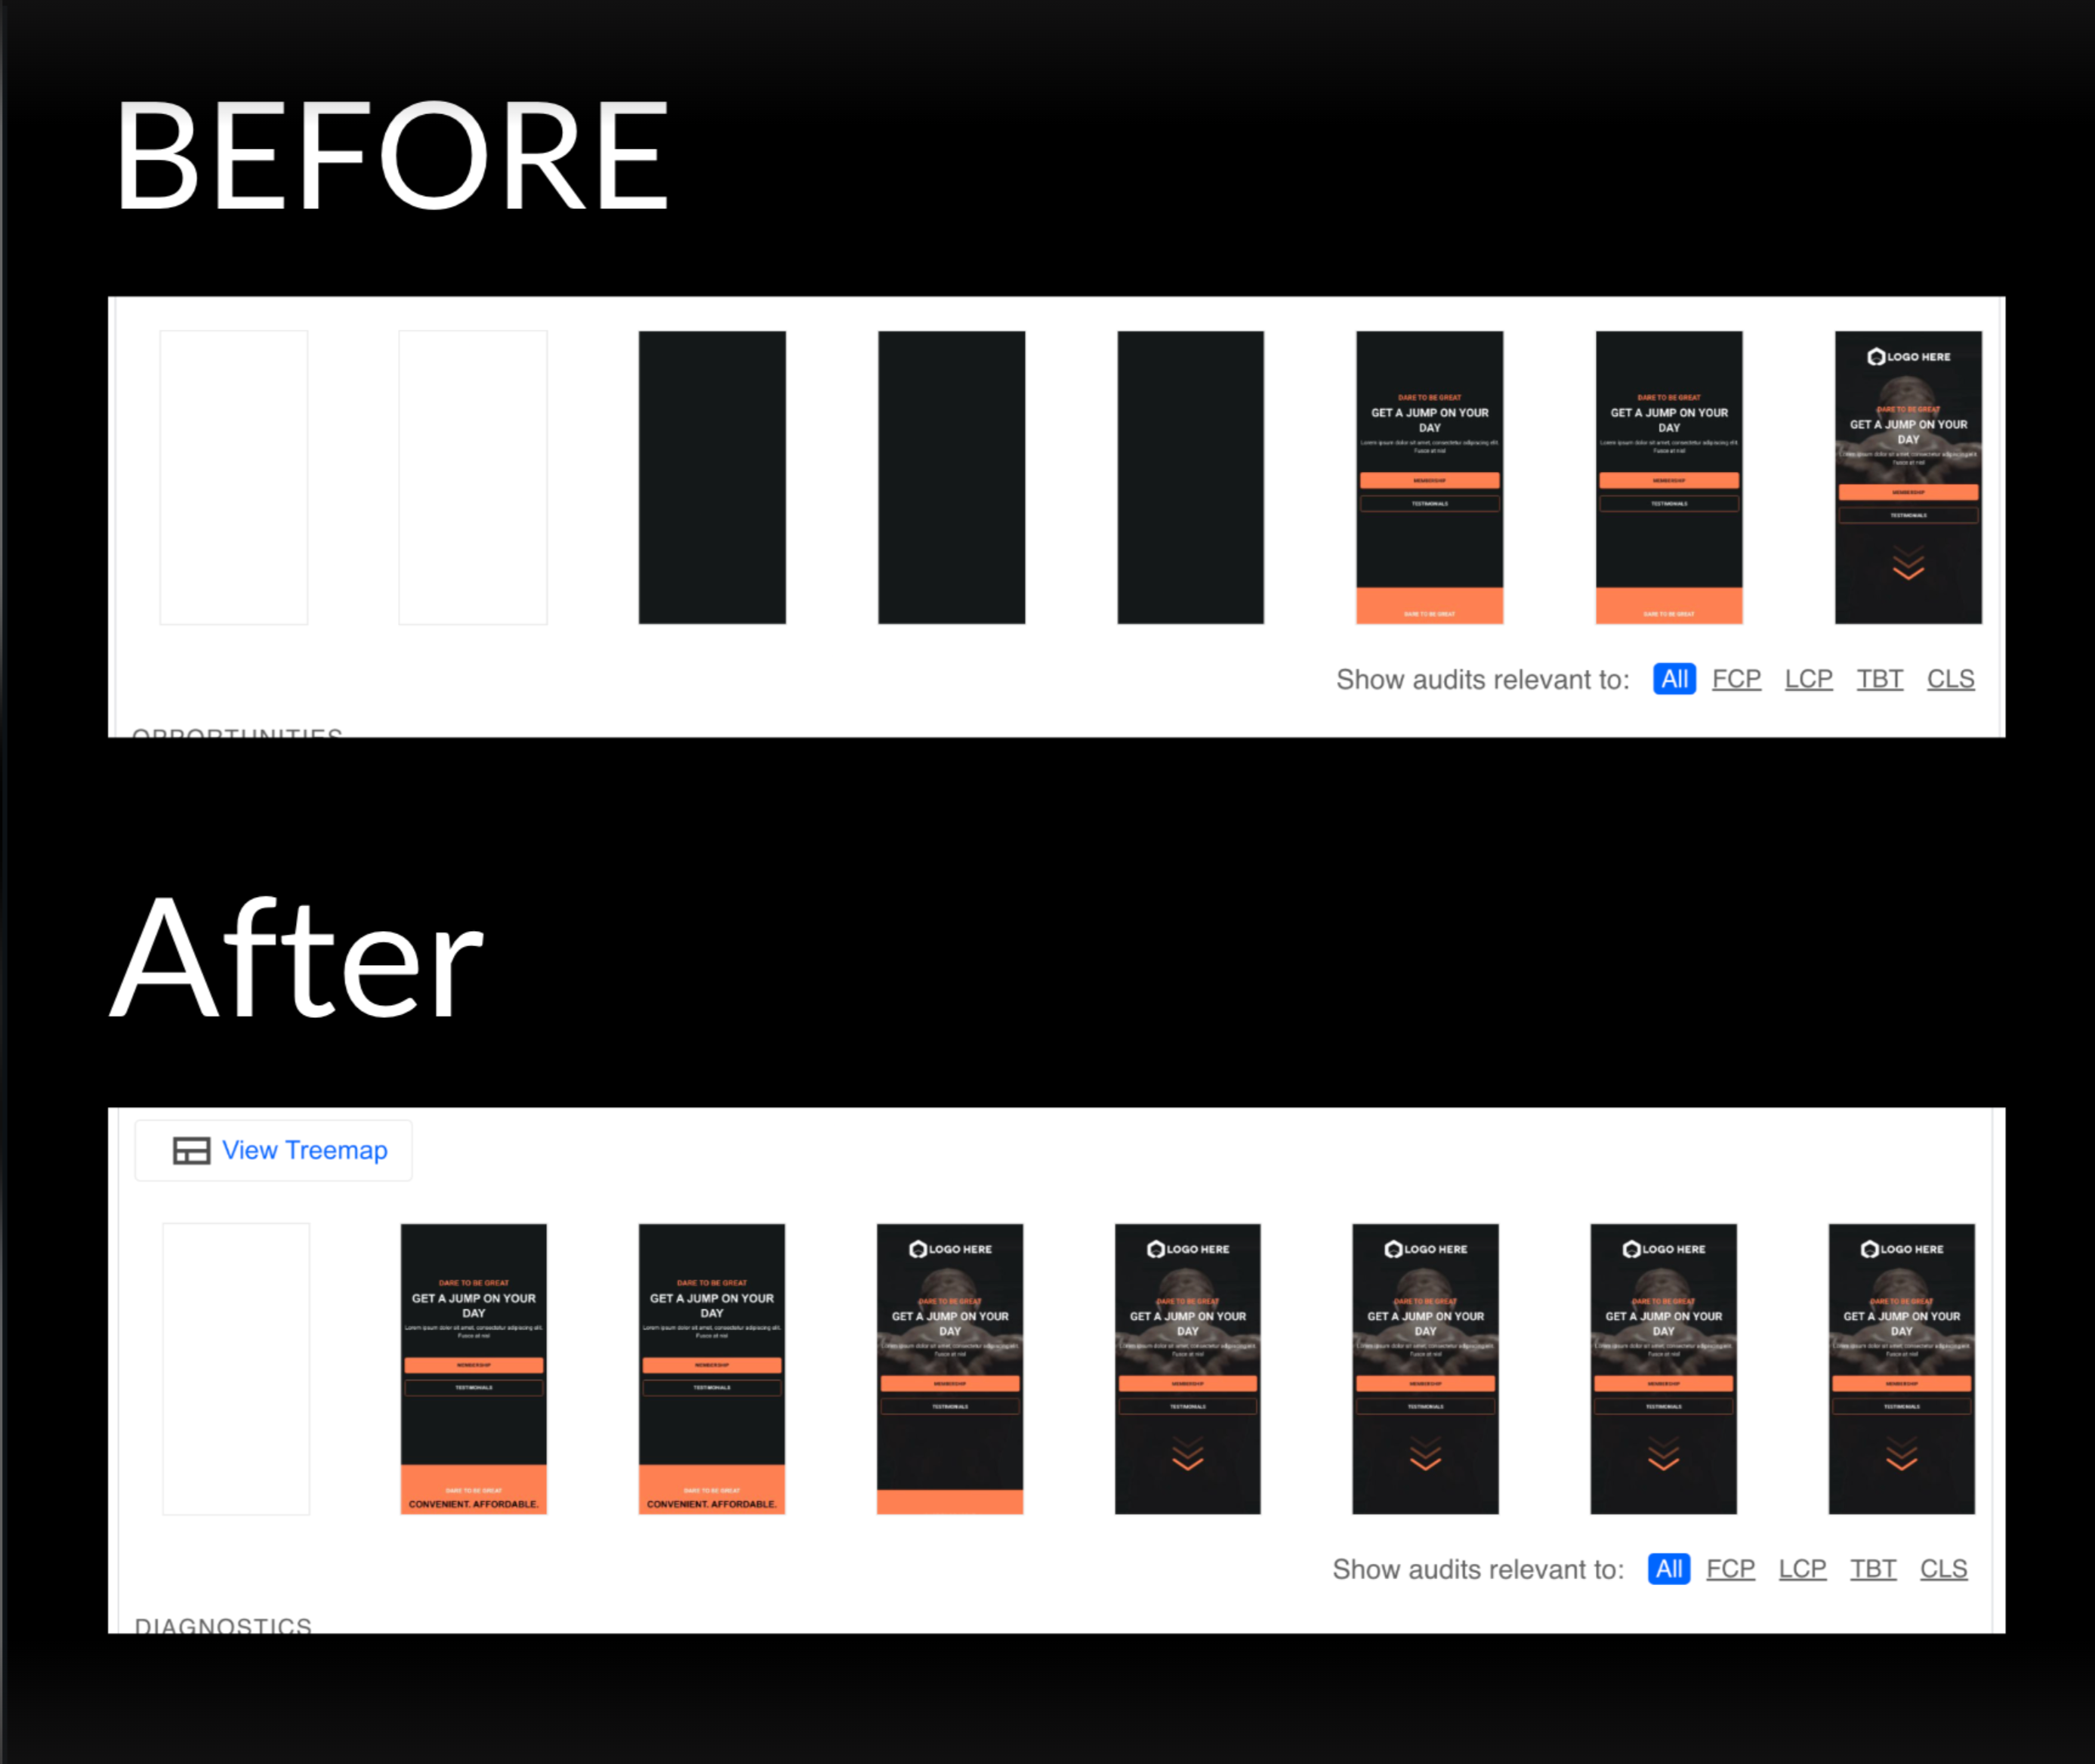
Faster initial web paint
Page is painted much faster than before, improving FCP and perceived page speed (refer images)
Due to payload size reduction, pagespeed tests running on mobile with slow connection can download data faster for better FCP
Huge improvement in desktop and mobile speed tests

Custom Fields/Merge Fields support for Video Element in Funnels/Websites 🔥
Custom Fields/Merge Fields are now supported as source for video in Funnels & Websites
🌟 Old Behavior
Only URL's and custom values were supported in Video Element as source
Users might want to add custom fields from contacts as video source
😎 New Behavior
All the contact custom fields will be now supported in Video Element as source
User's can make use of any contact info filled by the end customers to be used as sources for video element
Notes
Filling value via query params is not supported for the video element.
Custom Fields cannot be used for custom embed videos as source
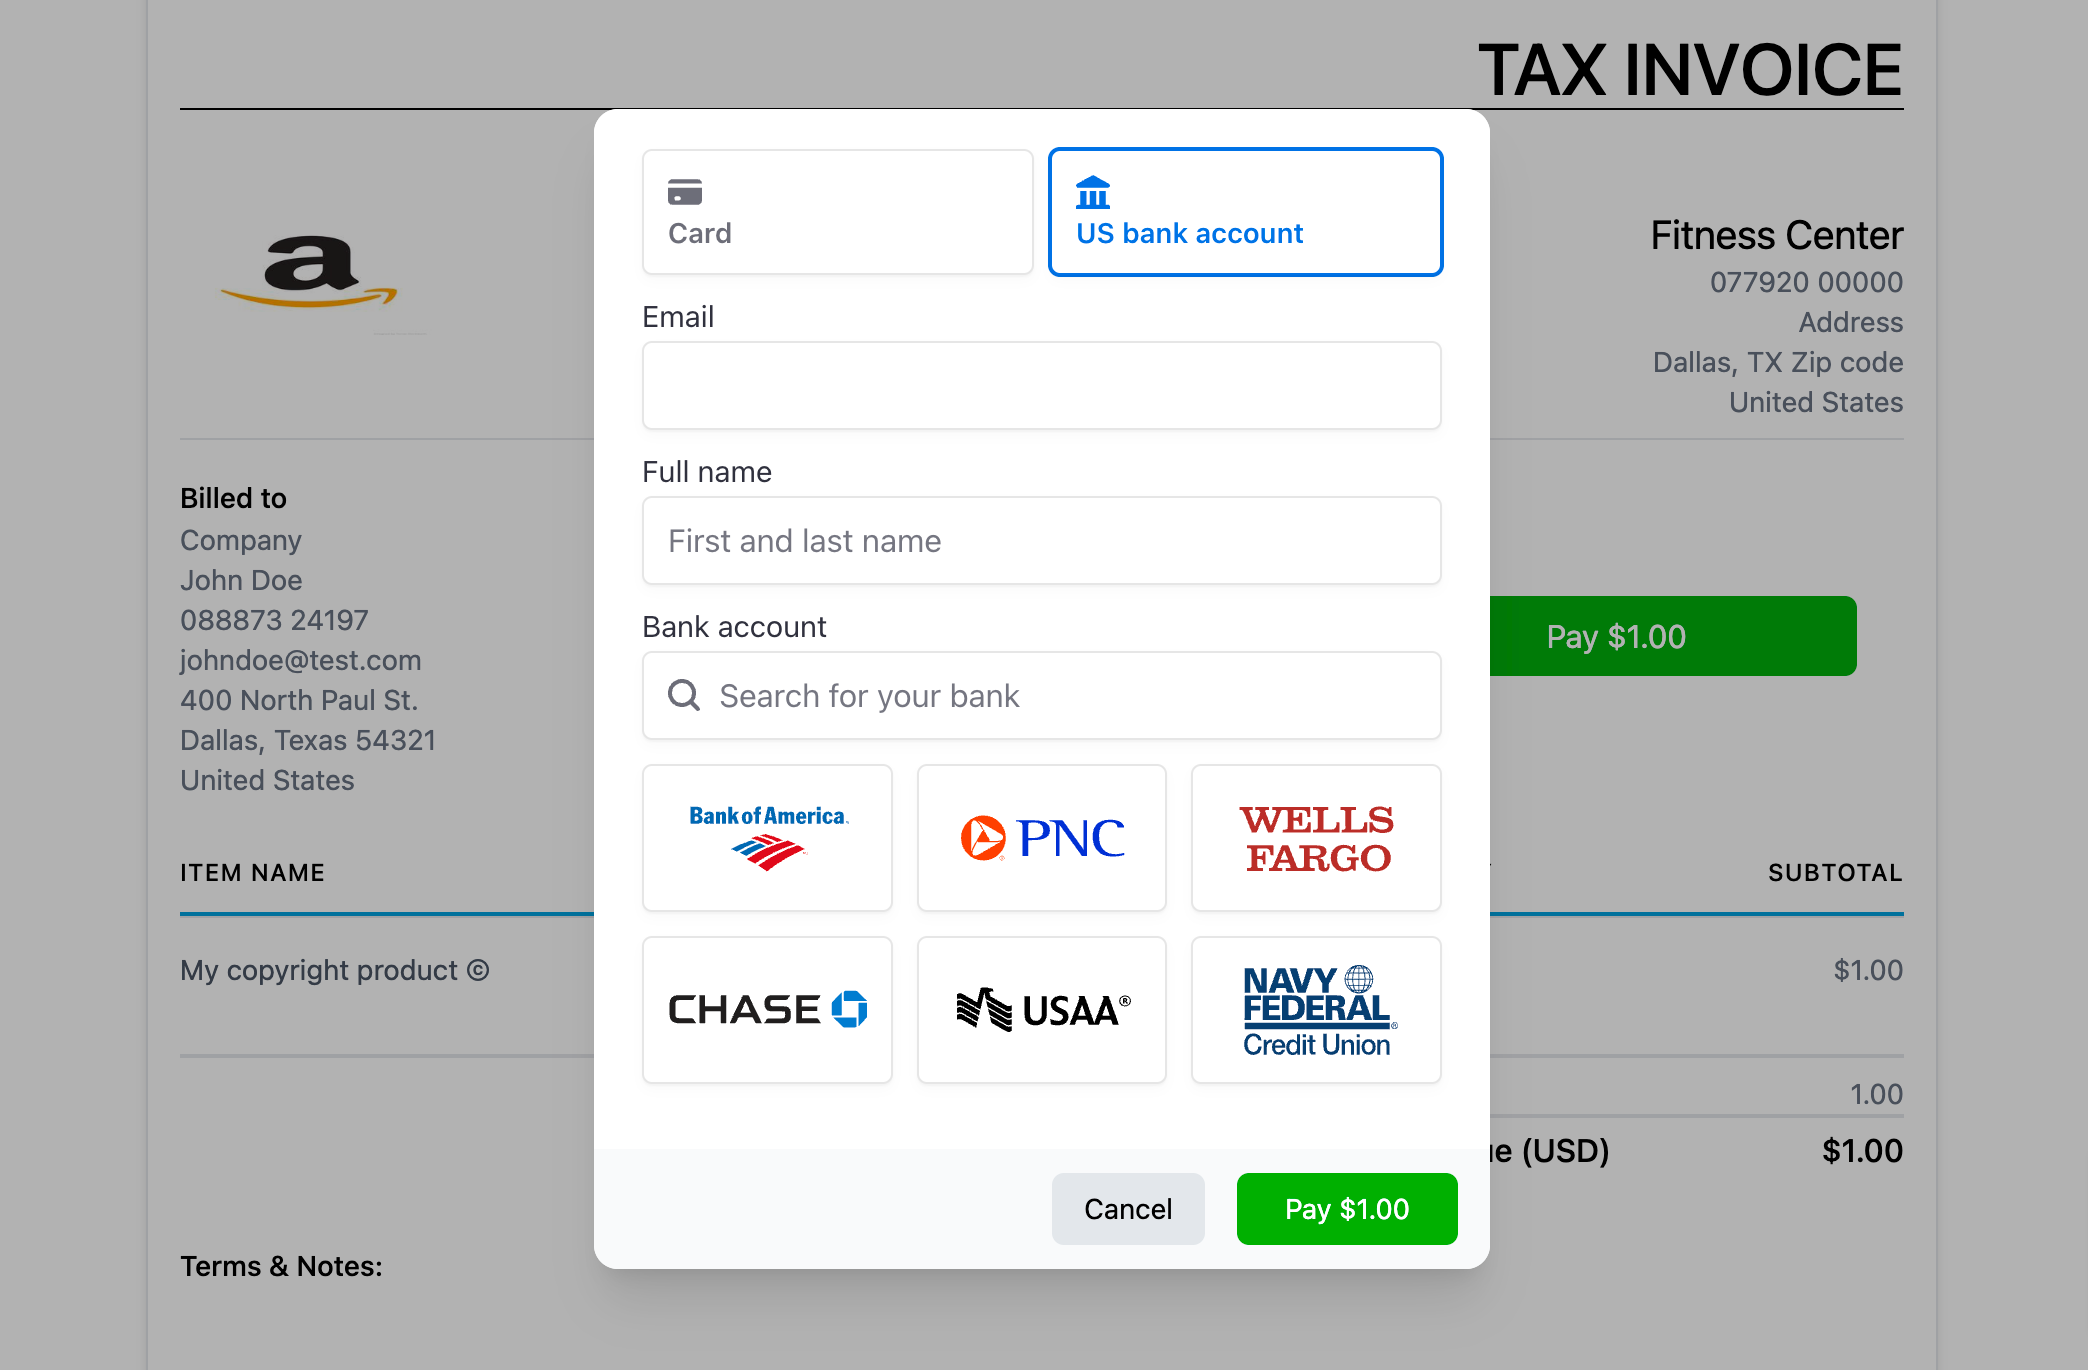
ACH Direct Debit payments on Invoices || Accept payments from customers with a US Bank Account
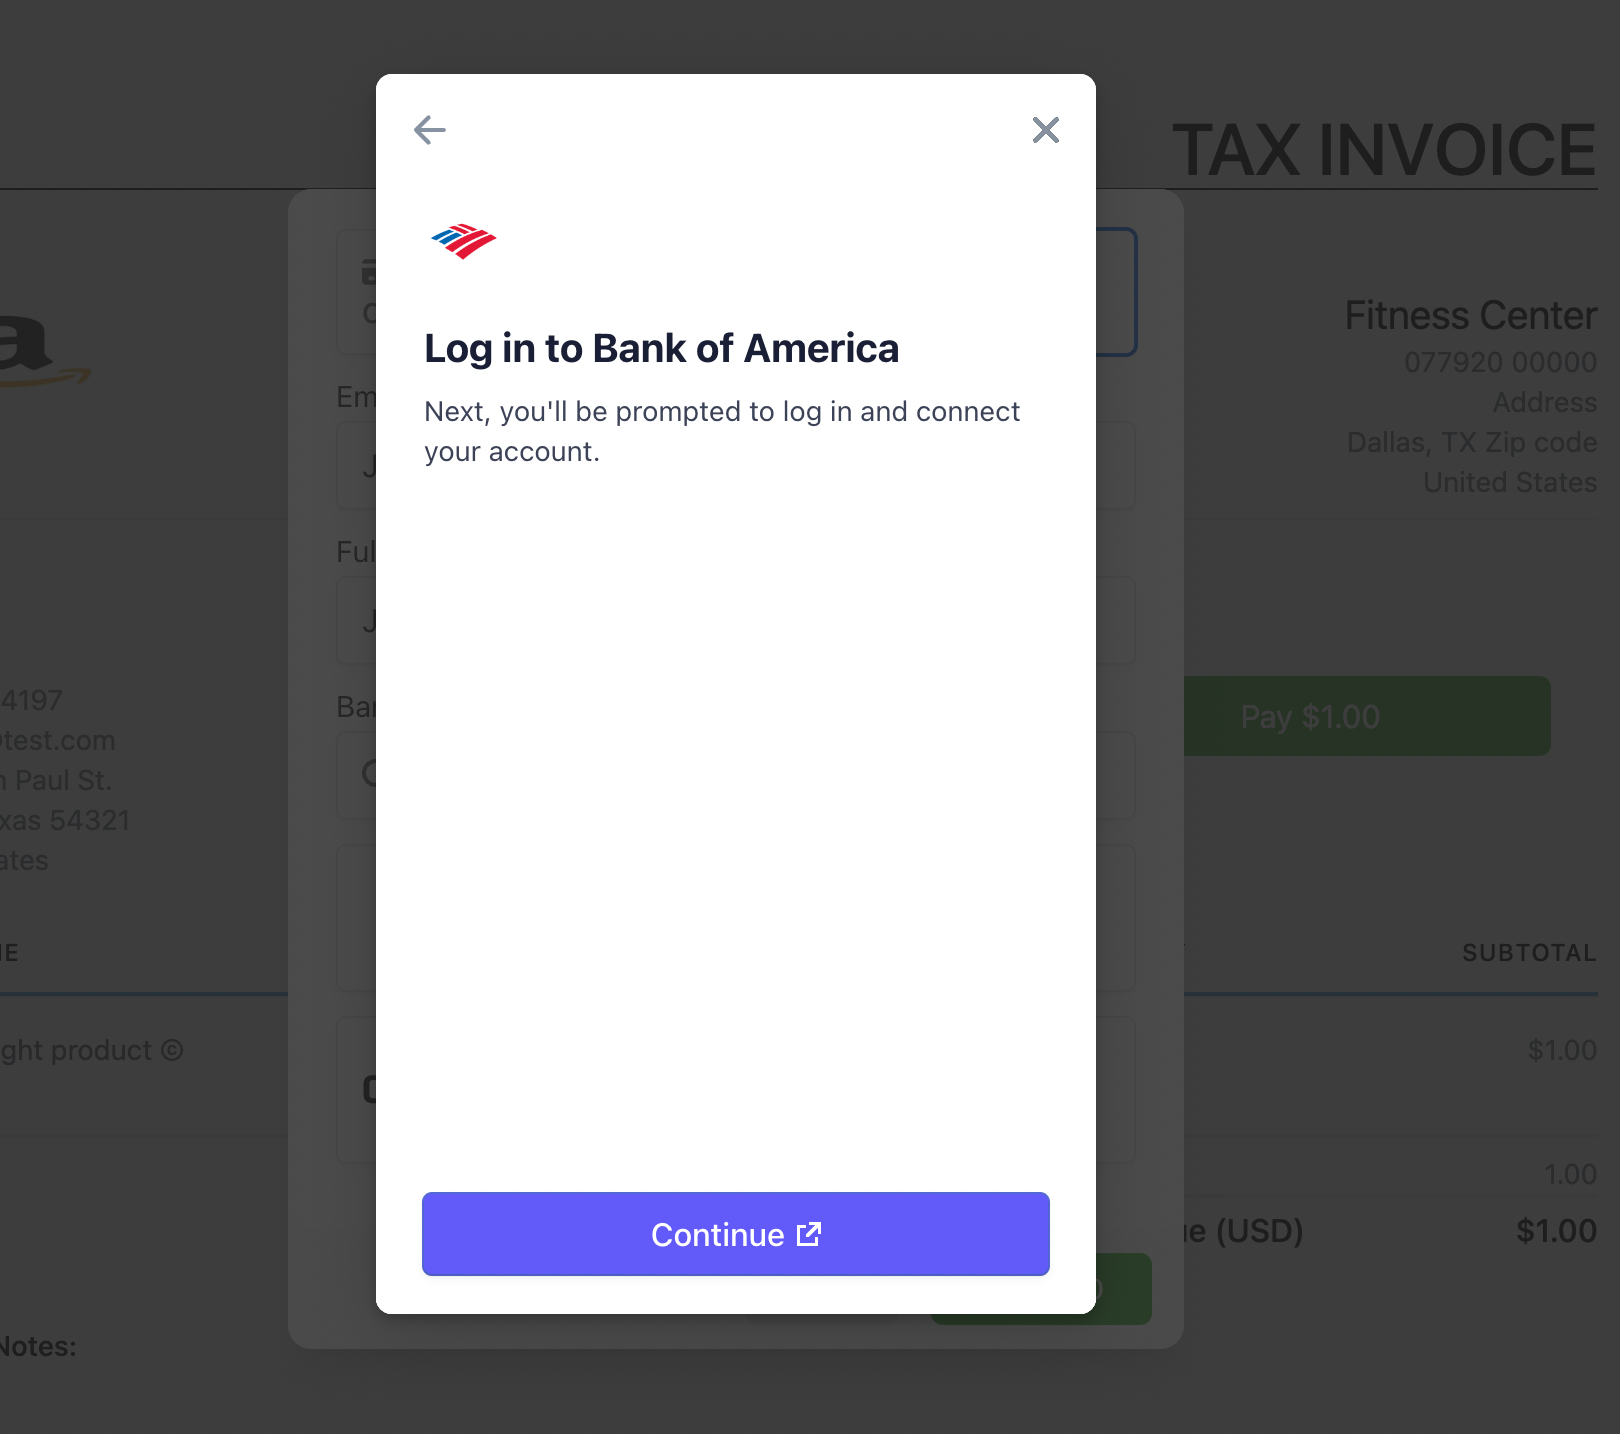
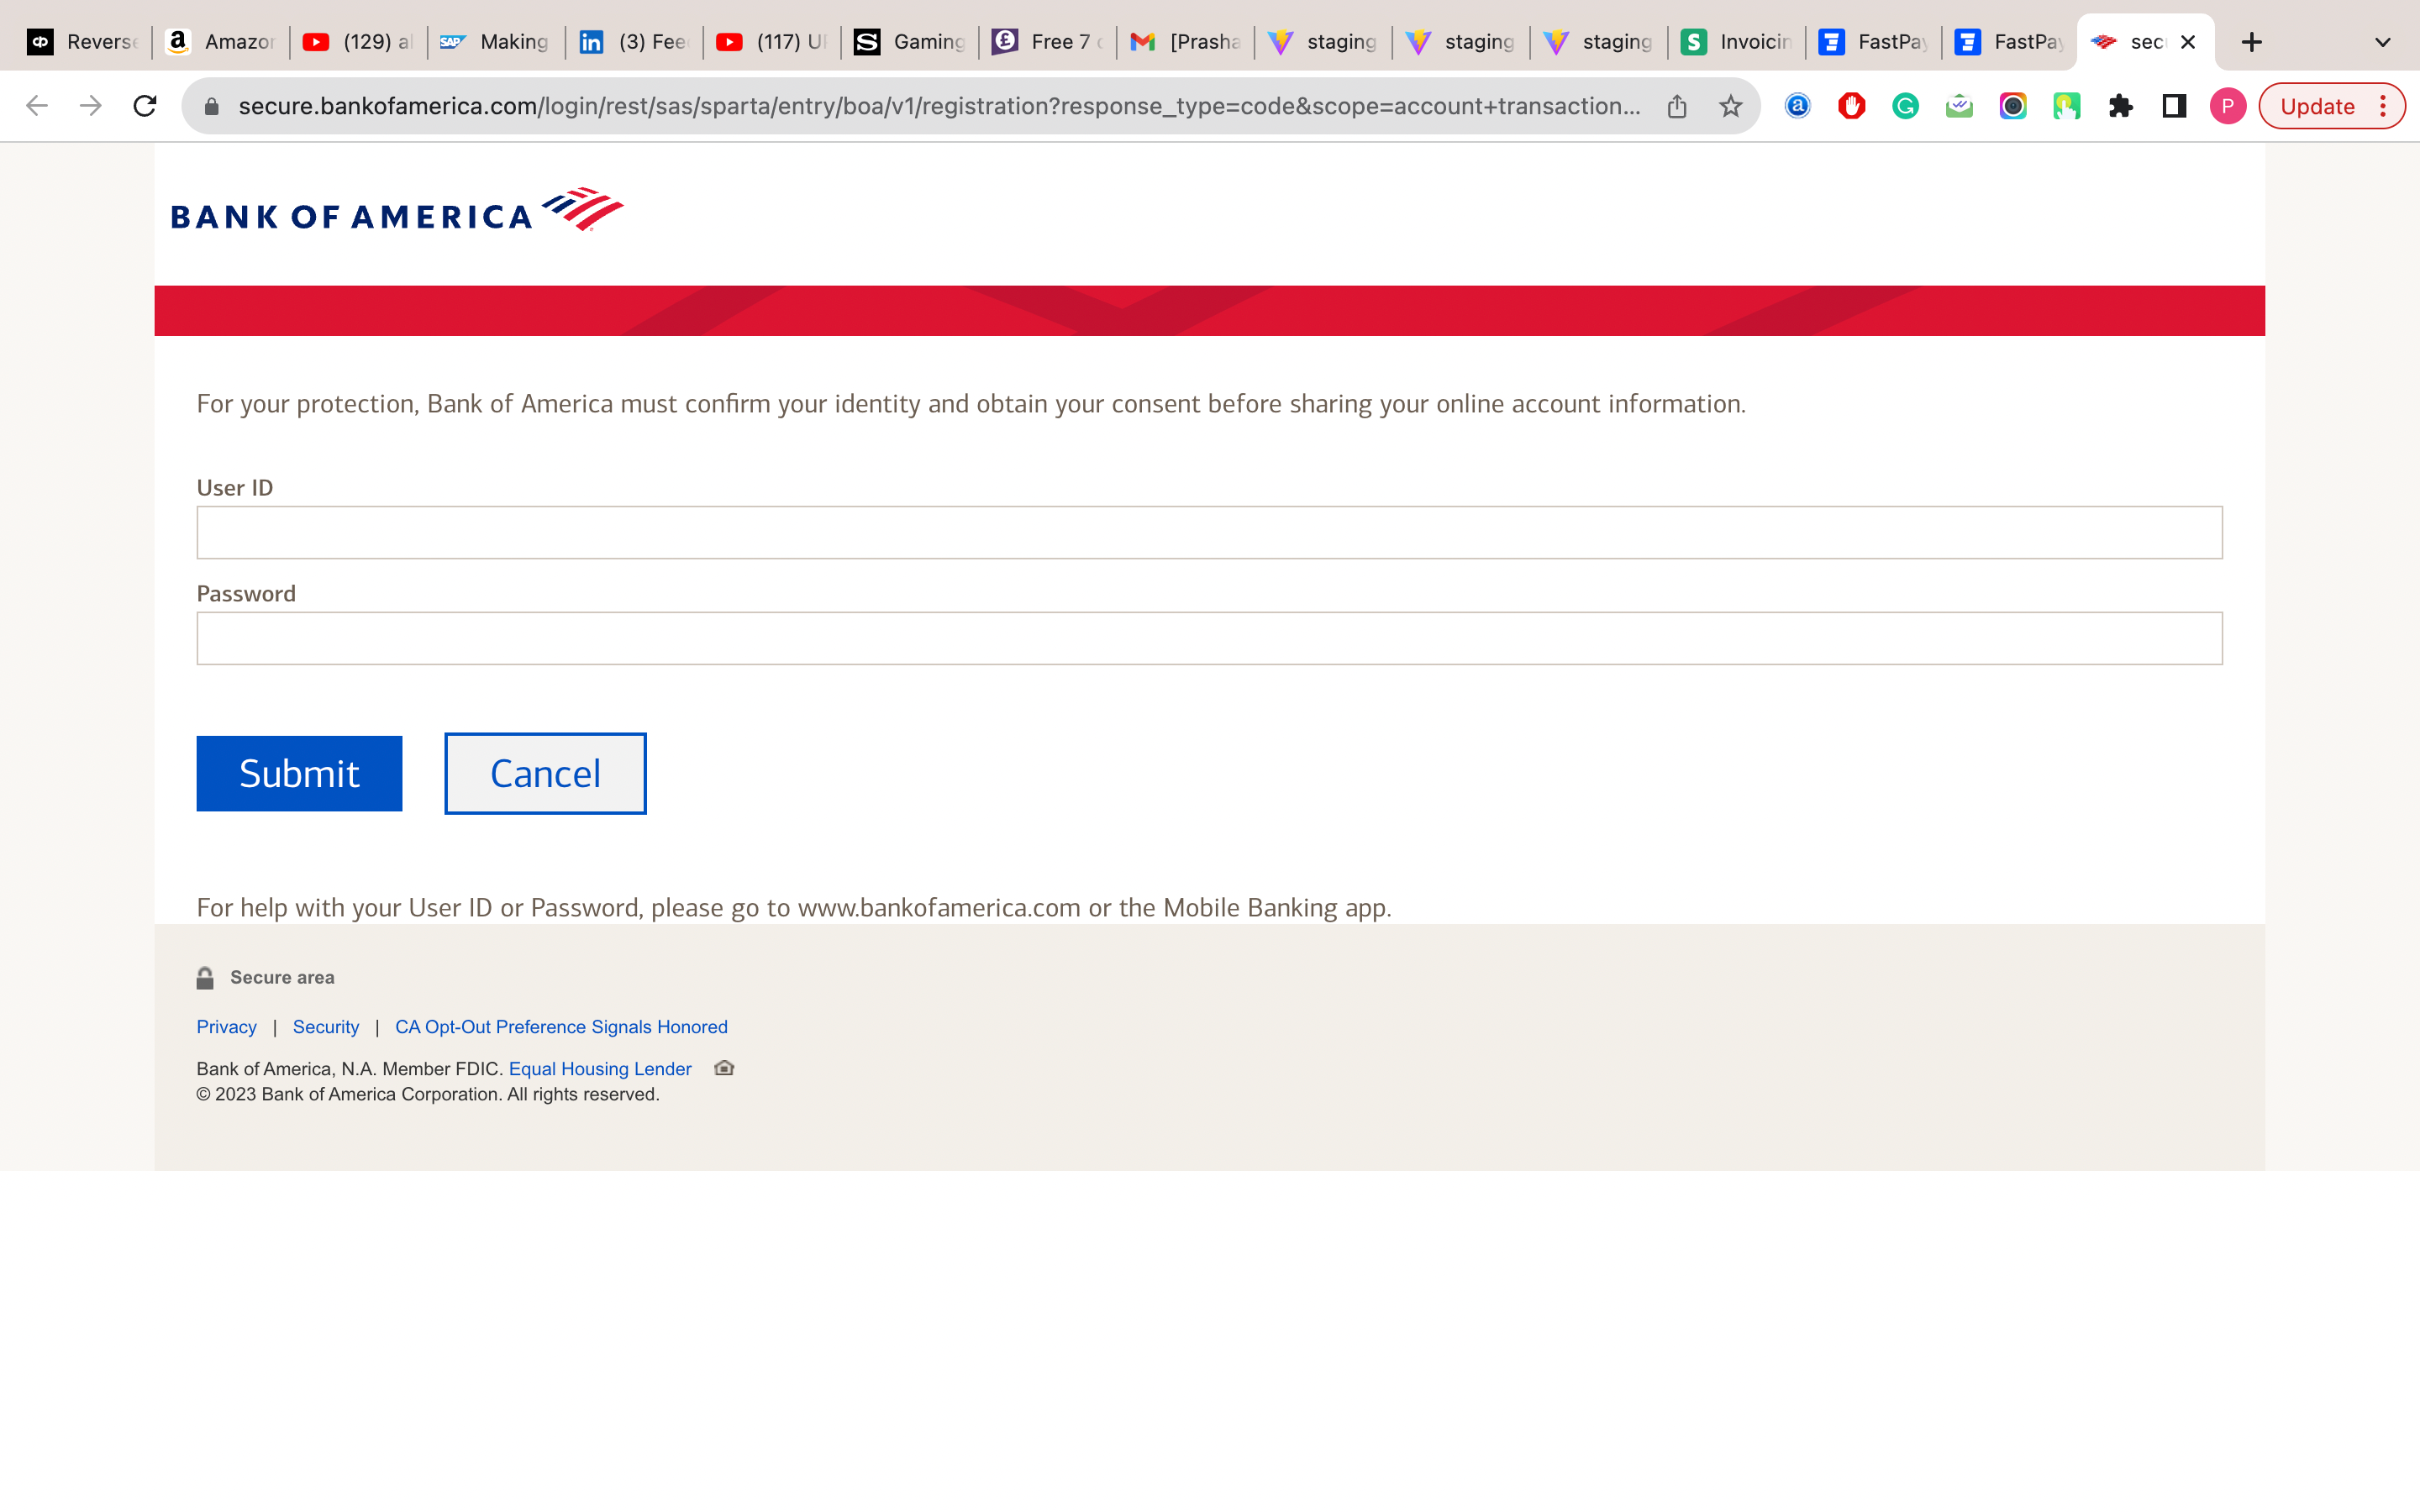
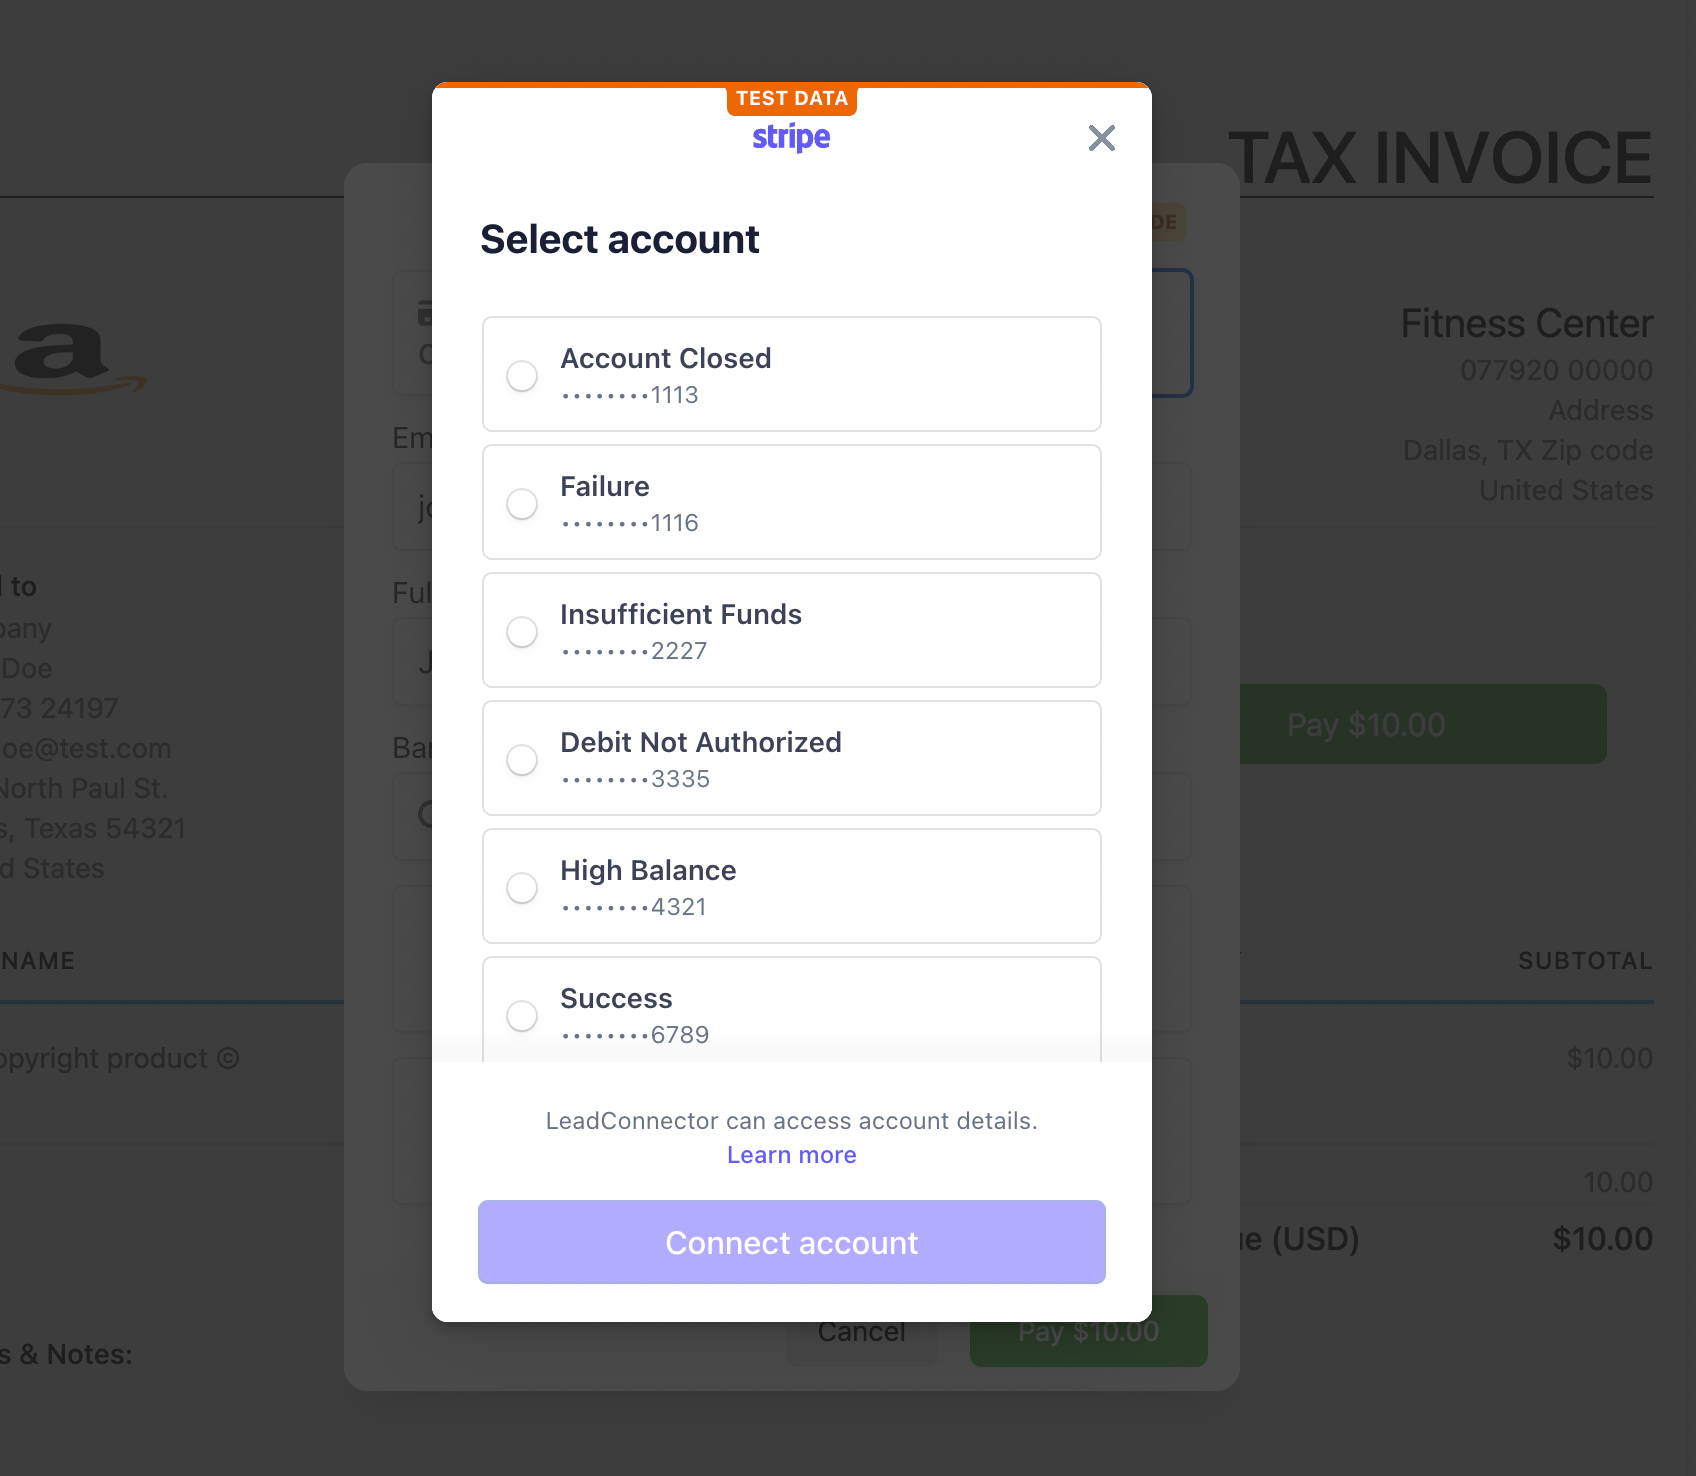
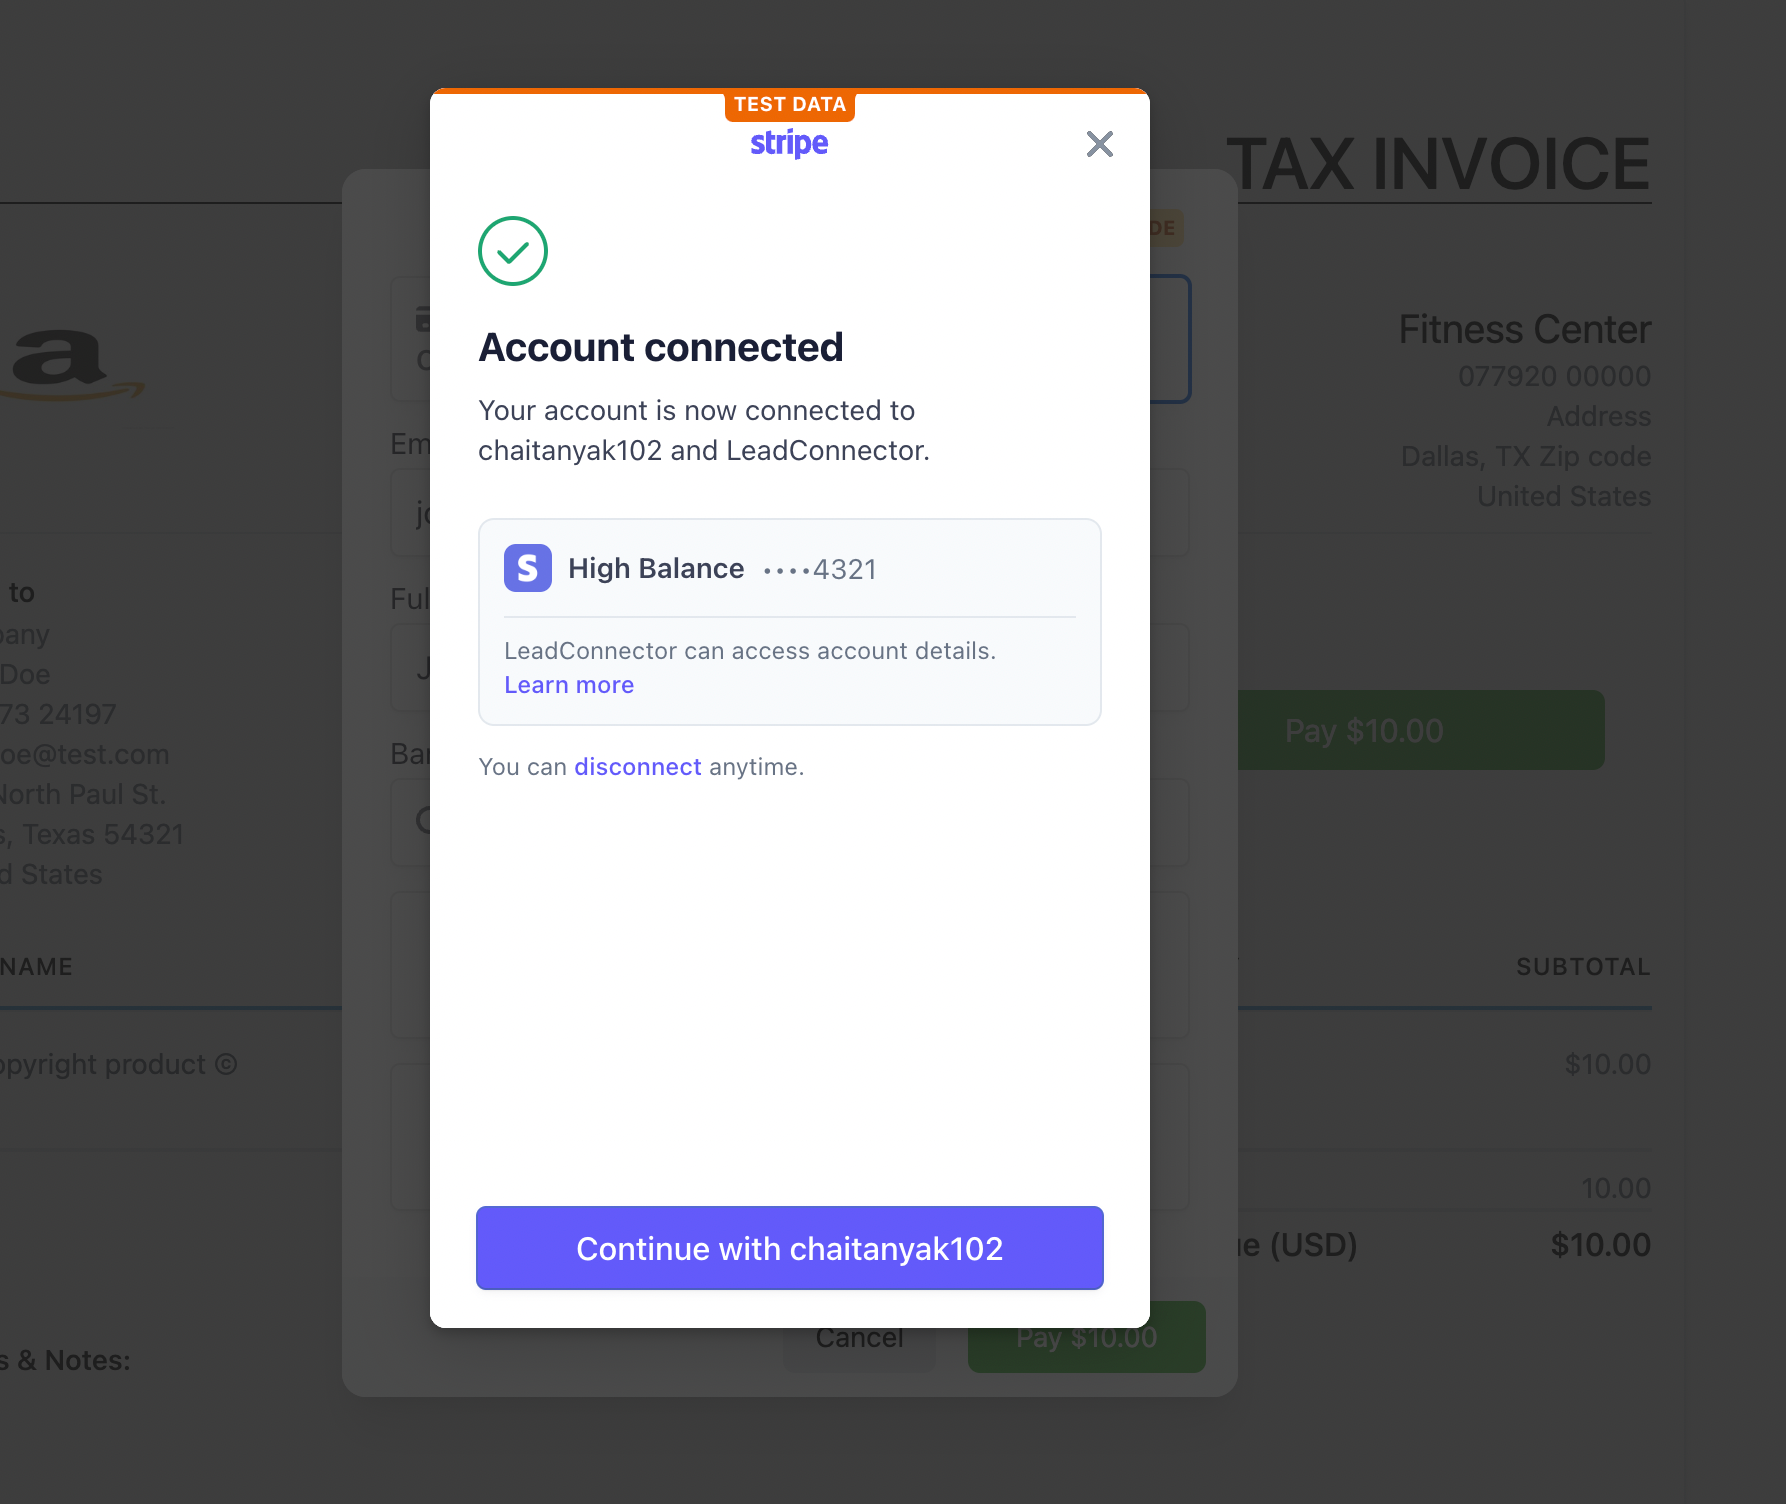
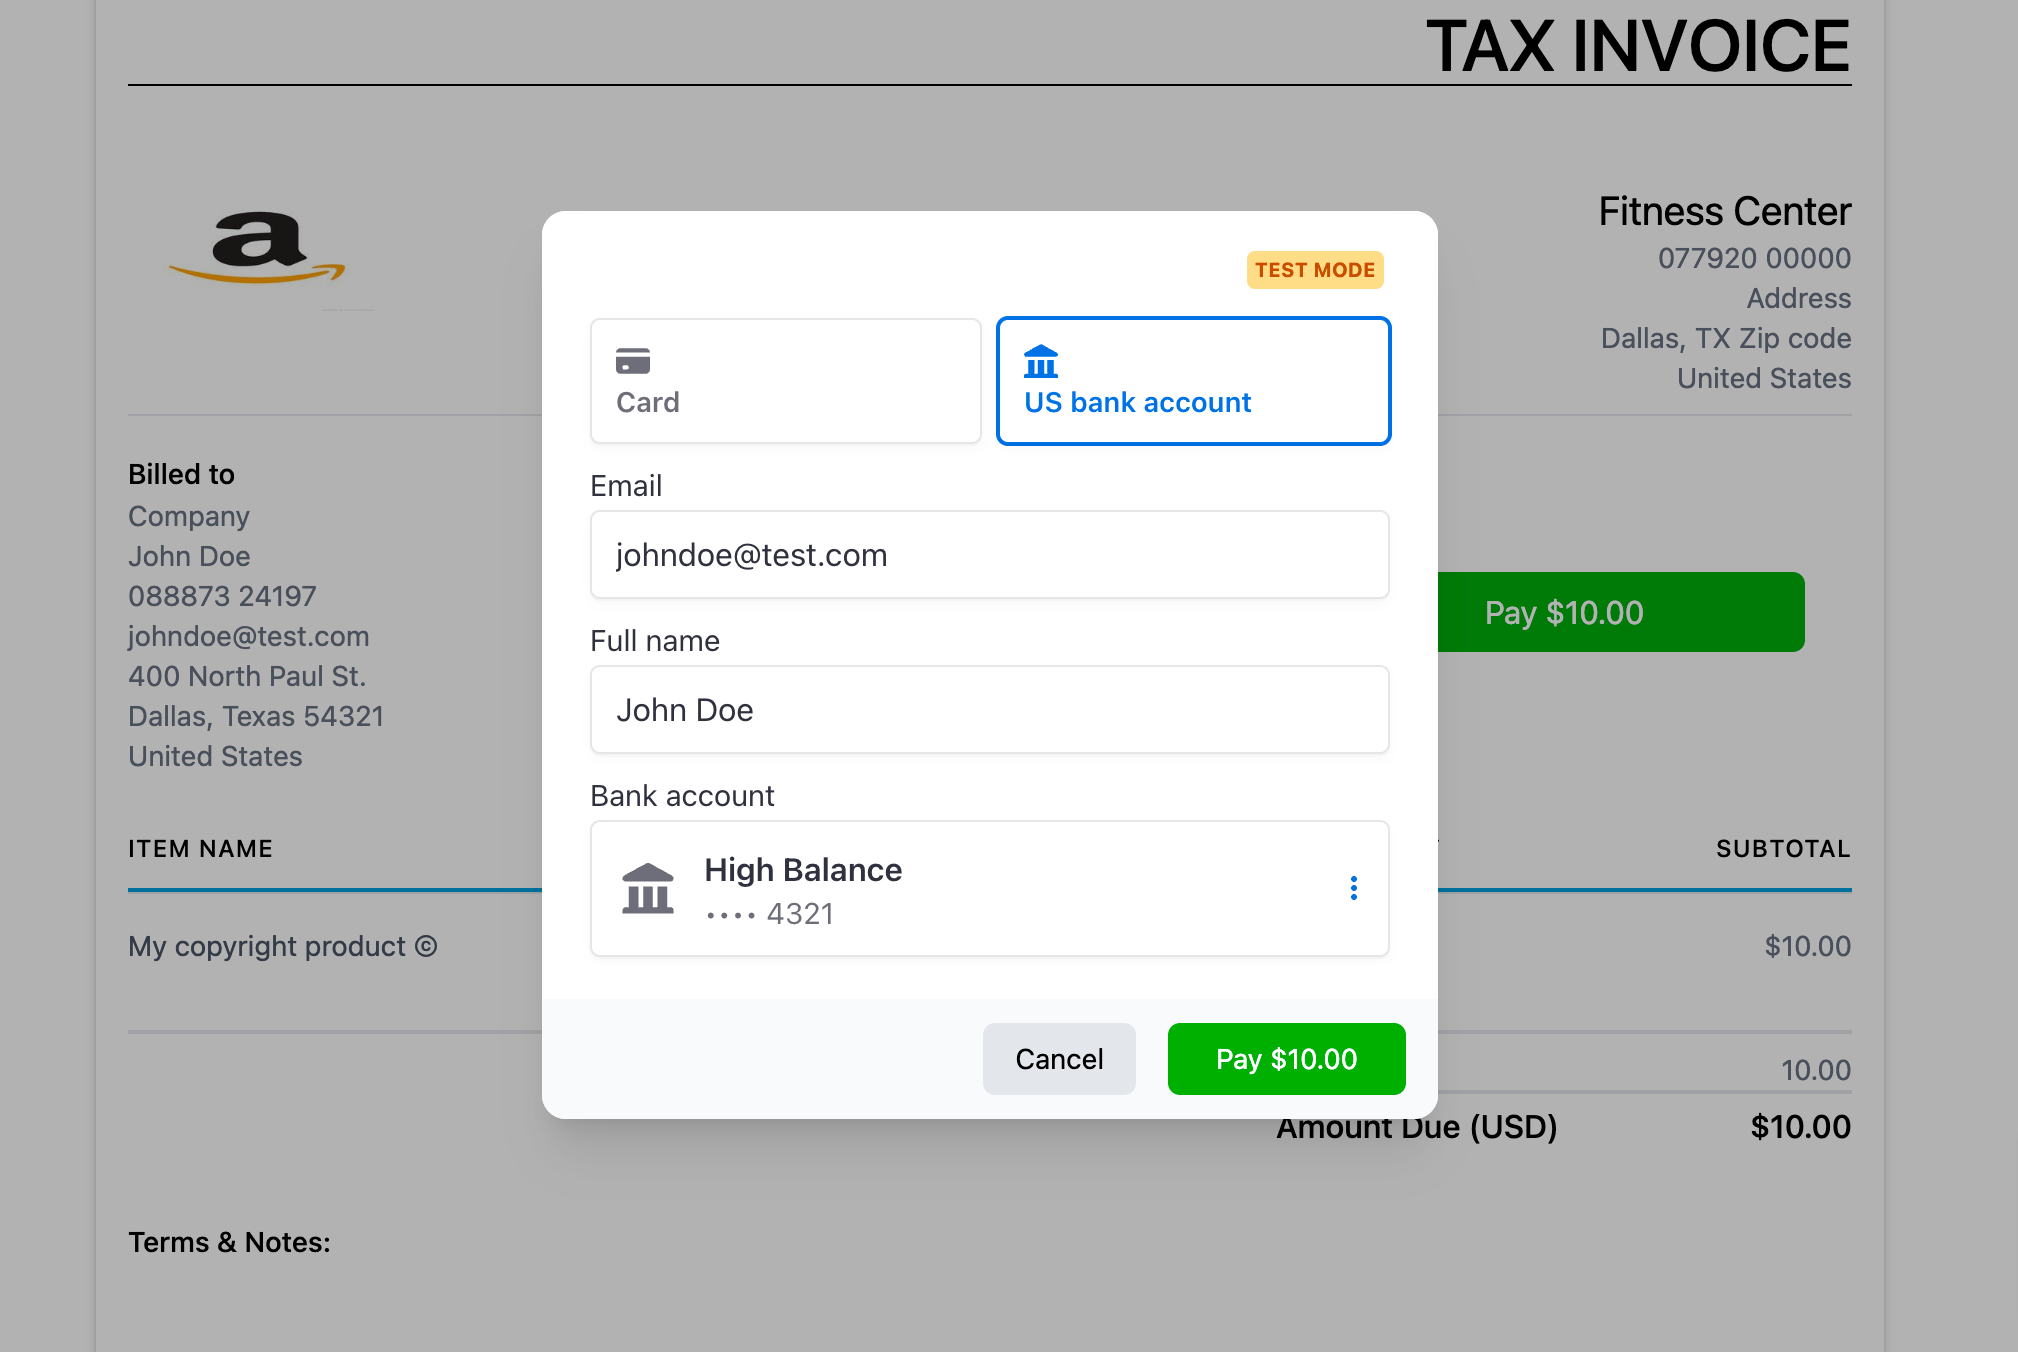
ACH Direct Debit is now available as a payment method with Stripe on invoices and Tex2Pay links
This supports one-time invoices, Text2Pay links, and recurring invoices along with auto-payments
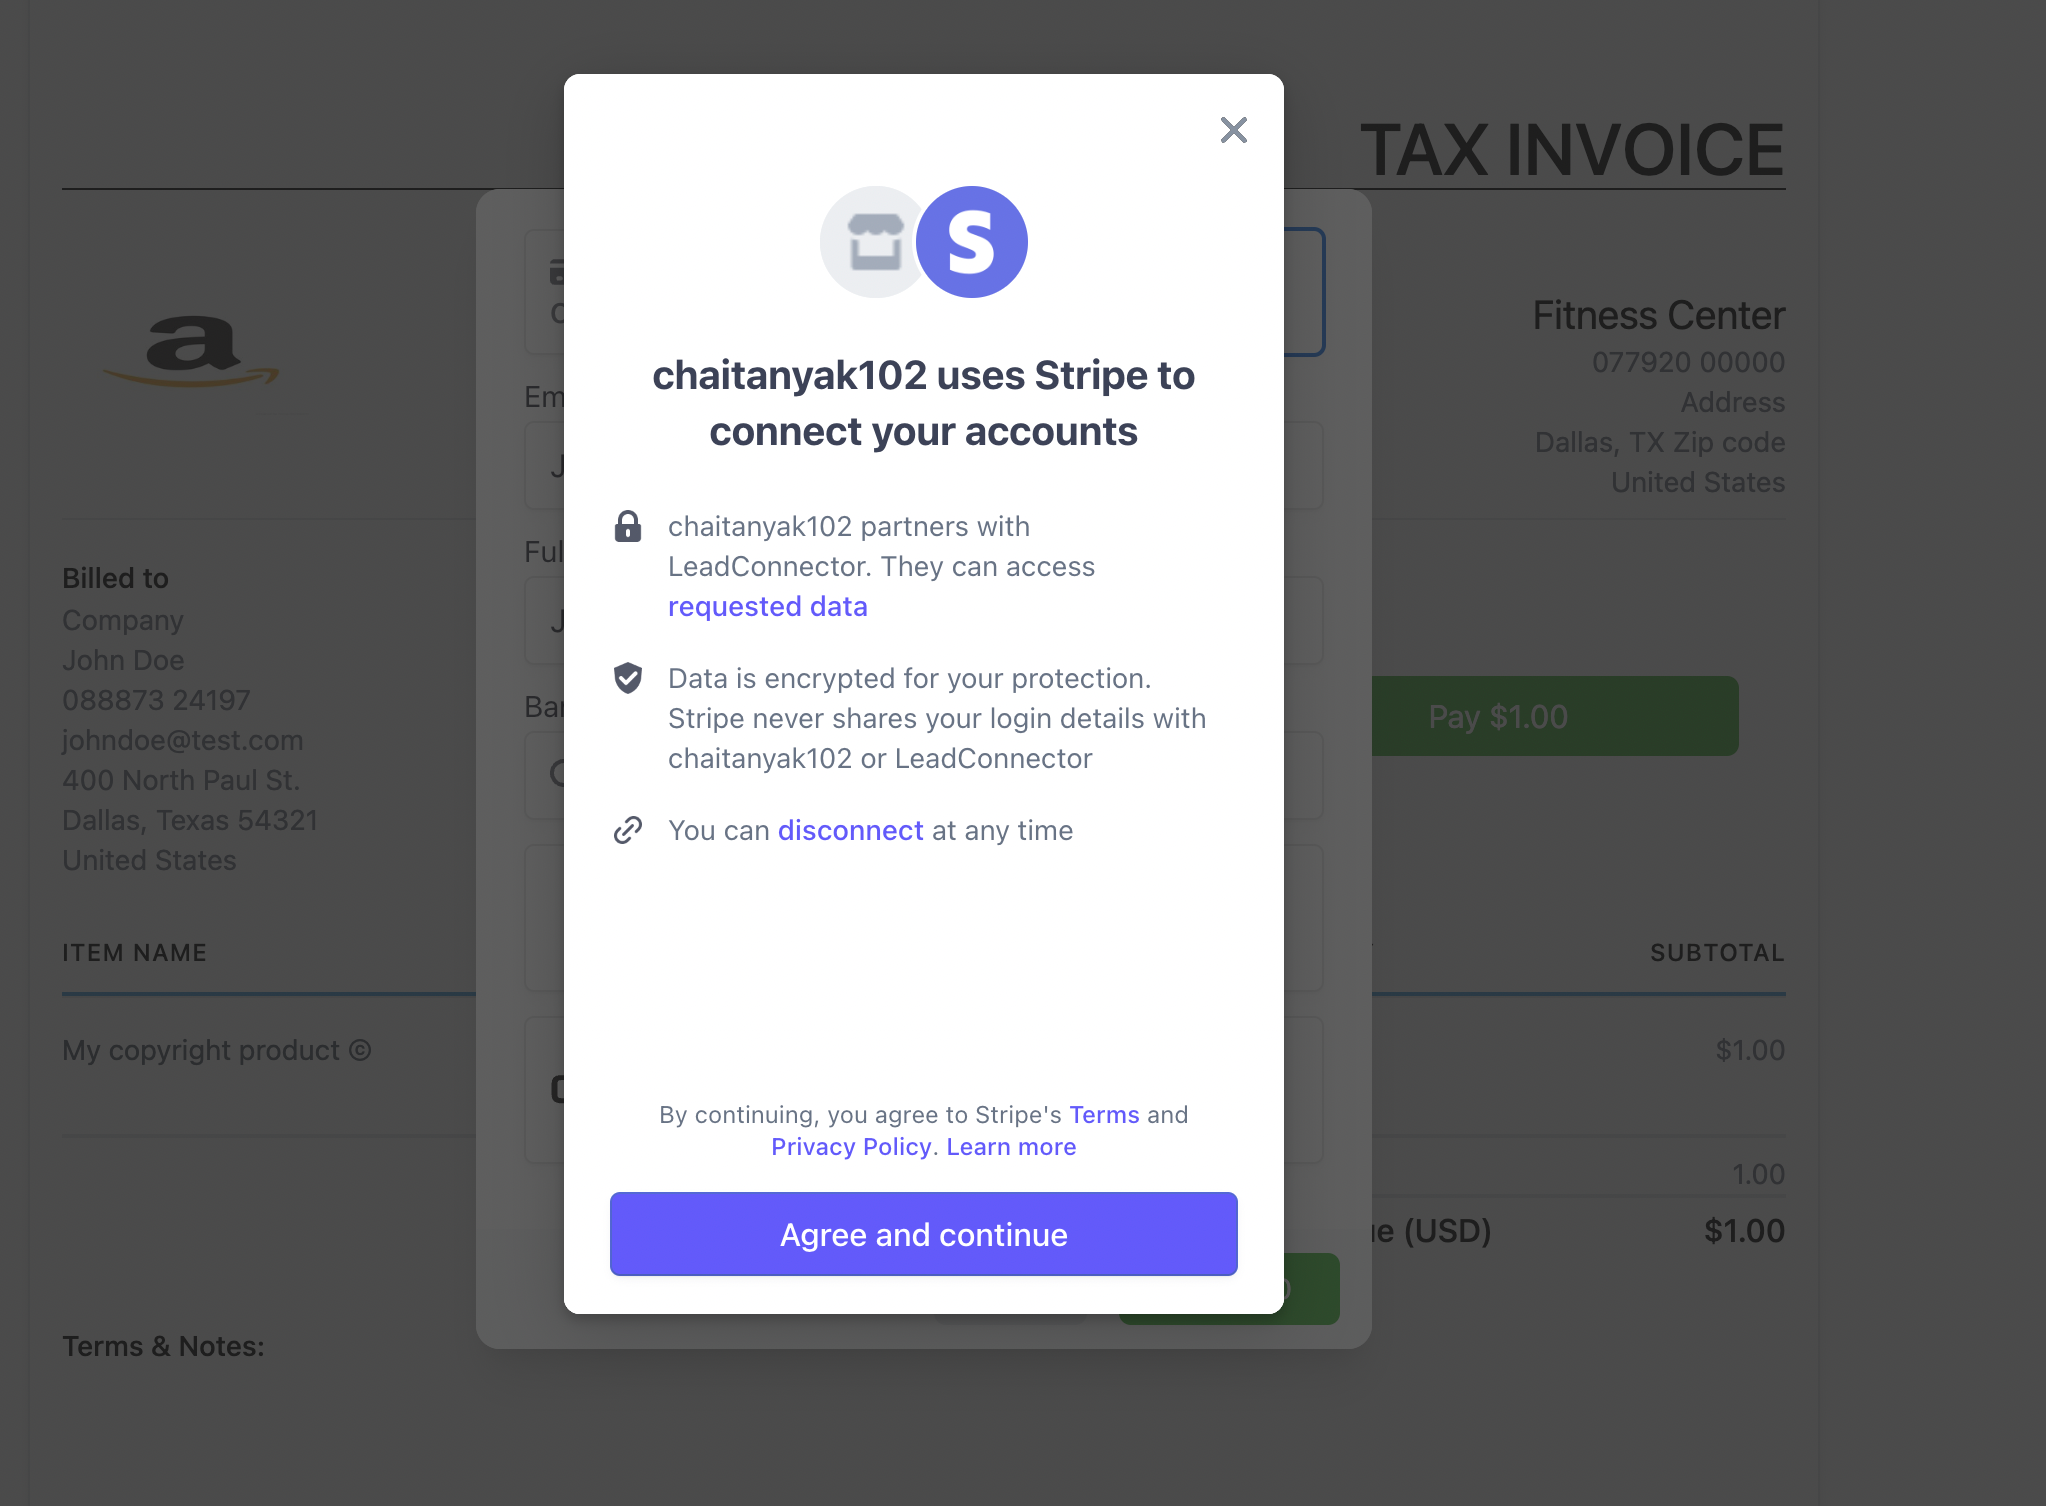
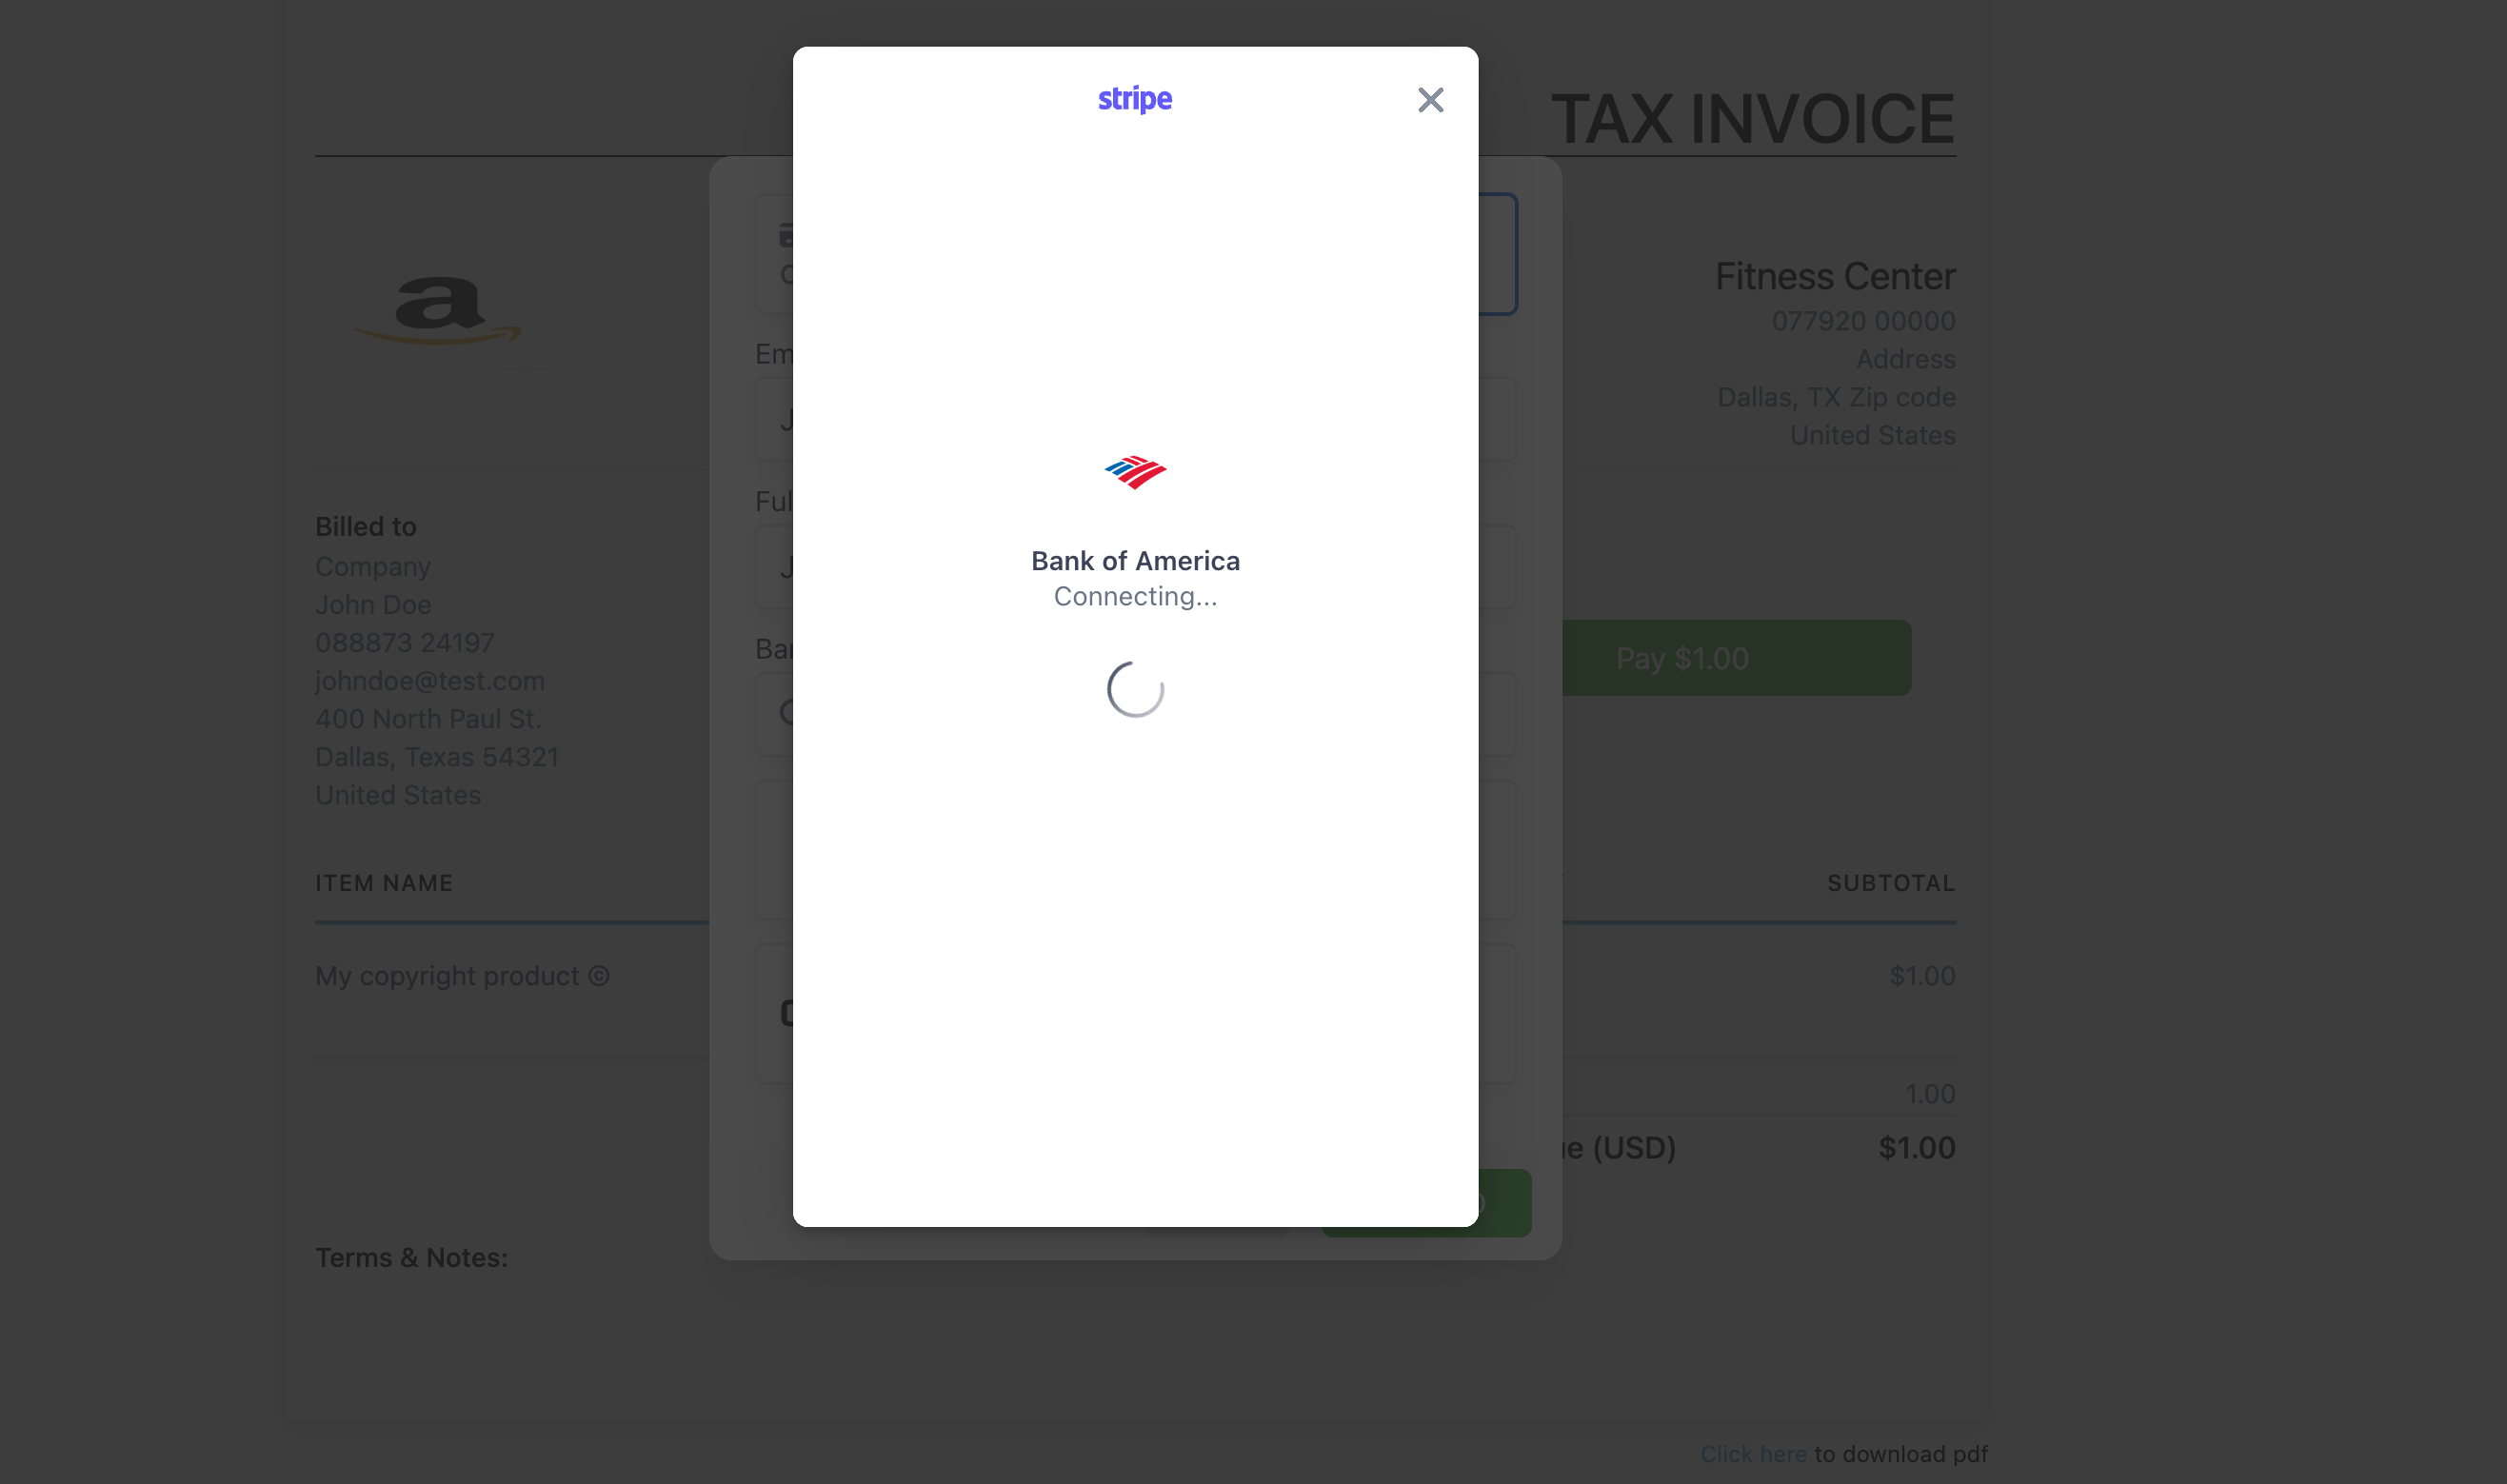
Stripe lets your customers securely share their financial data by linking their financial accounts to your business
Customize the business logo under Stripe Settings -> Branding and business name under Settings -> Public details to ensure the correct name and logo get used on the payment modal
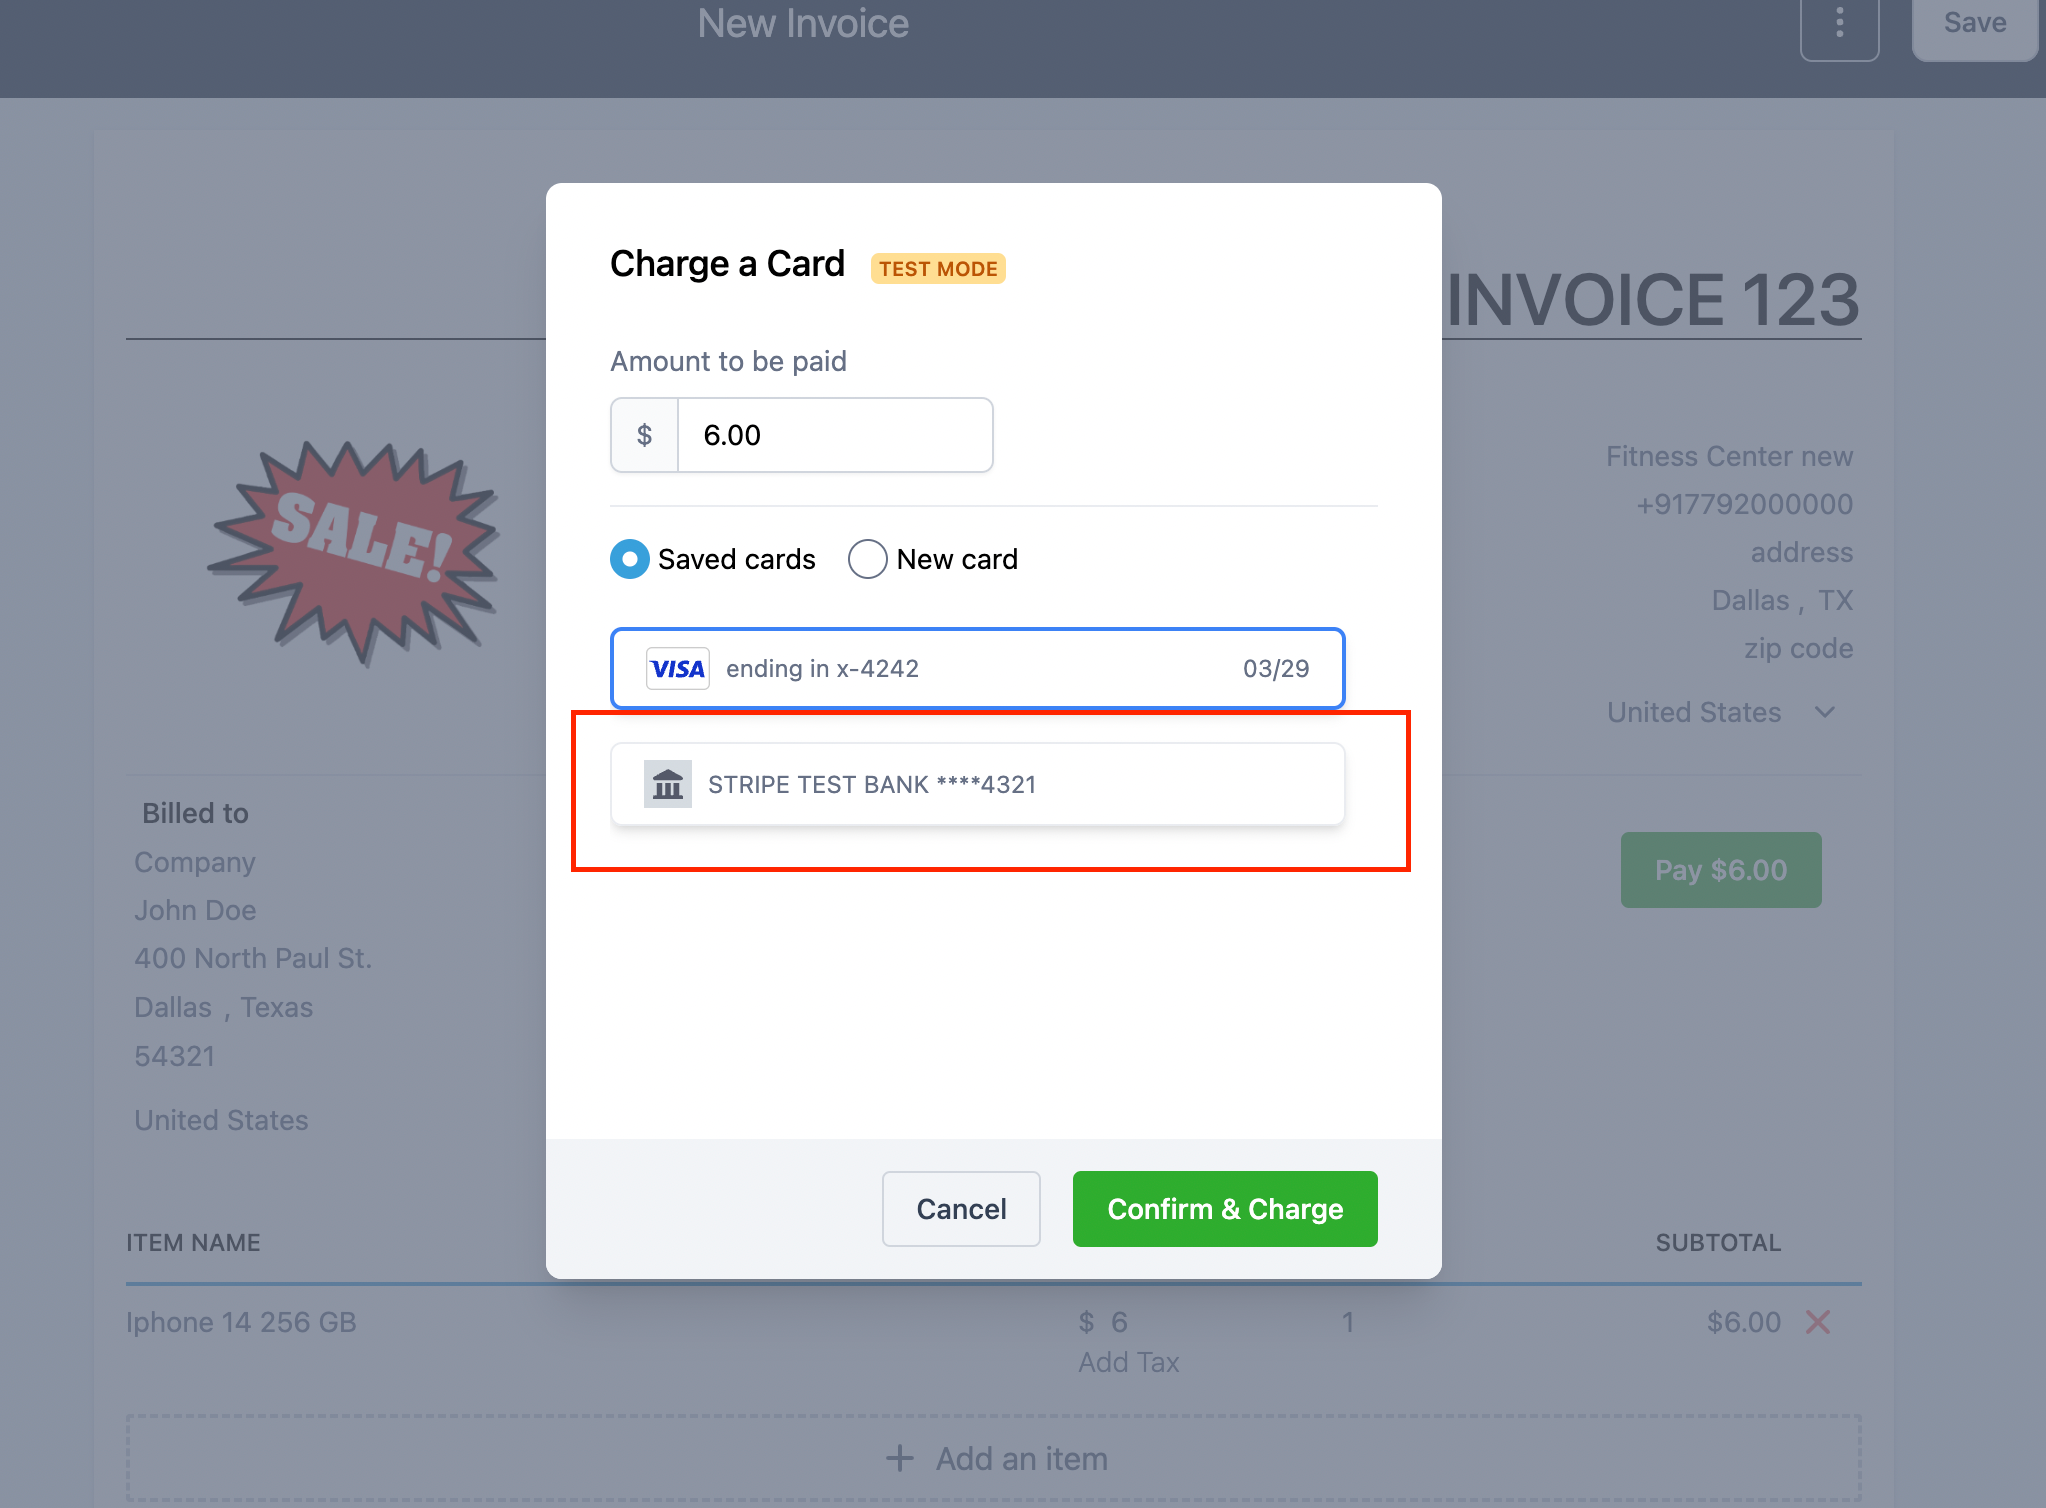
Businesses can use the saved bank information to record payments for future invoices as well. Saved bank information will appear alongside saved card information under the Record Payment option
US Bank Account option will be visible alongside Apple Pay and Google Pay along with Card, if applicable in the customer geography.
Refer to the help article for further help - Link
A2P Standard Brand Registration is Now Live!🚀
📅 Starting August 10, 2023, LeadConnector introduced a new and improved version of its basic registration service, called Standard Brand Registration. This is great because it follows the latest rules for sending official messages.
👥 Standard Brand registration is perfect for customers who need a higher daily sending limit approved by the TCR(The Campaign Registry).
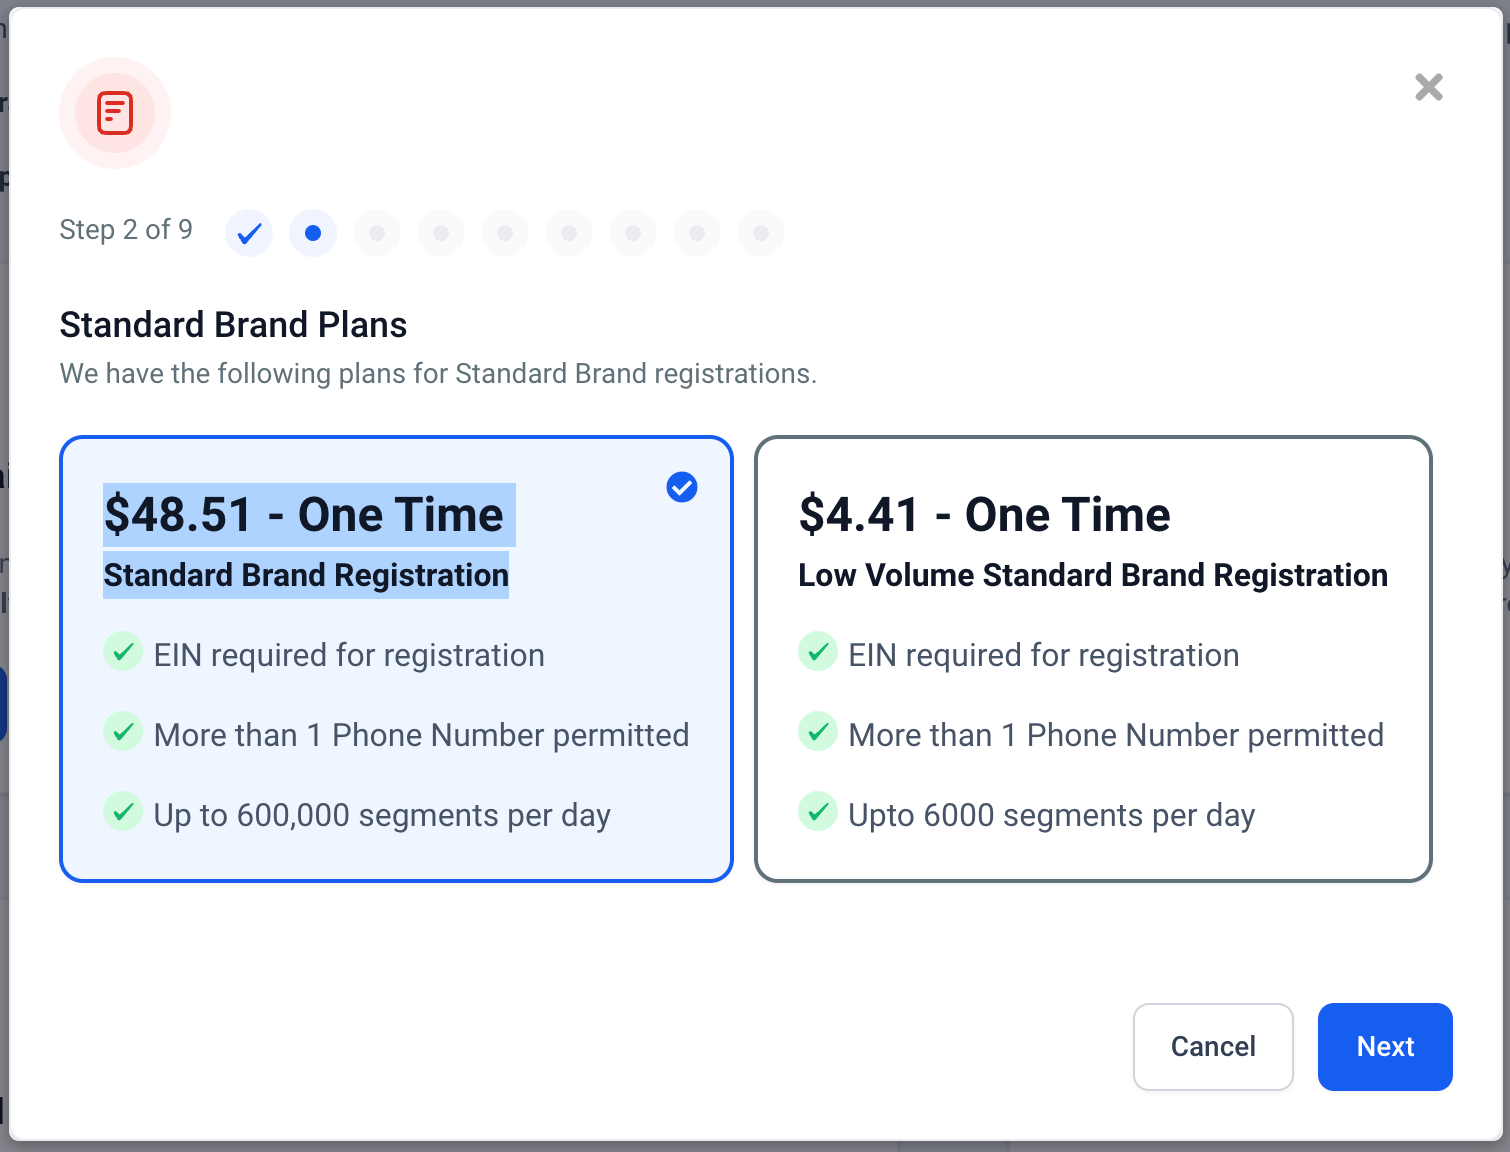
💰 If you have a correct Tax ID (or EIN if you're a U.S. business), you can sign up for Standard Brands only. To see how different types of Brand registration compare, look at the comparison of Starter, Low Volume Standard, and Standard options for A2P 10DLC.💡
📝 What are the requirements for Standard Brand registration?
Standard brands are available to businesses that meet the following requirements:
Have Tax ID
: Customers with a tax ID(EIN in case of US businesses) are eligible for Sole Proprietor Brands - use a Low Volume Standard Brand instead.
Valid Business Info
: Brands must include a valid and accurate business name, first name, last name, email address, phone number, and physical address.
💸 What are the fees for Standard Brand registration? - The following fees will apply:
One-time Standard Brand registration fee: $48.51 (Sole Prop and Low Volume Standard Brands fee is $4.41)
One-time Campaign vetting fee: $16.55 (existing Campaigns will be exempt from this fee at this time)
Monthly Campaign fees: $11.025 (applicable to existing and new Campaigns)
🚫 What are the benefits of a Standard Brand over Sole Prop and Low Volume Standard? - Standard brands have the following benefits:
Upto 200,000 Message segments allowed per day when compared to 6000 segments for Low Volume Standard Brands
Multiple Phone Numbers per Campaign when compared to Sole Prop which has only 1
How do I do the new registration?
Navigate: Sub-Account Settings ➡️ Phone Numbers ➡️ Trust Center
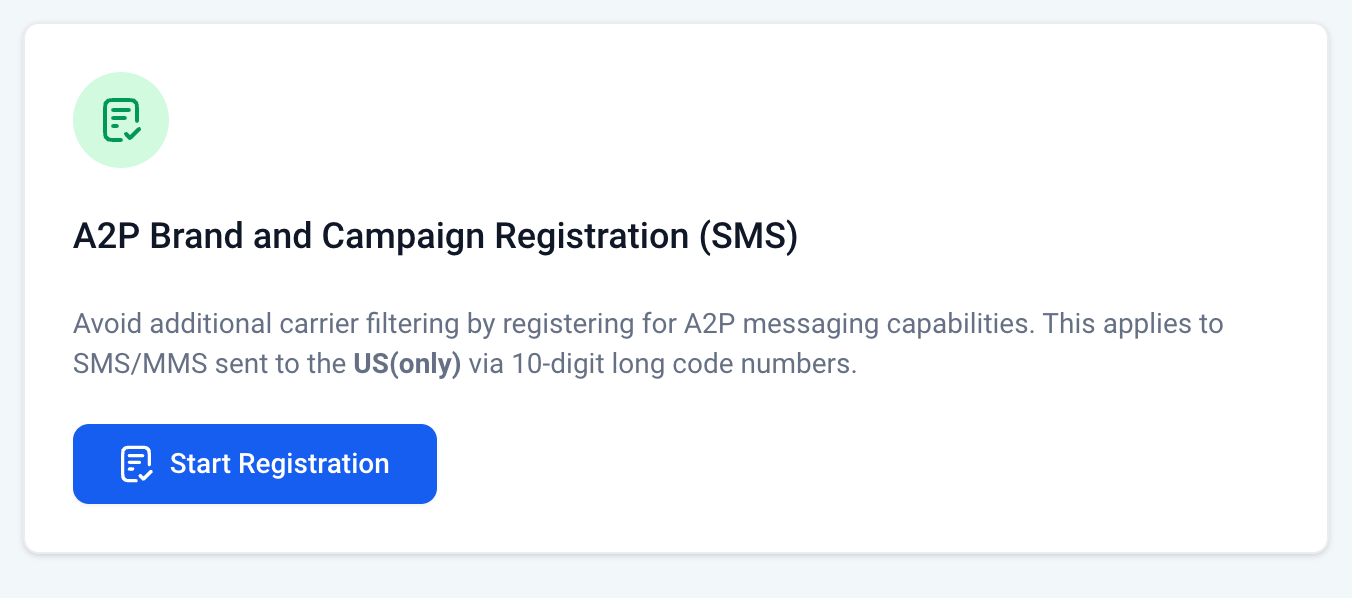
Step 1. Click on Start Registration on the card "A2P Brand and Campaign Registration (SMS)".
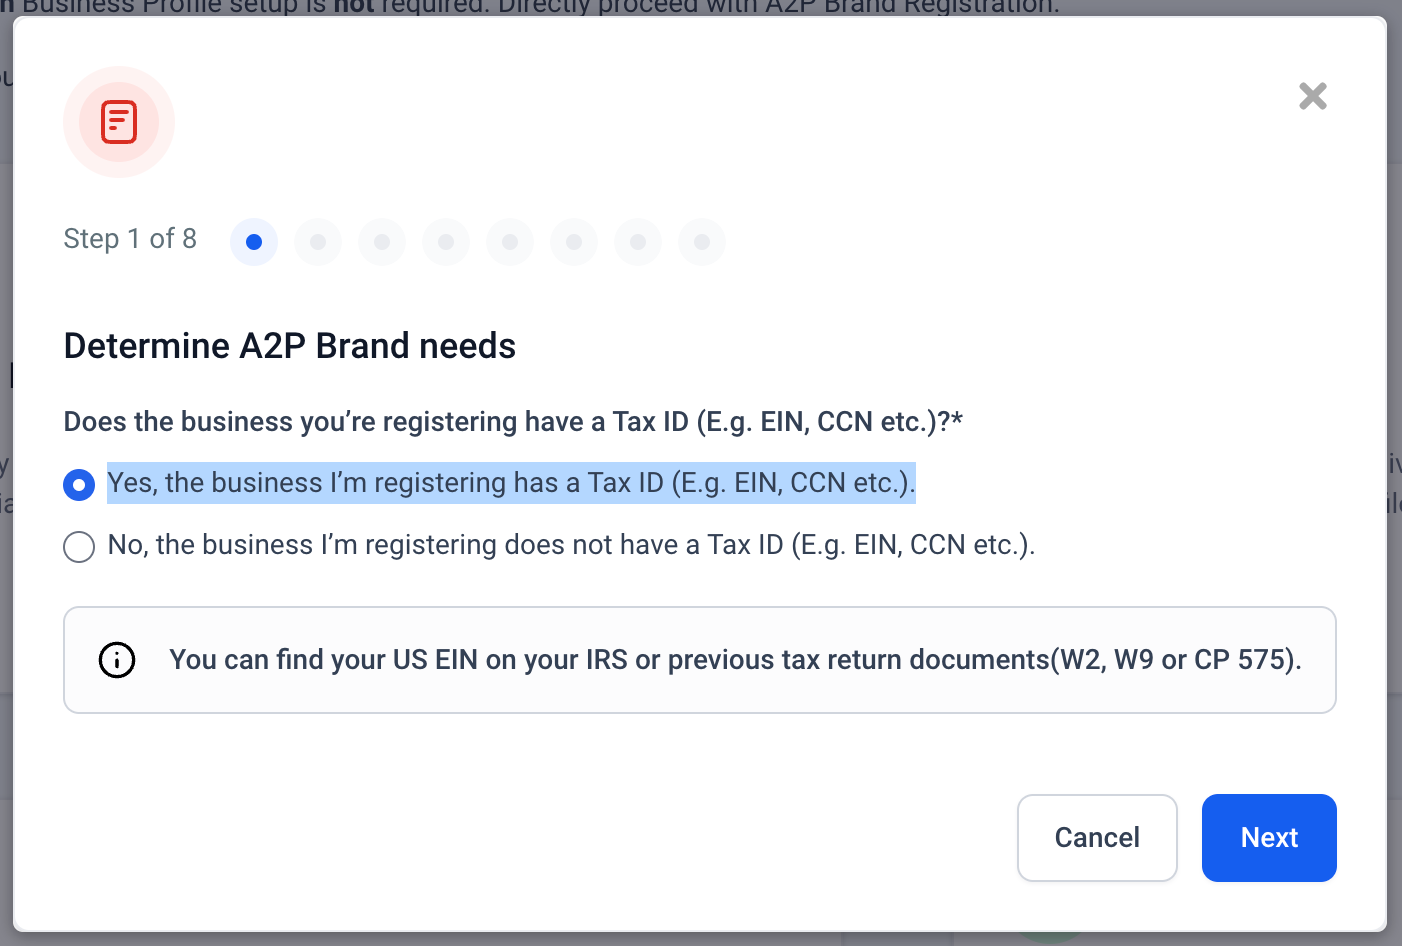
Step 2. Select the option "Yes, the business I’m registering has a tax ID"
Step 3. Select Standard Brand and fill in all the details wrt Brand and Campaign to complete till Step 9, and voila you're done!
Post Submission: Once the Brand is approved, the campaign will be automatically submitted for review and the relevant status will be shown on the UI.
📘 Refer to this changelog to view step by step process to register for A2P.
A2P Registration Important Dates 📅
👉🏼 31st August
All the unregistered traffic (sending SMS without registering a brand and campaign) will be blocked and the SMS would be allowed after brand registration.
All Sole Prop Brands who have "Info Needed" status must complete the OTP verification else these brands will be removed and deleted.
📝 Quick Note
The A2P Campaign registration is currently taking under two weeks, so it's the perfect time to get your registration in. For faster approvals, please follow the Campaign Registration Best Practices.👈
ℹ️ Explore more on the LC Phone System Messaging Policy here 👈
Custom Menu Link: Pass session details to the iFrame for Marketplace app installation
What's New:
The ability for users to directly send session details to iFrame custom links.
Why?
Some white-label agencies have had issues getting clients to add certain marketplace apps. The problem is that the installation link takes clients to a site called "app.gohiglevel.com." This doesn't match the agency's brand and interrupts the seamless experience that's intended for white-label use.
Solution:
To make it easier for users and keep the branded look, there's now a way to add session details directly in the custom IFrame links.
The main part of this feature is the sessionKey query parameter. Adding this to the app installation link in the custom menu settings makes sure session details are shared easily, keeping the look in line with the agency's brand.
Next Steps:
To make your custom menu links, just add the sessionKey to the app installation link you want to use. This makes the installation process easy for your clients and keeps it consistent with your brand.
Facebook: Streamlined Notification for Connection Expiry
What’s New:
Email Update: Now, instead of getting many emails about expiring connections for each Facebook page at different locations, users will get just one combined email.
Before, each Facebook page linked to different locations caused separate emails. Now, even if there are 50 Facebook pages at 100 locations, just one email will cover it all.
My Profile Page (Sub-Account & Agency) and Notification Preference (Sub-Account): Refactoring & Enhancements
What’s New:
Micro Frontend Architecture:
The My Profile page has transitioned to a micro frontend architecture, allowing efficient scaling for future feature integrations. This is also a pre-cursor to launch our user granular permission structure layout.
Vue.js 3 and GHL Front-end Library Integration: The My Profile page now utilizes Vue.js 3 in conjunction with the GHL front-end library components. This standardizes UI components throughout the application.
Optimized User Interface & Experience (UI/UX): Enhancements to the My Profile page’s UI and UX deliver a more streamlined and intuitive experience, with goals to boost productivity and simplify navigation.
Component-based Architecture: The revamped My Profile page adheres to a component-based architecture.
TipTap Text Editor Enhancement: The sourceCode option, previously available only on TinyMCE, is now enabled on the tip-tap text editor.
📩 Add Image and Text Layout in Email Builder
📩 Email builder lets you easily create attractive marketing emails with templates. New options for arranging images and text are now available.
😎 Advantages of Image and text Layout
Visual Appeal: A well-designed layout with balanced use of text and images makes your emails visually appealing. This can help increase engagement and encourage recipients to read your content.
Branding Consistency: Email Builder's layout tools allow you to incorporate your brand's colors, fonts, and logo, ensuring consistent branding across all your emails. This helps recipients recognise your brand and builds trust.
Message Hierarchy: A proper layout enables you to establish a clear hierarchy for your content. You can use headings, subheadings, and body text to structure your message, making it easier for readers to understand and follow.
Call to Action (CTA): Effective CTAs are essential for driving desired actions from your recipients. With a well-designed layout, you can make your CTAs stand out using buttons, contrasting colors, and appropriate placement.
🤩How to use Image and Text Layout?
Go to Marketing > Emails > Templates/Campaigns
Choose any template or start from scratch to build the emails.
In the layout option, we have introduced option to add image, text and button together.
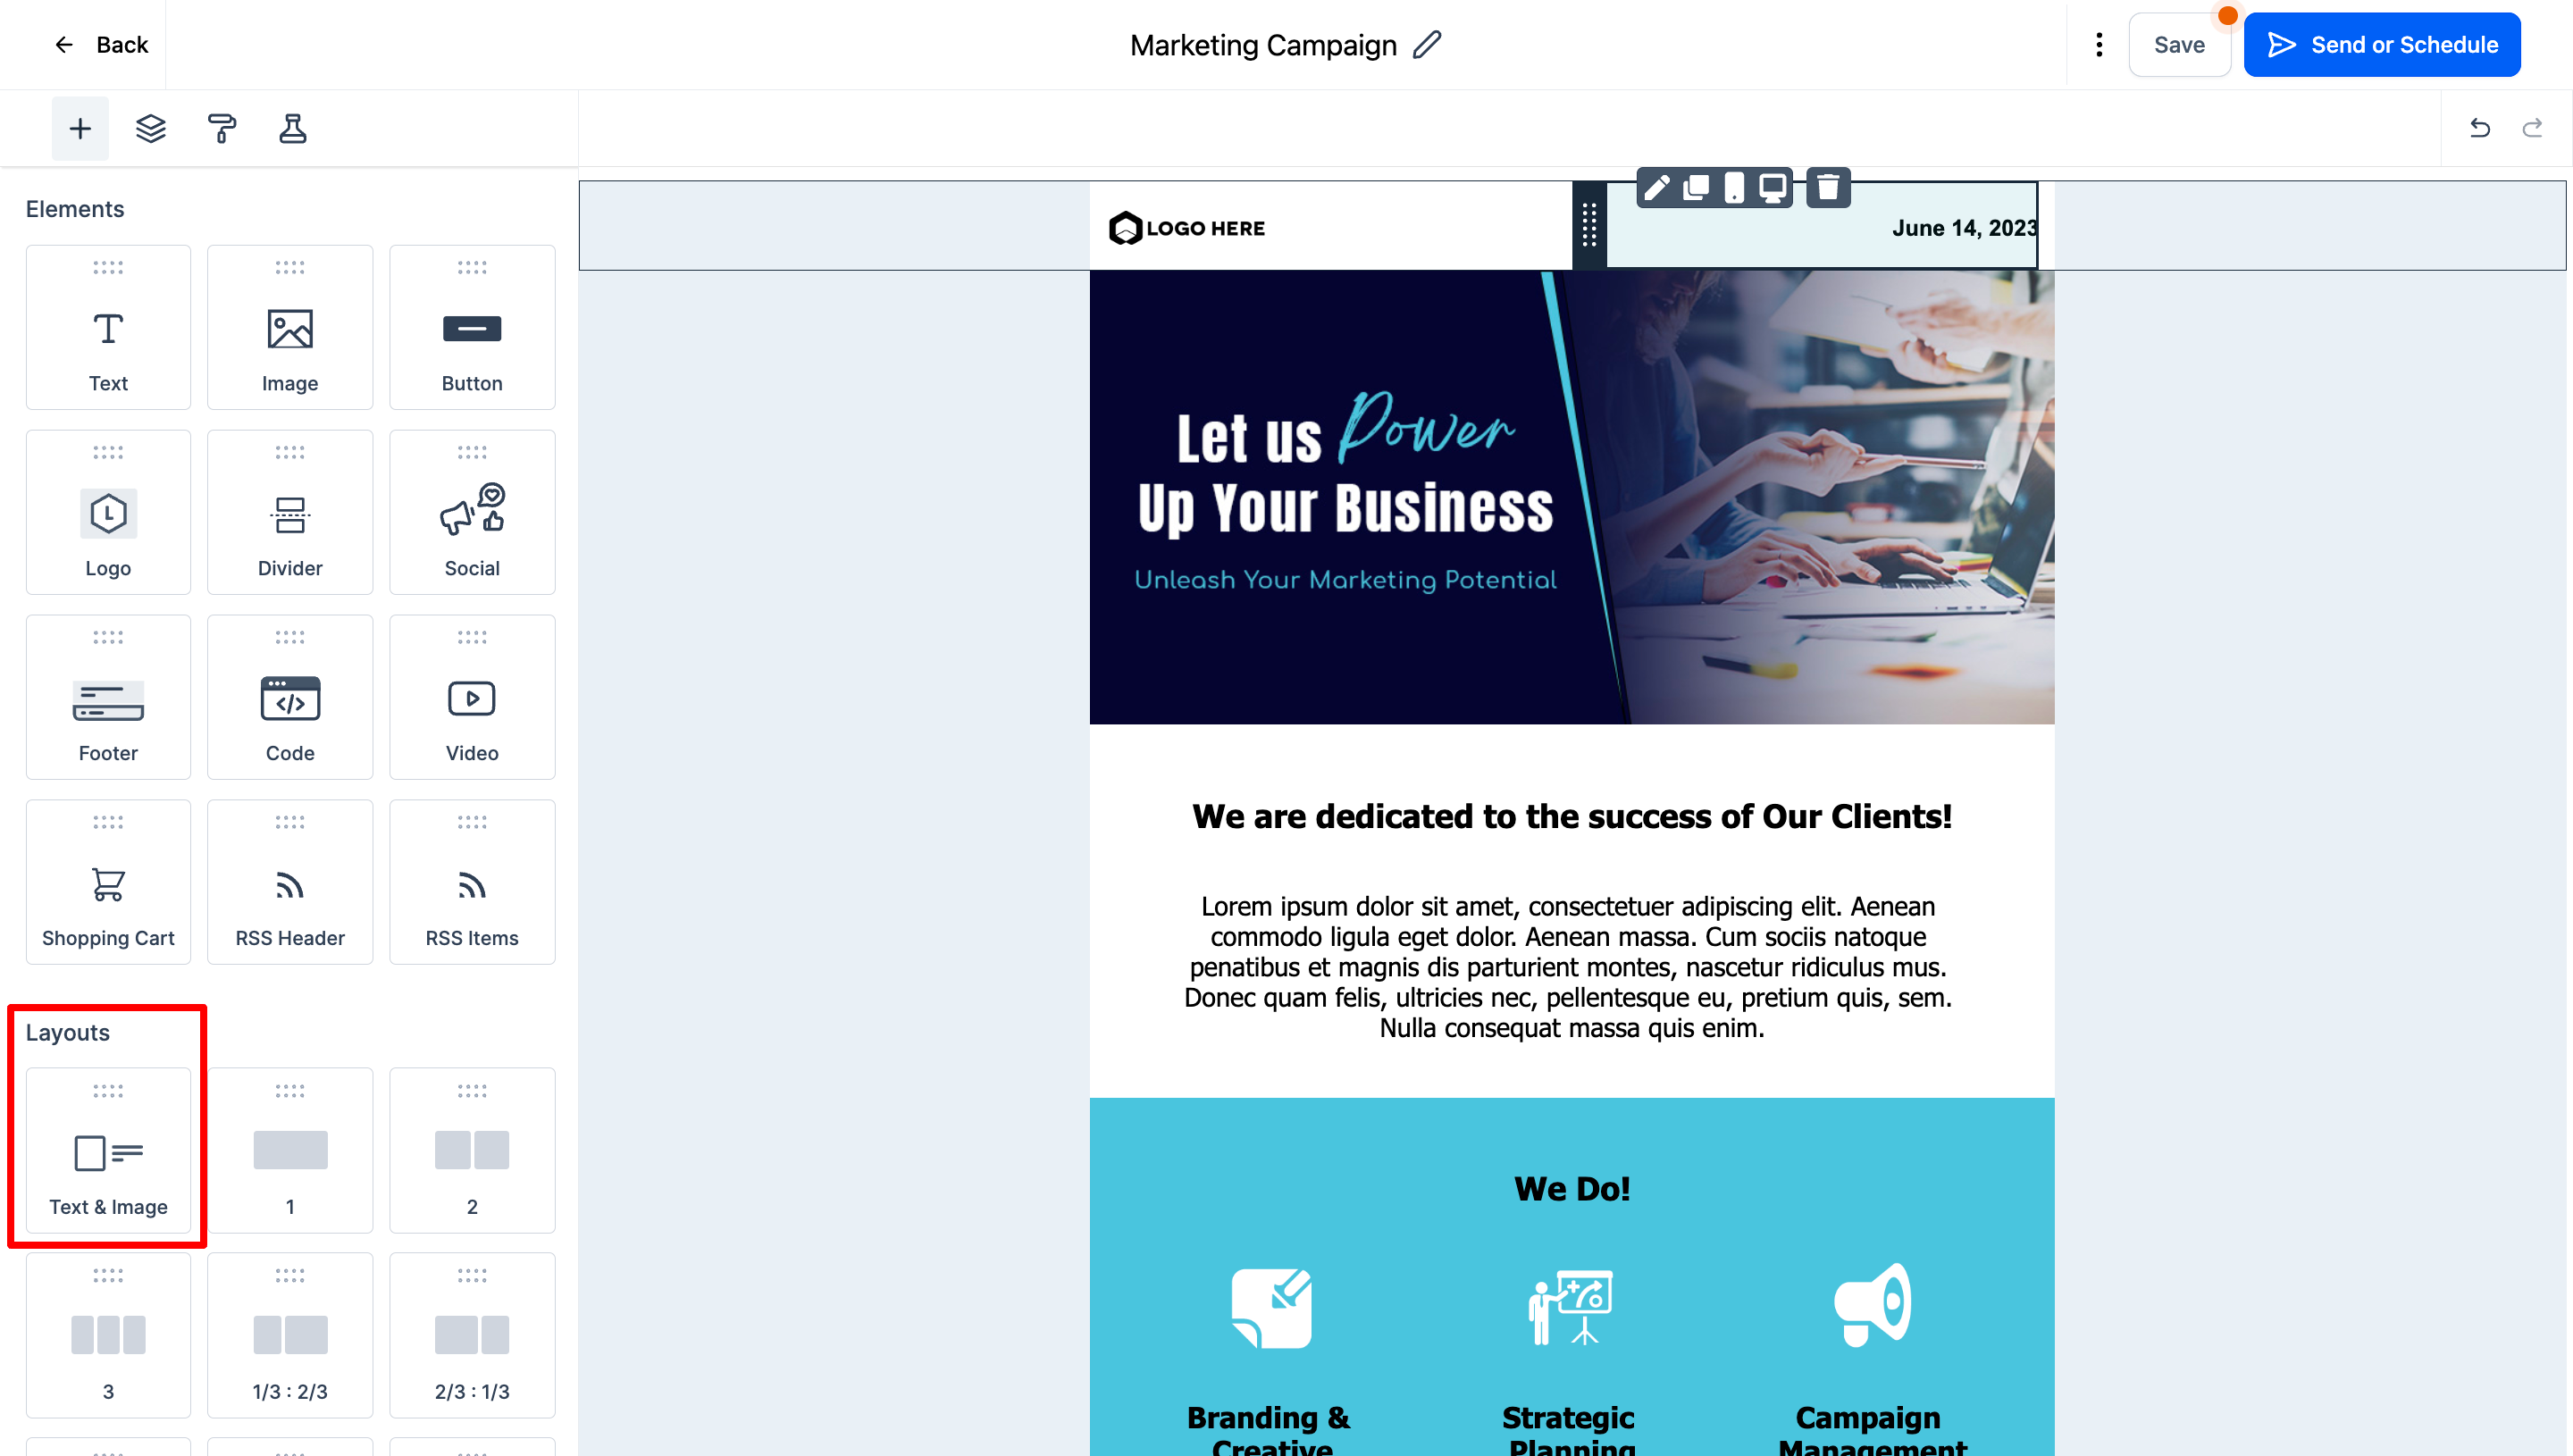
4.Once you drag and drop the Text and Image layout in Builder area, it will bring
Image
Text
Button
5.The User will have to select the layout design.
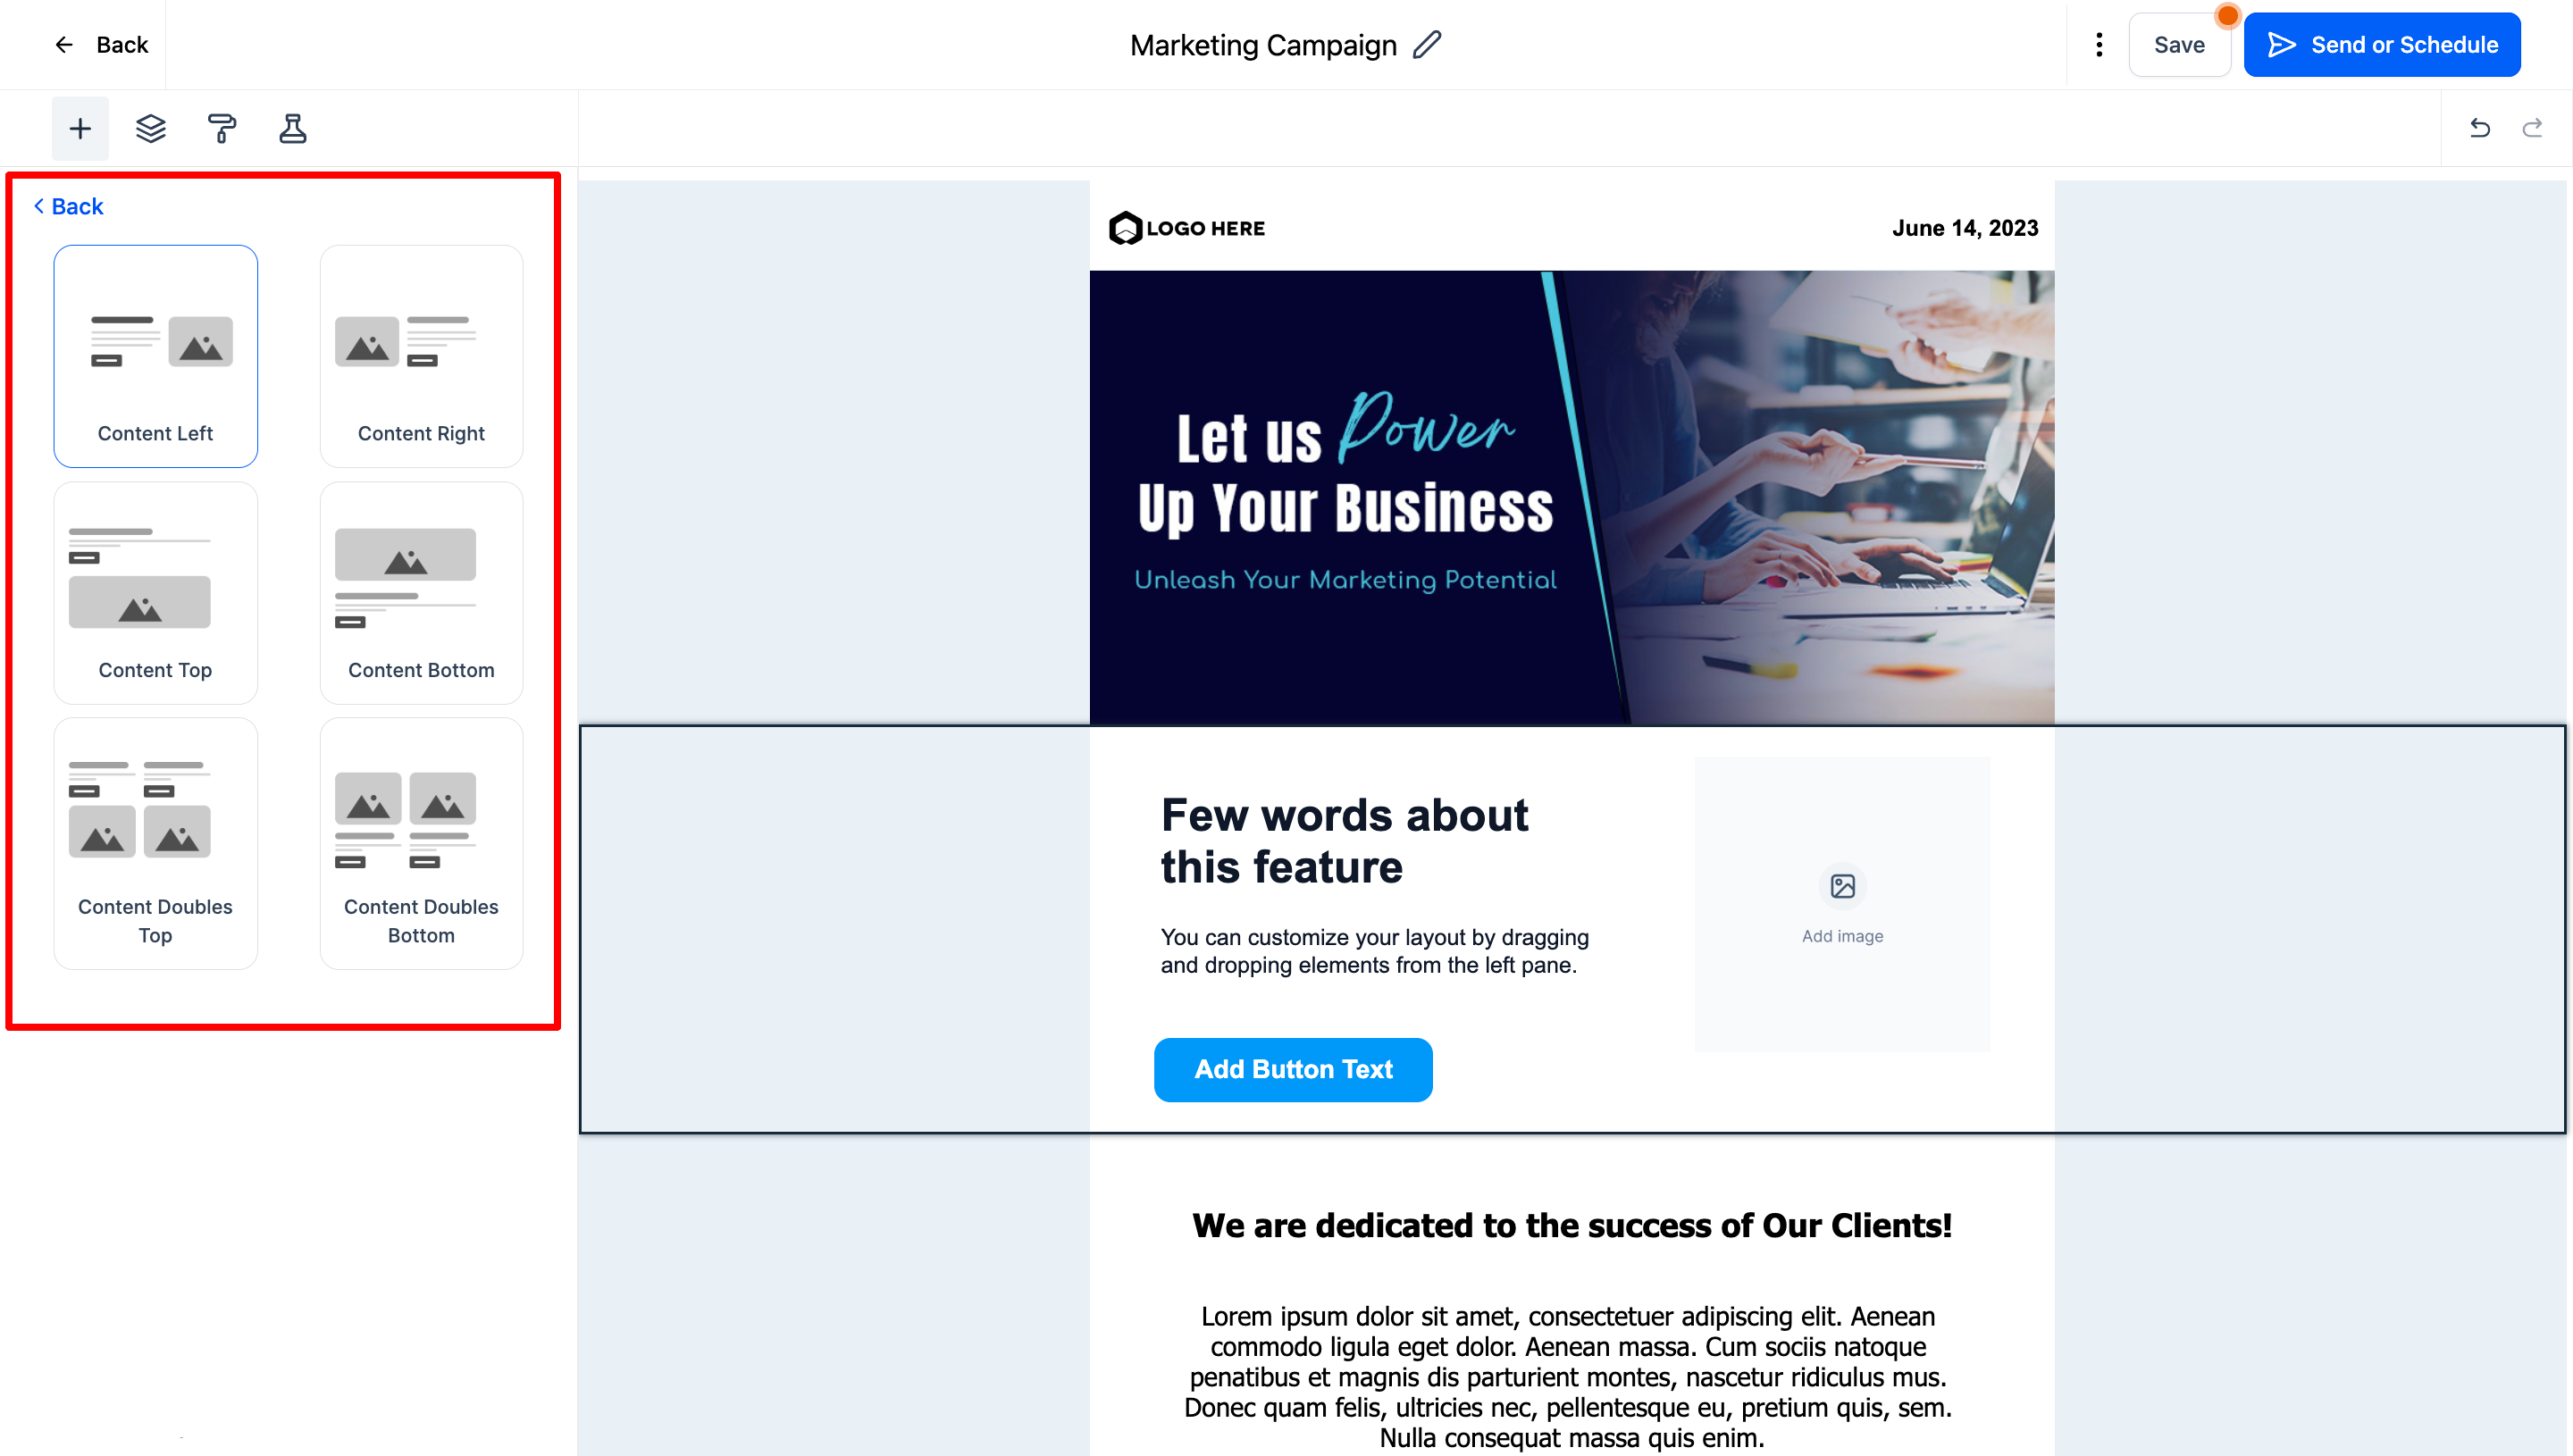
6.Once the layout option is selected, it will show option to select the padding and background color.
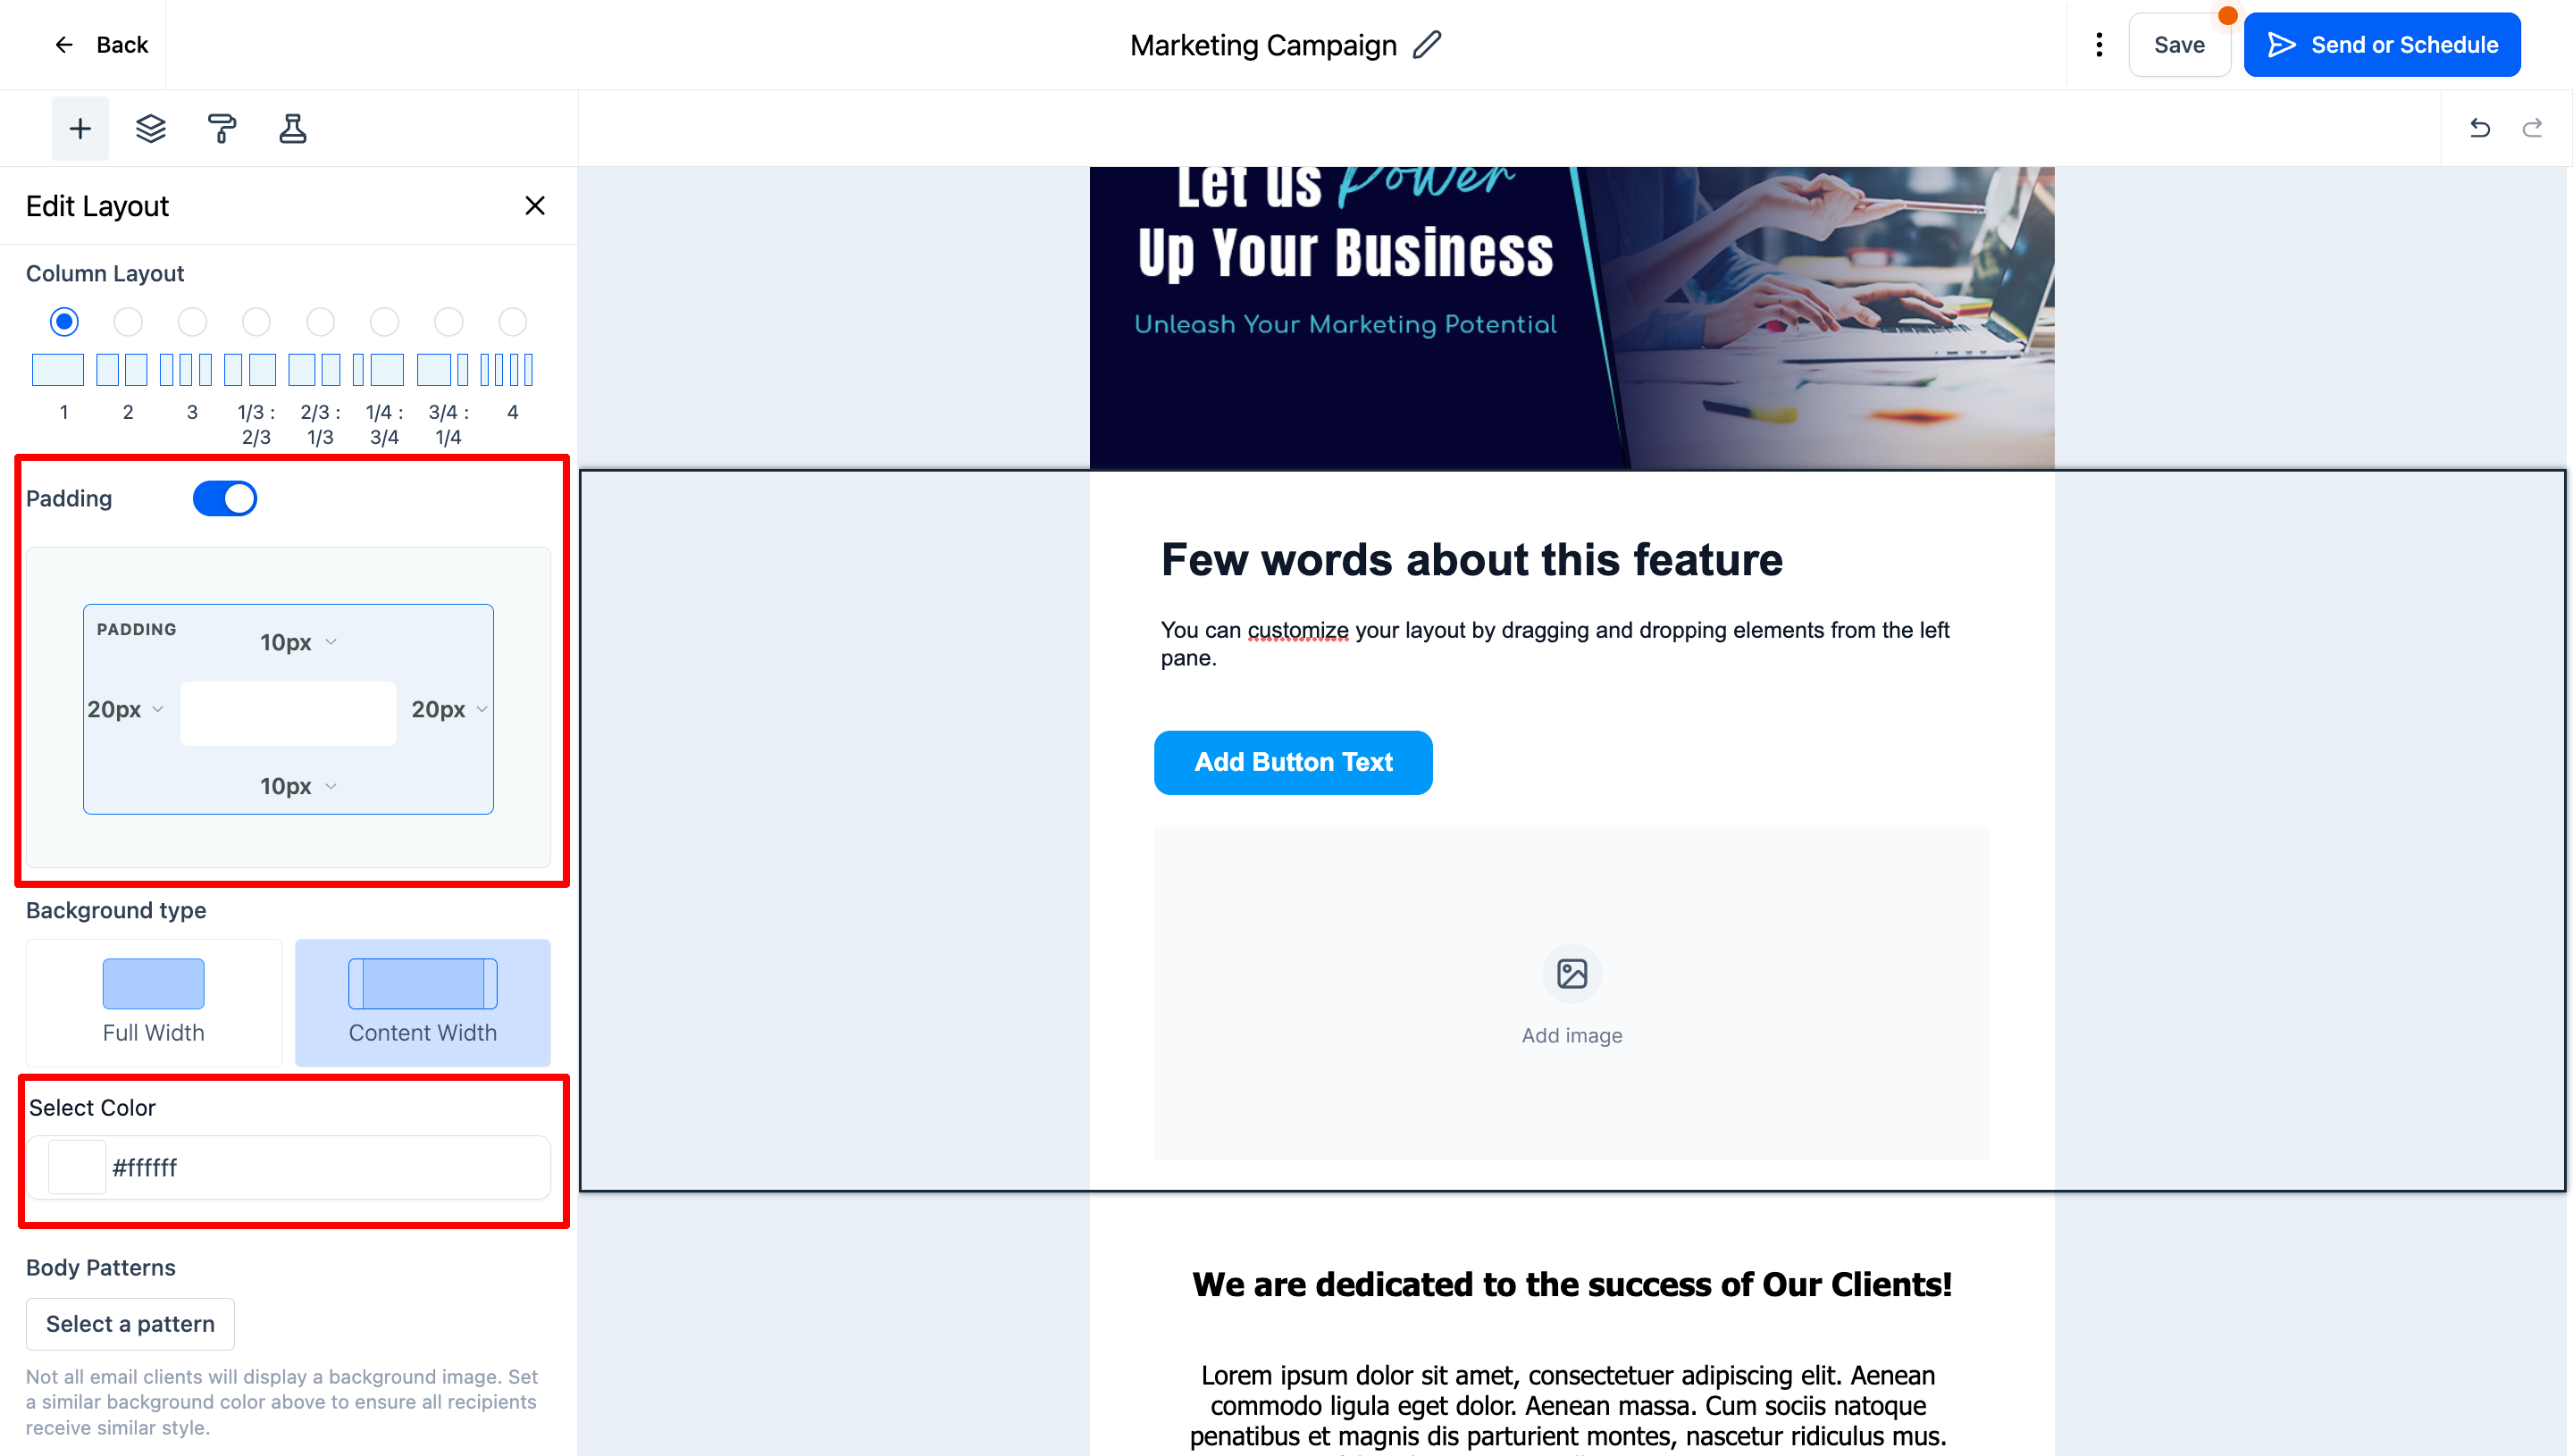
7.Yeyy! You are all set to add the details of emails in one go rather than dragging 3-4 elements.
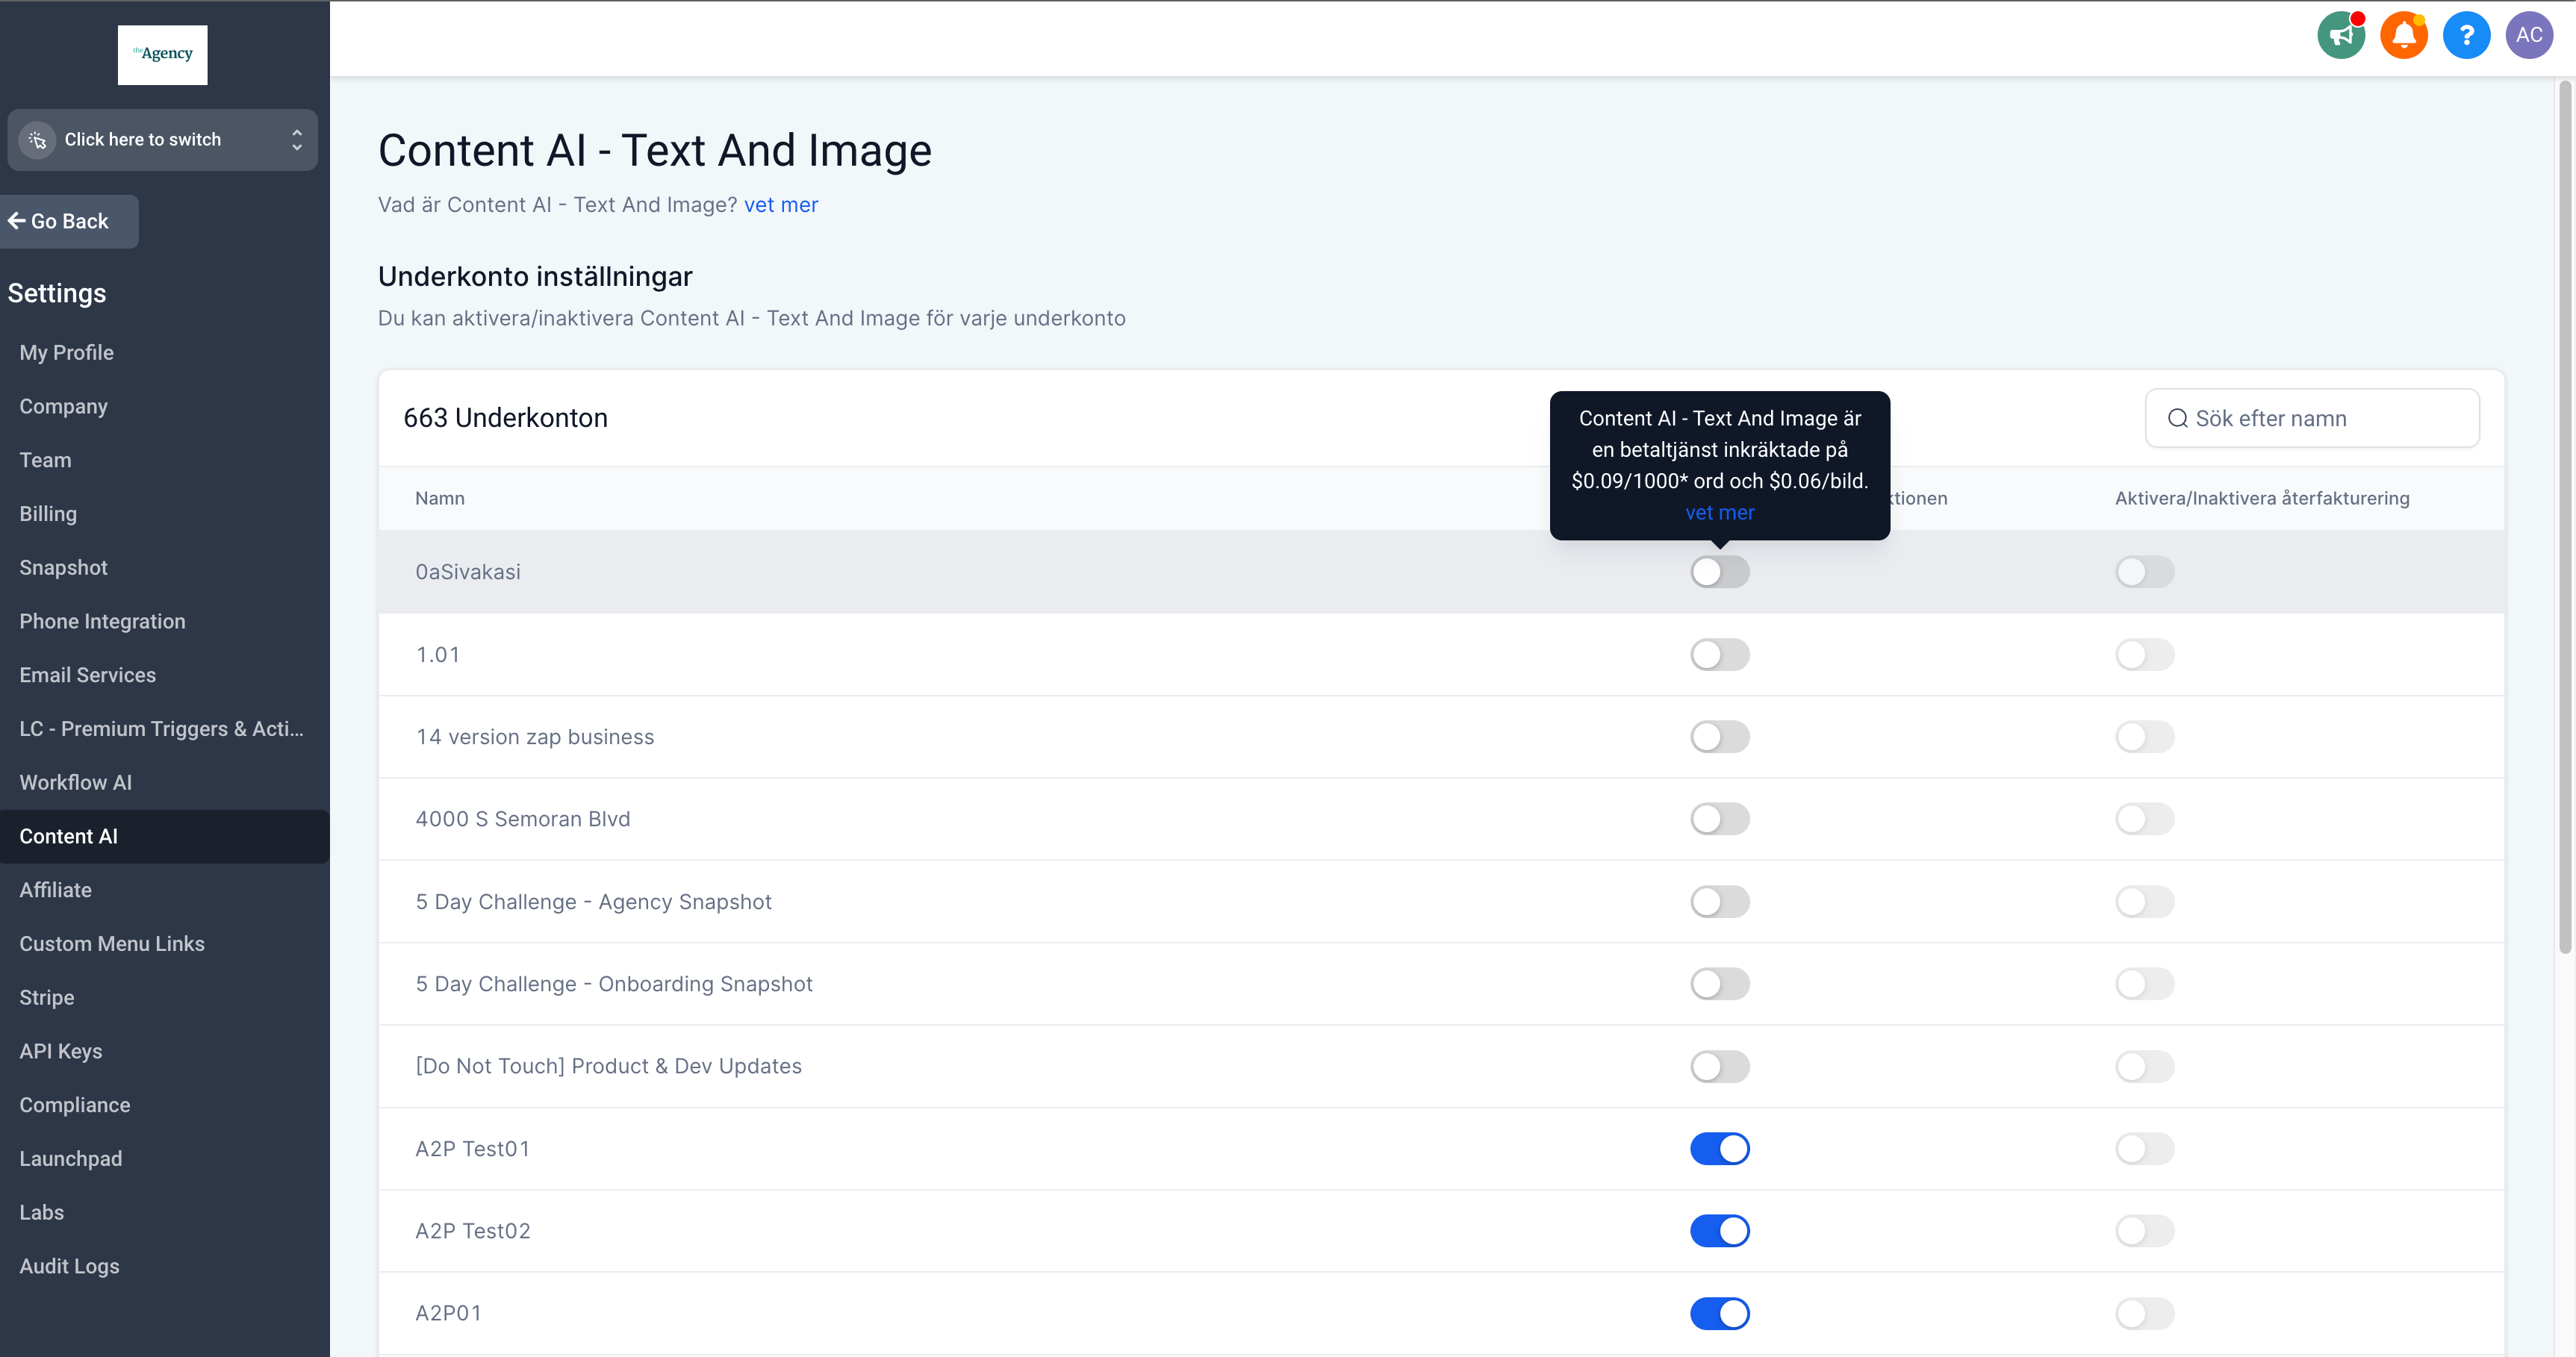
🖼️ Internationalisation for Content AI - Image
Multi-language support is now available for Content AI - Image.
🖼️ What’s New?
Users have the option to choose their preferred language from a list of available languages.
Internationalisation support covers the following languages: -
Spanish
German
French (Canada)
French (France)
Portuguese (Portugal)
Portuguese (Brazil)
Italian
Dutch
Swedish
Danish
Finnish
Norwegian
🤩 How to set up the language preference?
There are two ways to do it. One uses the User’s profile settings and another uses the Business Profile Settings.
To select a preferred language for a user go to Settings -> My Profile -> Platform Language
To select a preferred language for a business go to Settings -> Business Profile -> Platform Language
The language selected under My Profile will take a preference over the language selected under the Business Profile
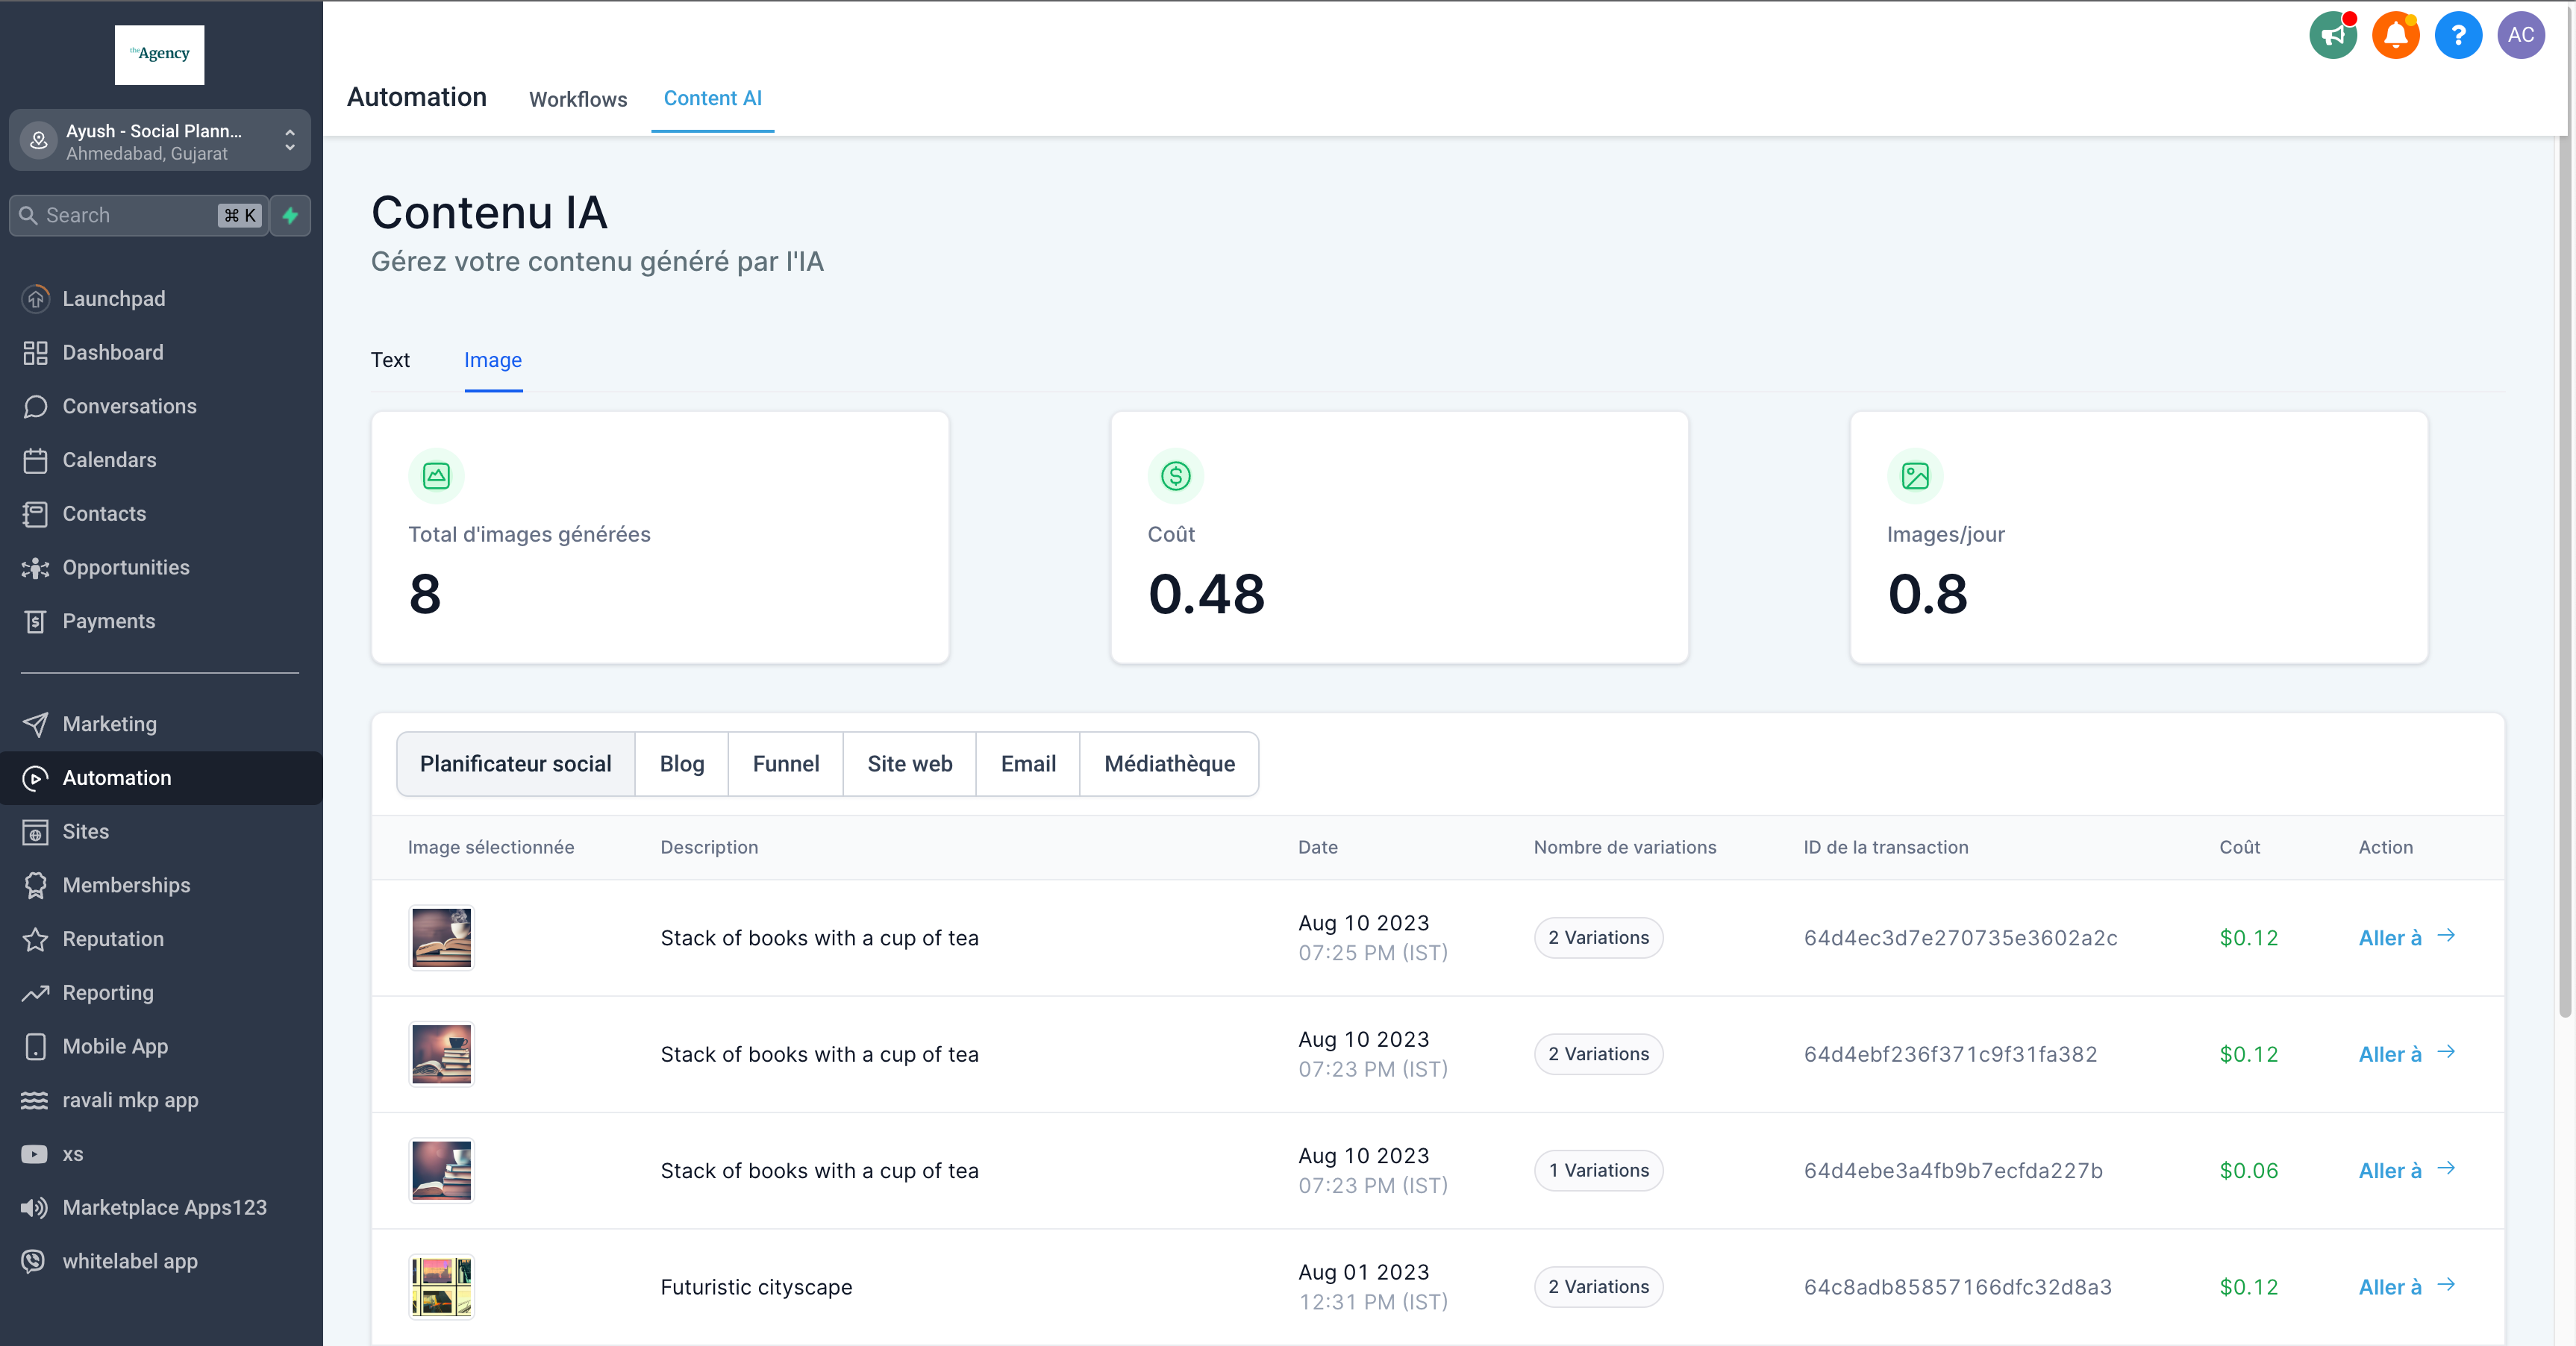
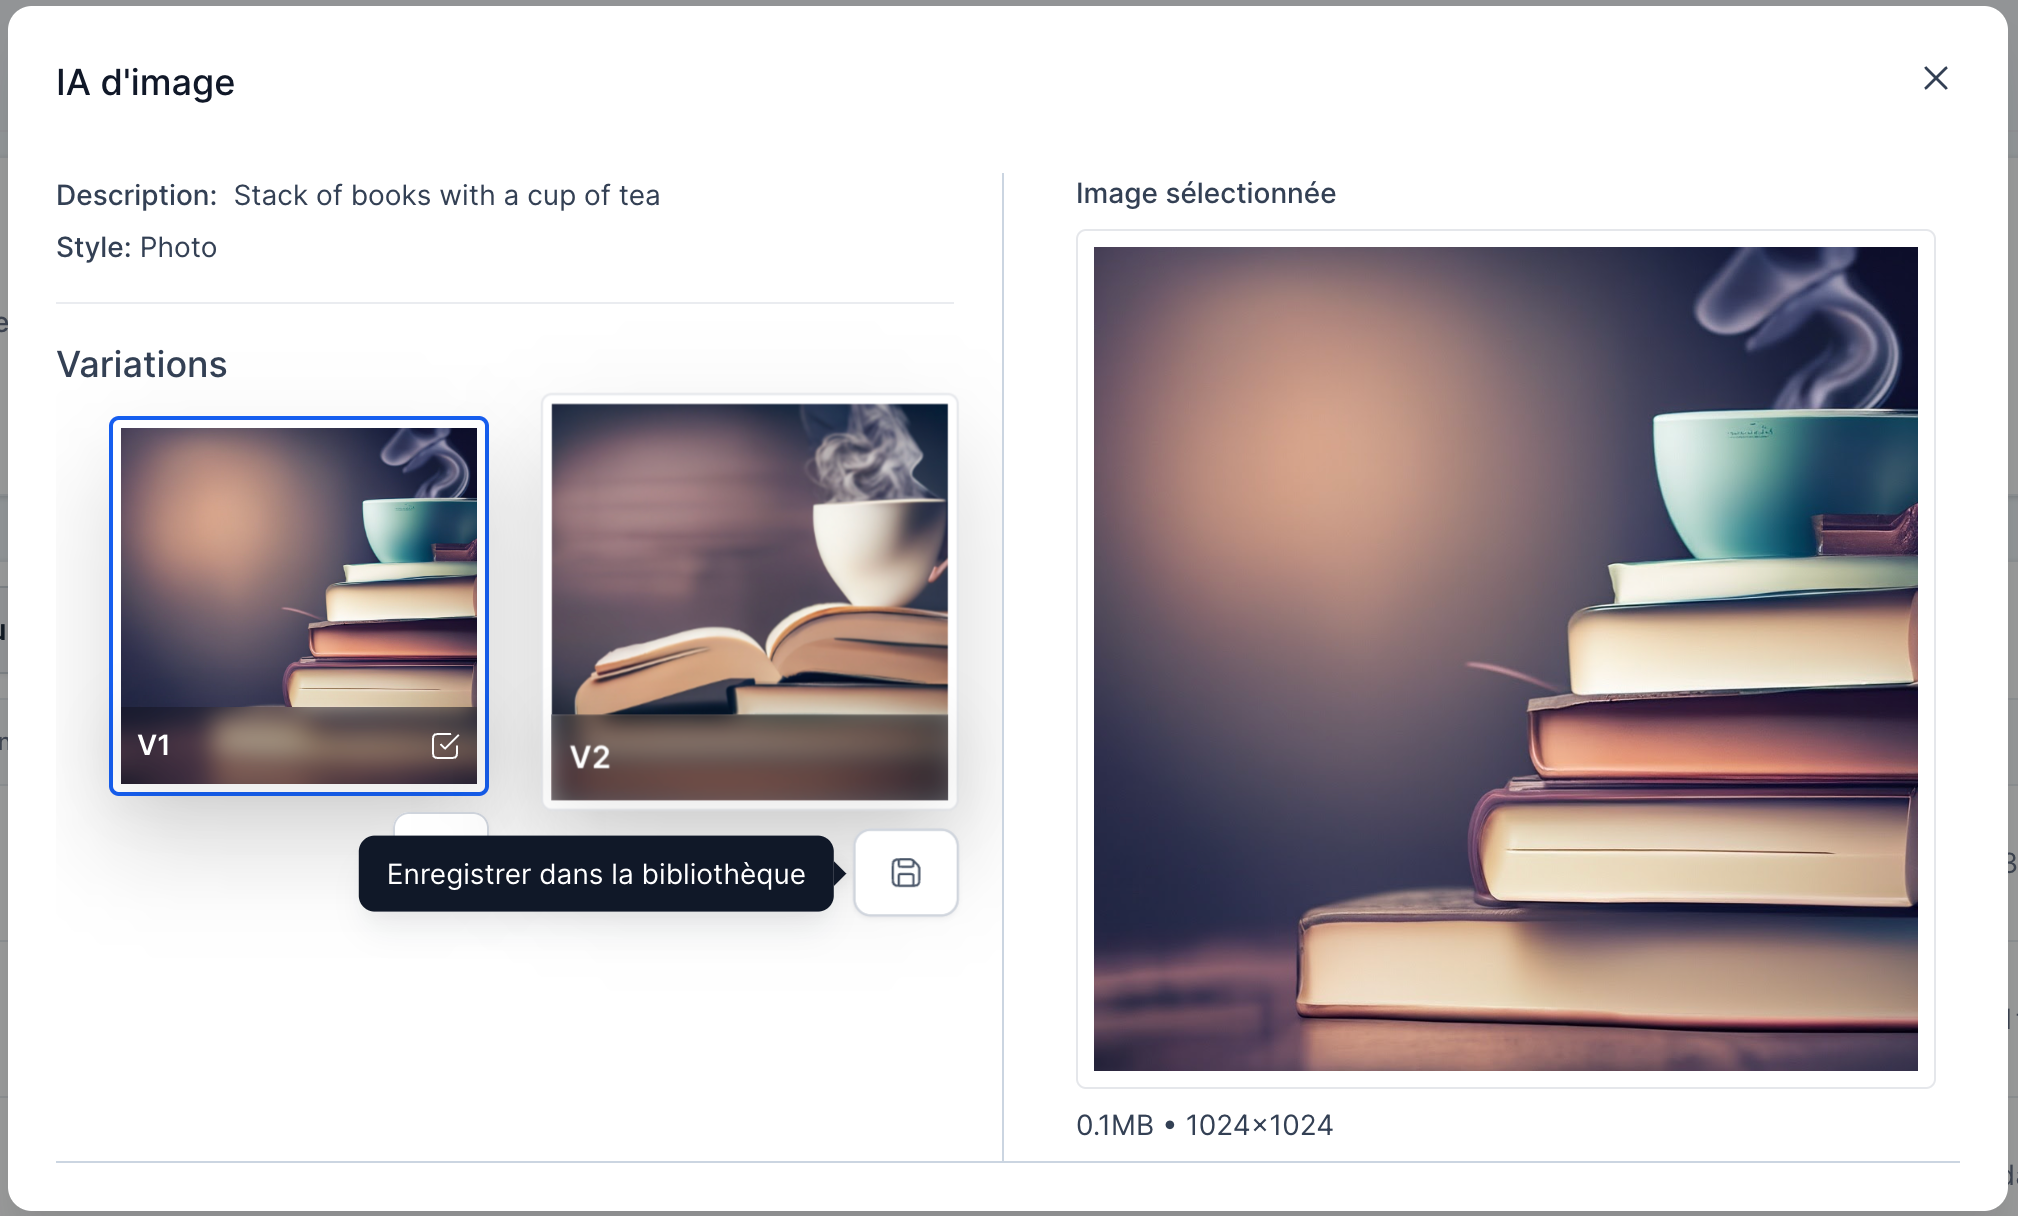
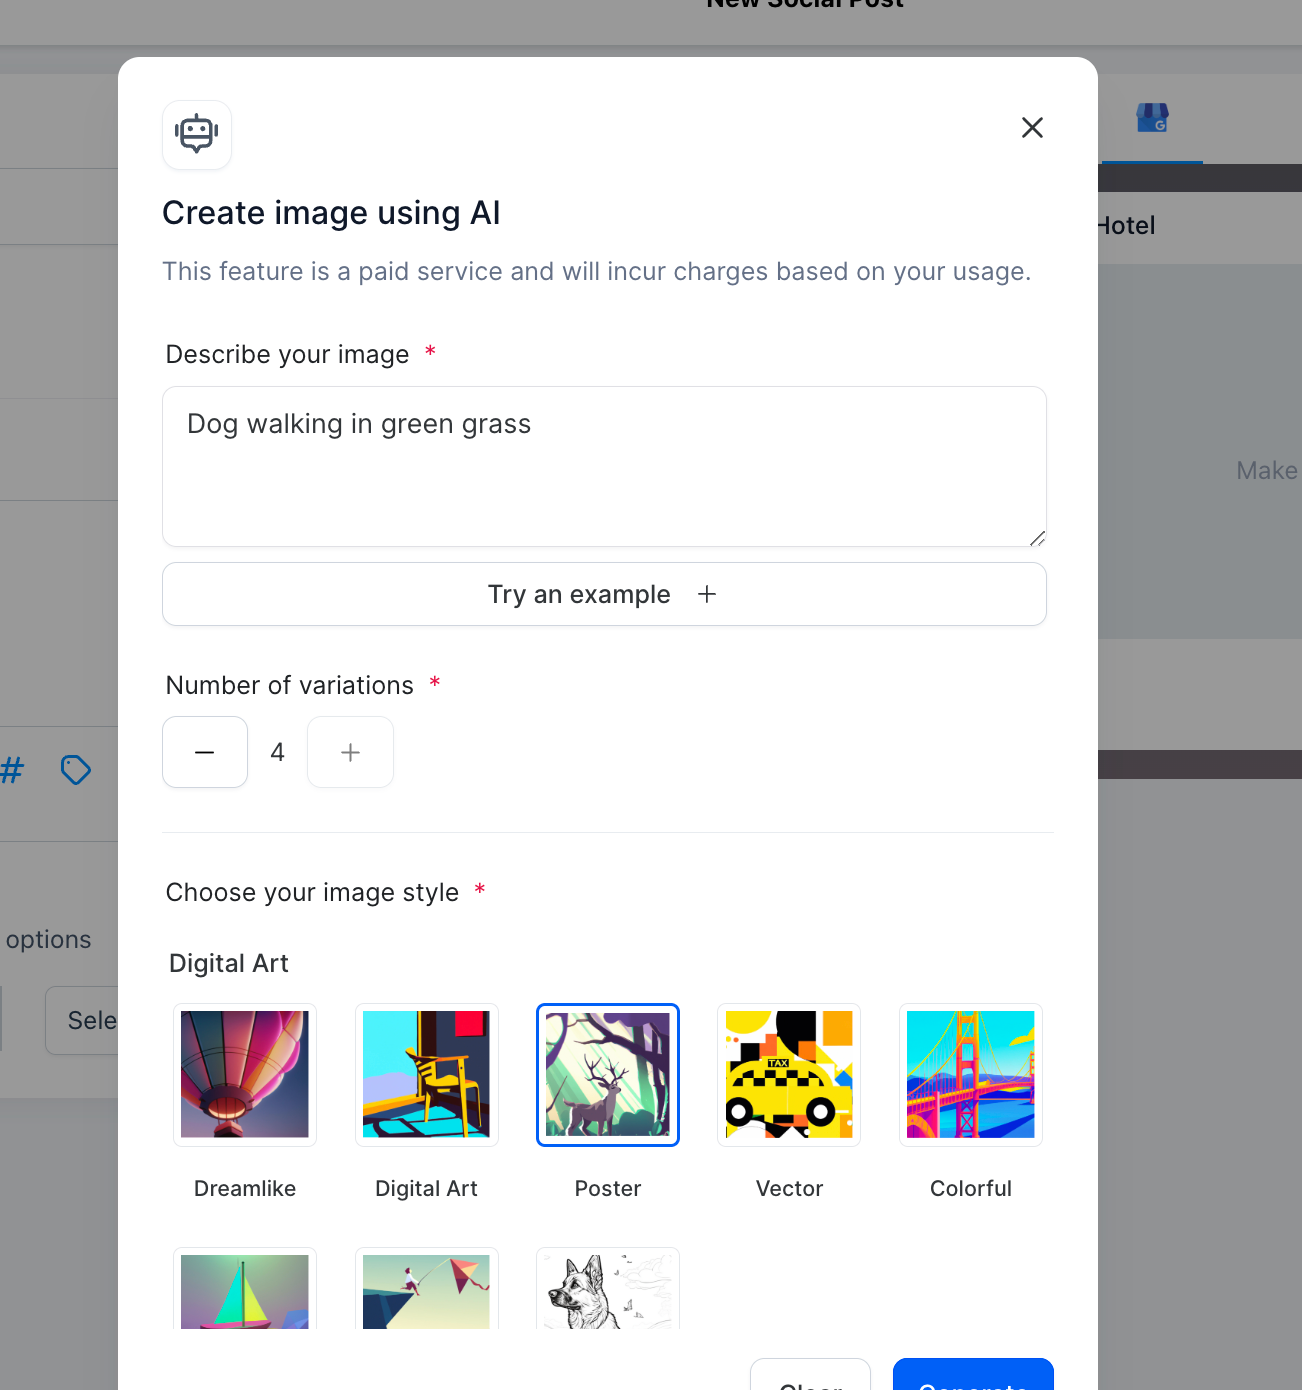
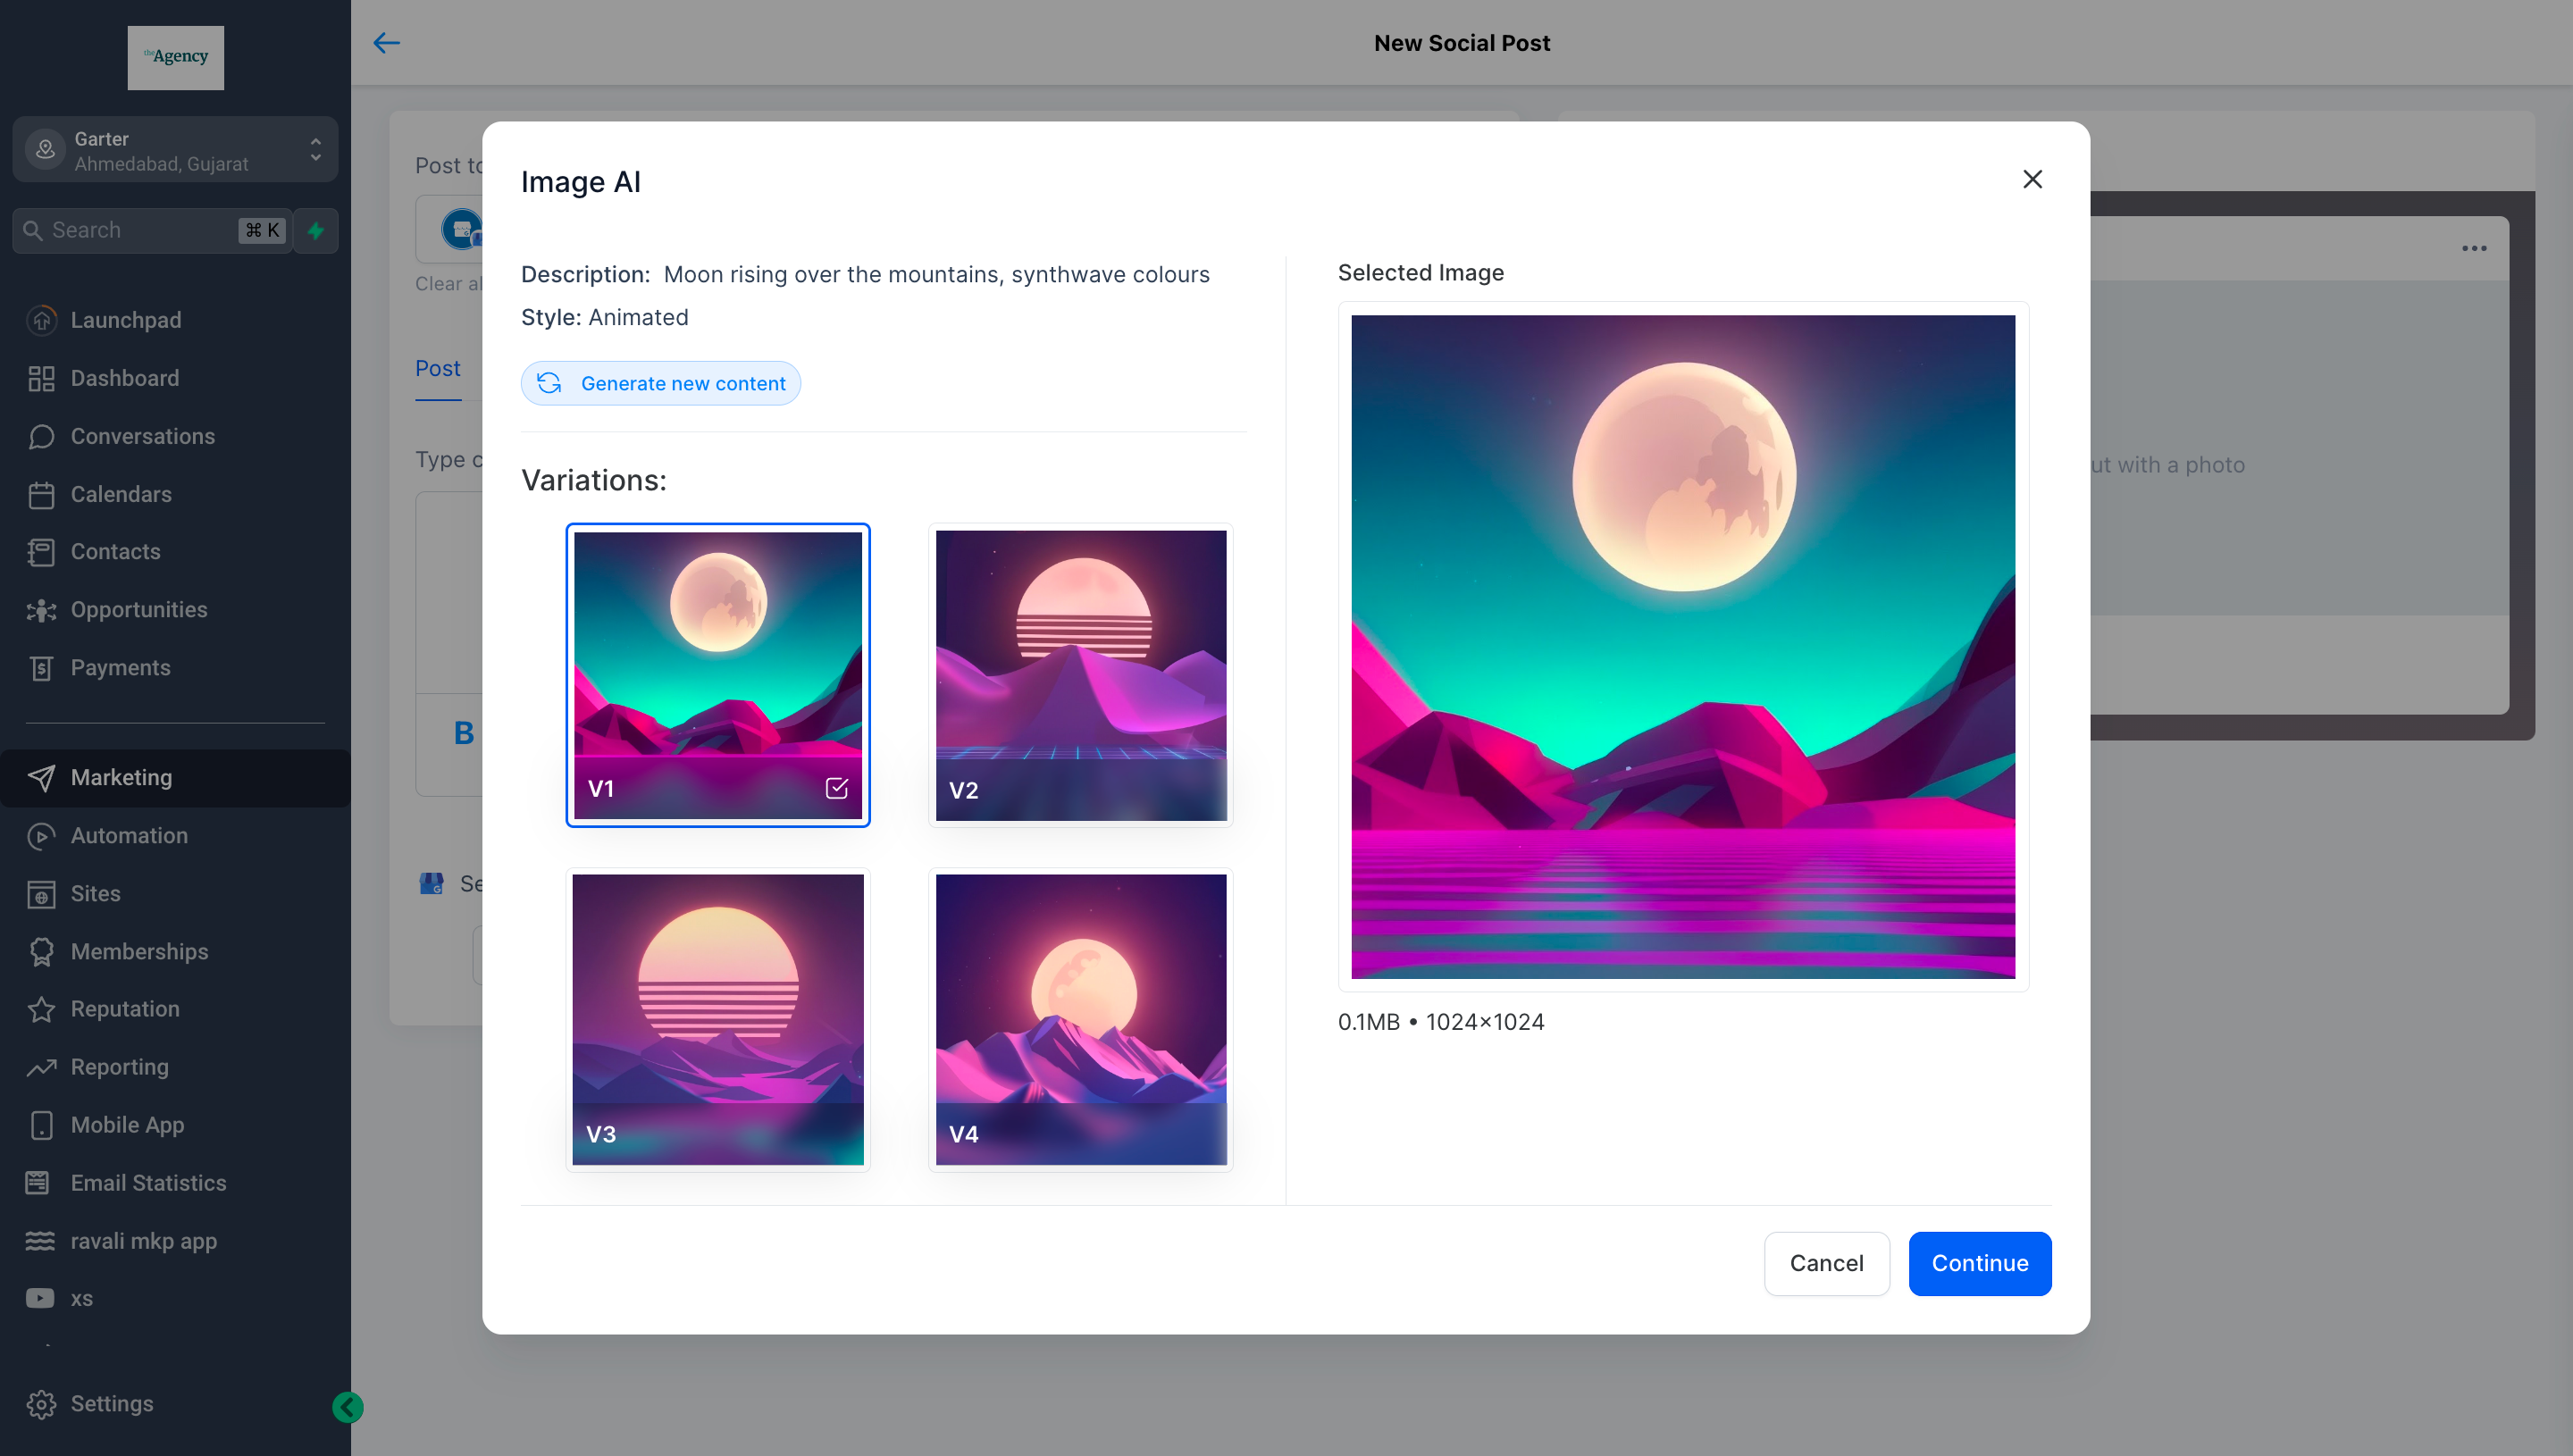
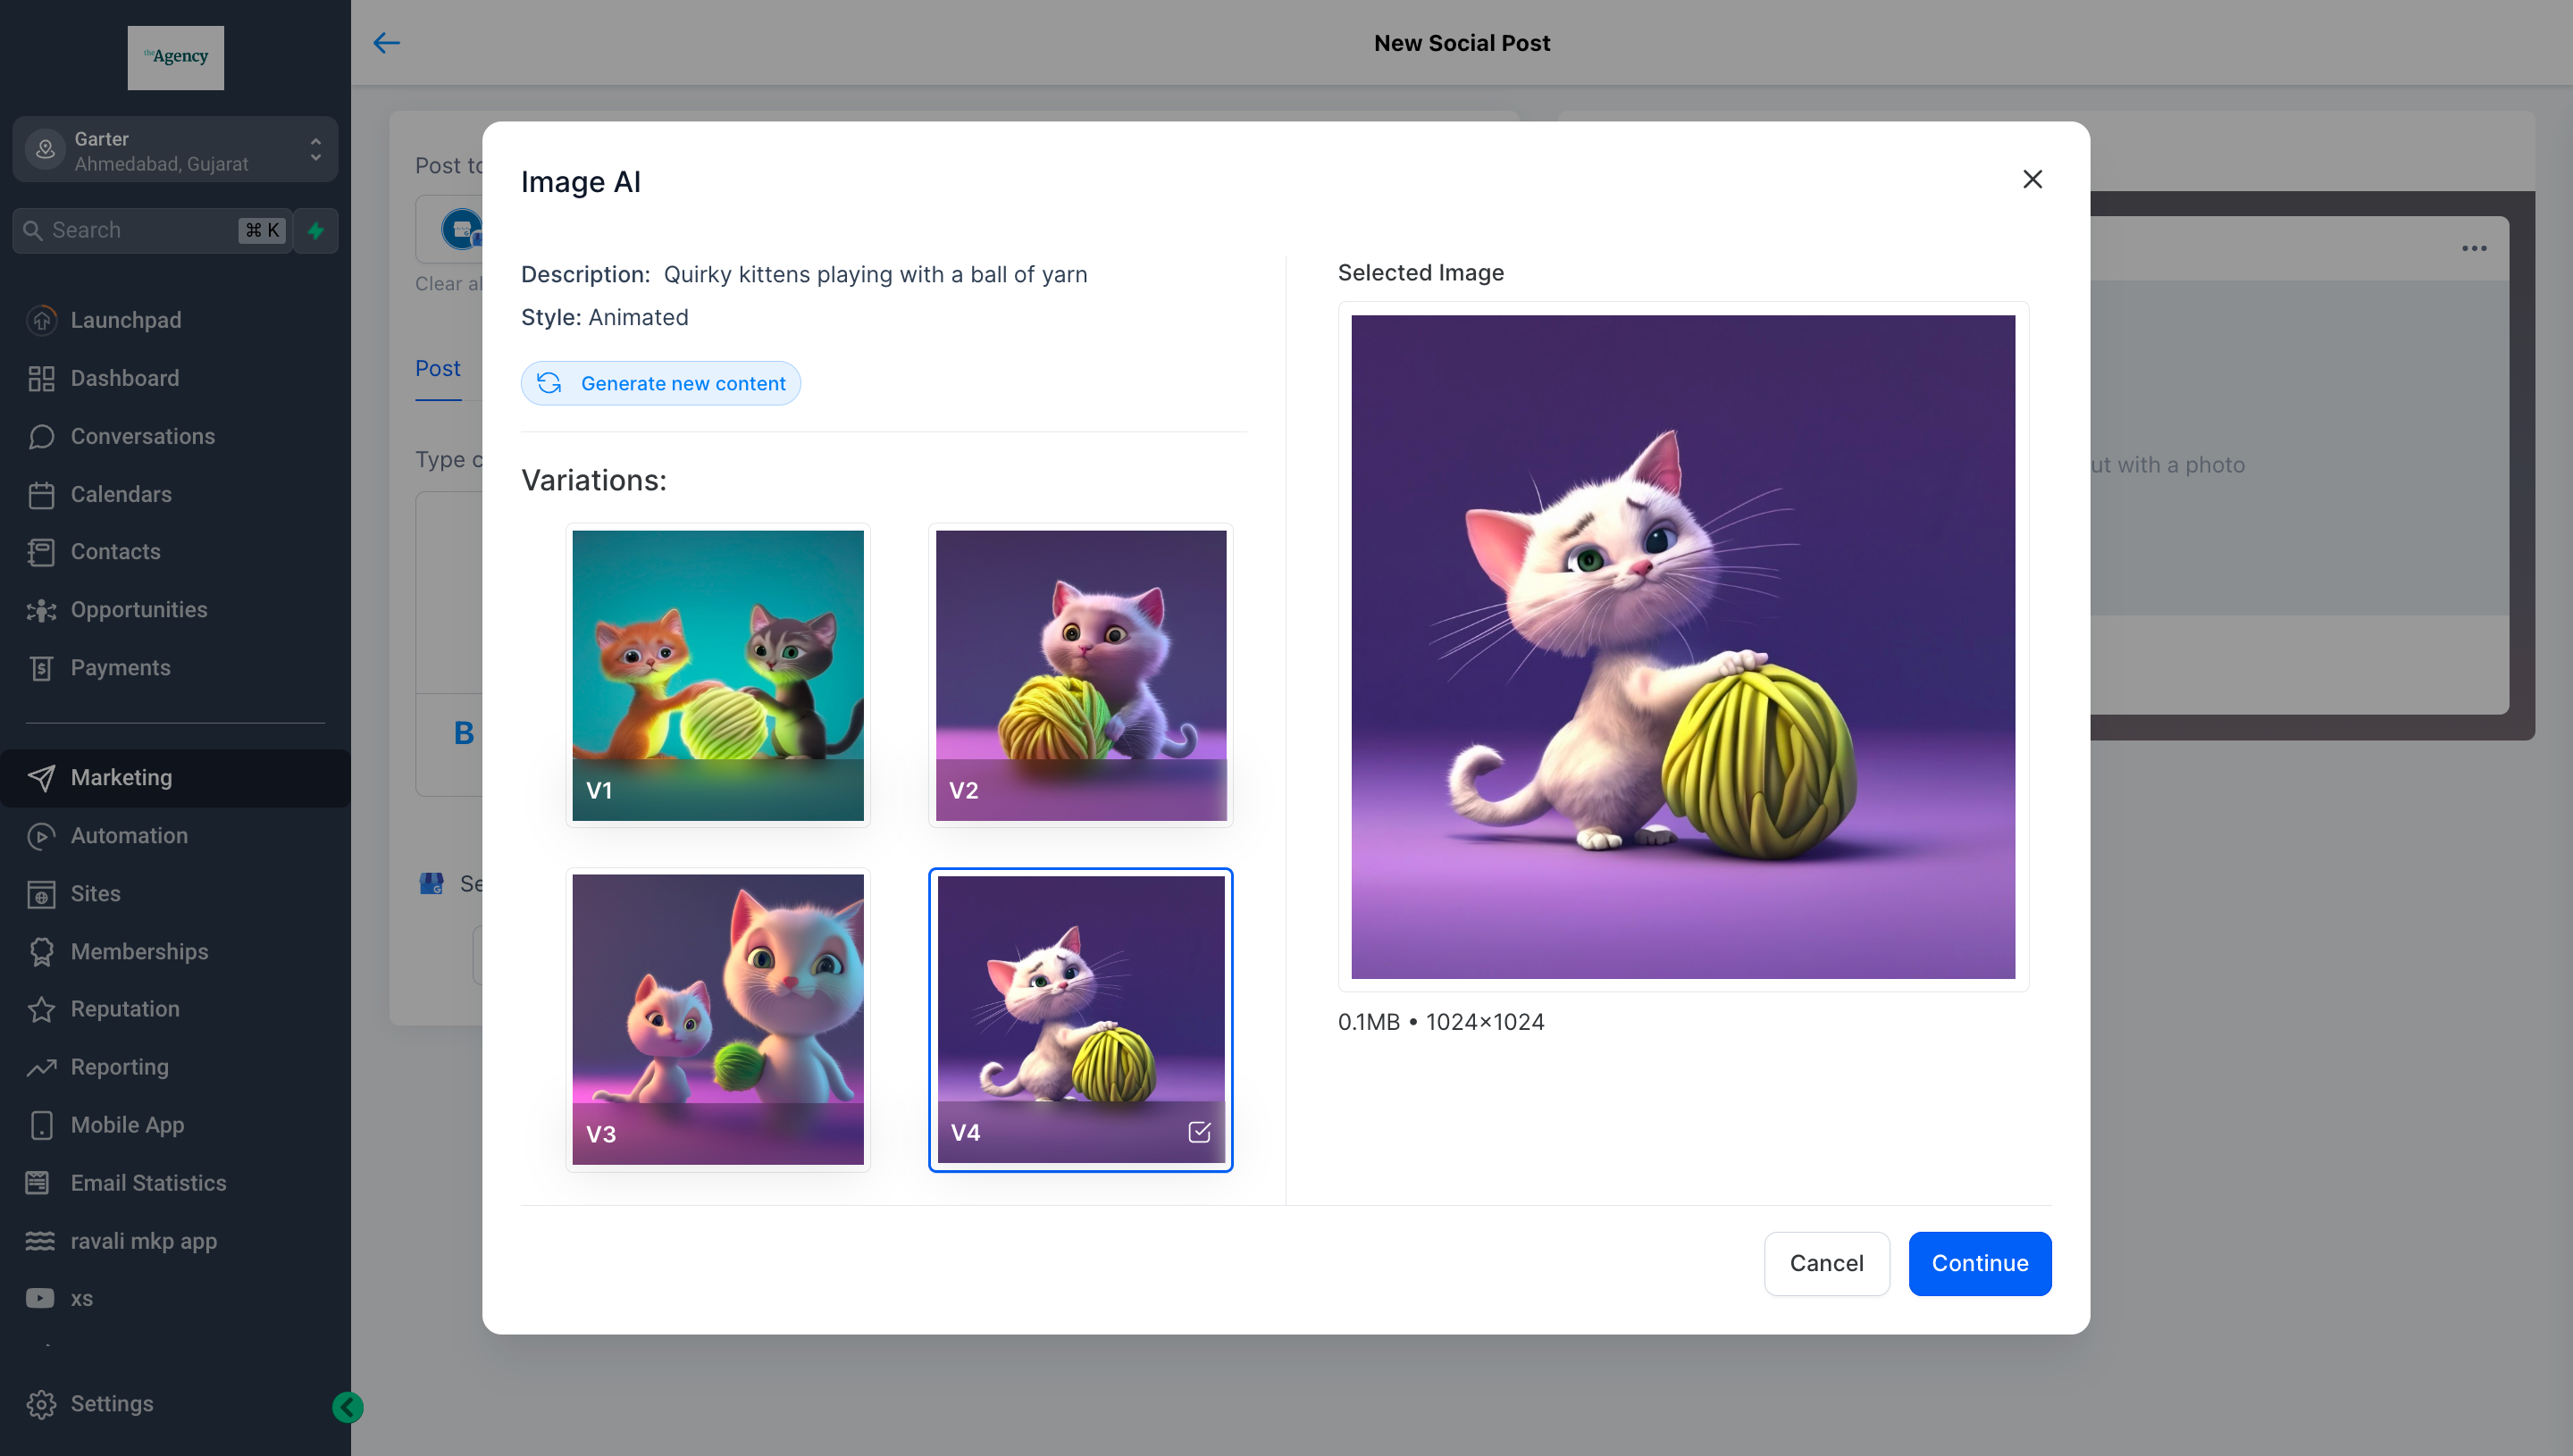
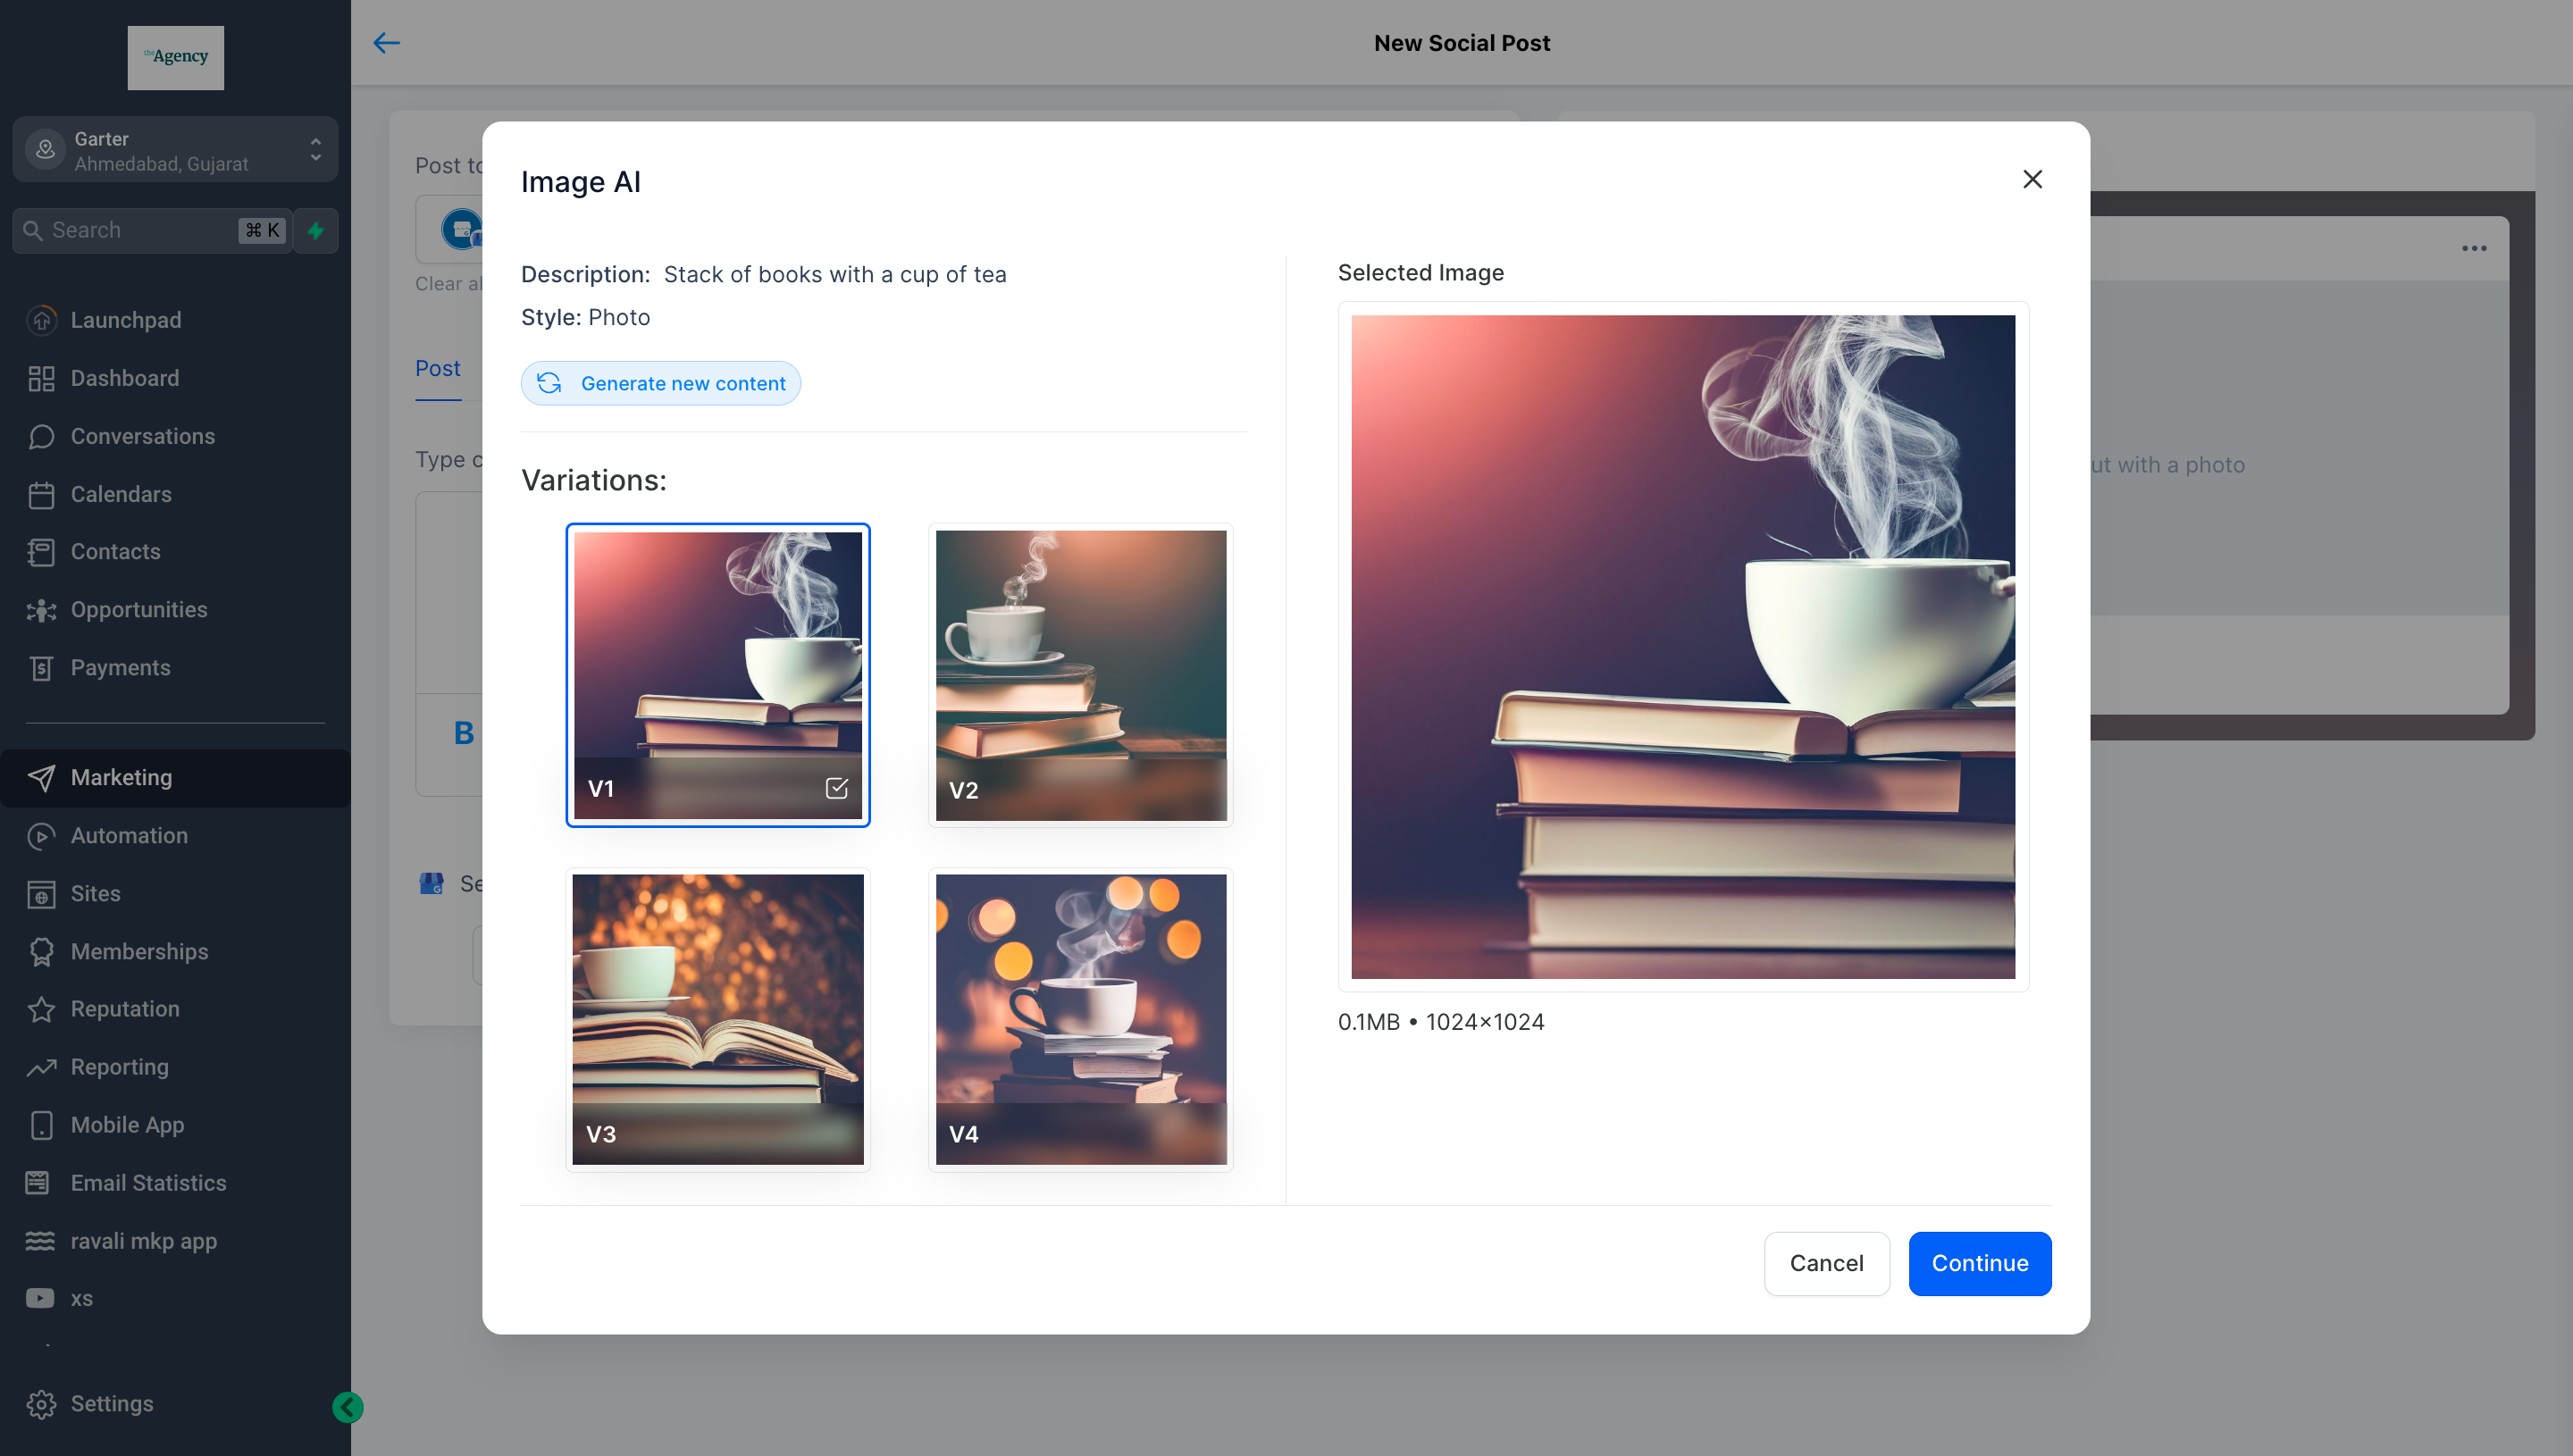
💃 Improved Content AI - Image
Exciting news! The updated Content AI for images is here
In some cases, Images with human figure/faces may not be perfect. We are actively working to improve the quality.
Sometimes based on the prompt and variation added for example 4 variations needed, it will not bring up 4 images and just bring 1 image. The user will not get charged for 4 images, they will get charged for only 1 image.
Filmic option in style is renamed to Animated
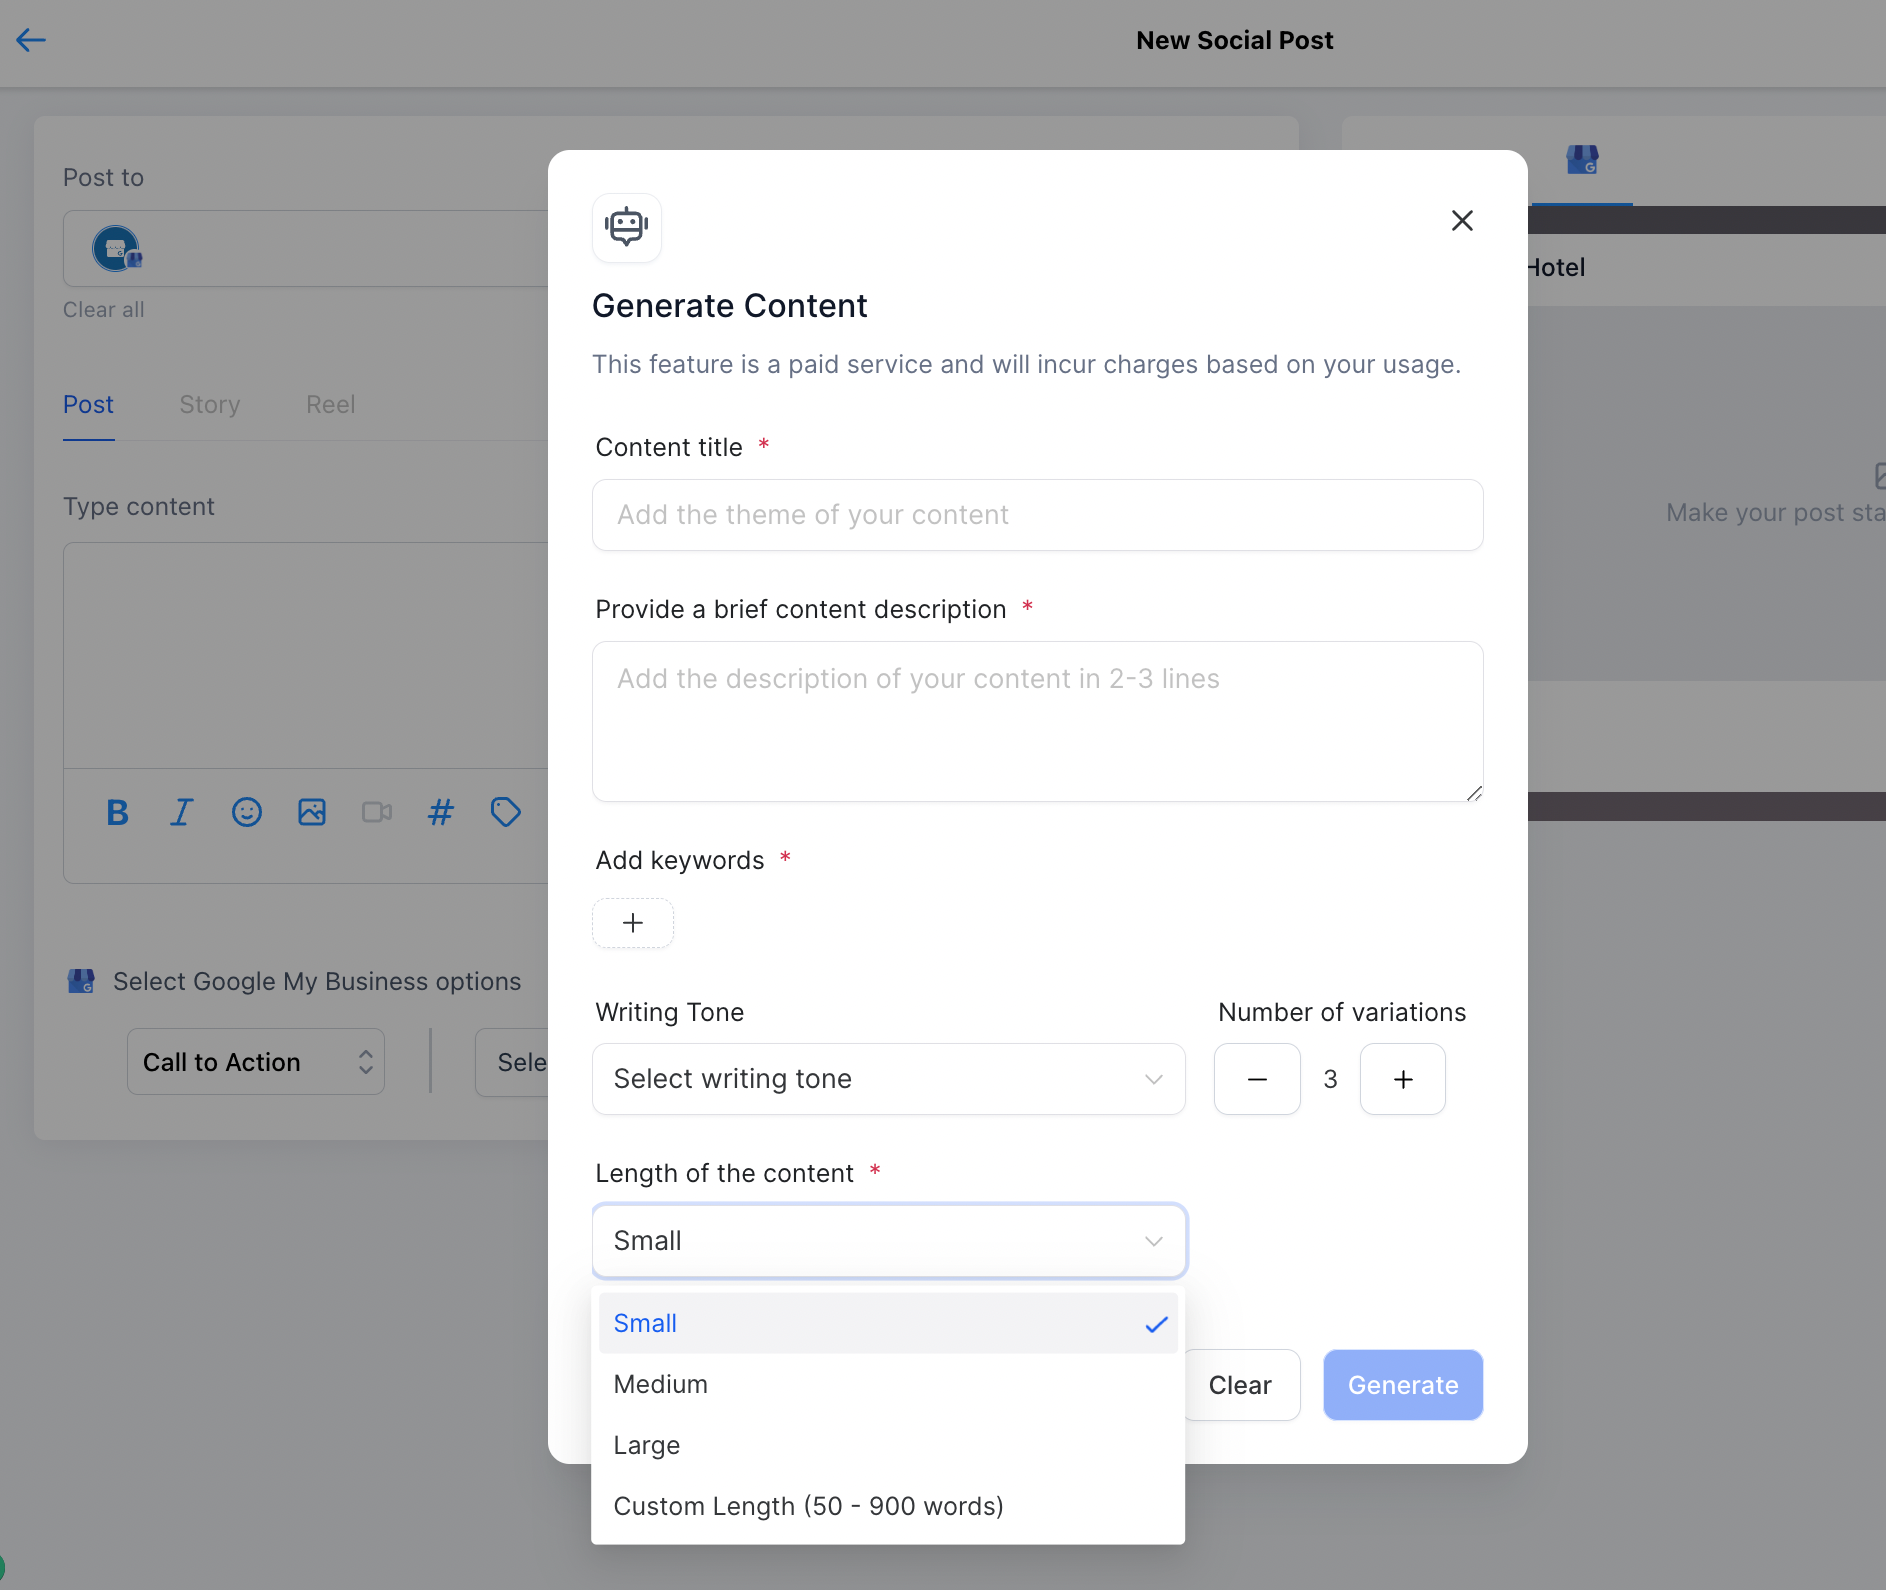
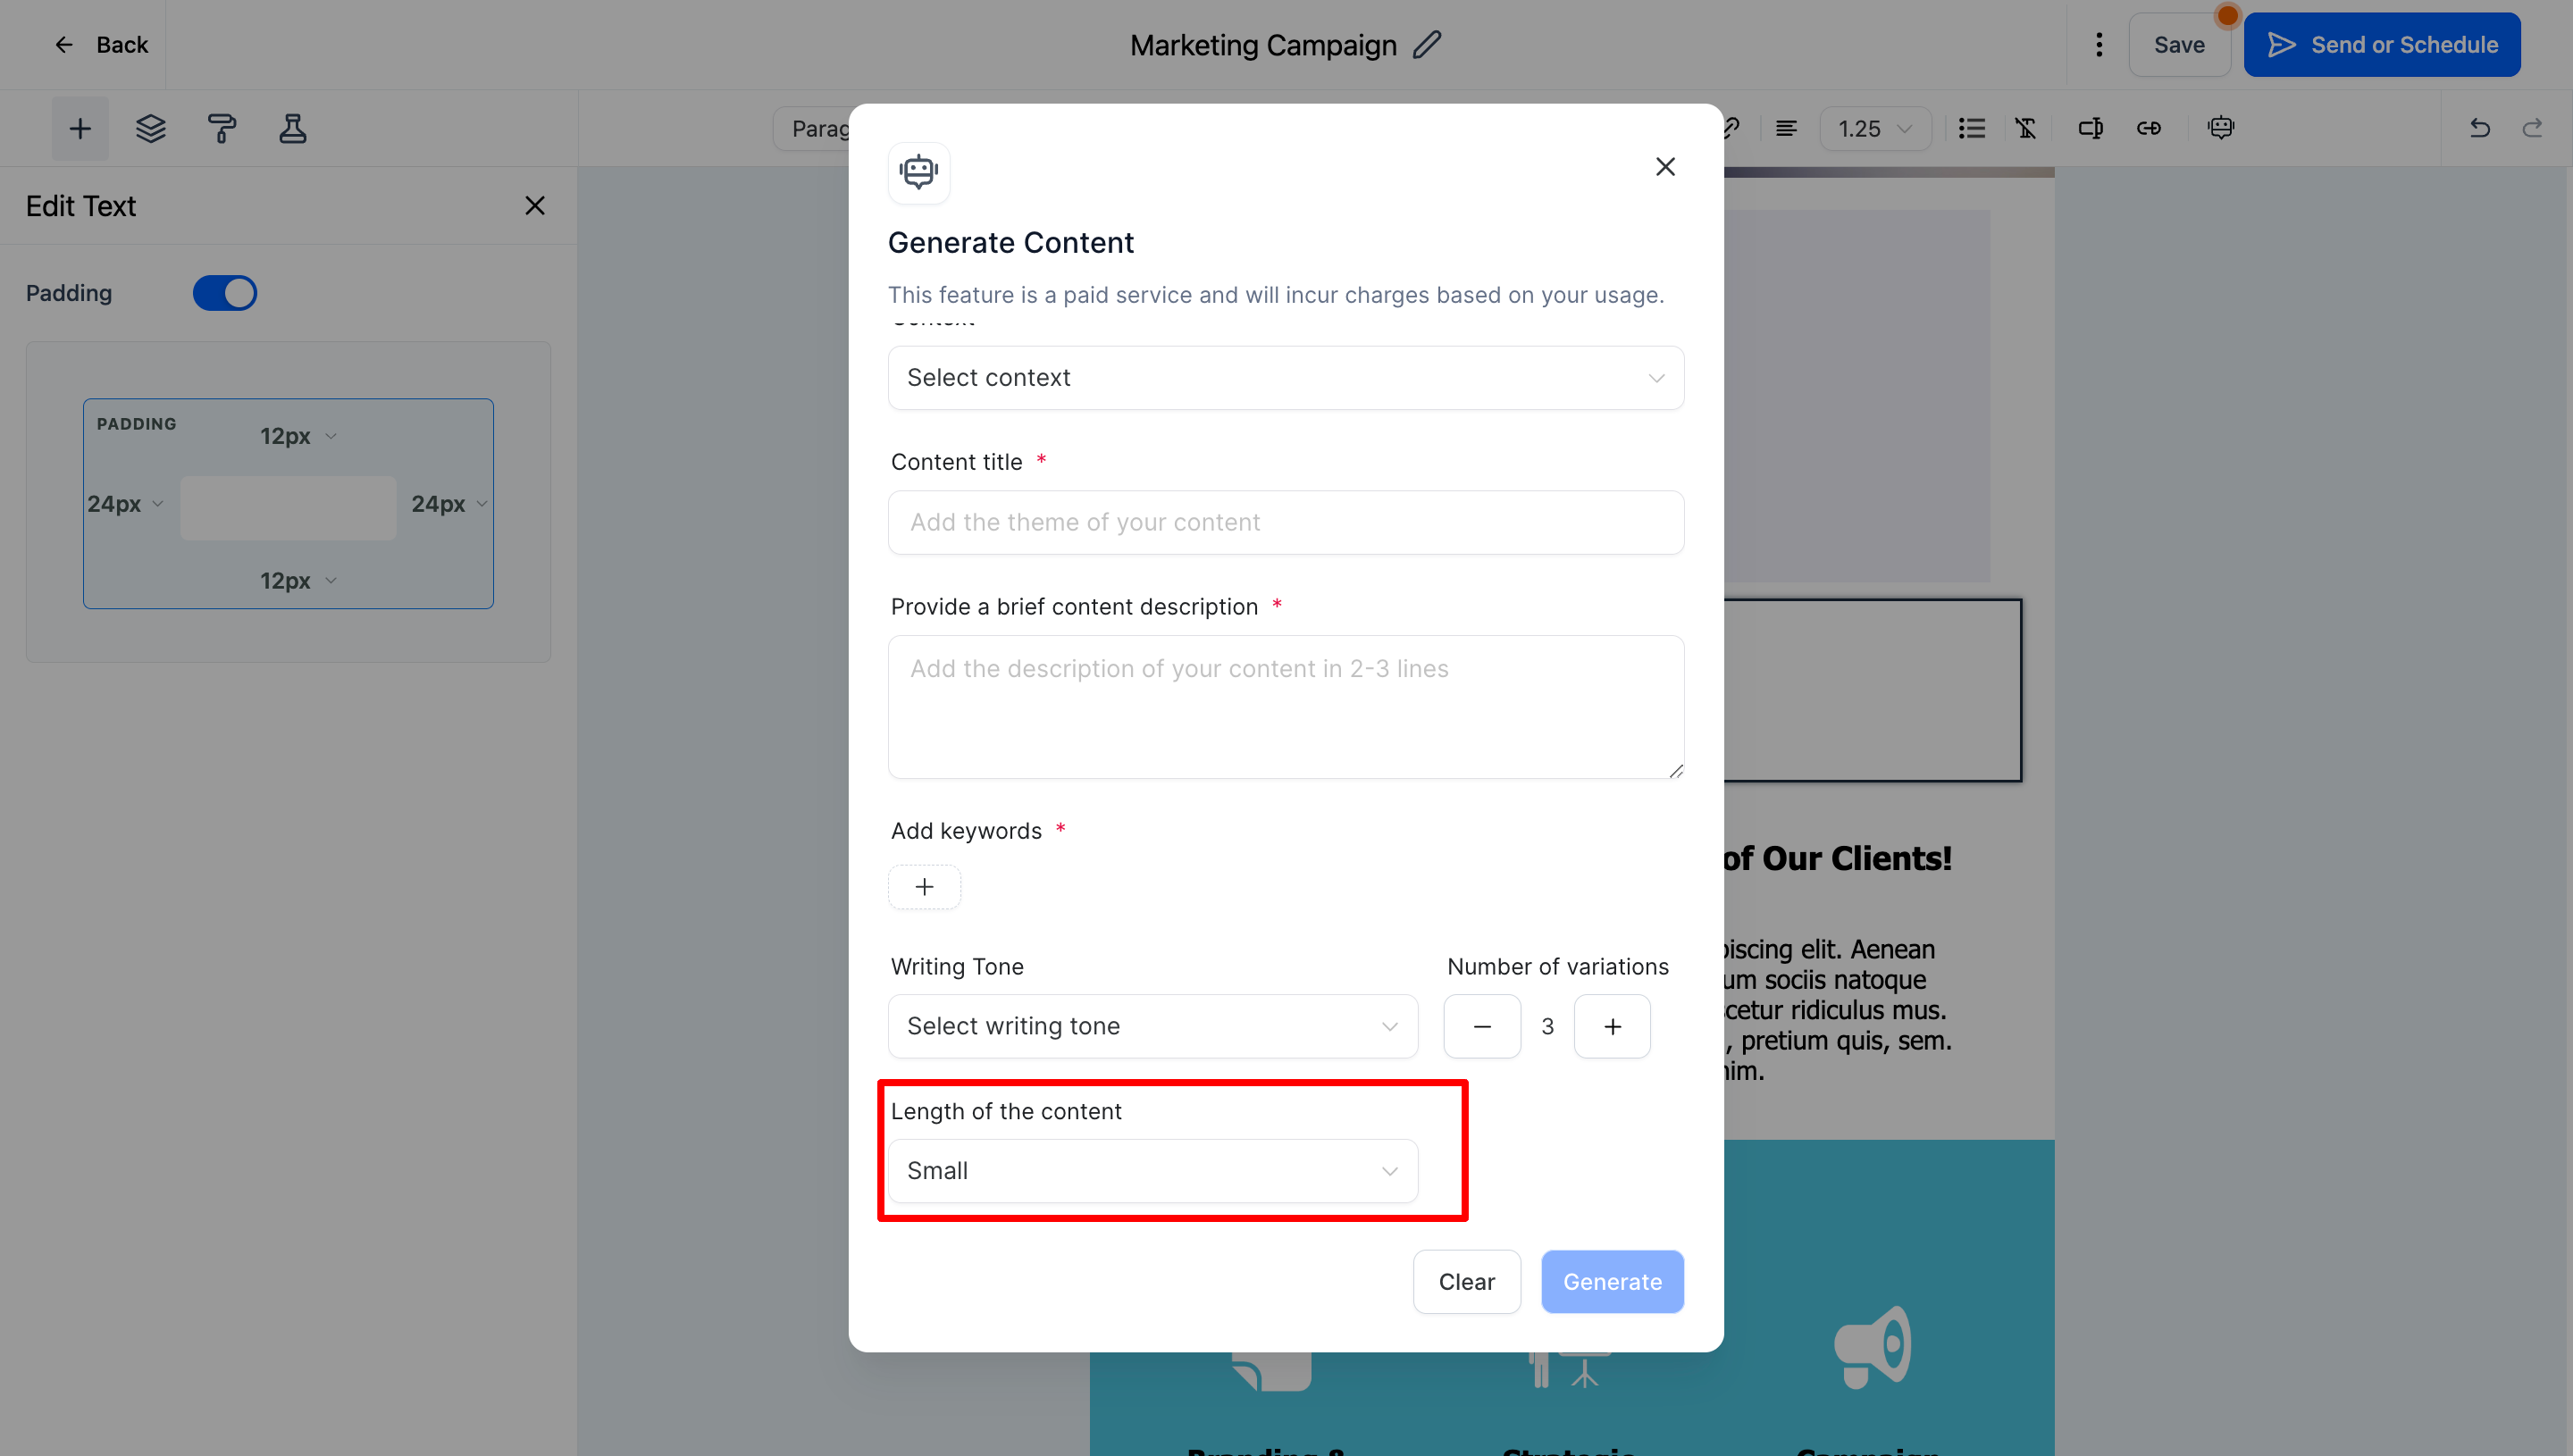
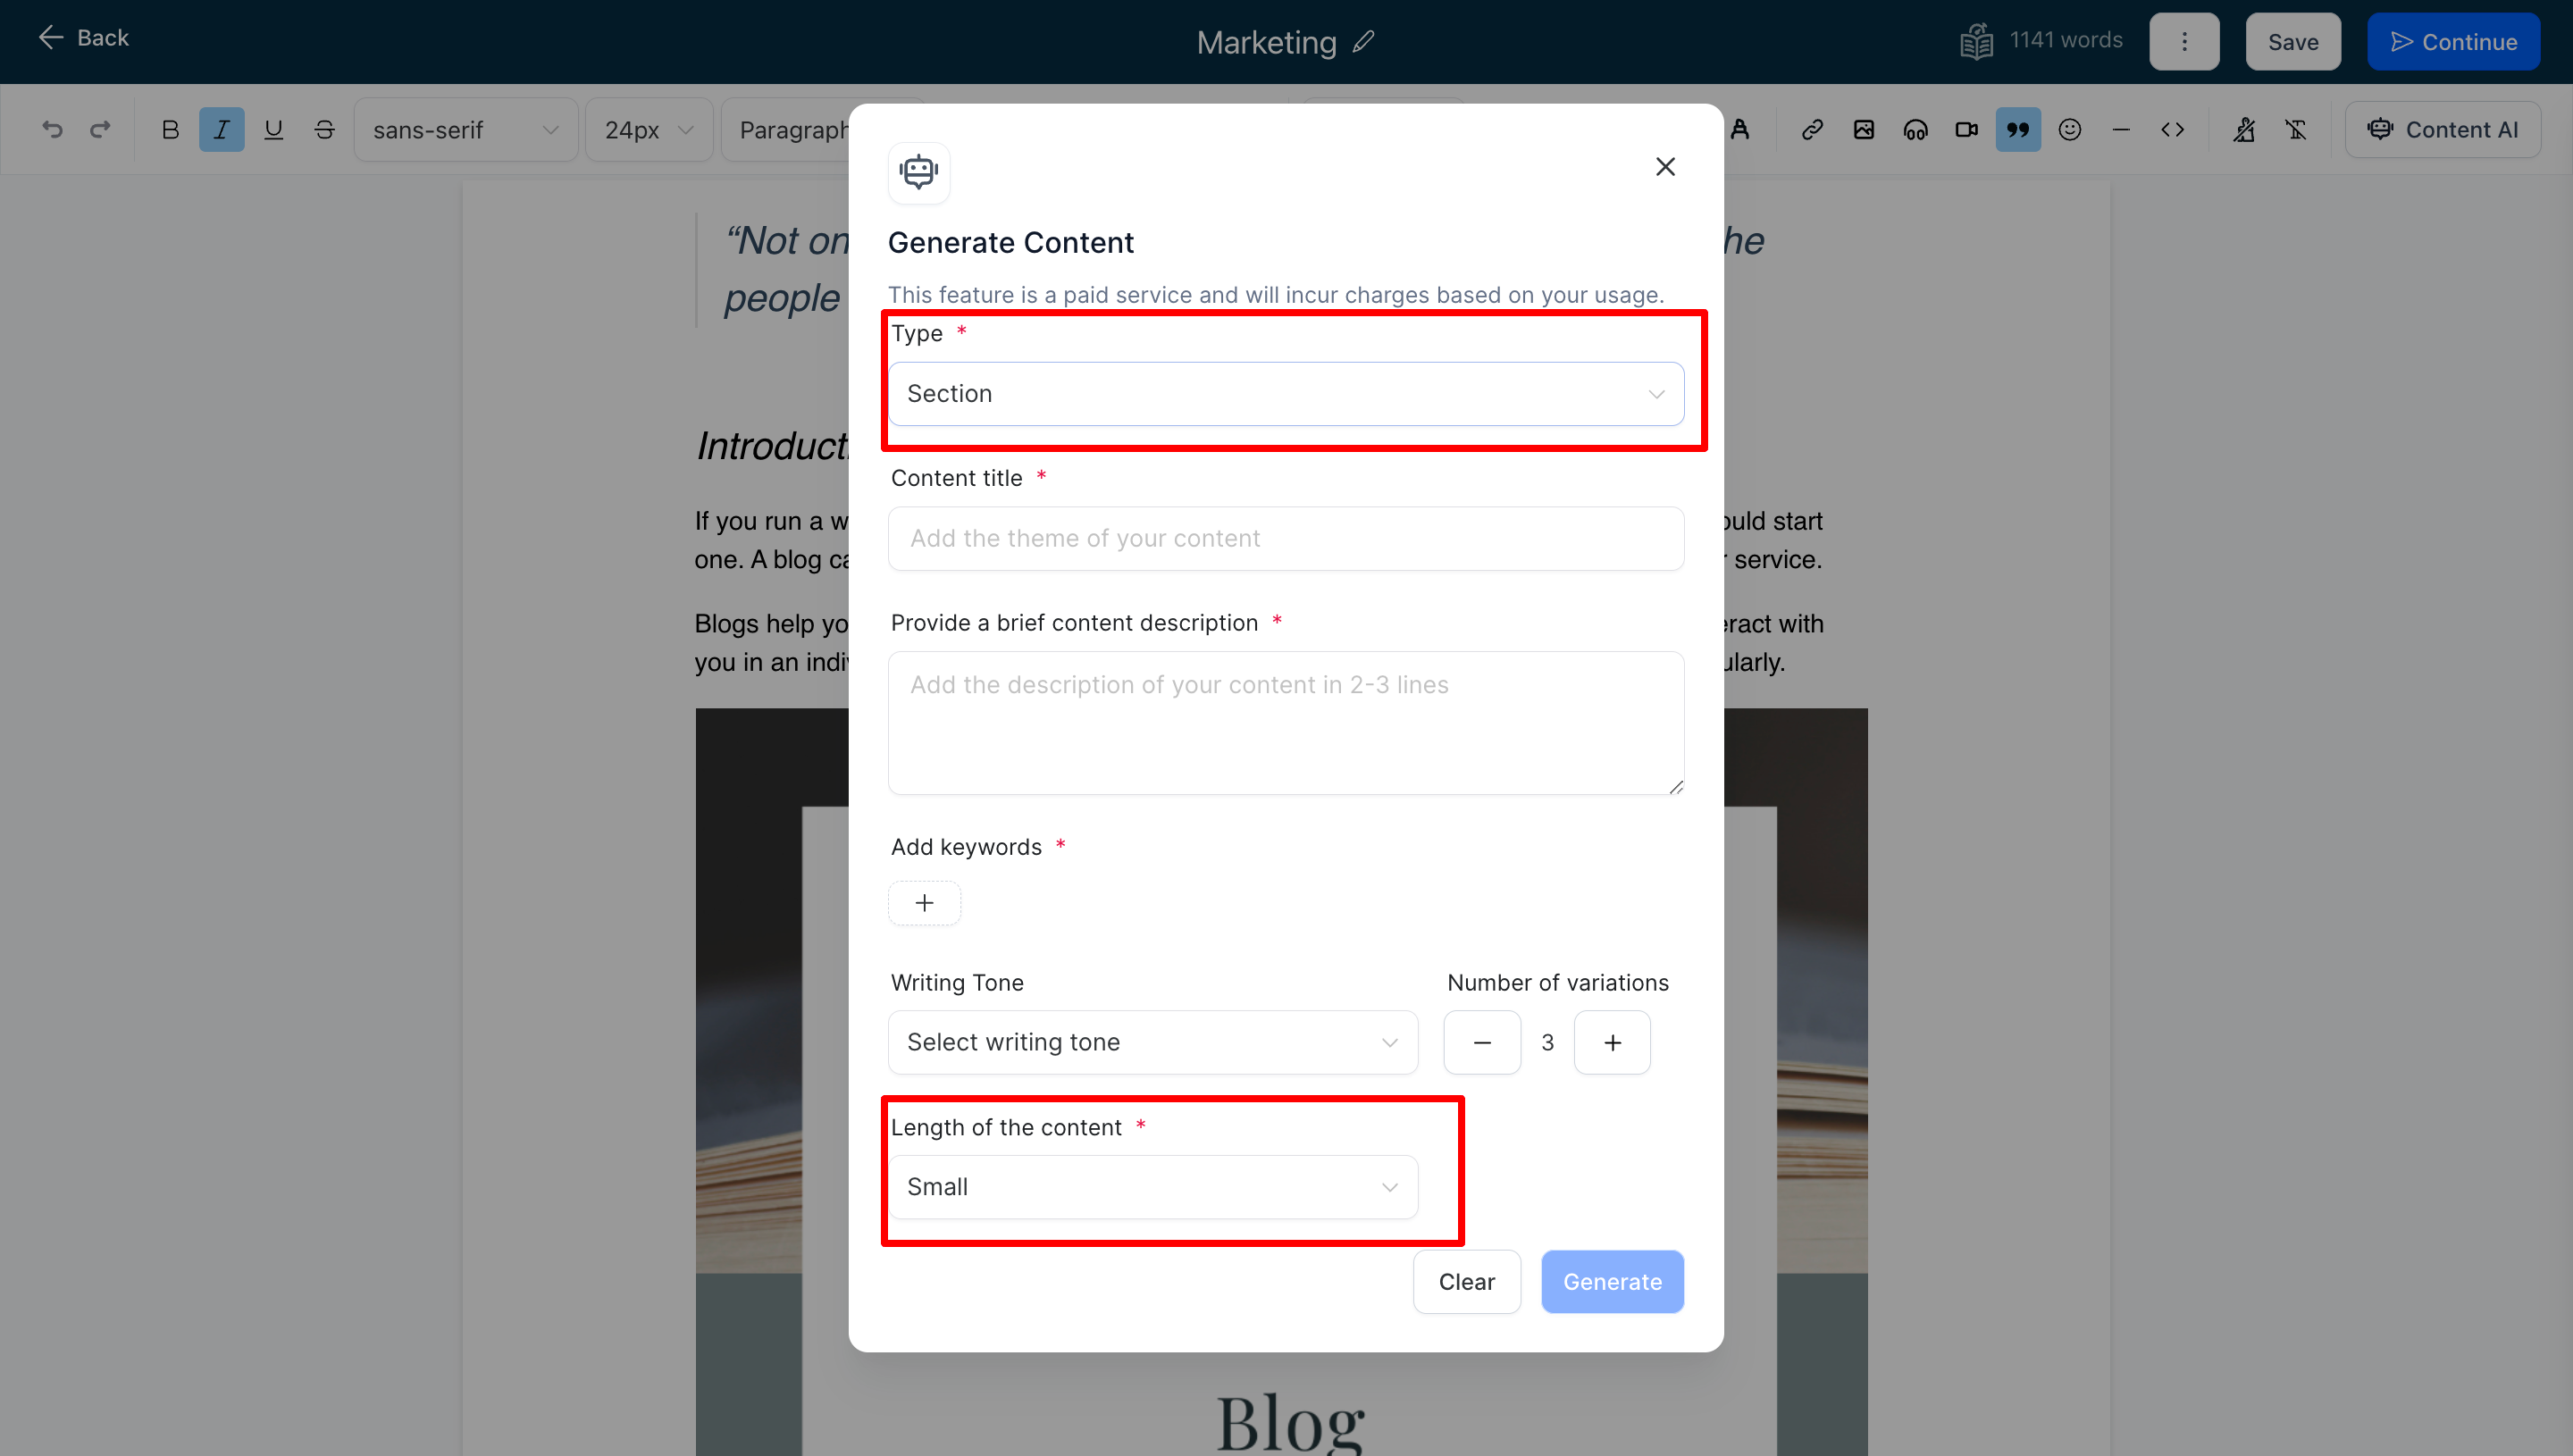
📜 Length of Content - Content AI -Text
Content AI is an AI-powered writing assistant that can help generate content faster, easier, and better.
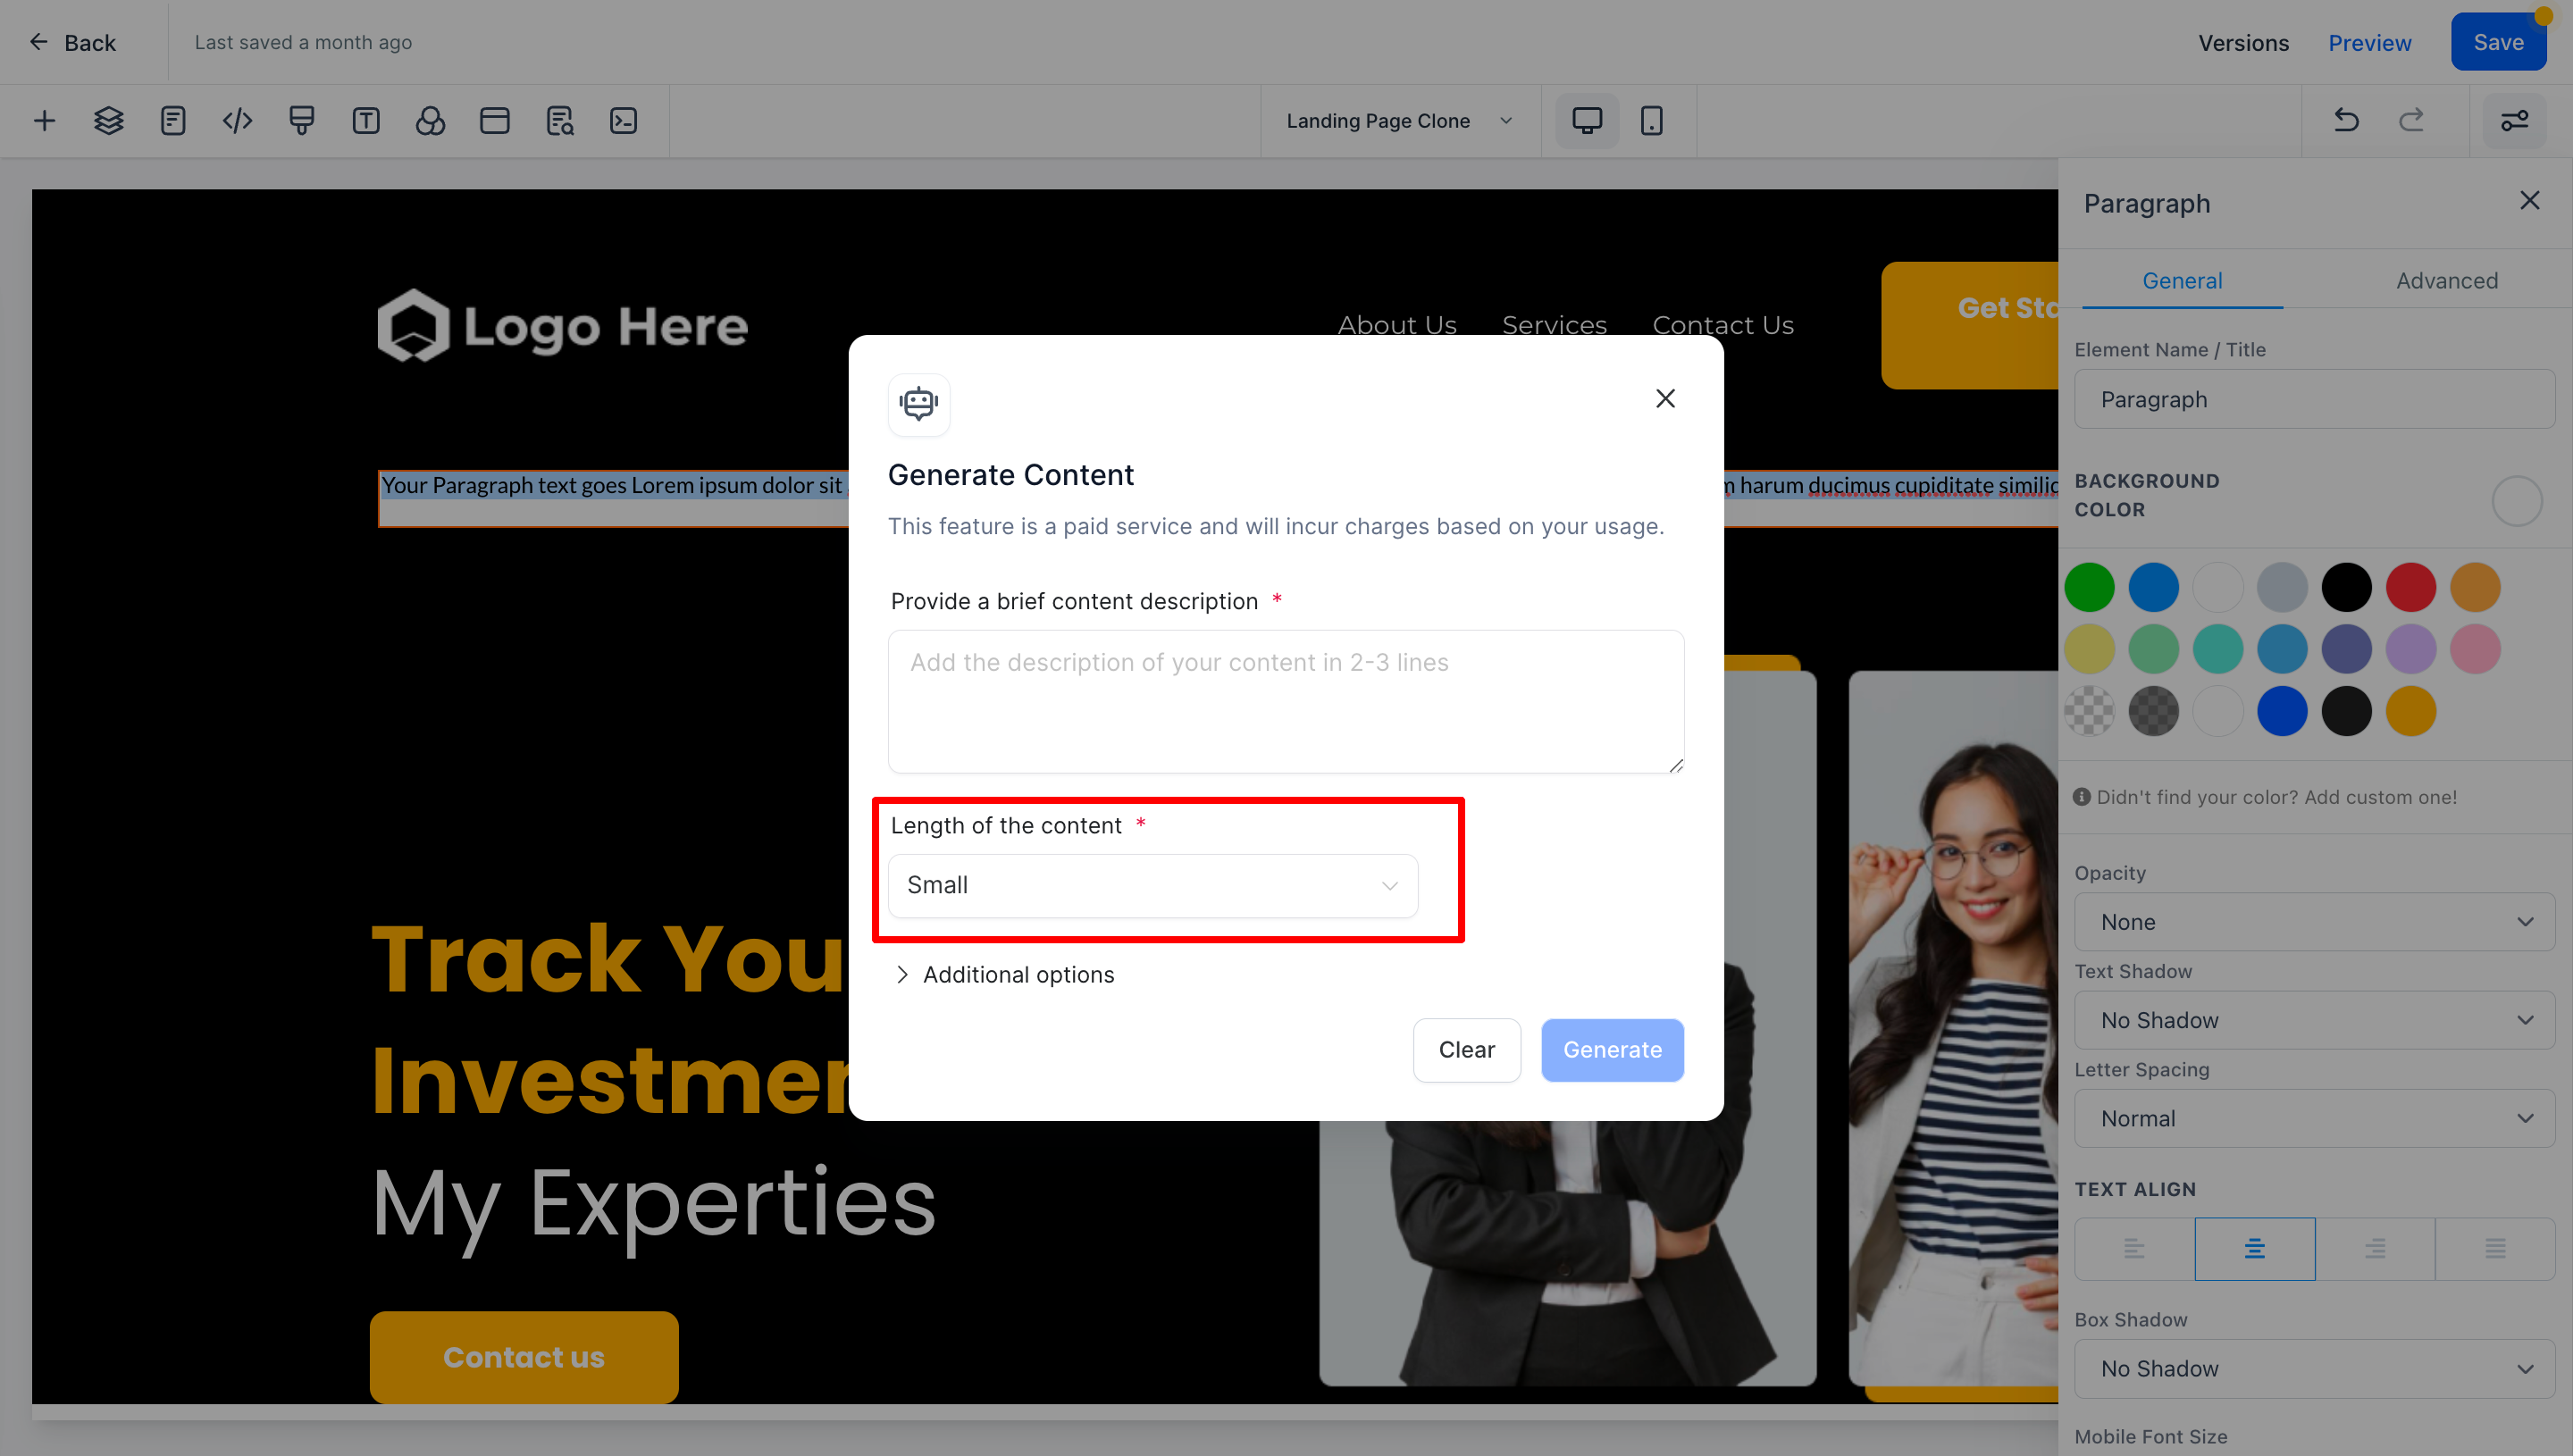
Customers said they wanted to choose the content length. The team listened and made it happen.
Before, people asking for specific word counts created problems for good content creation.
Now, users can pick how long each section will be.
🖼️ Funnel - Paragraph element
📱 Social Planner - Posts
📩 Email Builder - Text
🗒️ Blog - Section option
Multi-Language Support for Reputation Management 🌏
More people can use Reputation Management easily with new support for many languages. Now you can read reviews, give feedback, or use the review dashboard in the language you prefer.🗣️
Languages currently Supported:
🇪🇸 Spanish
🇩🇪 German
🇫🇷 French (Canada)
🇫🇷 French (France)
🇵🇹 Portuguese (Portugal)
🇧🇷 Portuguese (Brazil)
🇮🇹 Italian
🇳🇱 Dutch
🇸🇪 Swedish
🇩🇰 Danish
🇫🇮 Finnish
🇳🇴 Norwegian
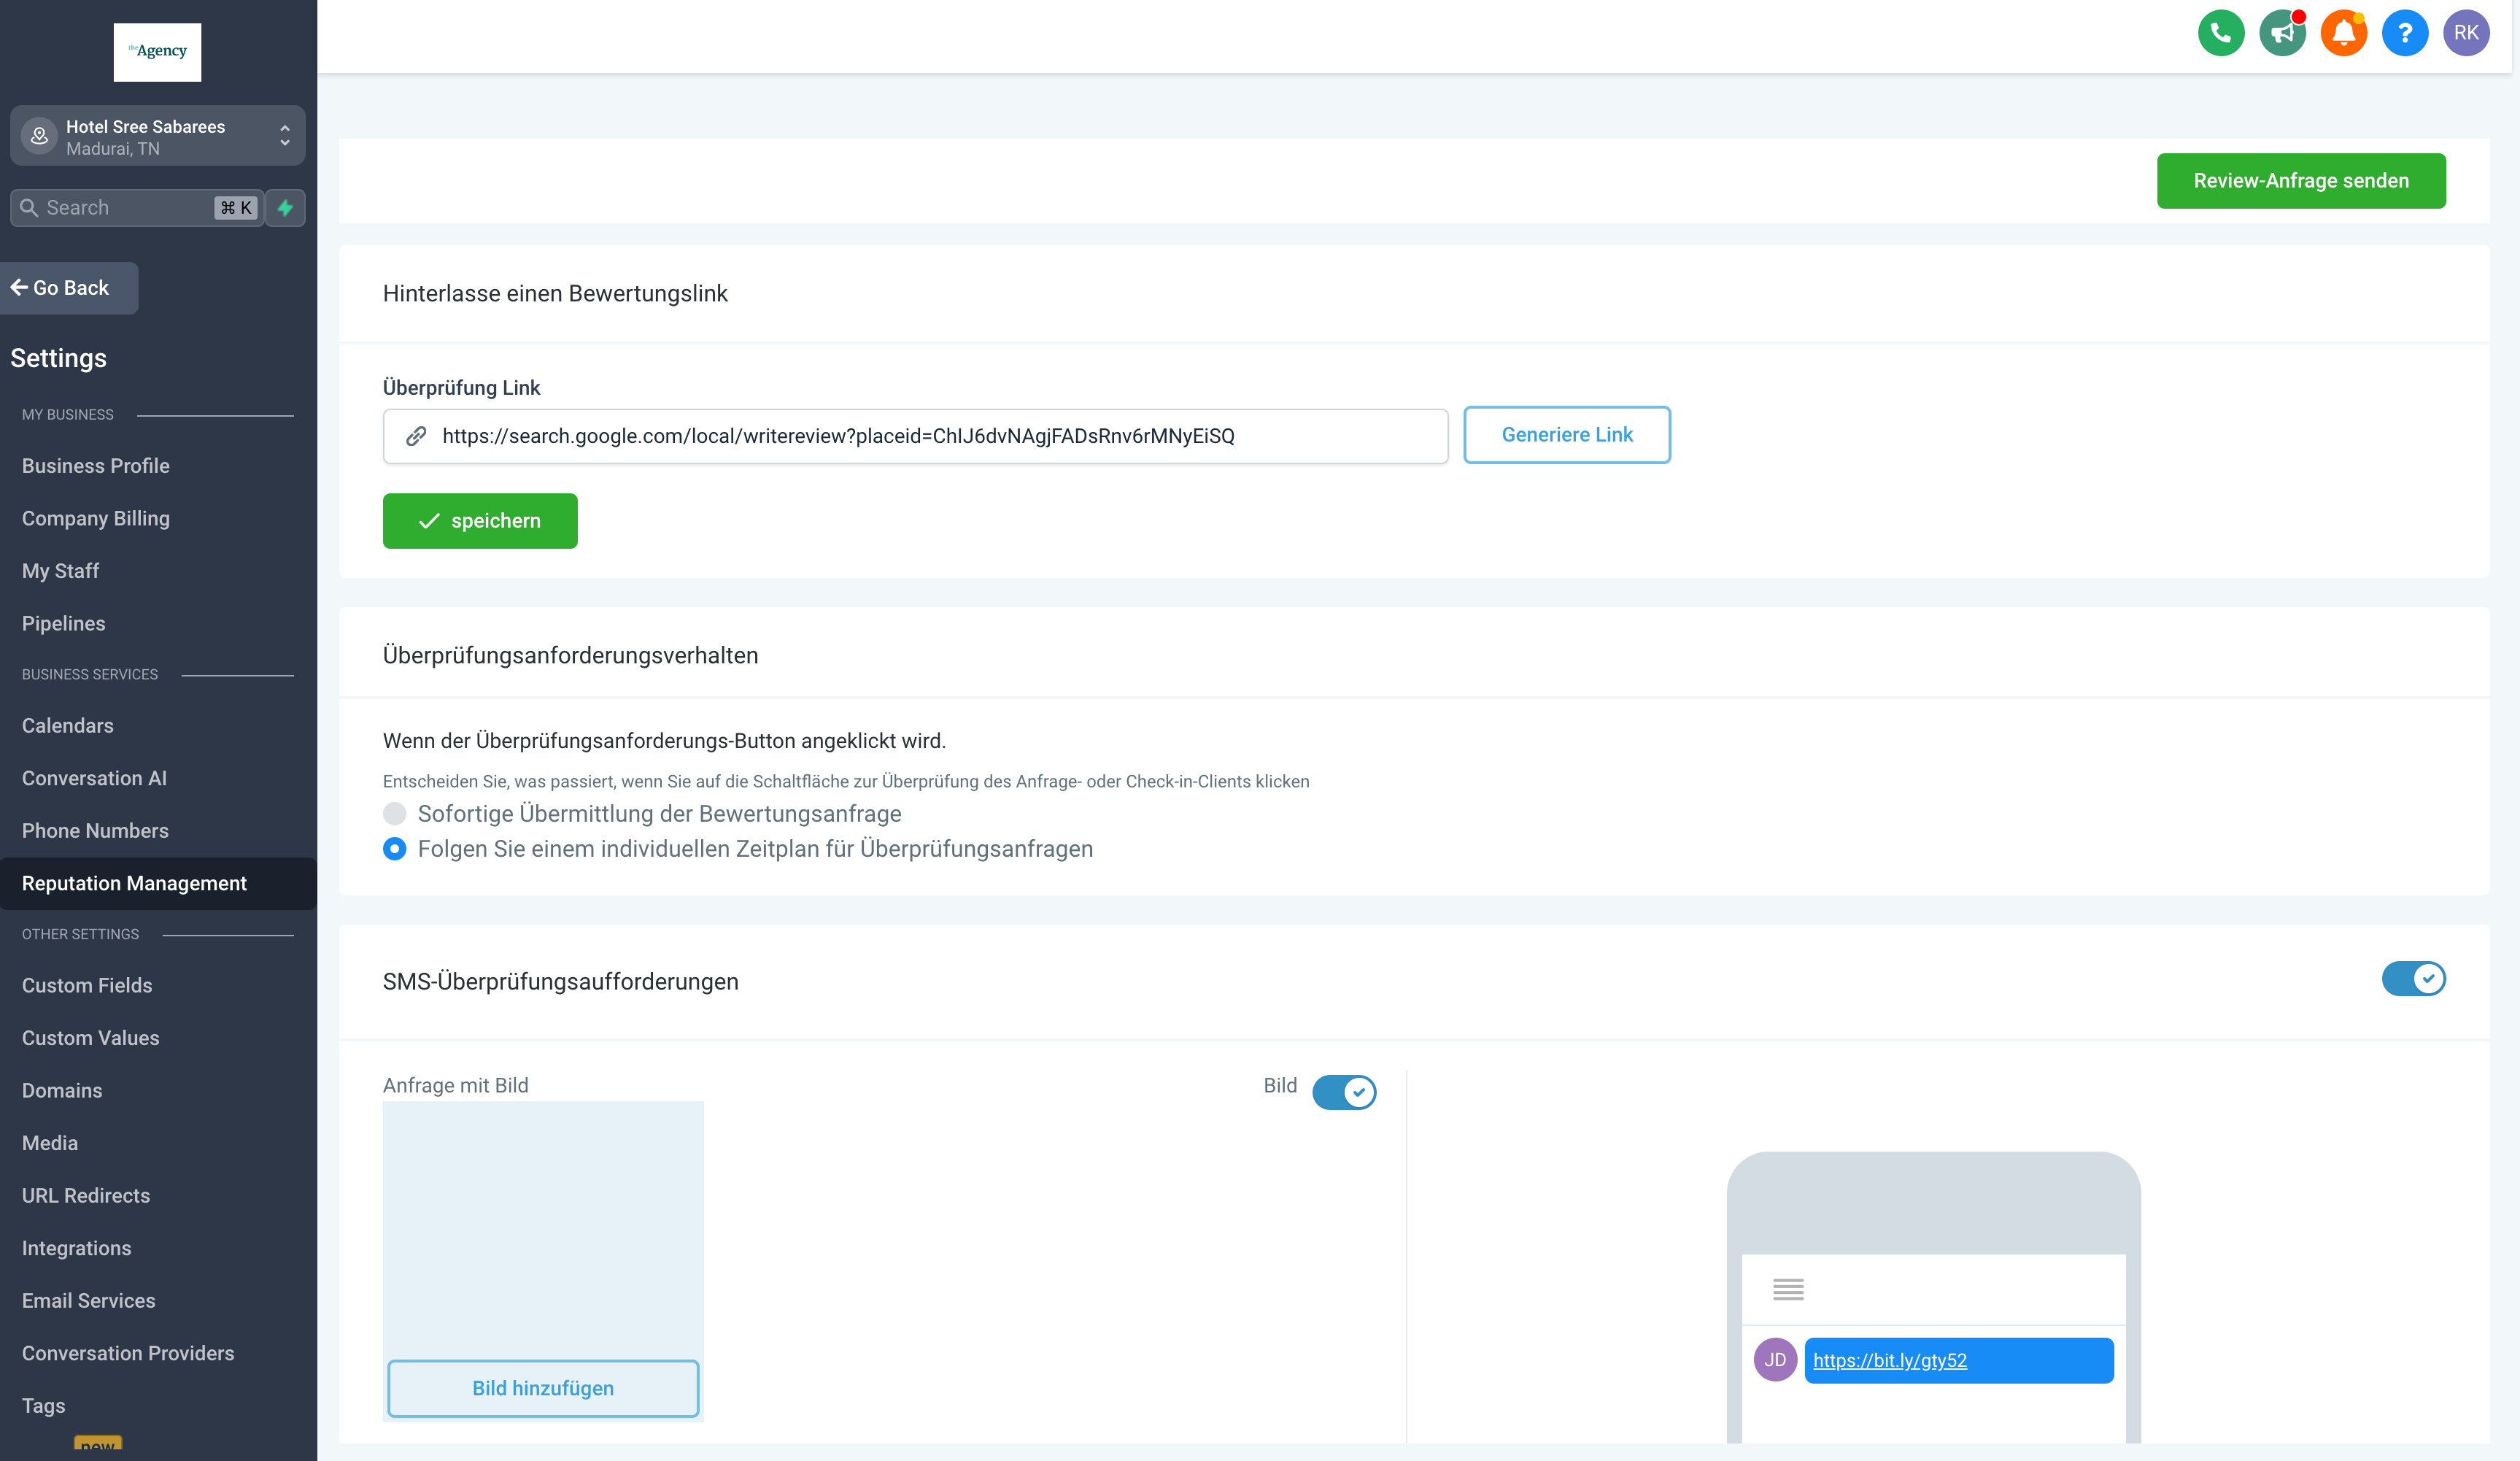
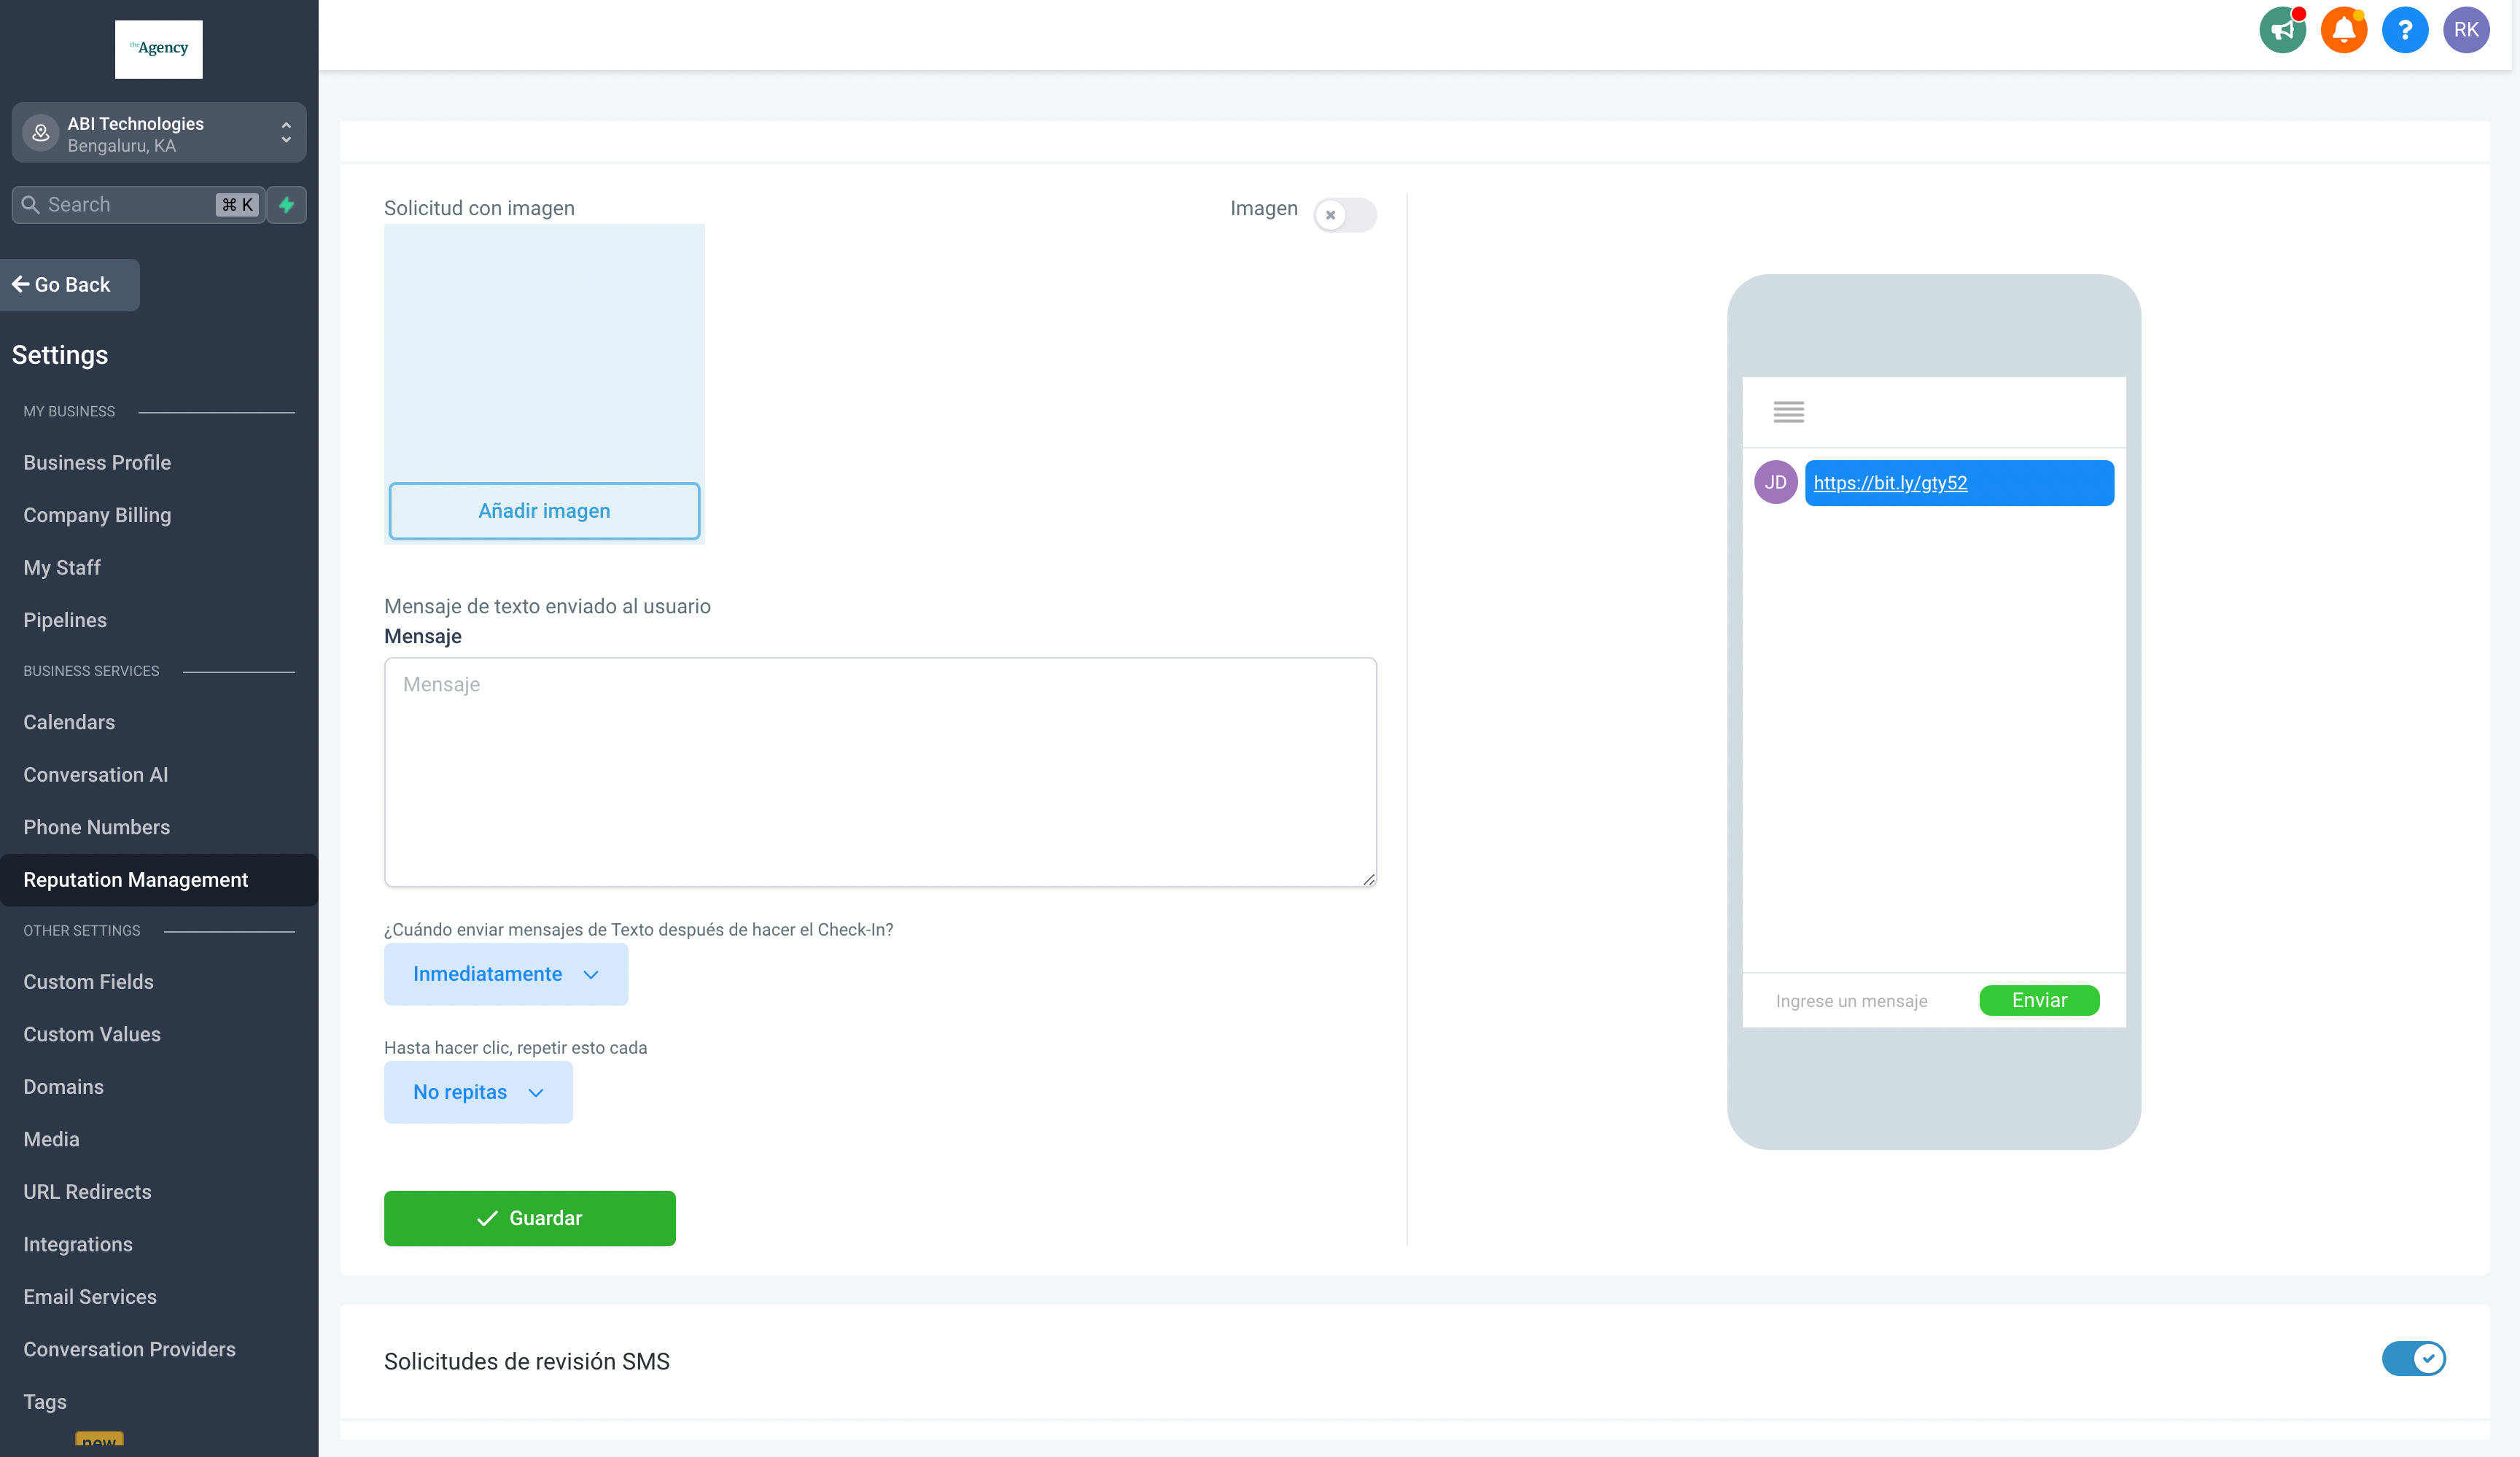
See these examples to understand how multi-language support appears in Reputation Management:
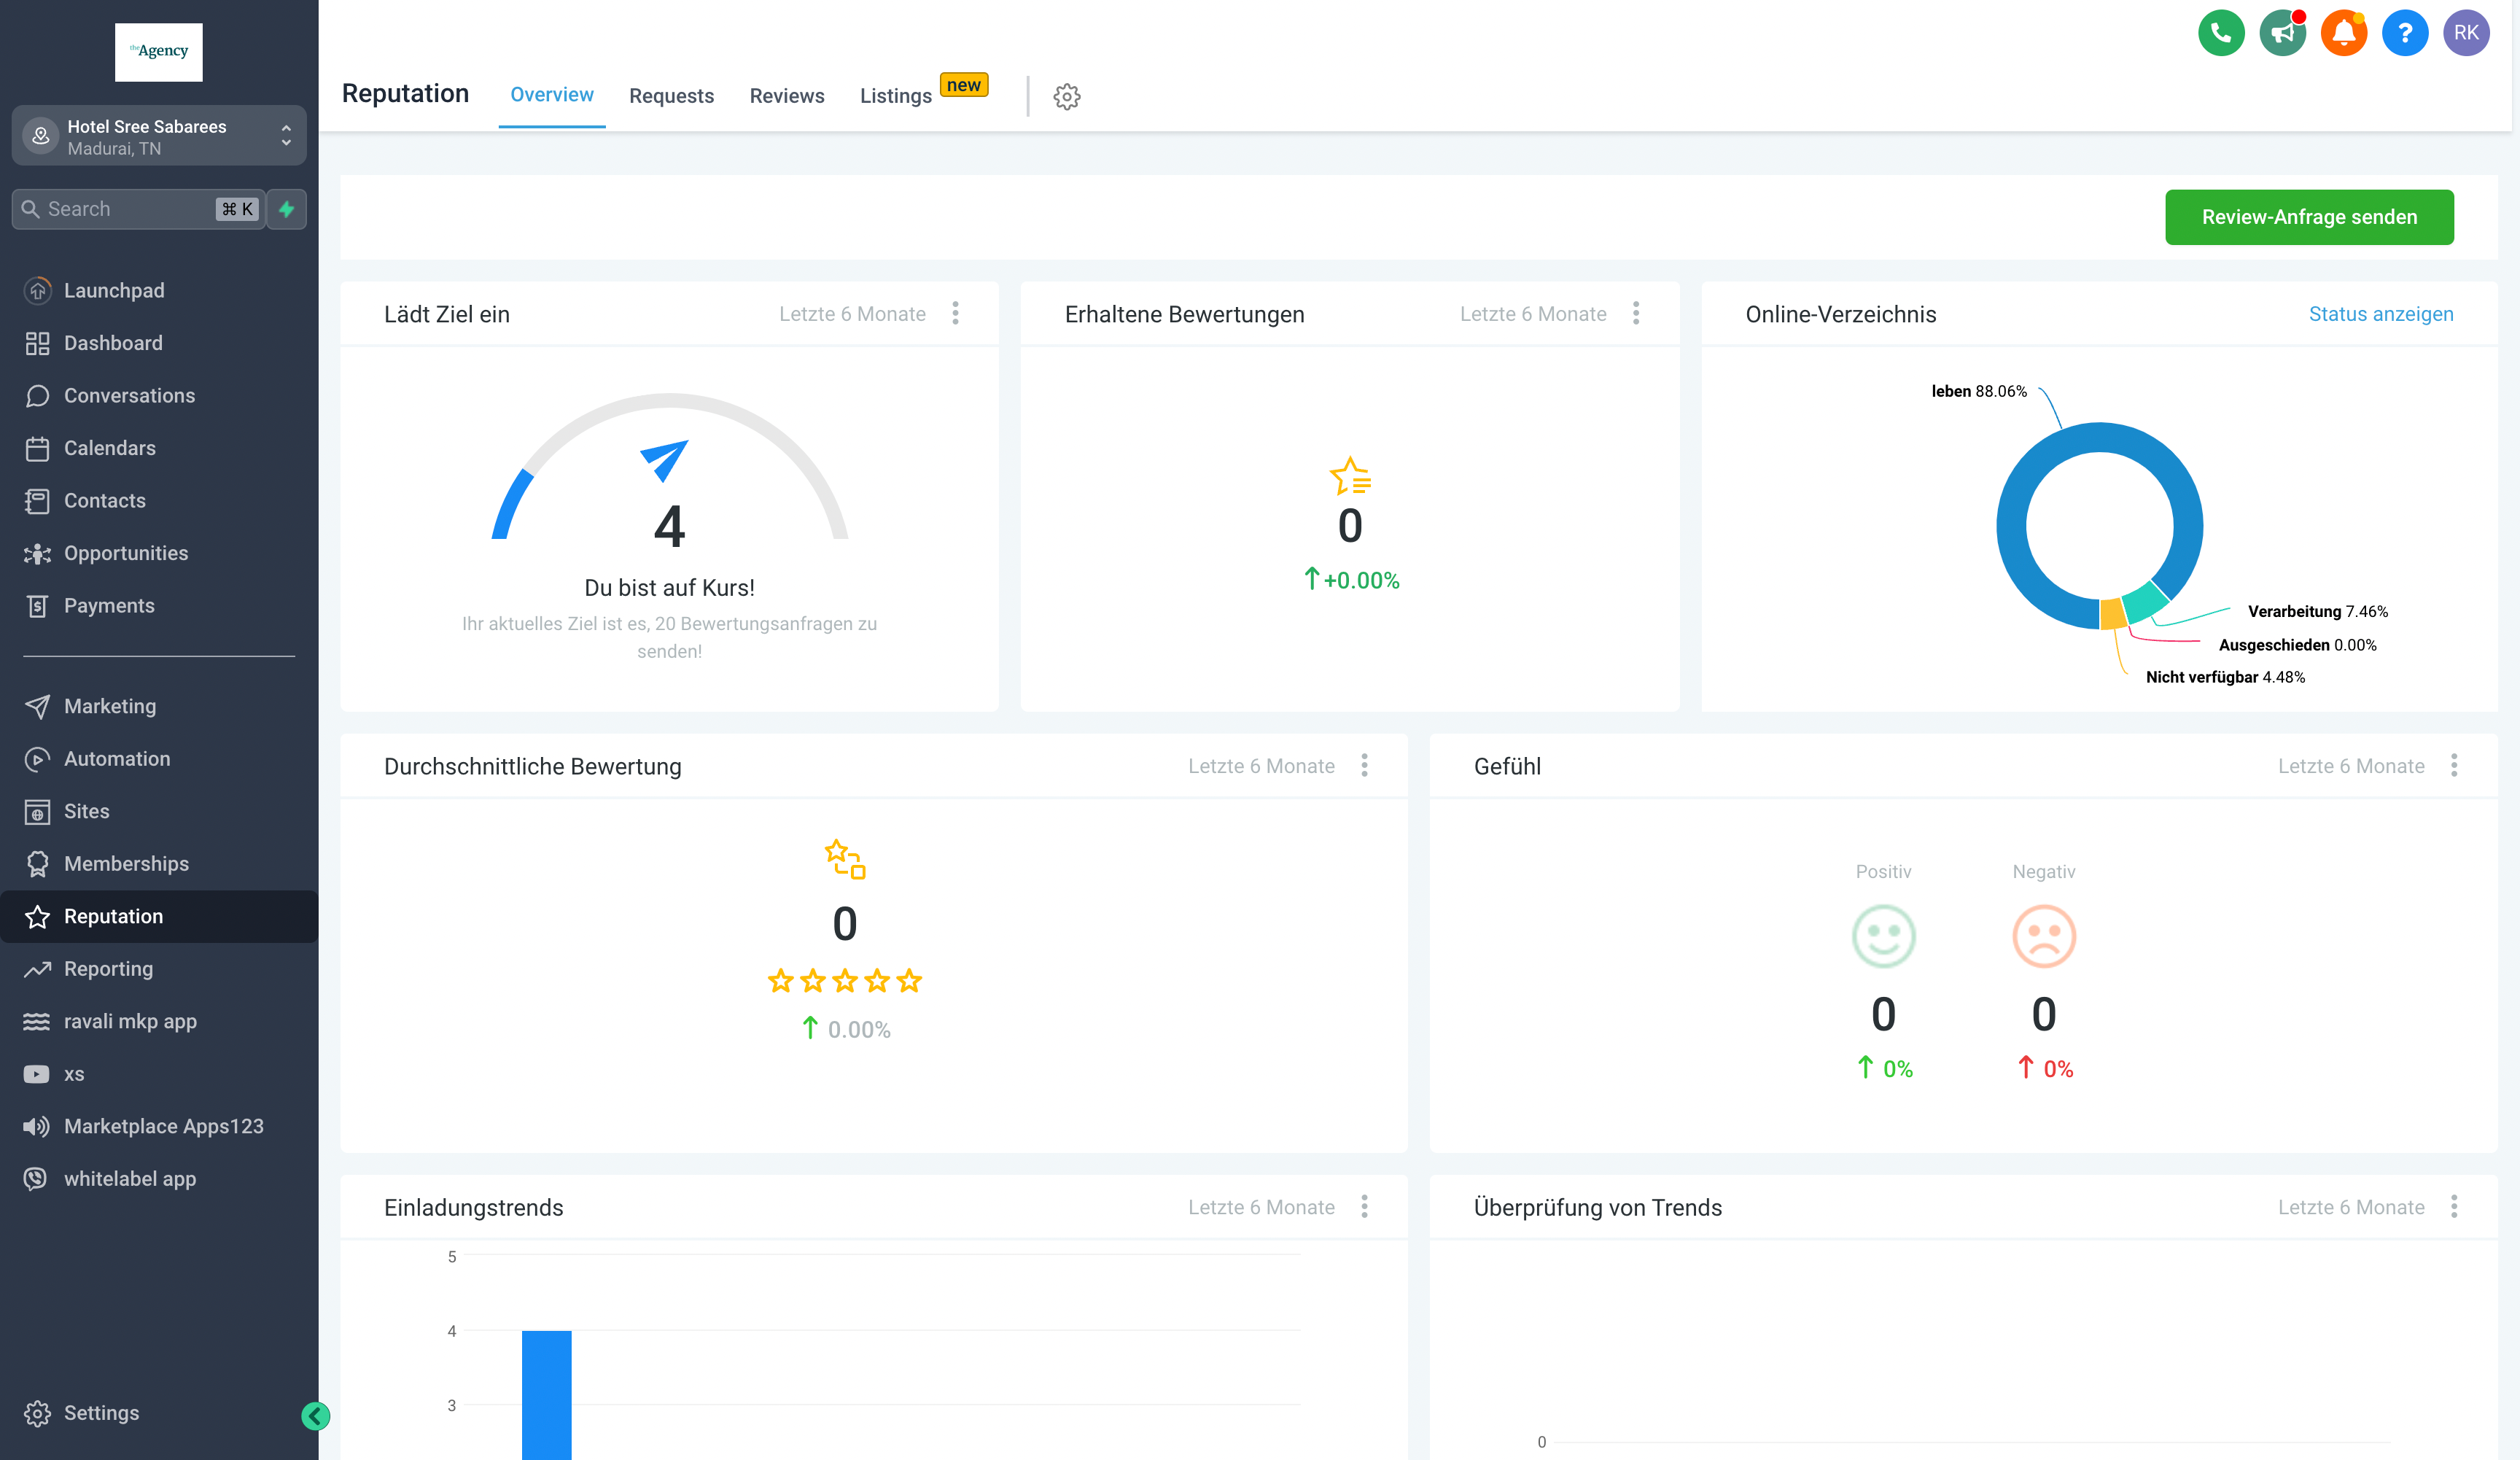
To take advantage of this new feature, follow these steps:
Go to Sub-Account Settings ⚙️.
Select "Business Profile" 🧑💼.
Choose the Platform Language Preference 🌐.
Hit the "Save" button ✅.
App Marketplace: External Authentication Support
New features are now available in the developer app marketplace.
What's New;
Support for external authentication added to the marketplace.
Users can now input a third-party API key during application installation.
Developers gain increased flexibility to integrate with external services.
Custom menu links: Form reset issue & UI crashes
In this update, bug fixes enhance how Custom menu links work.
Fixed the issue where the form would reset while updating a custom menu link. This happened when someone chose an icon and then updated the name or URL; the icon would also reset.
Fixed the issue where the user interface would crash when changing from non-iframe options to iframe mode.
Media Library APIs Enhancements
An upgraded feature for the Media Library APIs has been announced.
What's New;
Media Library API Enhancement:
Hosted Links: Now you can add links from other websites straight to the Media Library. This makes it easier to include outside media without having to download and upload it again.
Live Update of Media: This improvement lets you instantly see changes to media files. If you update the media at its original online location, those changes will show up wherever that media appears. This keeps the content up-to-date.
Copyright Automate Your Hustle CRM 2022 -- All Rights Reserved
We don't want to hustle harder...we want to automate the hustle!