
BLOG
Automate Your Hustle CRM Updates - AUGUST 4,2023
⌛️As July draws to a close, we're thrilled to introduce some new enhancements. Dive into the latest additions to Automate Your Hustle CRM for the week spanning July 29th to August 4th, 2023.
Should you have any questions about these updates or any aspect of your 'Automate Your Hustle CRM' account, or if you're considering joining our services, feel free to reach out to our committed team at [email protected]. We're here to assist!
🤝 Enhancement of "Thank You" Page for Lengthy Forms!
The "Thank You" page now has longer forms and surveys for a better experience. The aim was to simplify filling out and sending in detailed forms. Here are the updates:
📝 Improved Visibility of the "Thank You" Page:
Before:
The "Thank You" page in long forms or surveys was hidden at the top, requiring users to scroll to see it after submission.
Now:
The "Thank You" page is immediately visible after submission, without any need for scrolling!
🌟 Seamless User Experience:
This change makes it easier and nicer to submit forms or surveys. After you finish filling out the form or survey, you'll quickly get a thank you message. This will make you more interested, and we think these improvements will make you even happier with the experience.
📈 Deal Value Integration in the Deal Chart of Agency Reporting!
The Sub-Account Report and Email Scheduler have been improved to make it easier for you to understand and manage the pipeline. Here are the updates:
📊 Deal Overview Card Enhancement:
Previous State:
The Deal Overview card on the Report showed only the counts.
New Enhancement:
We've added the amount alongside the count in this release, offering more detailed insights.
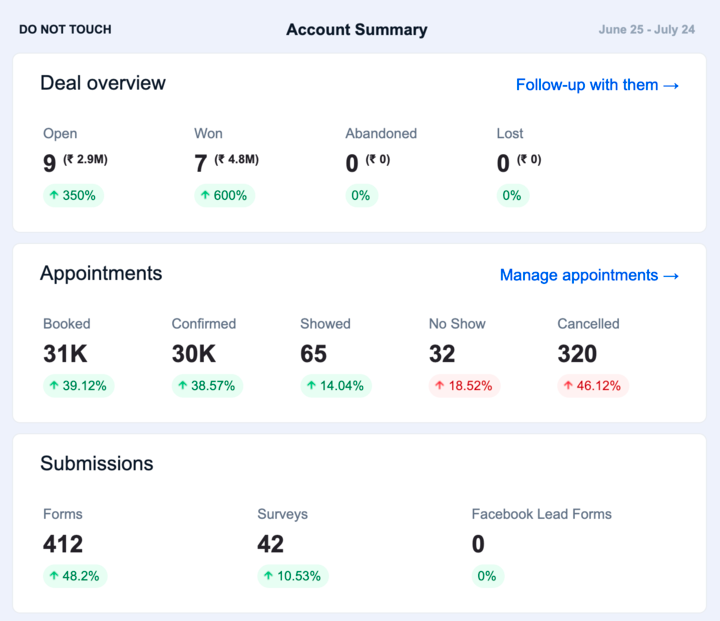
📈 The Amount Displayed Now Includes:
Open
Won
Lost
Abandoned
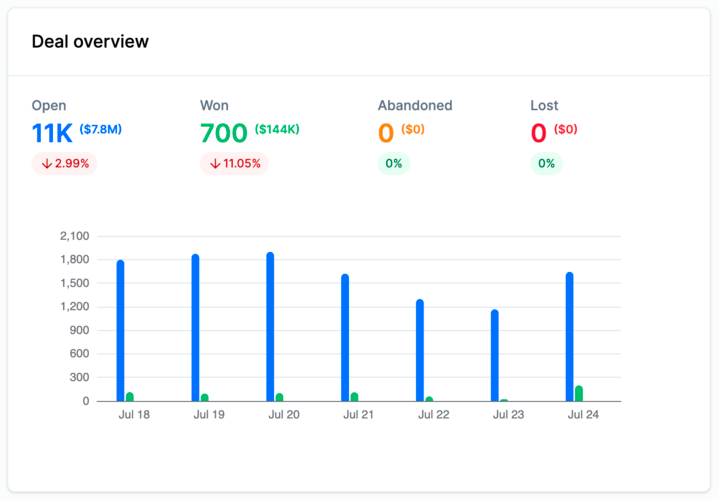
These updates will make it easier to see how valuable each status is in the list. This will give a clearer picture of how well the pipeline is doing. These improvements should give clients the ability to make smarter choices. 📬
📧 Enhanced Verification, UI Improvements & Increased LC Email Sending Limit!
The LC Email verification system got better with new upgrades. Here are the important details:
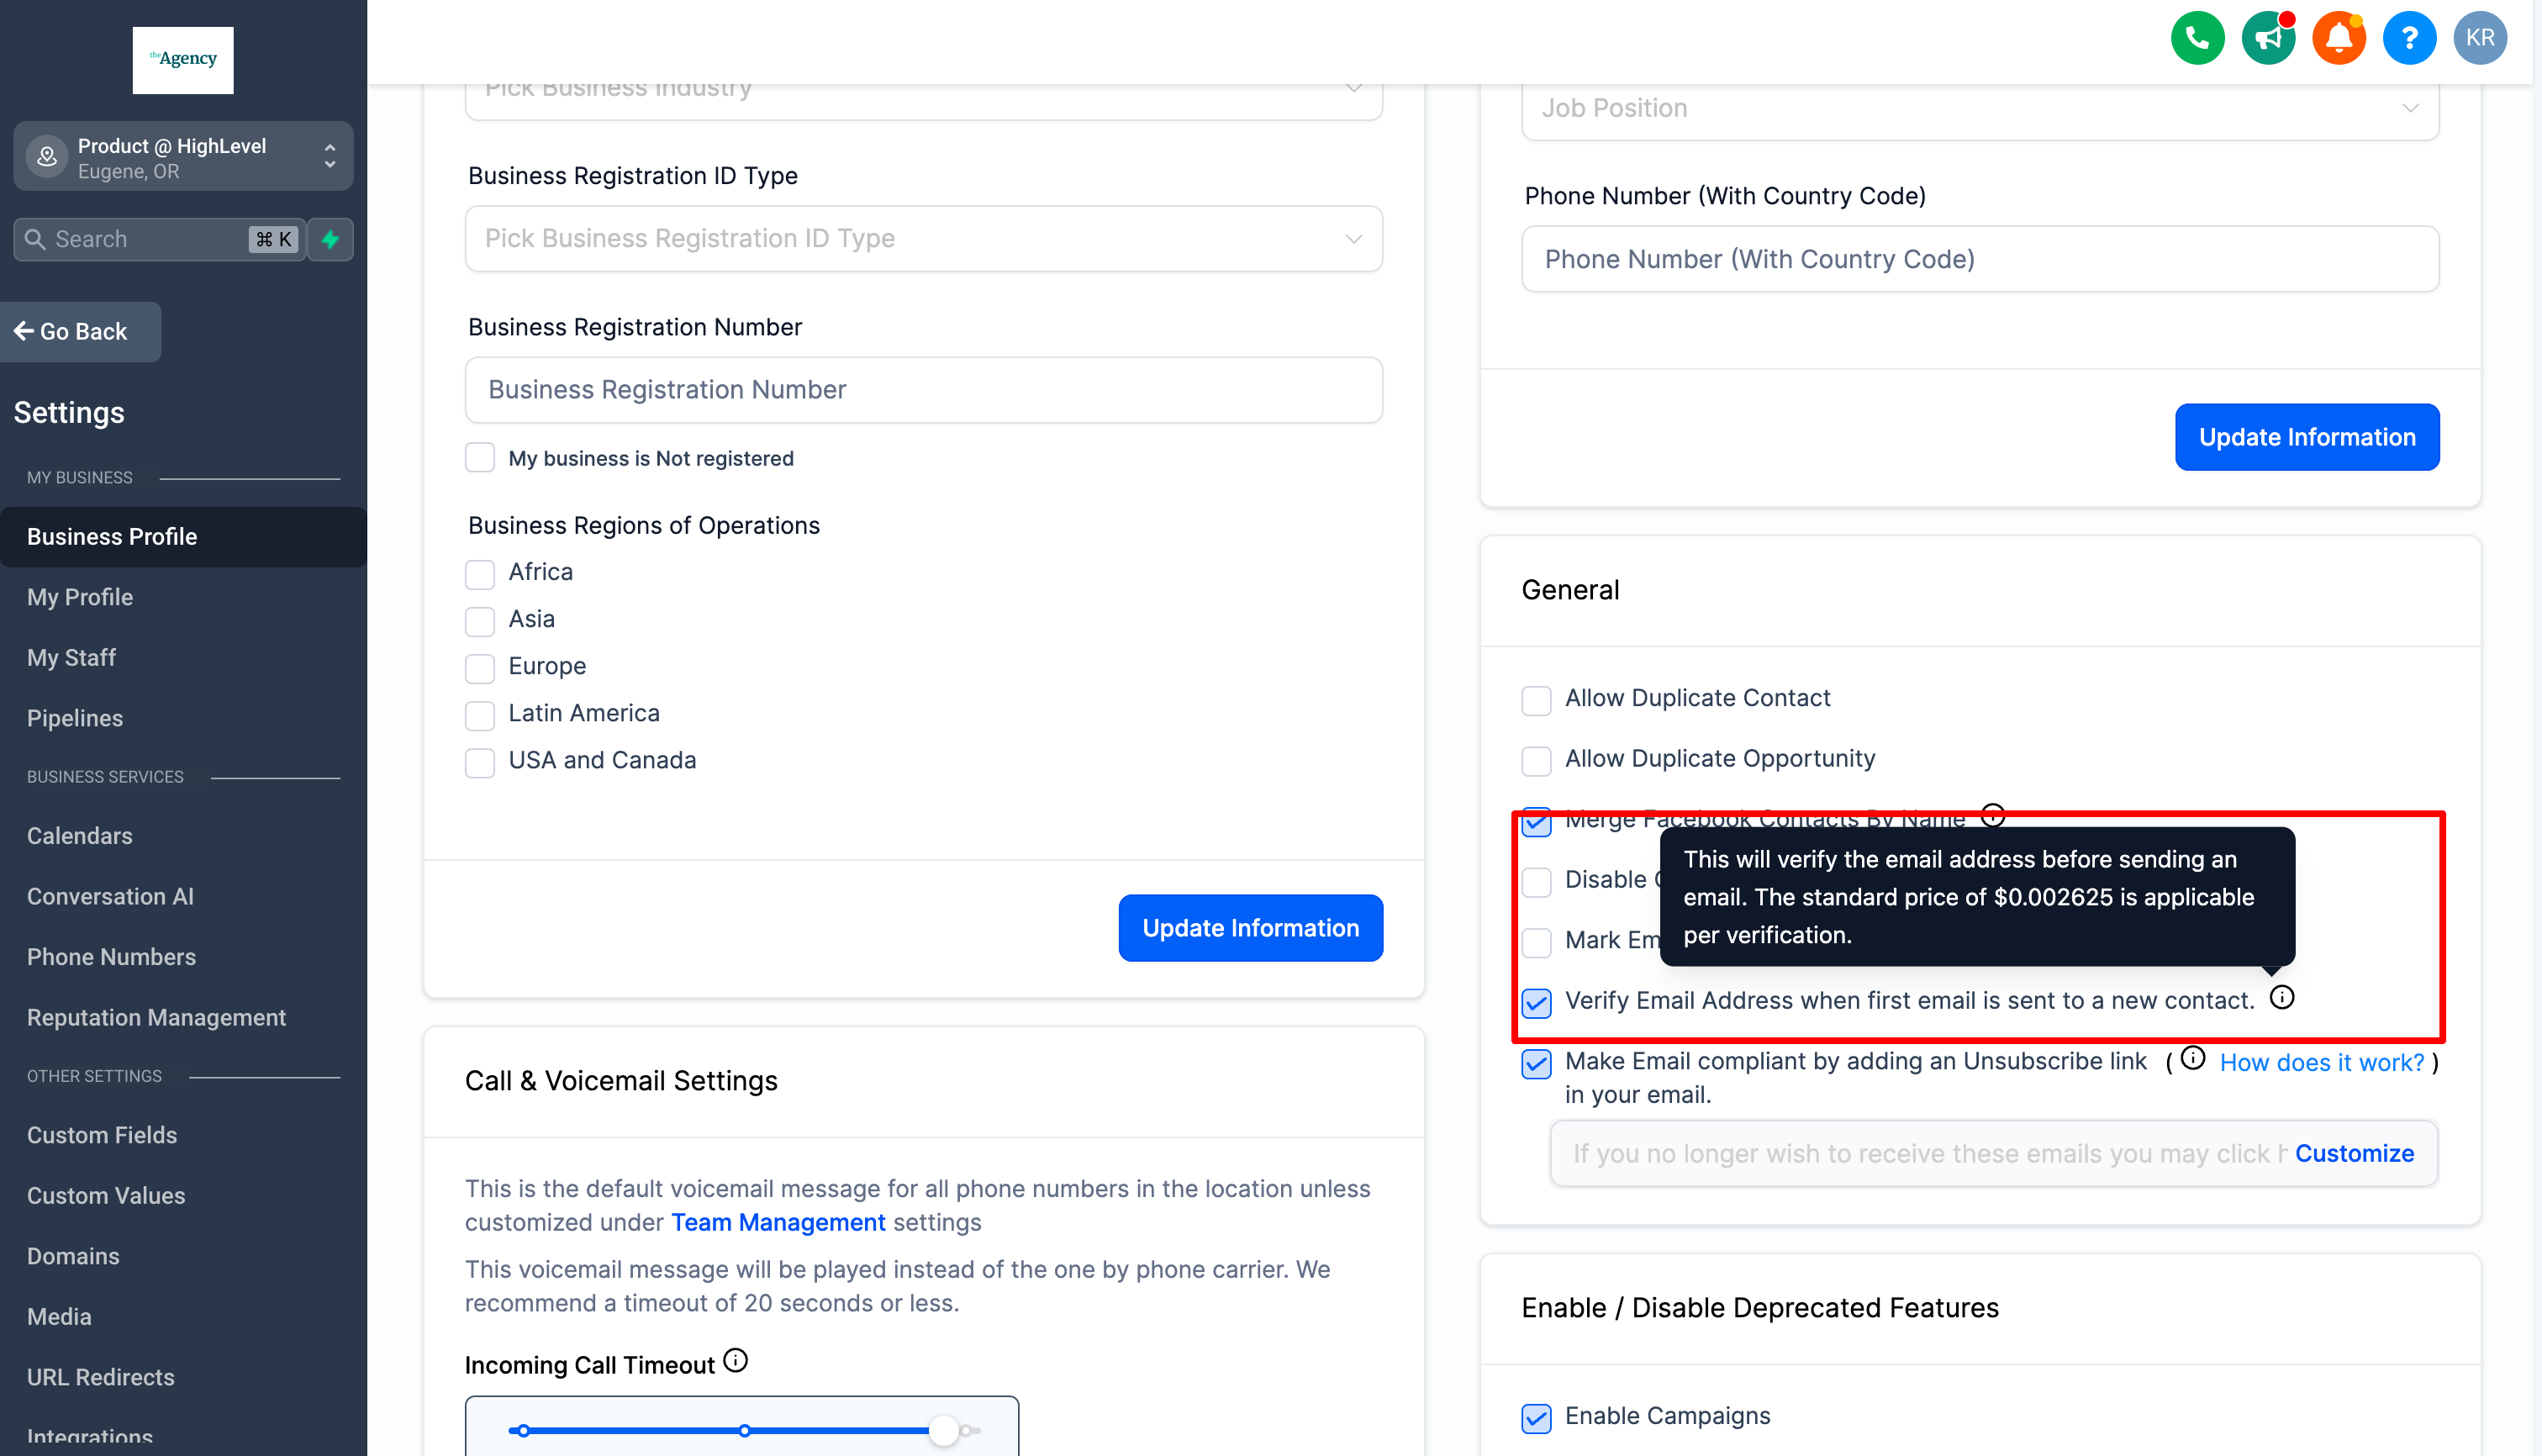
🛂 Sub-Account Level Email Verification
Sub-account users now have the ability to enable or disable email verification.
When email verification is enabled by a sub-account user, an email notification will be sent to all non-deleted agency admins and the company email.
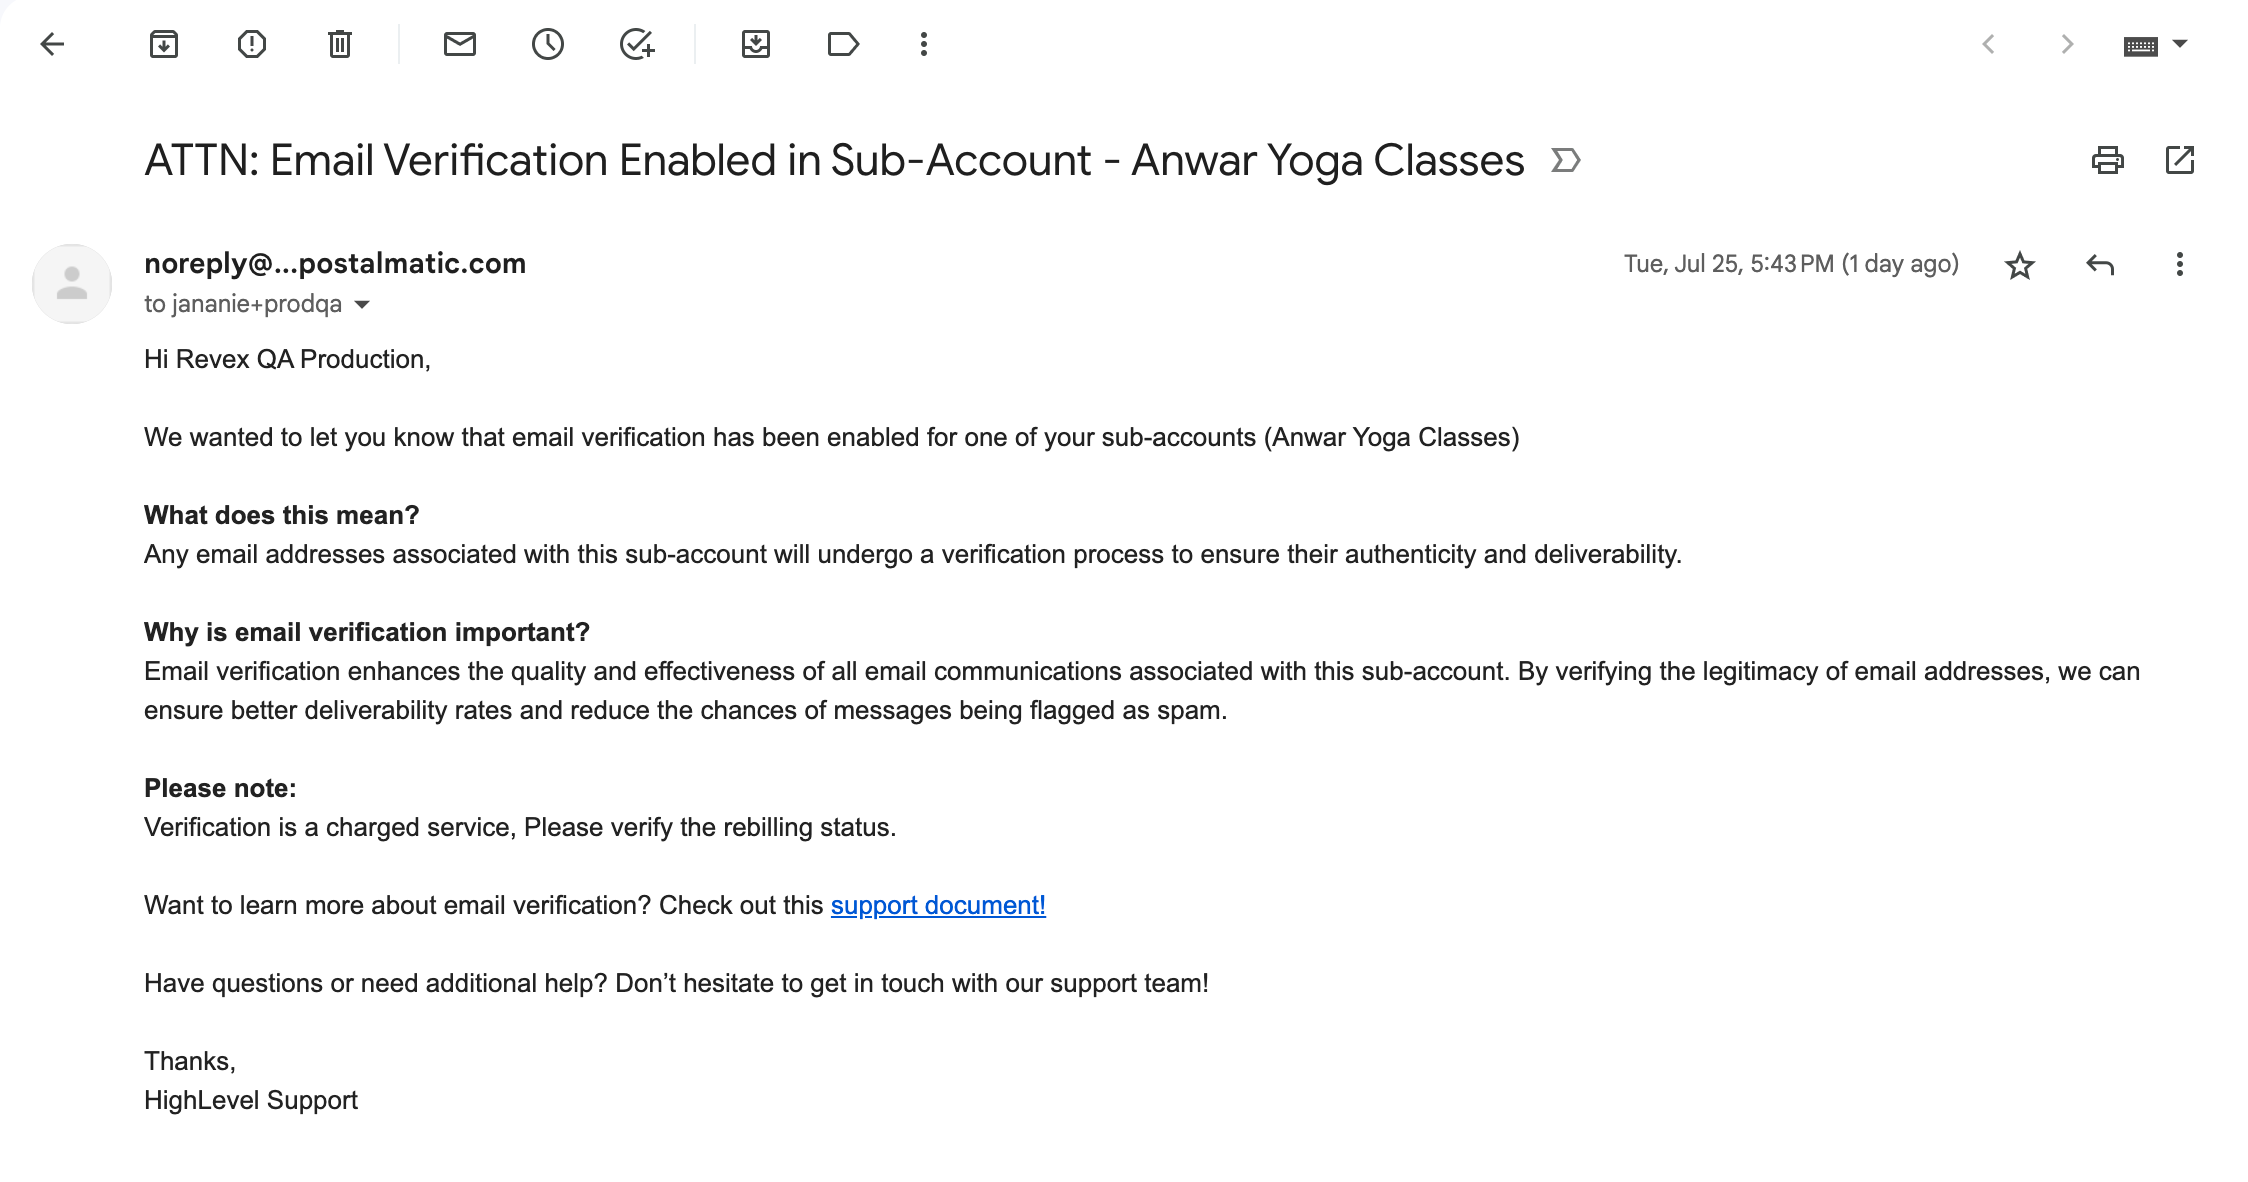
Note: This functionality is only available for LC email users.
Enhancements:
🌟 Email Verification UI Enhancements
The Email verification details interface has been upgraded on the contact page to display the status as ✅ Verified, ❌ Invalid, and ⚠️ Not Verified.
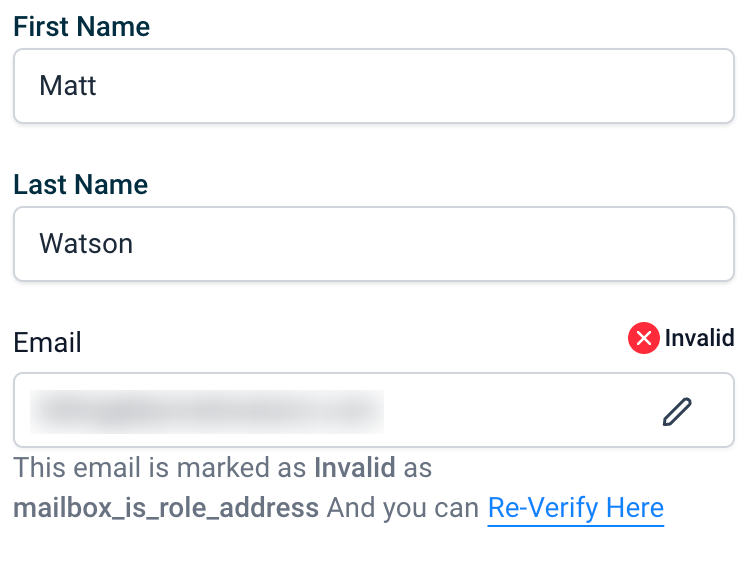
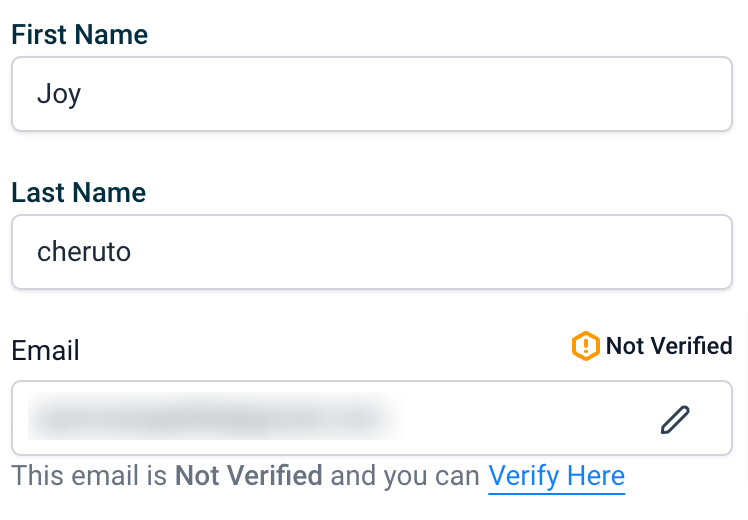
Reasons for invalid email addresses are now shown, helping to clarify why an email is marked as Invalid.
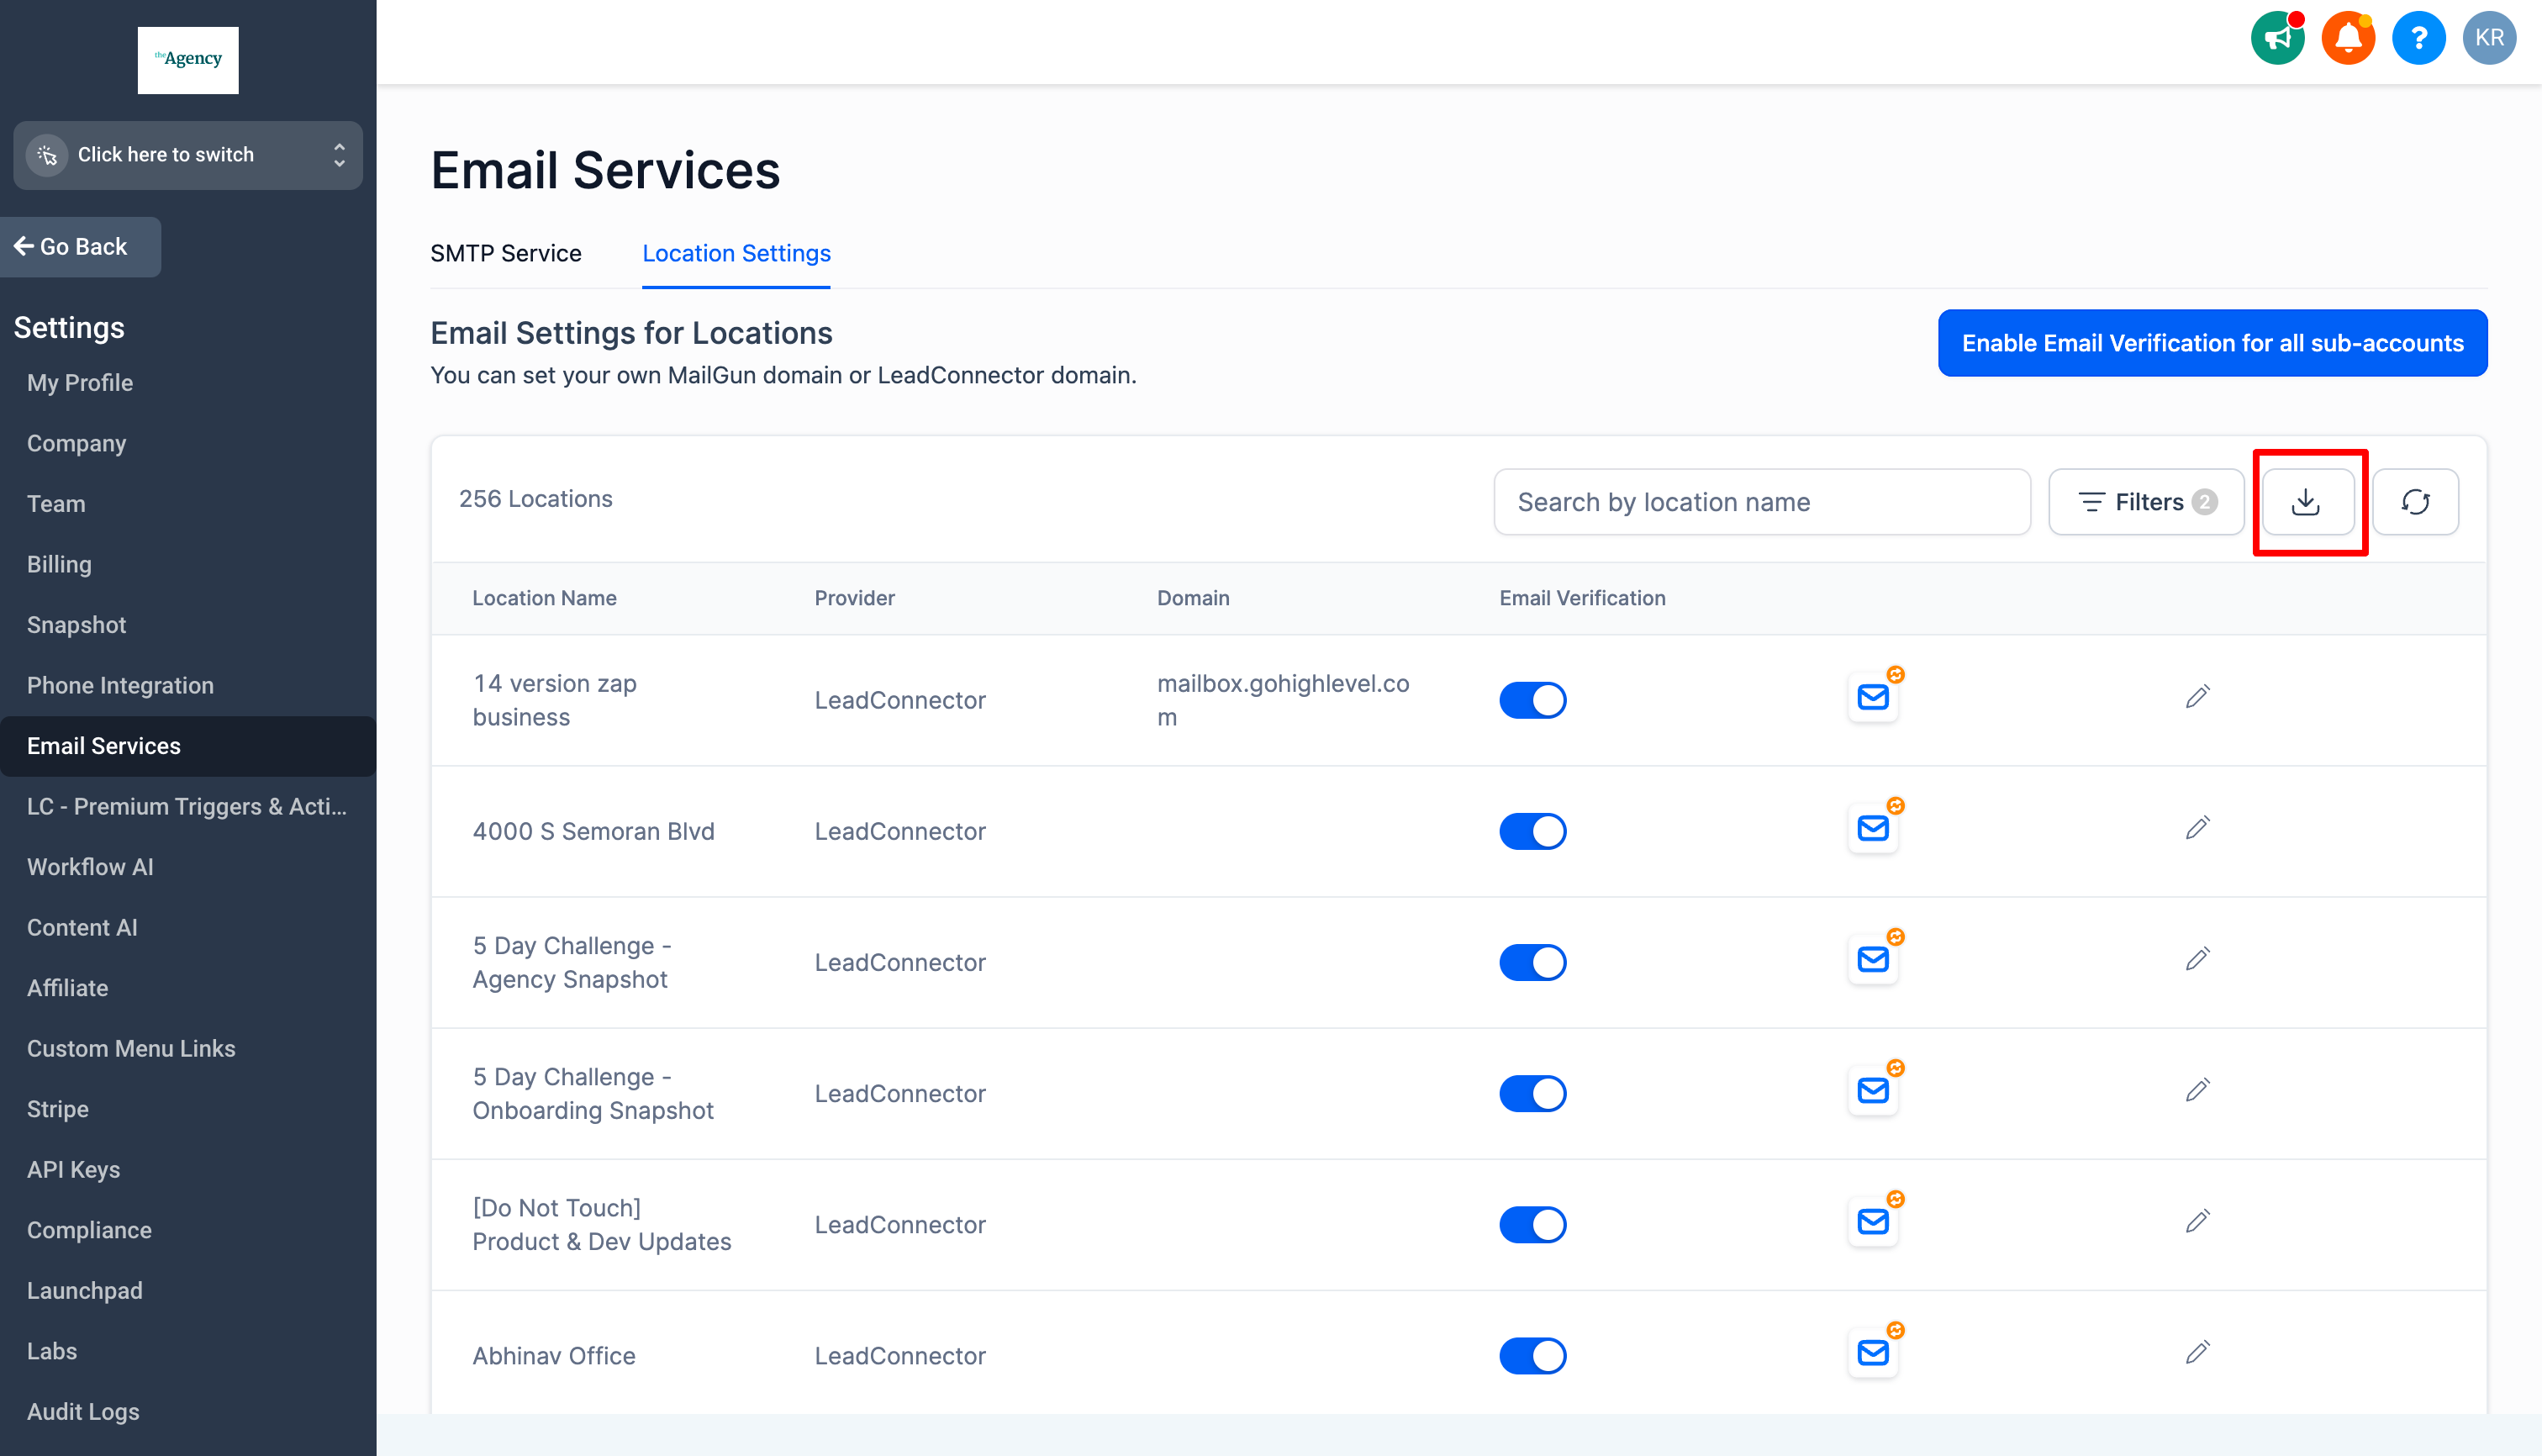
📩 Download Option for Email Service Settings
A download option is now available for Email service settings, benefiting users with high volume accounts.
🚀 Increased Sending Limit
The daily sending limit has been increased from 150K to 450k for LC email dedicated domain users, offering more flexibility for large-scale communications.
These changes are designed to provide greater control, clarity, and capacity in managing email communications within the platform.
ℹ️ Explore more about LC Email dedicated domain here👈
Automated receipts for Invoice and Text2Pay link payments 🧾
Now Available:
You can now get automated receipts for invoices that are one-time, those that repeat, and payments made through Text2Pay links. When an invoice is paid by the person you're dealing with, a confirmation receipt will be sent right away.
Customization Options:
Companies can make the experience more personal by creating their own receipt title, picking a starting number and prefix for receipt numbers, and choosing a special email template for sending receipts.
Receipt Delivery:
Receipts will be delivered as a PDF attachment to the contact's email using the selected template.
Custom Template Values:
Improve your receipts using special information in the email creator. This helps you make a unique template for sending receipts. Take out the words "we" and "our."
Refer here for further help - Link
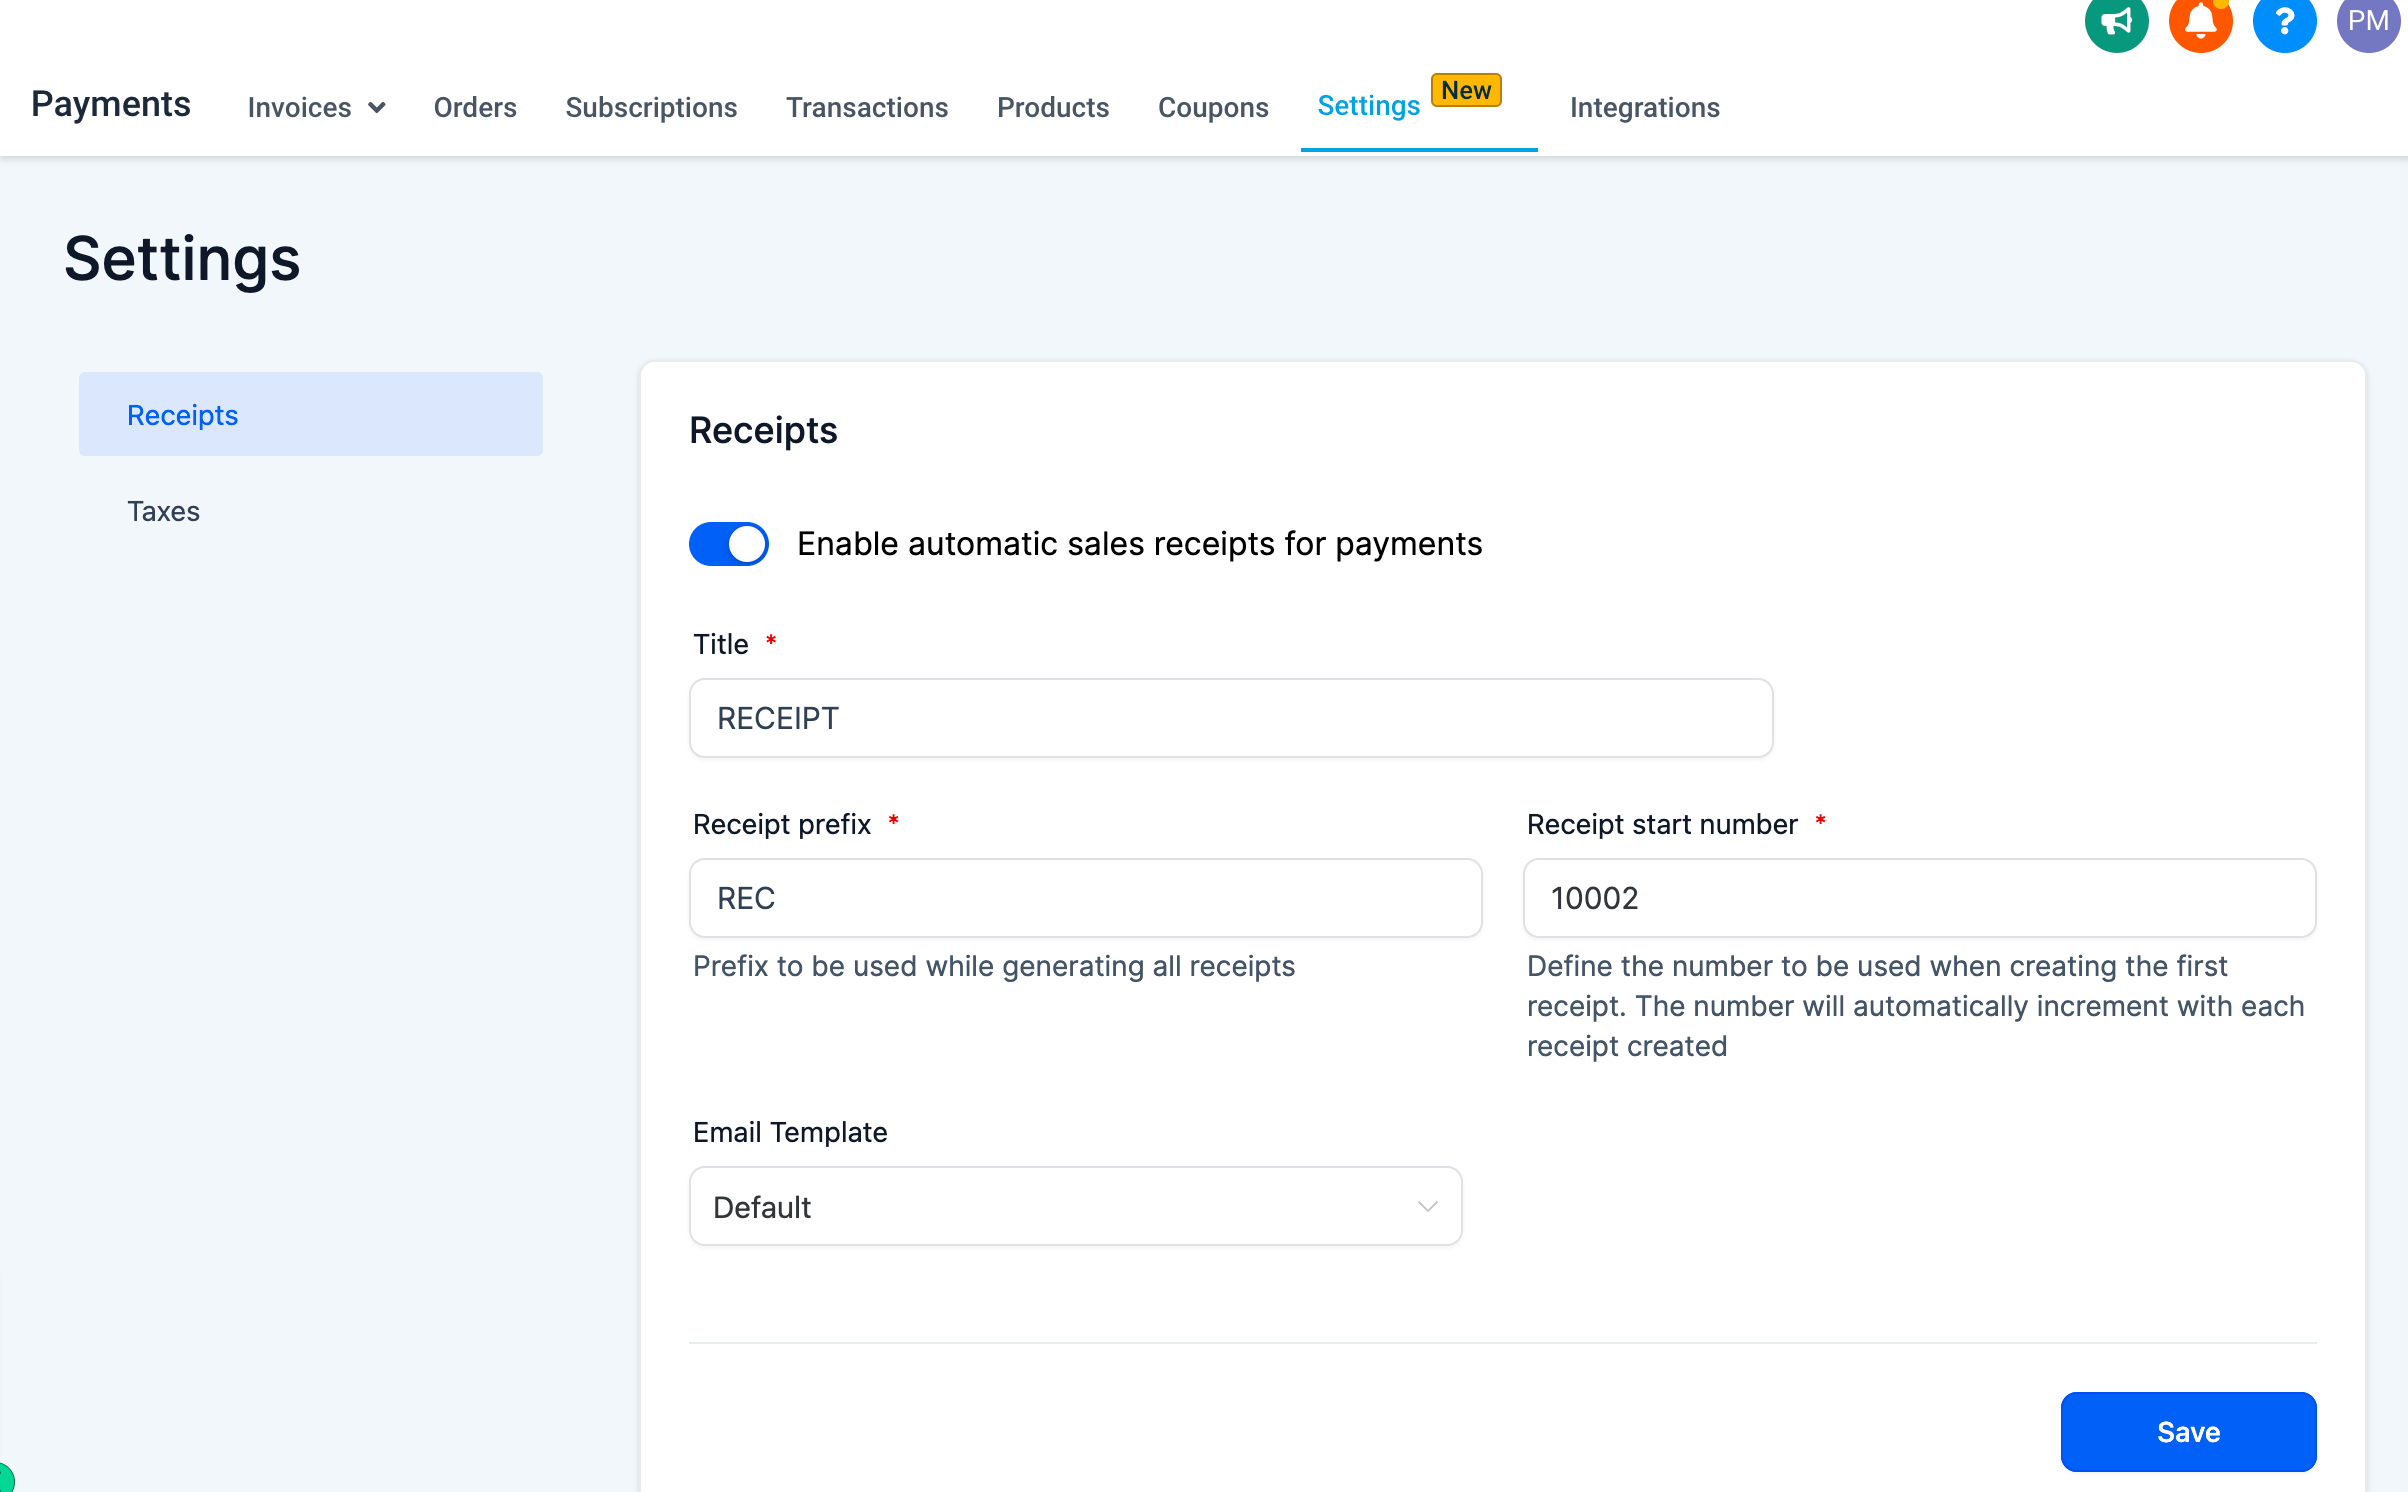
These updates make it easier and more convenient for businesses to acknowledge payments, providing a streamlined and professional experience for both parties involved! 🎉
XML Sitemaps generation for blogs and categories Now Live 🚀
The newest version of the XML Sitemap Generation is now available, designed especially for blogs.
😎 What's New?
This update lets business owners list the website addresses (URLs) of the blogs they add to their funnel or website pages.
It helps find the blogs and categories on the funnel or website pages and goes through the URLs. This is done by only saving the funnel page in the funnel builder.
😎 Old Behaviour
Before, the sitemaps only included the main funnel URL, URLs of funnel/website pages, and any additional custom paths.
🔥 New Behaviour🔥
Currently, in addition to the main funnel web address, we're also keeping track of the web addresses for each page of the funnel, as well as any unique paths. Furthermore, we're now including the blogs and categories that are added to the funnel page or pages.
🌟 How It Works
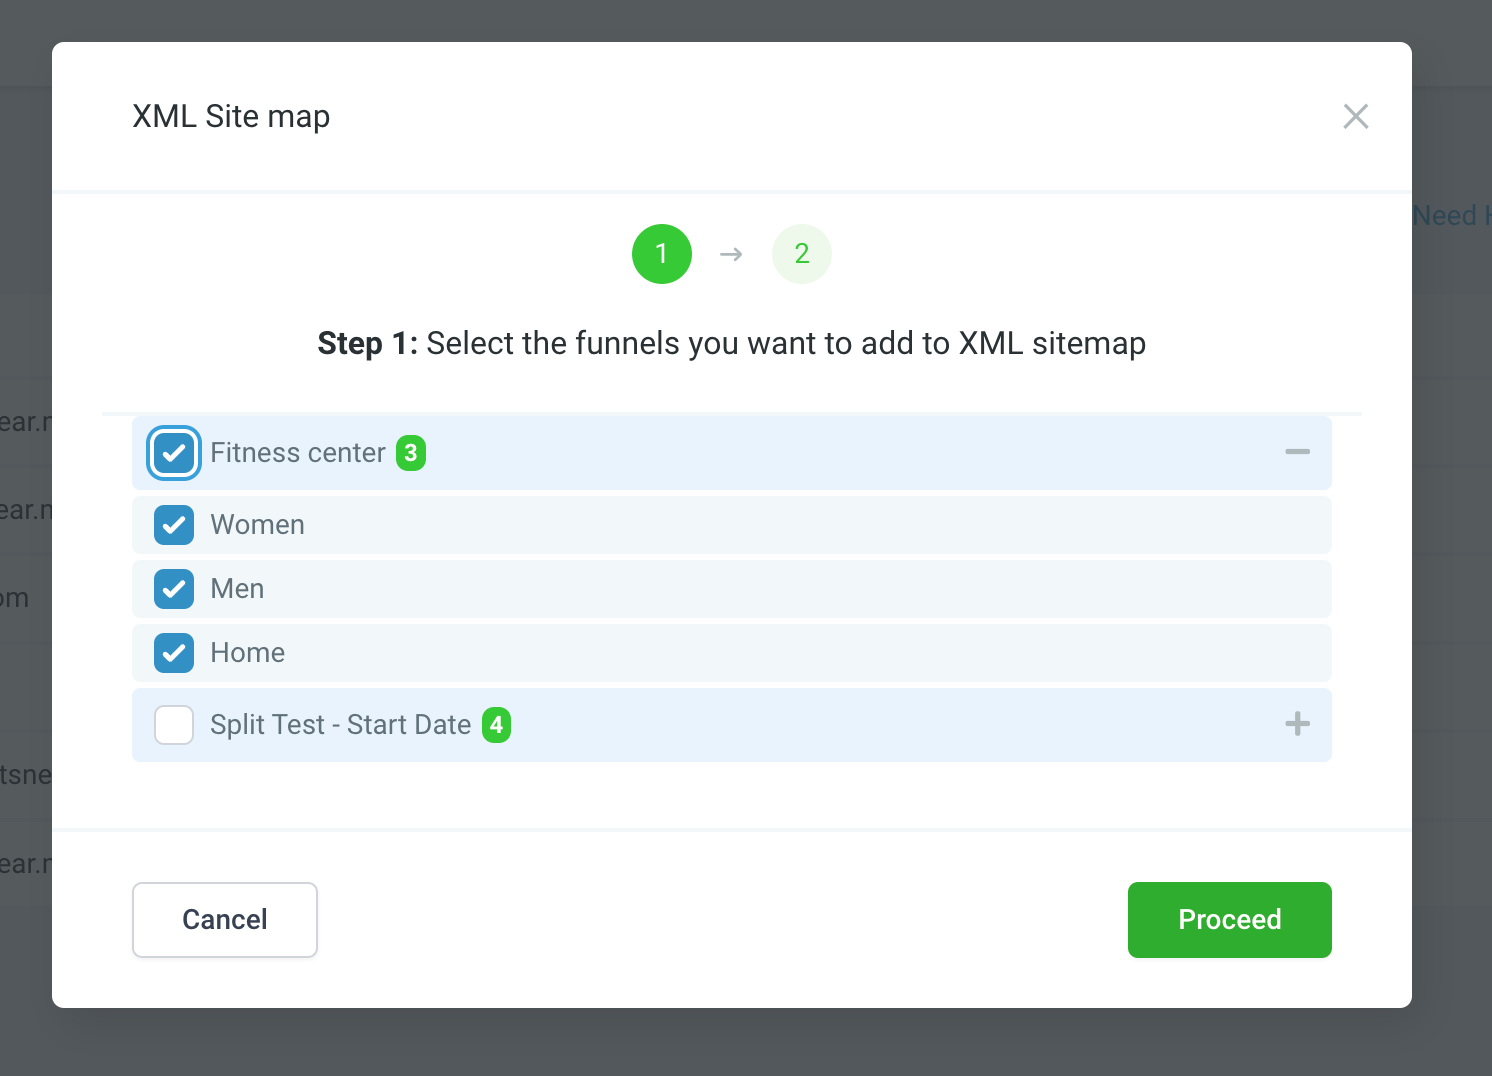
Indexing the blog URLs in a funnel page(s) is very straightforward. Navigate to domain settings -> XML Site map -> Select the Funnel/website page(s) with blogs/categories you want to index.
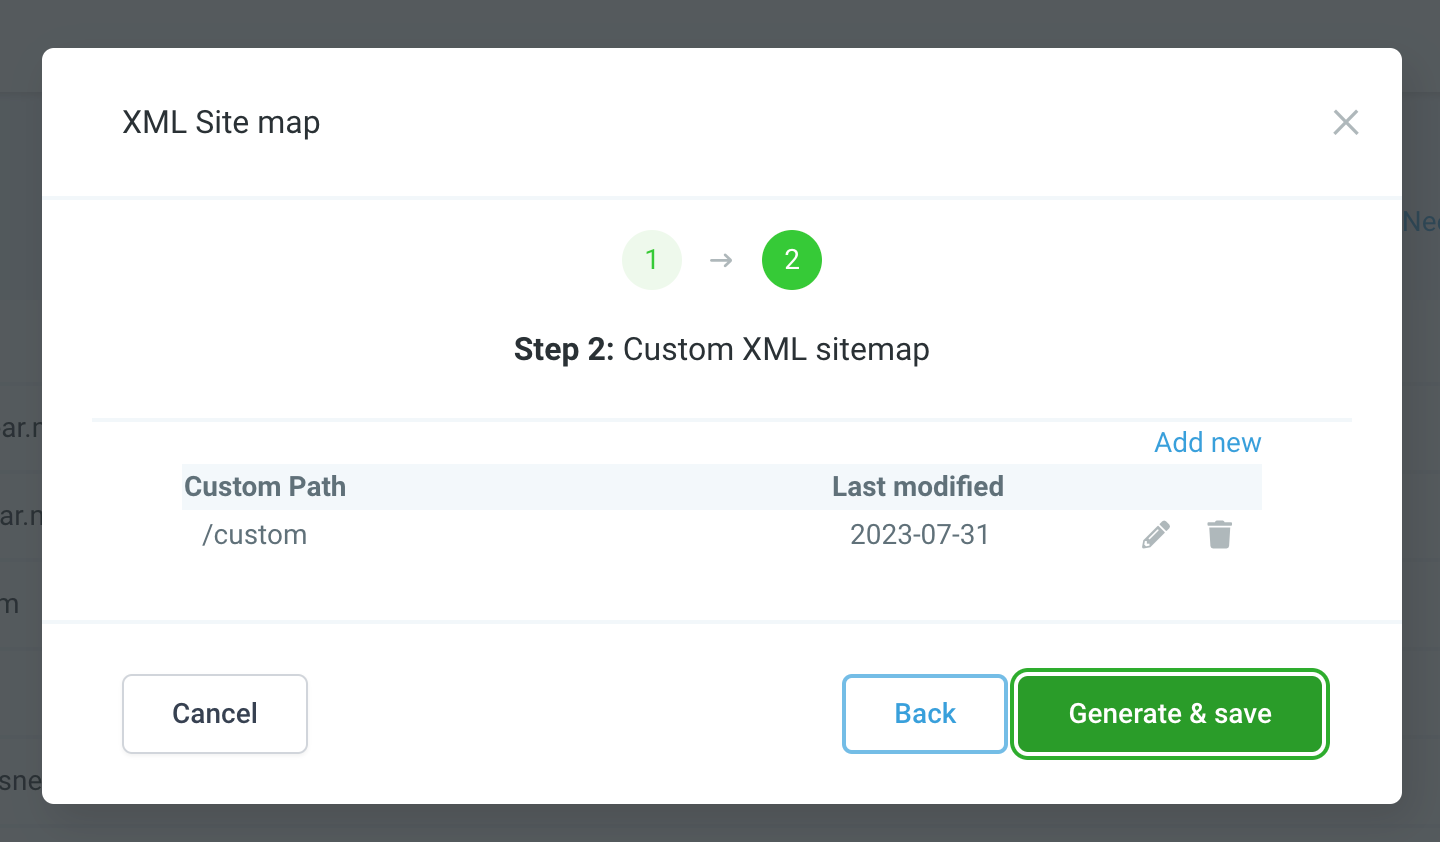
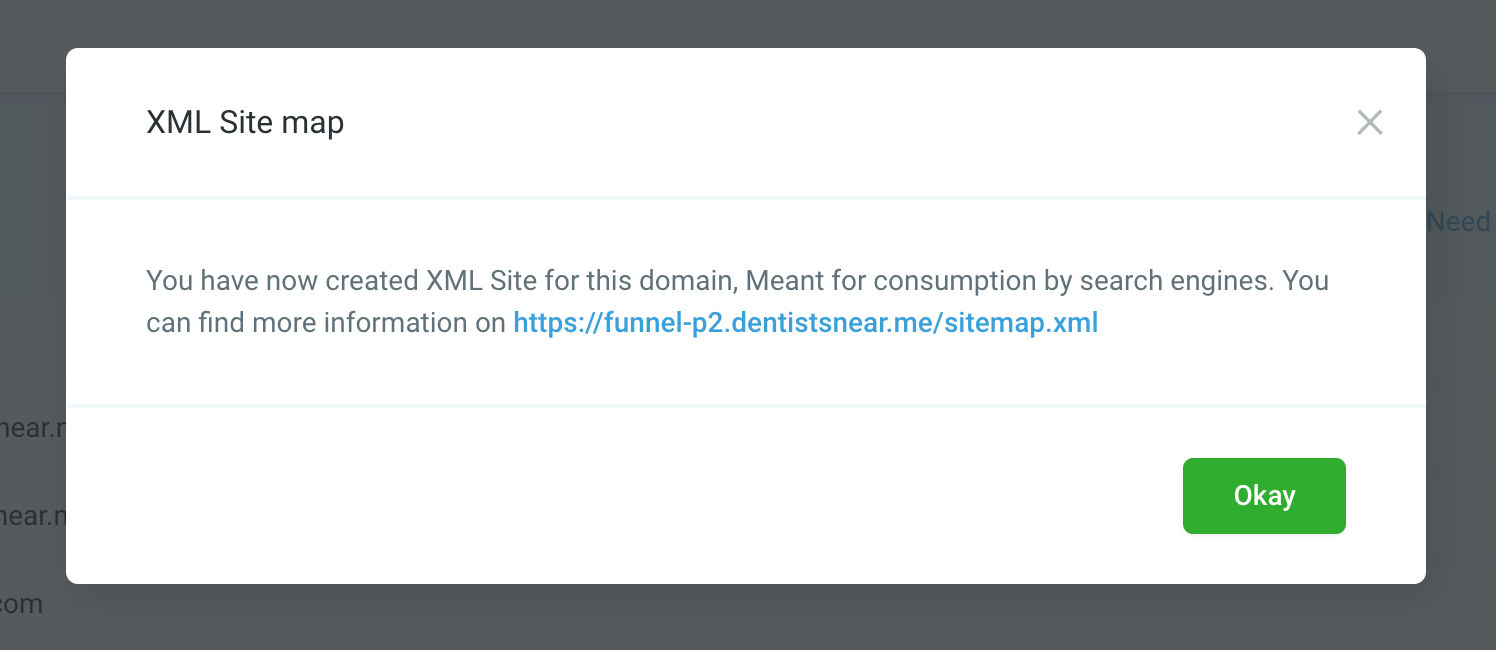
Once you select the funnel/website page -> continue -> provide any custom path if you want -> click Generate and save. You will be provided with the sitemap URL.
🔥 Pain Point Solved
Automatically searching through the website or funnel page to check if it has a blog or category navigation. If it does, the page will be saved. This makes it easier for users, as they won't have to keep visiting the domain's page whenever they make changes to their funnel page.
Note:
Automatic crawling works only if the funnel/website page is selected for crawling. You can check this by navigating to domain settings -> XML Site map.

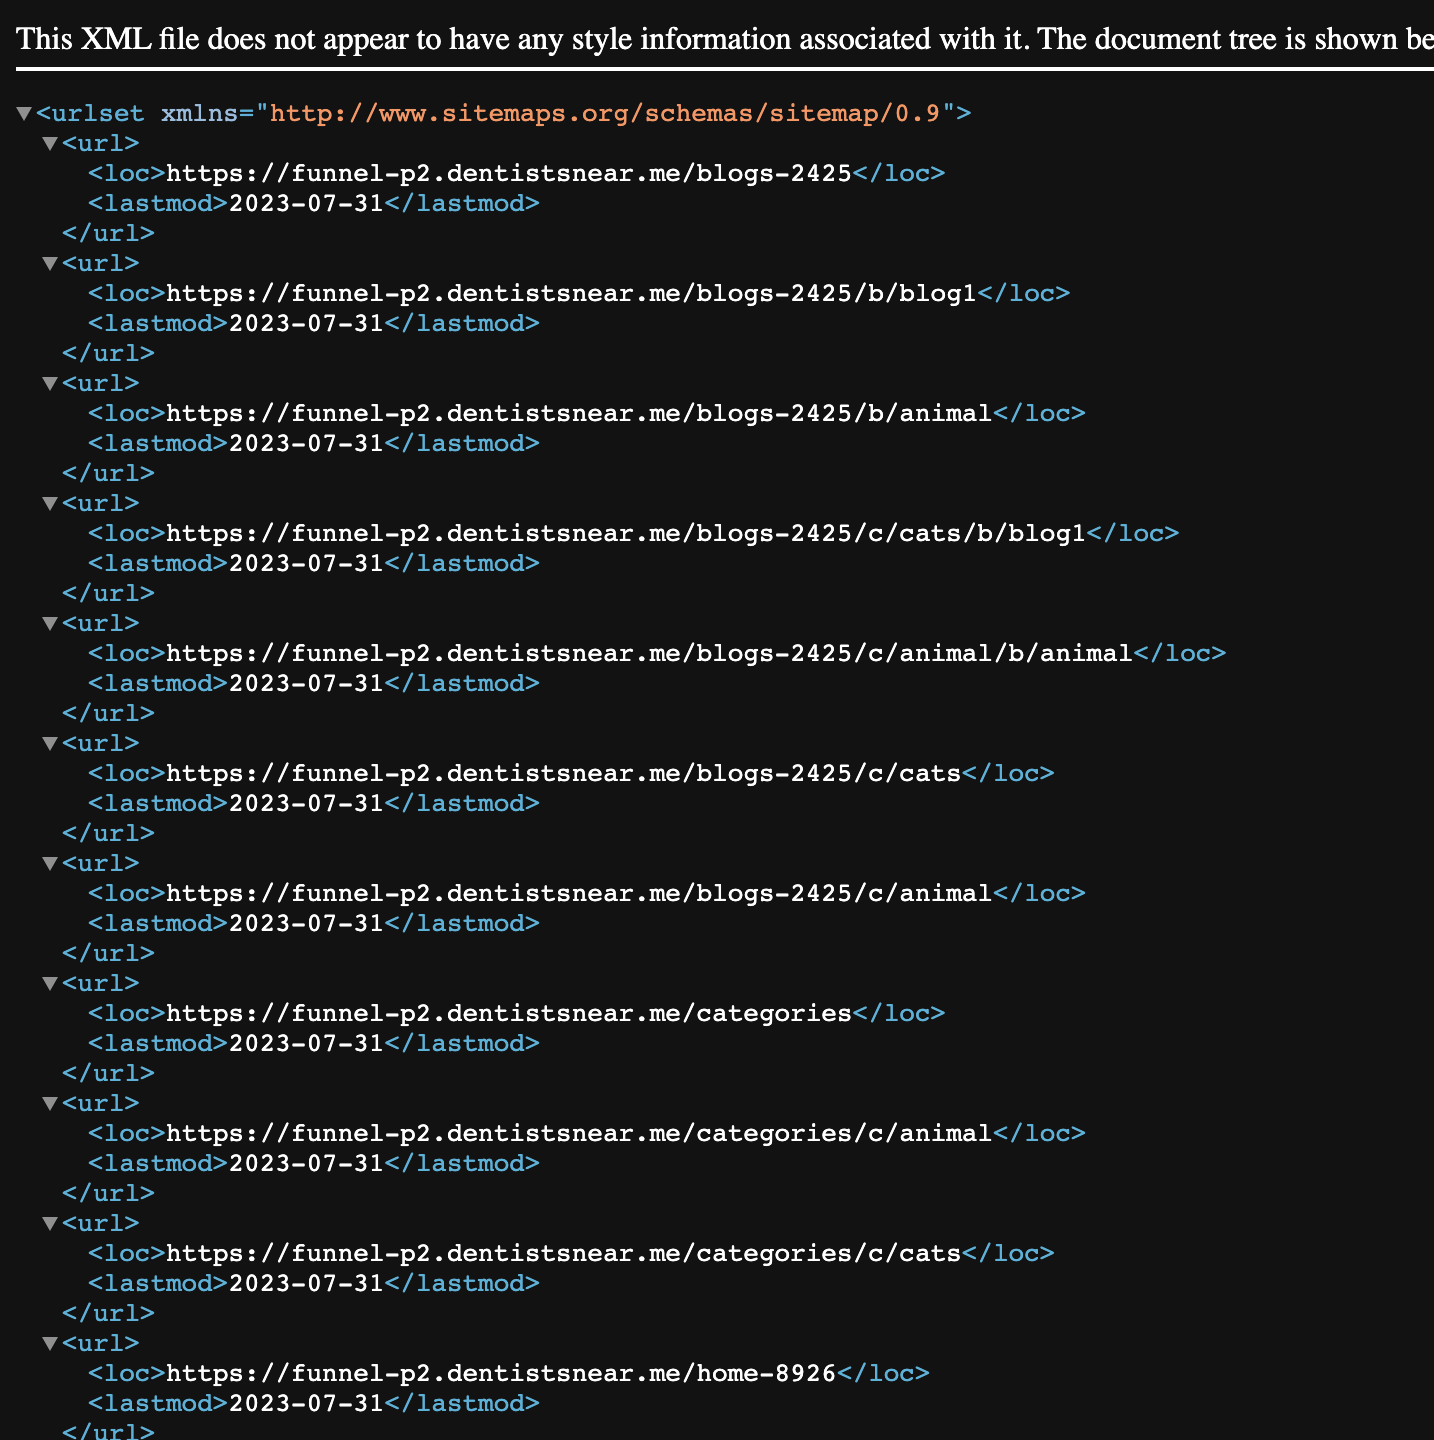
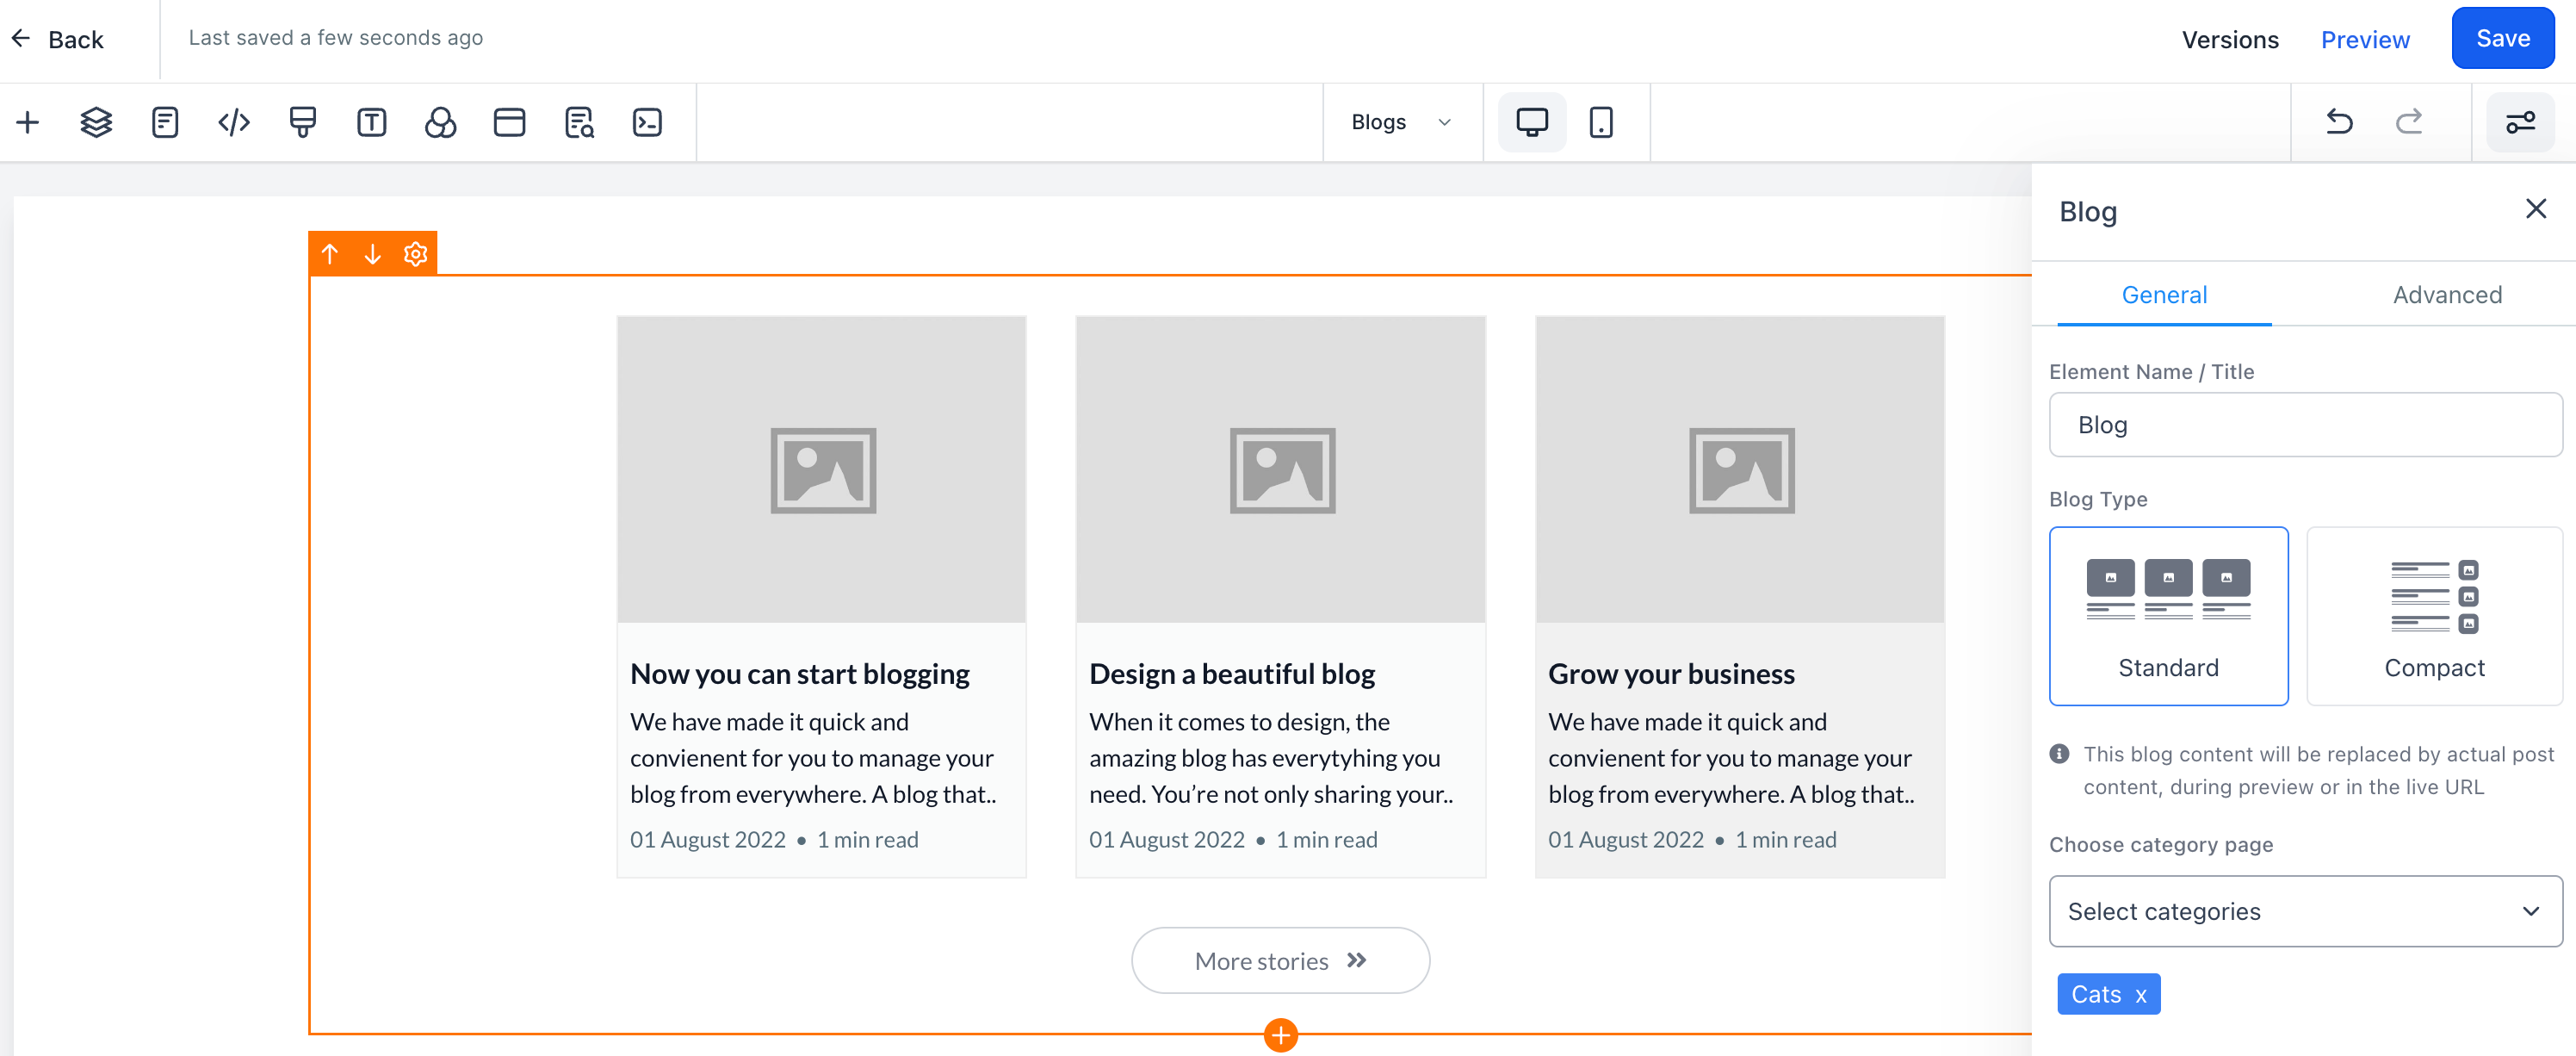
The update brings more control and efficiency to XML Sitemap Generation, enhancing the funnel's performance and search engine presence. 🚀
Sticky Editor Enhancement (New Funnel/Website Builder) 😎
Major User Experience issues faced by users are now resolved 🔥
🌟 Old Behavior
Sticky Editor overlapping the element settings even when not editing text
Sticky Editor opening up without selecting any text
Save button is blocked by tooltip.
🌟 New Behavior
The sticky editor will be showing up below the text
The sticky editor will show only if text in the elements are selected.
Quick loom for the update: https://www.loom.com/share/ee23bcca828b4504ae108f8c89fe392d
😇 Create Surveys with Template Library
Template library now supports Survey. Save time by using predefined mind-blowing templates.💥
📑 Why should you use Template Library in Survey?
Adoption: Get started with few clicks rather than starting from scratch.
Time Efficiency: Templates provide pre-designed, reusable look and feel elements components that can be easily integrated.
Personalisation and Customisation: While templates provide a standardised foundation, they can still be personalised and customised to meet specific customer needs. CRM users can modify templates by adding personalised details, such as names, specific selections or tailored messages.
Consistent Branding: Template libraries enable organisations to maintain consistent branding throughout customer interactions. Get it in different business categories and tag associated.
🤗 Where will we find Survey Template Library?
Go to Sites > Survey > Add Survey
Select to start from scratch or Choose from Template

3.Choose the option, view the full form and details like preview and if any customisation/pre-setup required.
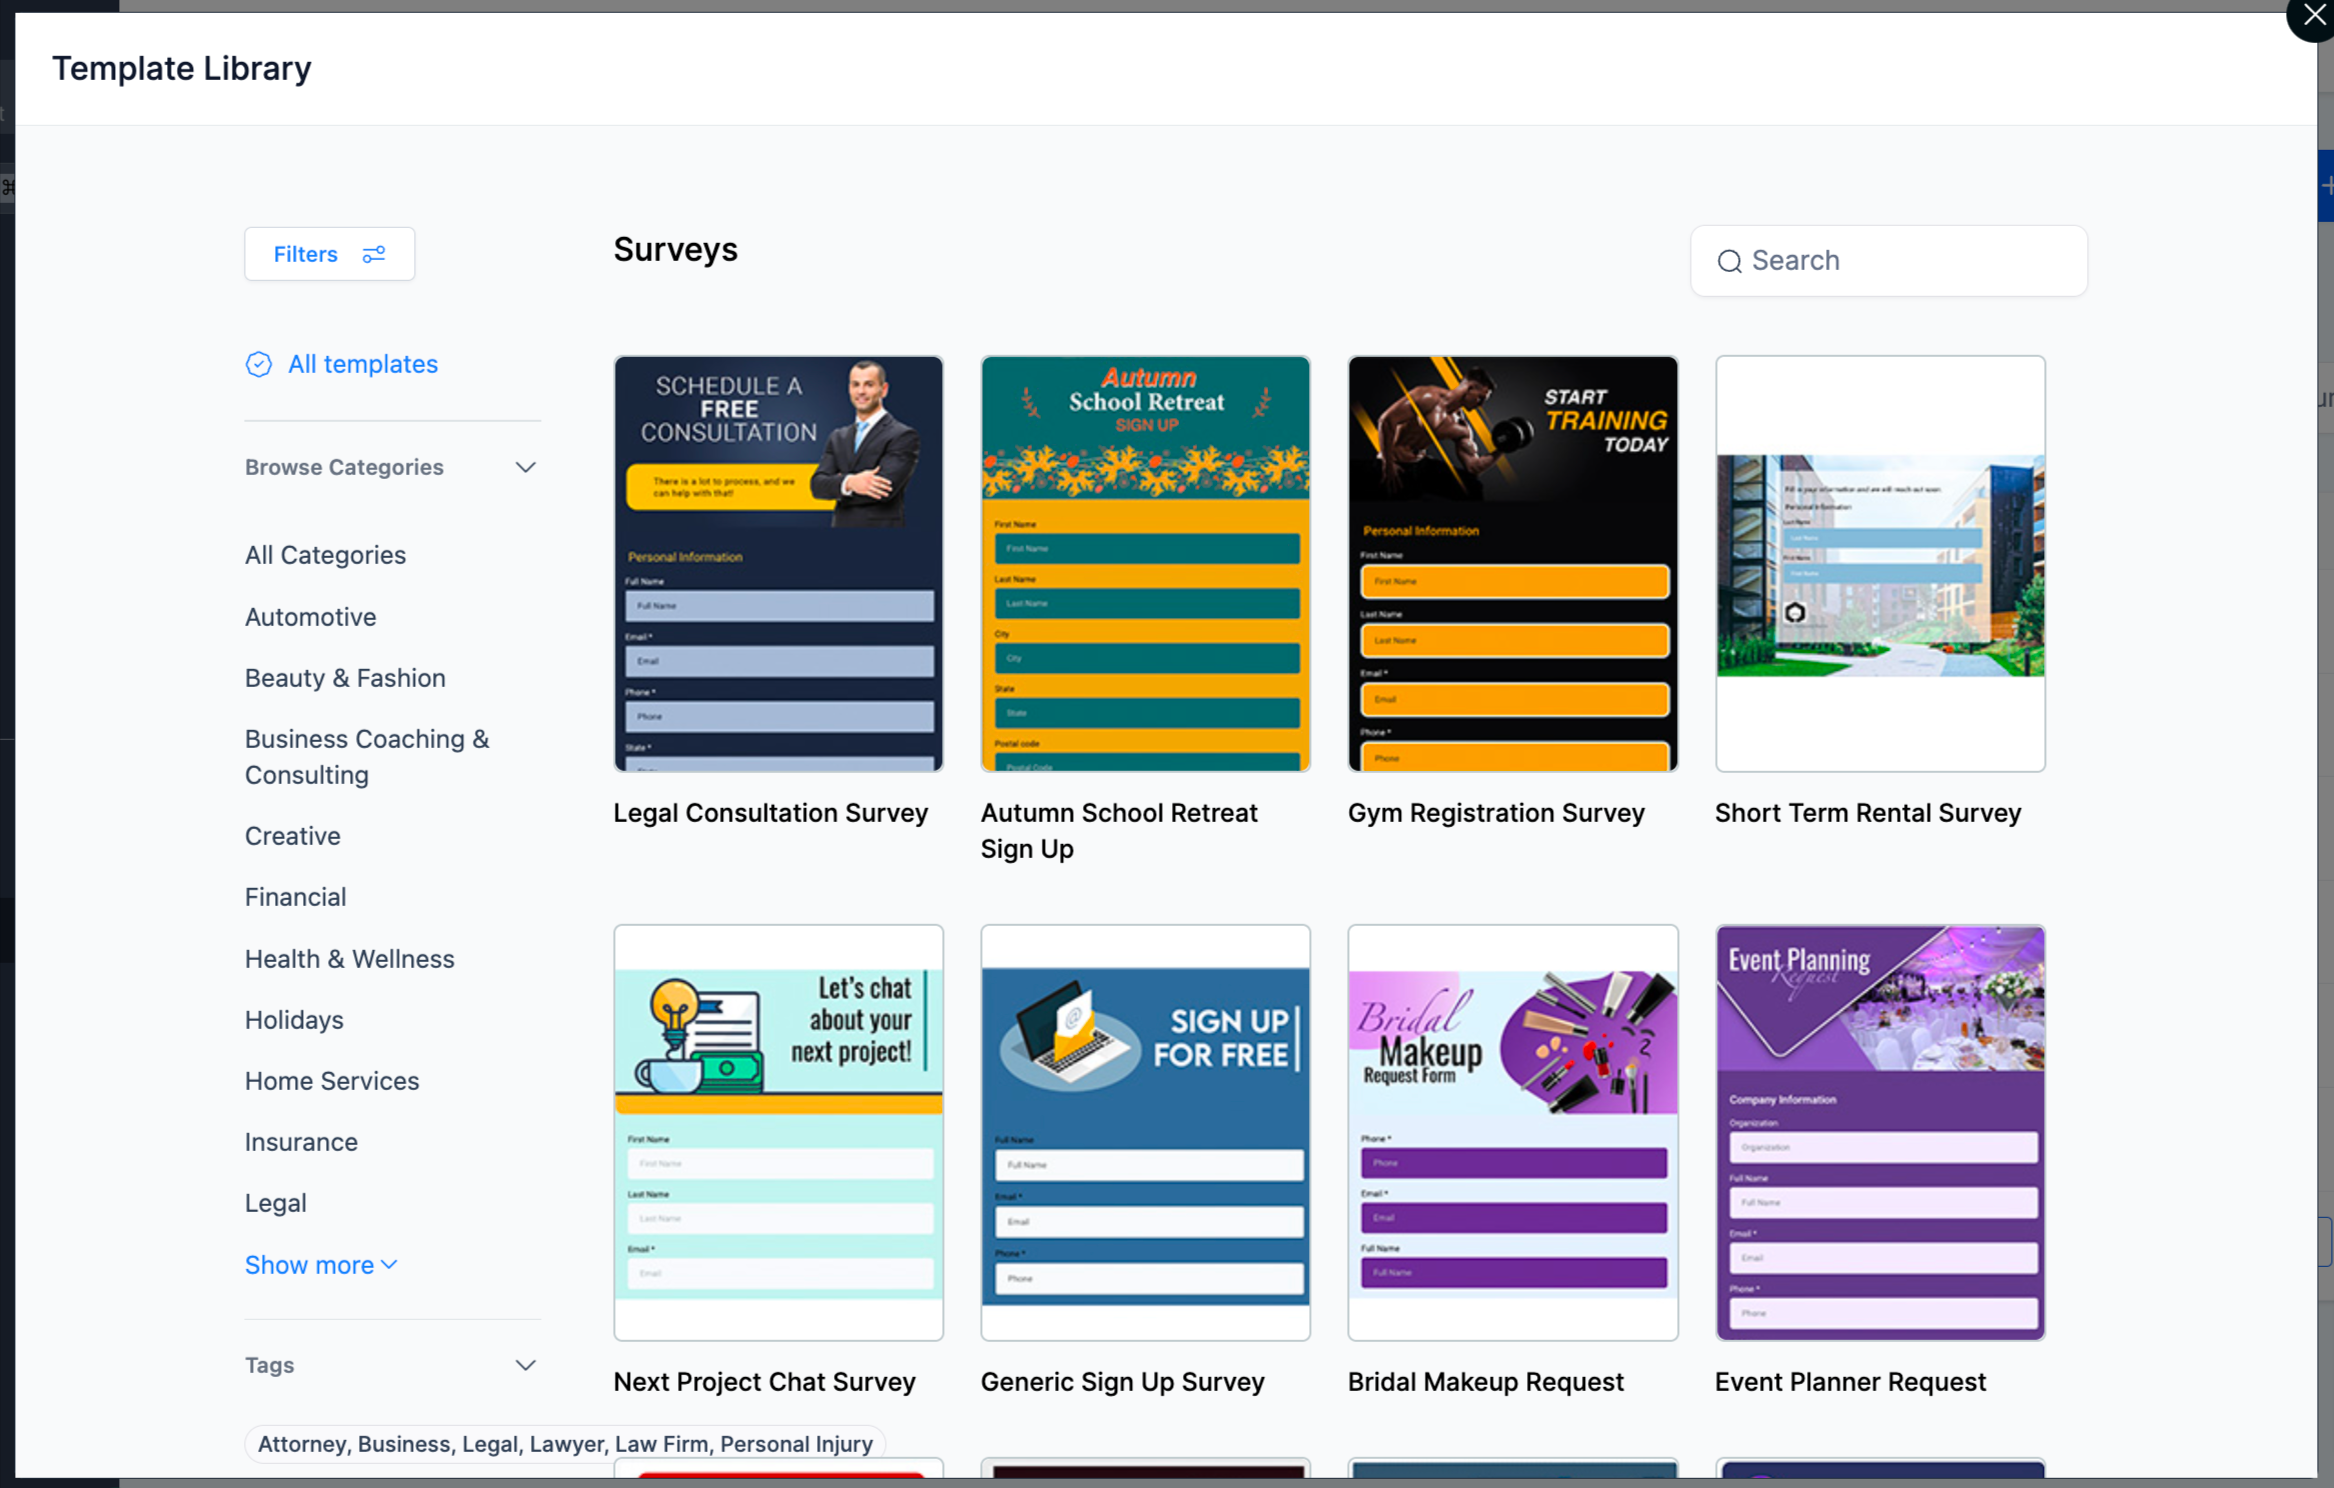
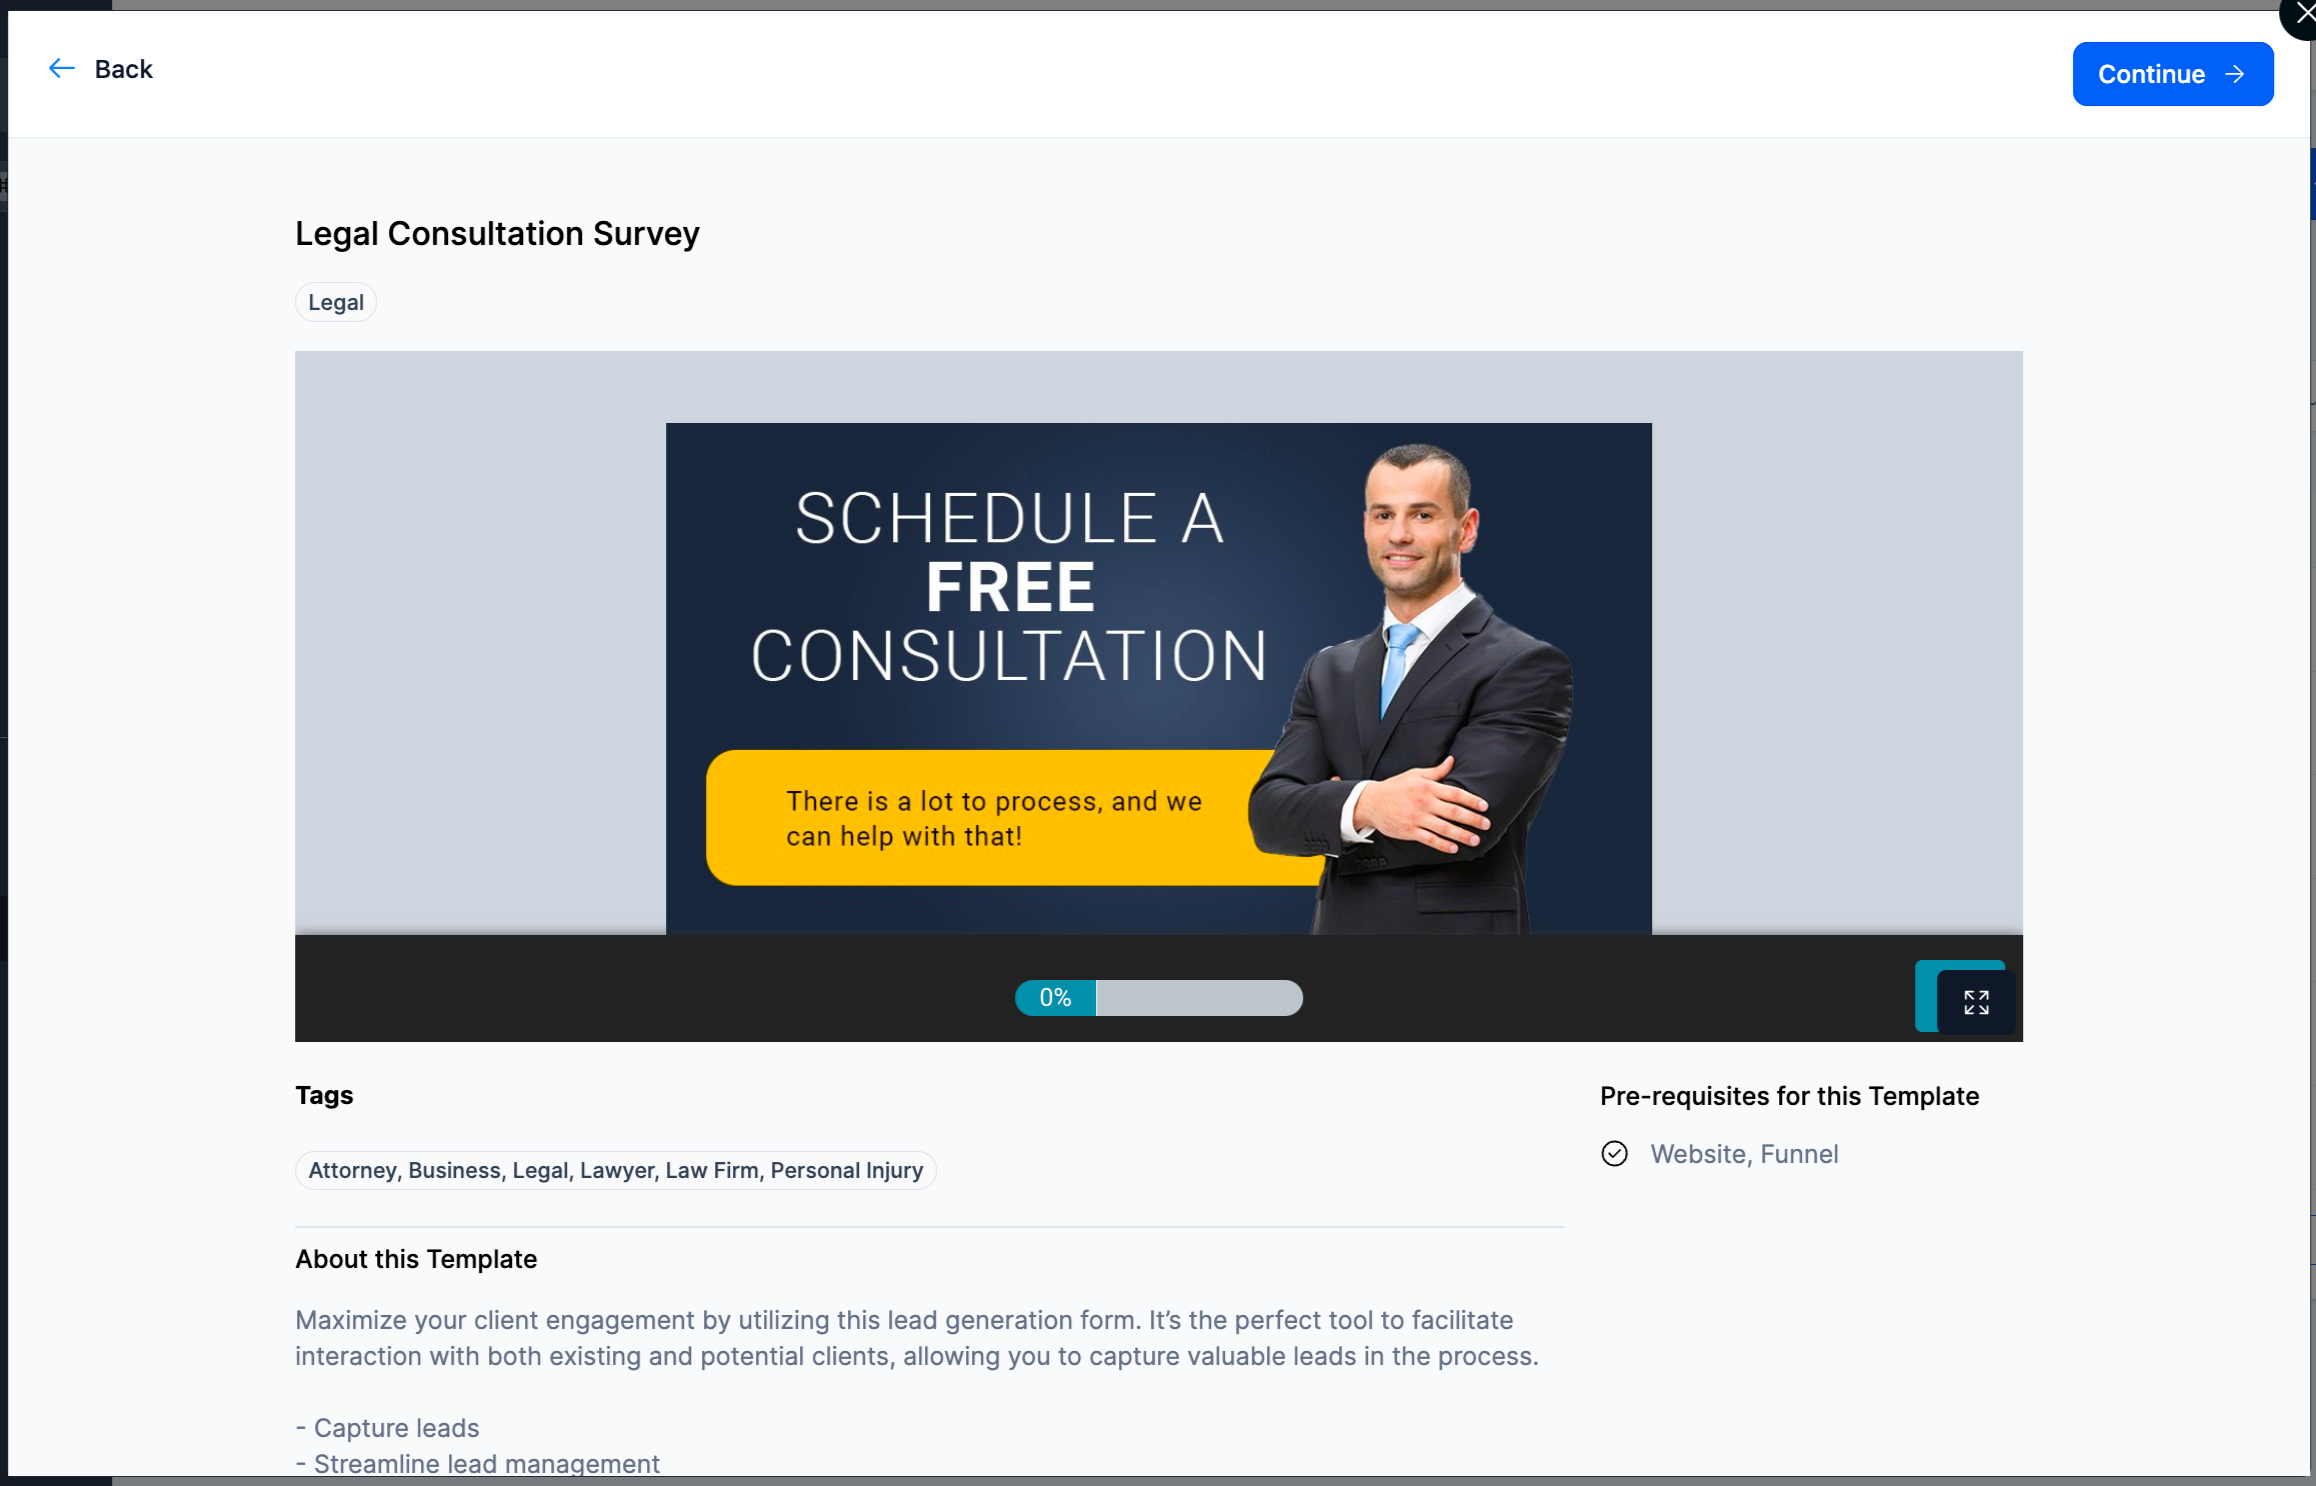
4.Go forward with Continue to add Survey Template.
👥 How to Enable Template Library for Client(sub accounts)?
Navigate to Agency Settings > Company > scroll on right to enable of Template Library
Copyright Automate Your Hustle CRM 2022 -- All Rights Reserved
We don't want to hustle harder...we want to automate the hustle!