
BLOG
Automate Your Hustle CRM Updates - SEPTEMBER 8, 2023
🤖We are rolling out the latest updates to the Automate Your Hustle CRM for the week of September 2nd-8th, 2023. Stay tuned for some exciting improvements!
If you have any questions regarding these fresh additions or any other matters concerning Automate Your Hustle CRM, please don't hesitate to reach out to our exceptional support team at [email protected].
[Workflow] Opportunity Triggers
Workflow now has two more Opportunity triggers:
Opportunity Created
Opportunity Changed
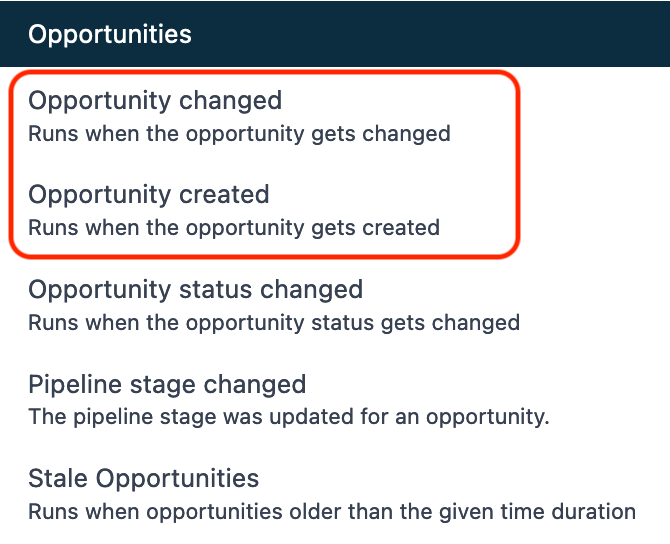
Triggers can be configured with different filters: Assigned to, In pipeline, Has Tag, Lead value, Status, Opportunity Custom Fields and Contact Custom Fields
https://ideas.gohighlevel.com/automations/p/workflow-opportunity-enhancements
Typography Preview Live in New Funnel/Website Builder 🚀
Typography Preview Live in New Funnel/Website Builder. Please turn it on Brand New Funnel Builder from LABS to use the feature.
🌟 Old Behaviour
Users have no idea how a font looks like when they try to select a font from the Typography settings.
Font has to be applied in order to see how it looks which is an extra step for users
🔥 New Behaviour
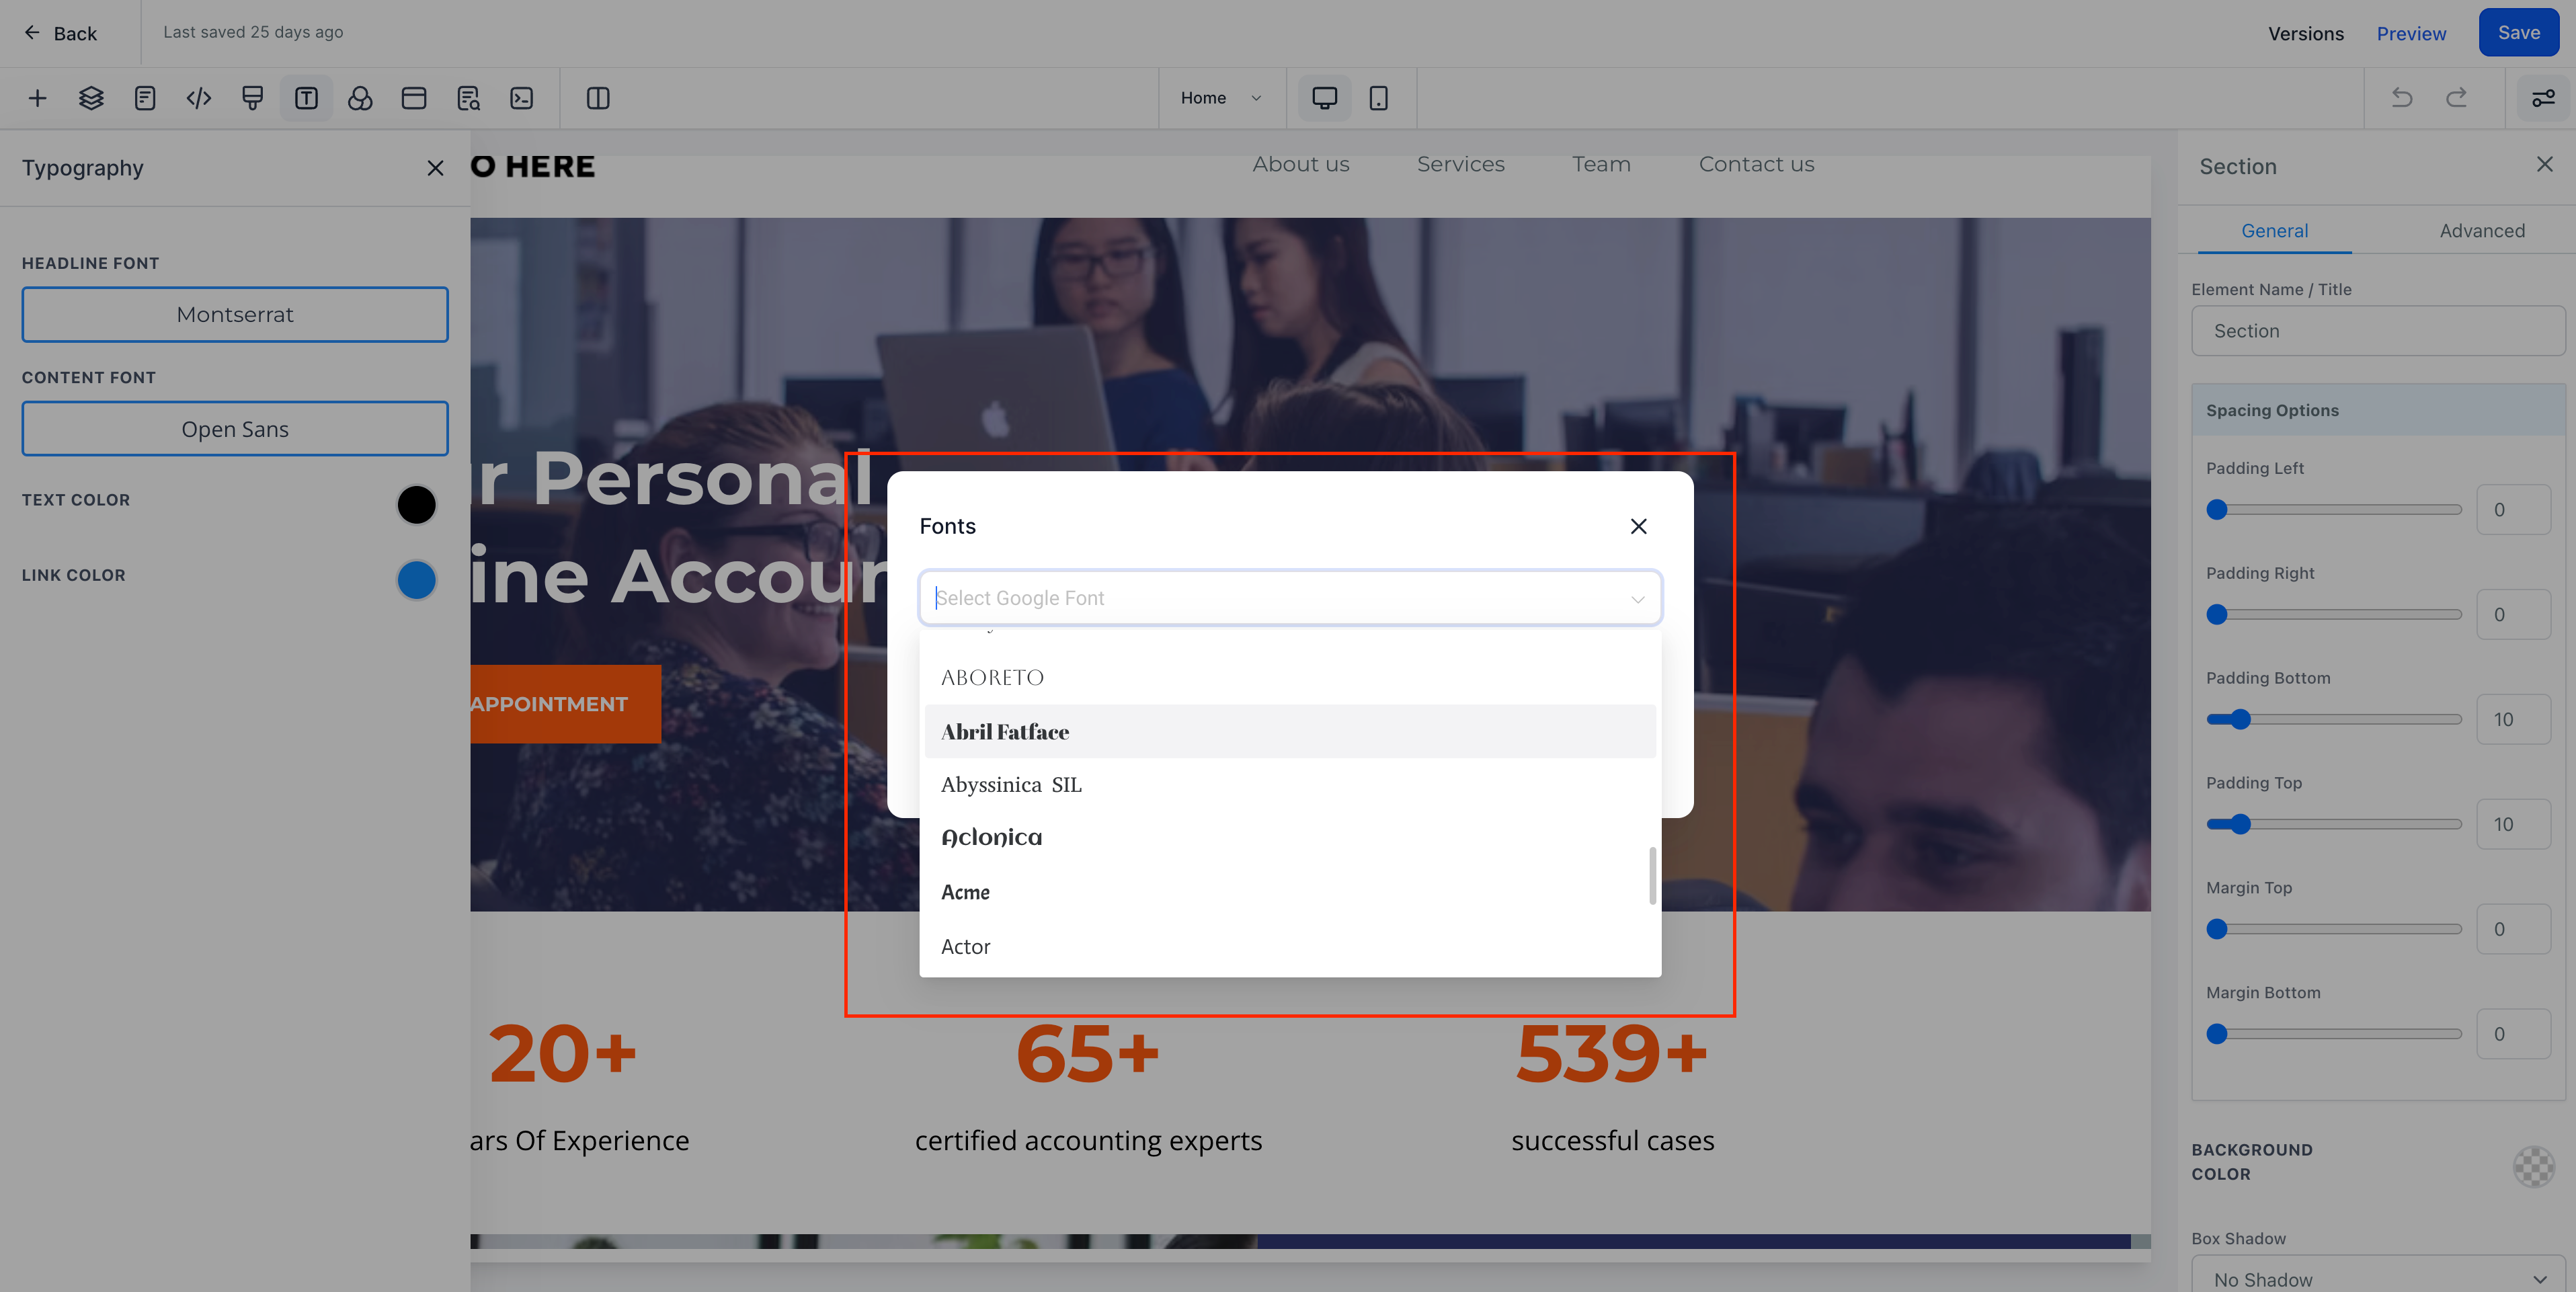
User's will now be able to search fonts across the list of 1500+ available fonts in Google Fonts, and see how it looks like in the font selection dropdown itself instead of applying it and then seeing how it looks
This reduces an extra step and makes the funnel/website building process faster.
😎 How It Works 😎
Go to location settings and turn on Brand New funnel Builder,
Go to the Builder and Go to Typography to see your font.
🌟 Google Fonts in New Form and Survey Builder with GDPR-Compliant Typography Option 🌟
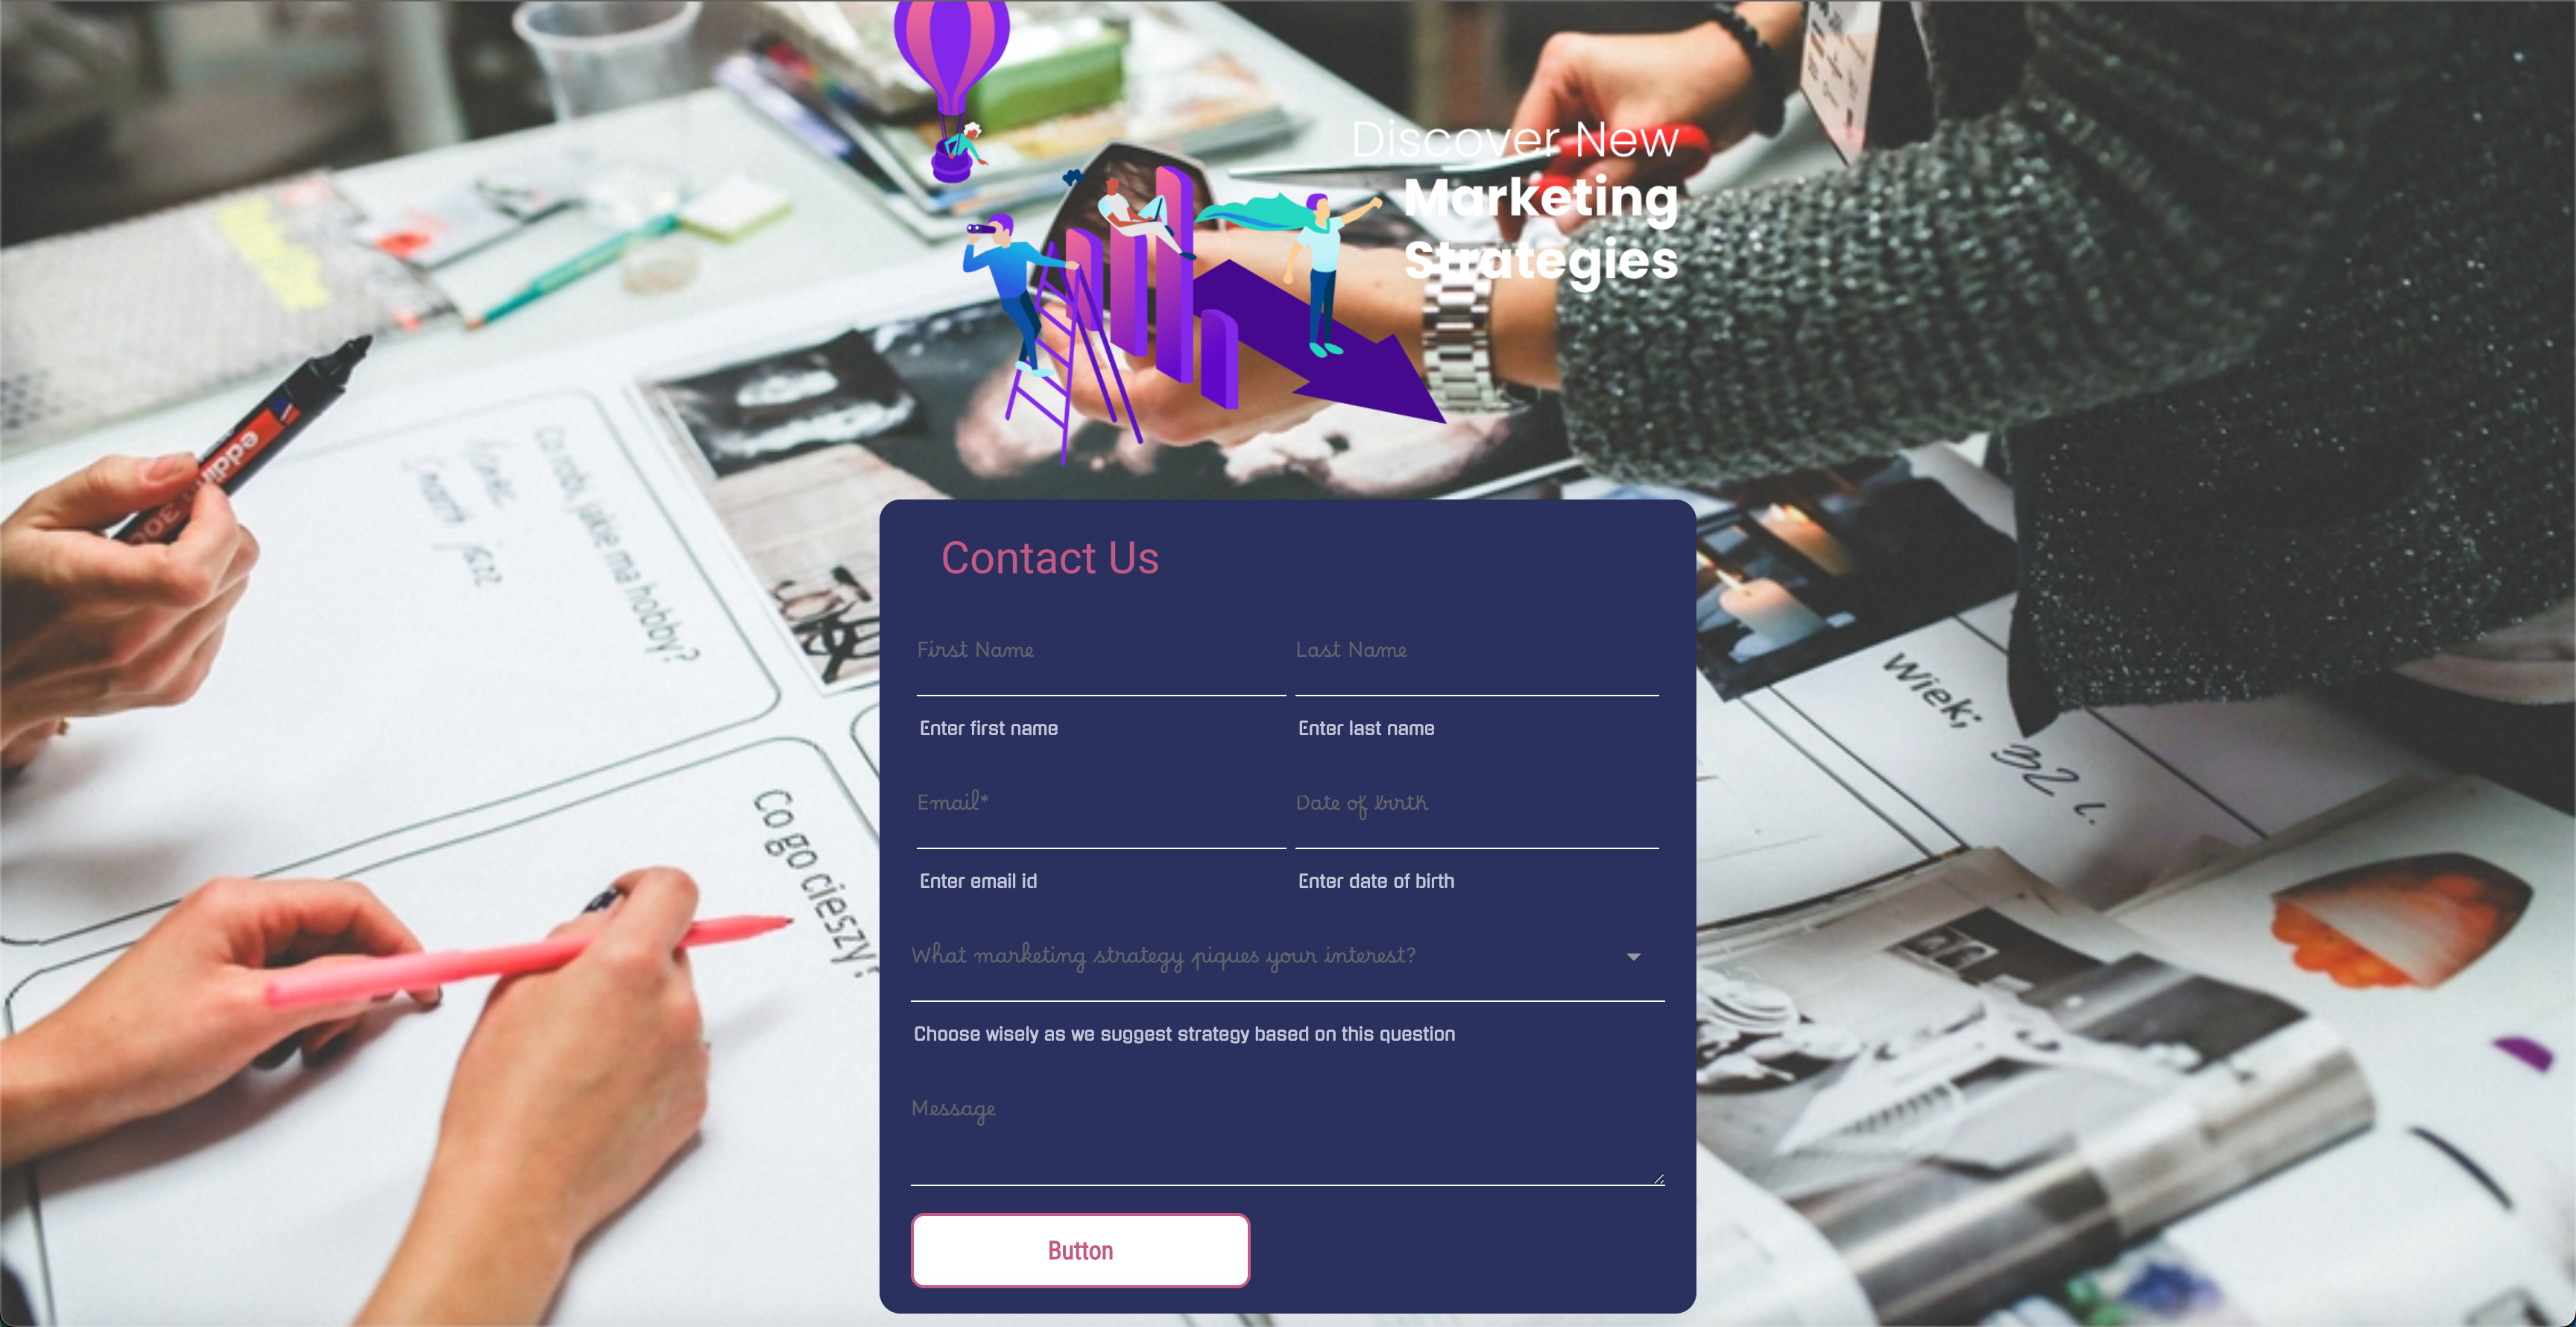
The latest Form and Survey Builder now includes a sophisticated enhancement: a seamless integration of Google Fonts with GDPR-Compliant Typography.
🔥 Why Google Fonts with GDPR-Compliant Typography Option ?
Design Versatility: You can pick from over 1500 different fonts. These fonts come in various styles and moods, so you can match them with your brand or design choices for your forms and surveys.
GDPR Compliance at Its Core: Protecting data is crucial. The Typography we provide follows GDPR rules, ensuring the fonts used in your forms and surveys meet these standards. This guarantees your confidence when handling user data.
Professional Visual Appeal: Typography can greatly impact how your forms and surveys look. Using Google Fonts can easily make your designs look better and more welcoming.
😎 How It Works 😎
Integrating Google Fonts with GDPR-Compliant Typography is intuitive and user-friendly. Here's a quick guide:
Enable New Builder: Enable new builder from Labs section in your location settings
Access Google Fonts: Open a form and go to the Font Family Settings section in the Form and Survey Builder. Here, you'll find a carefully chosen set of fonts that meet GDPR requirements and work well for different design purposes.
Select Your Fonts: Select fonts that match your design vision and meet GDPR compliance needs.
Fine-Tune Typography: Modify the size, style, and thickness of the font to get the precise appearance you want, all while following GDPR rules.
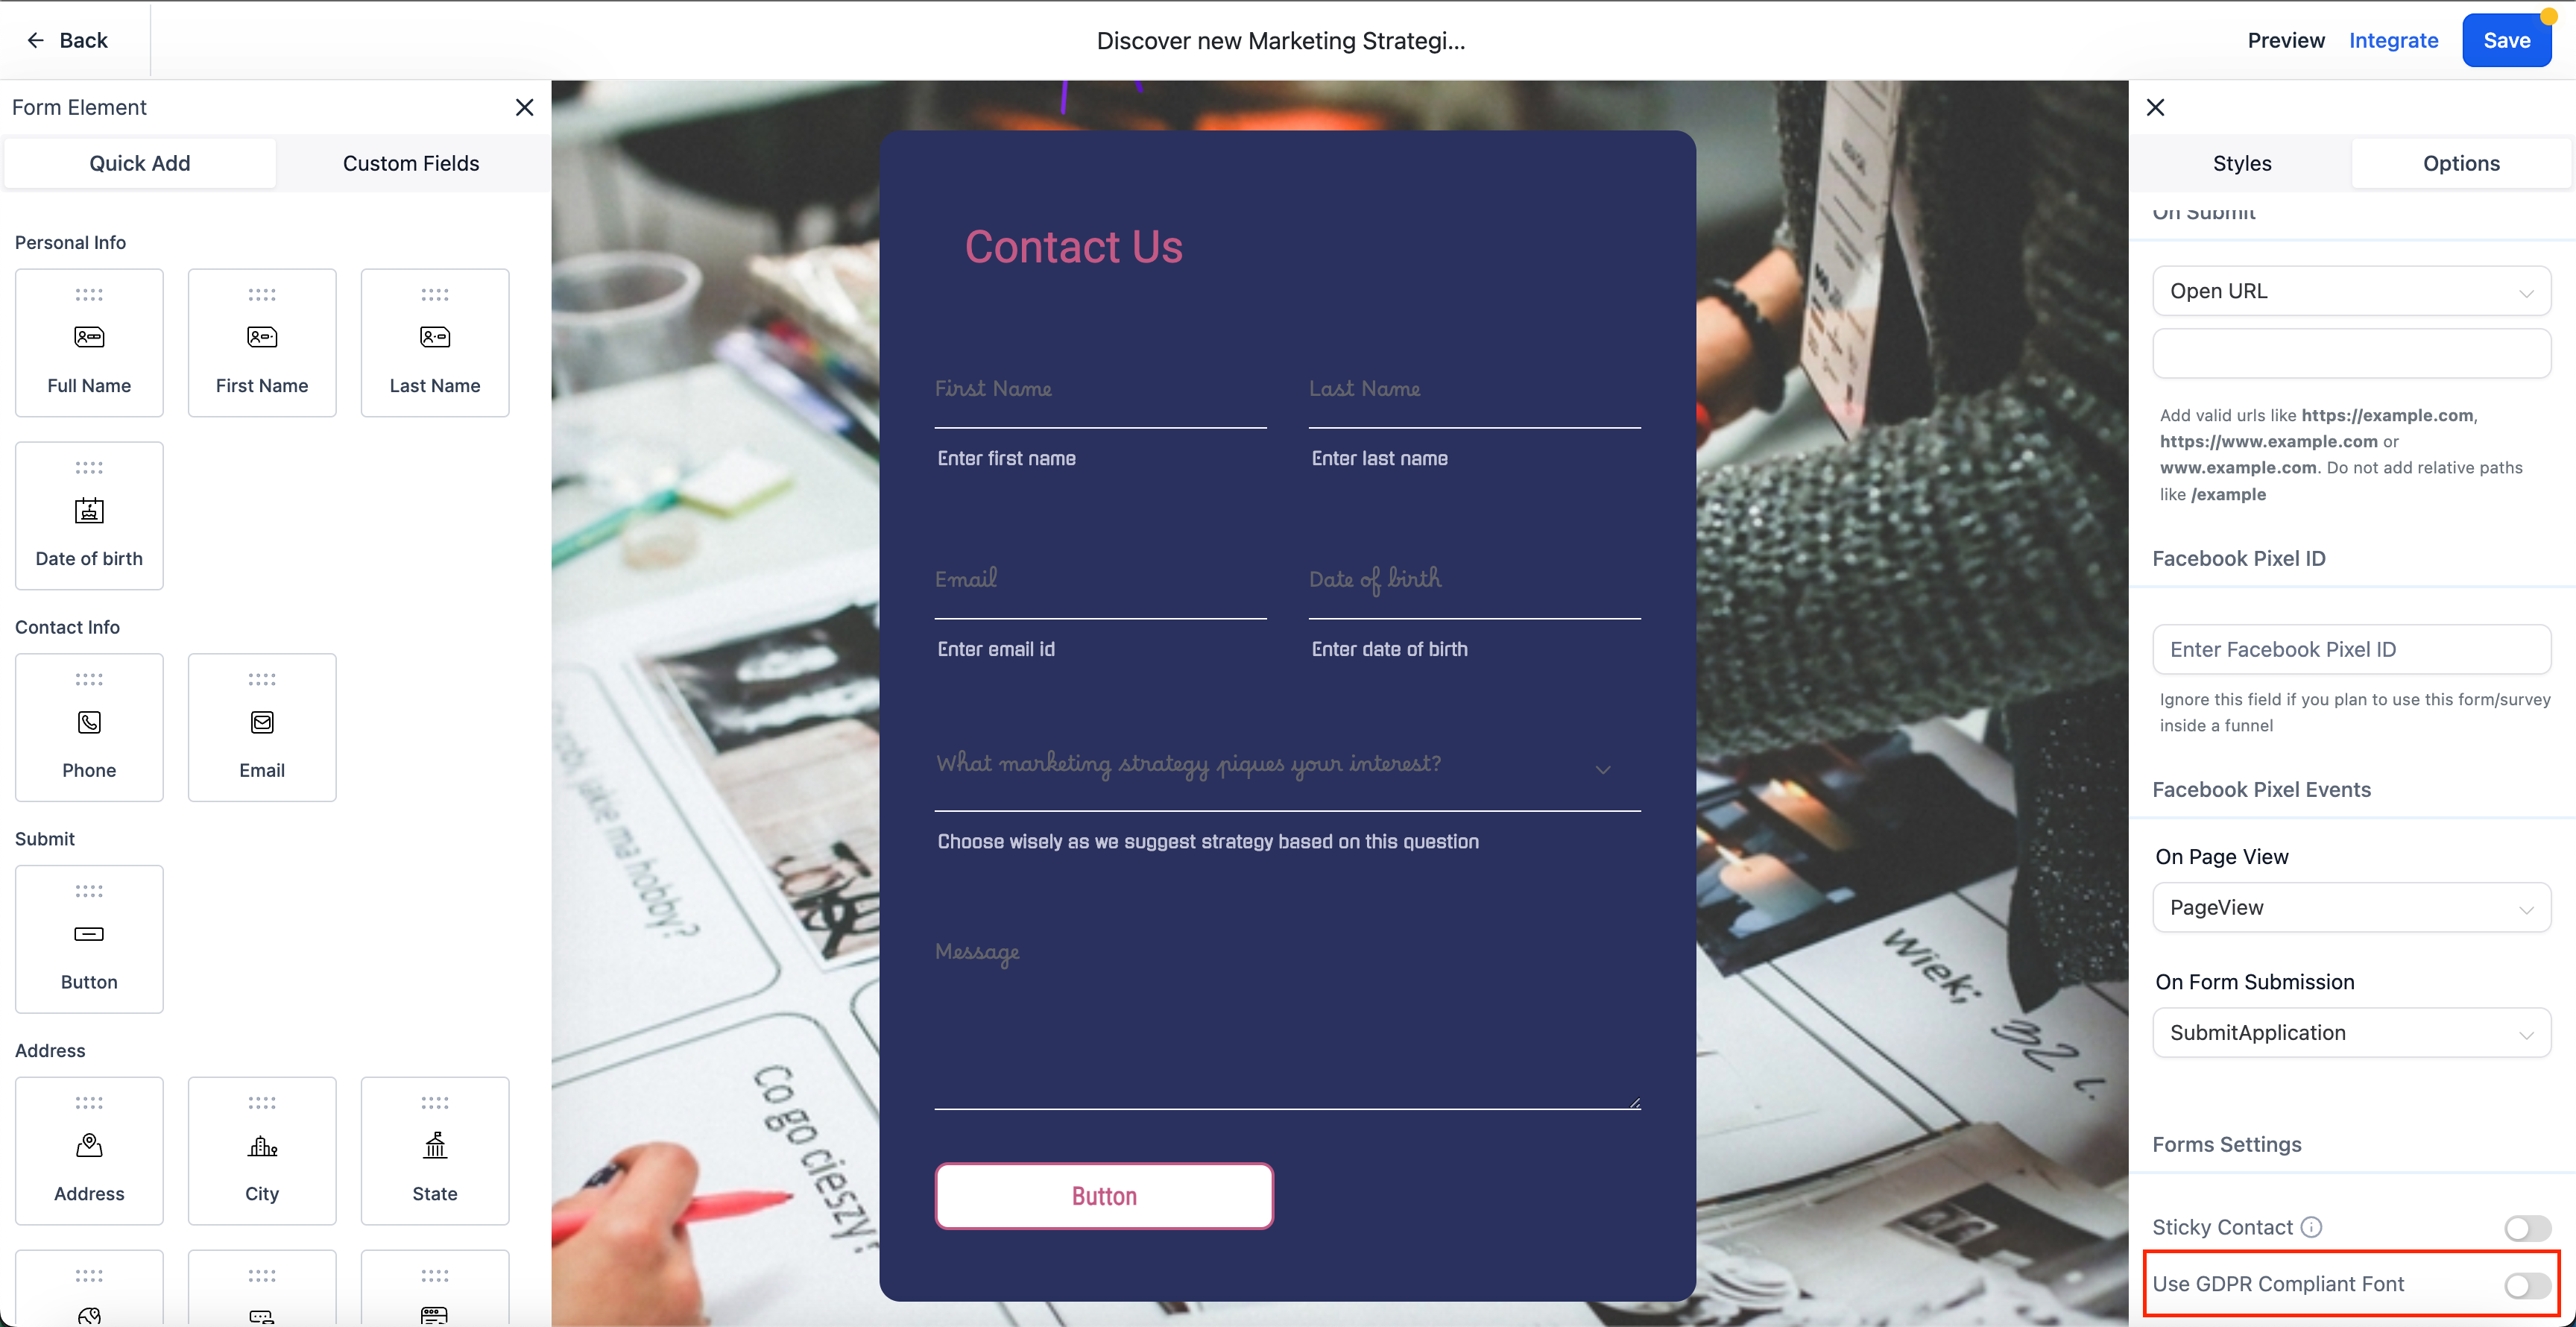
How to Enable GDPR compliance Font: Go to right sidebar settings, In Options tab you can find switch to enable or disable GDPR compliance Font
Note: If You don't find your font in the list then use search feature attached to font family select options that will search all possible google fonts for you.
Examples:
Internationalisation of New Funnel Builder 🌍
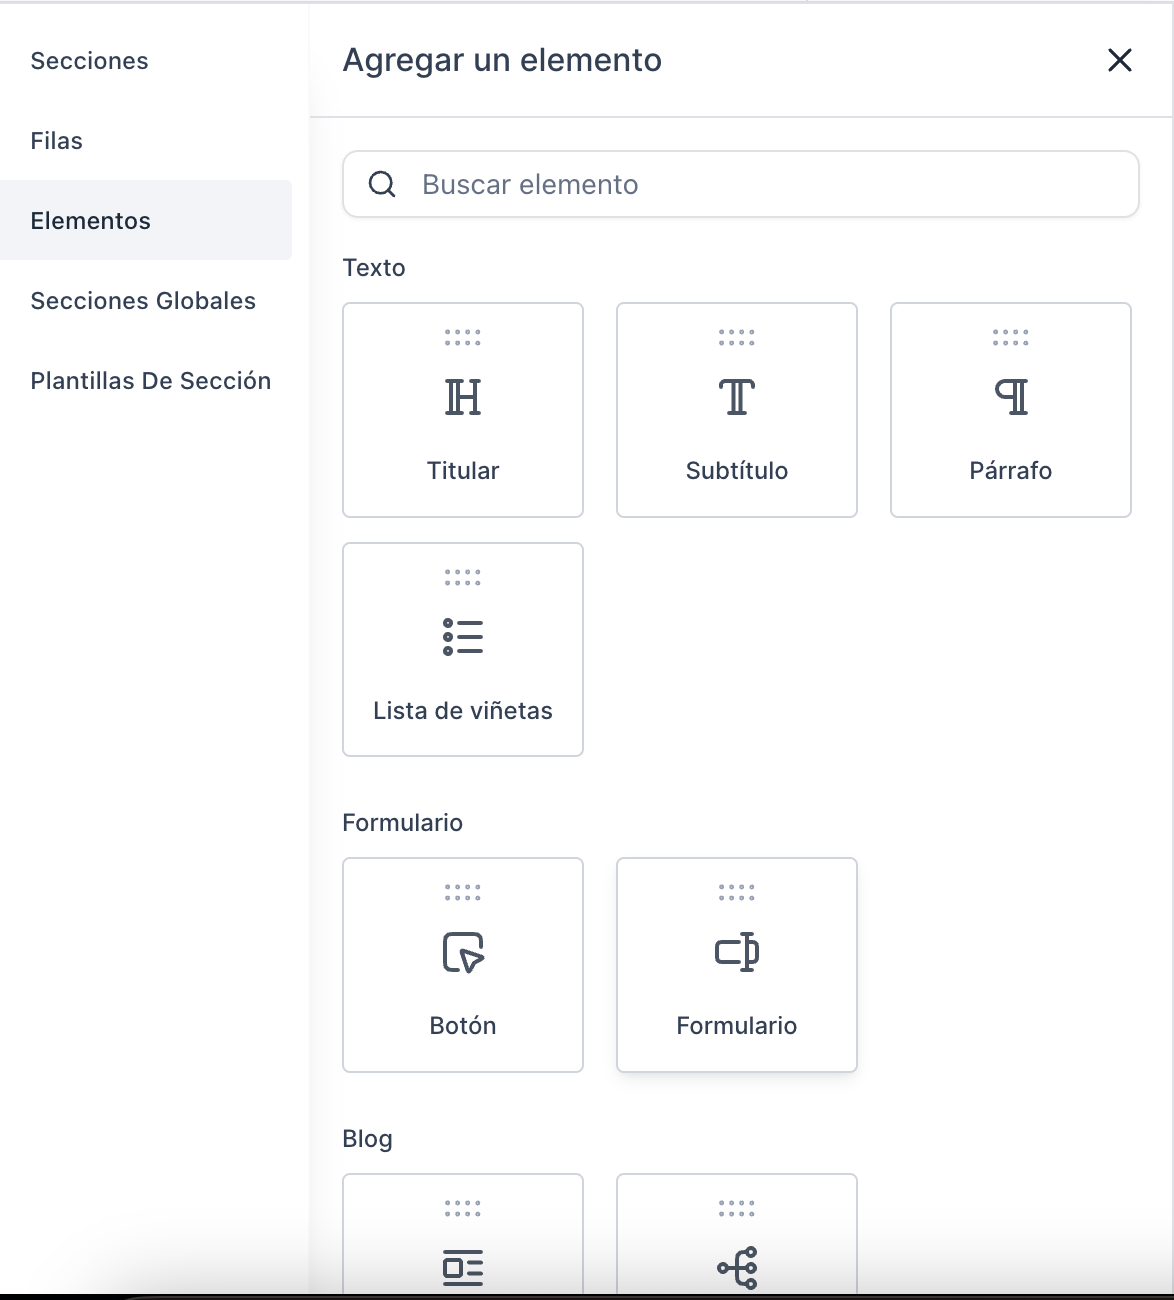
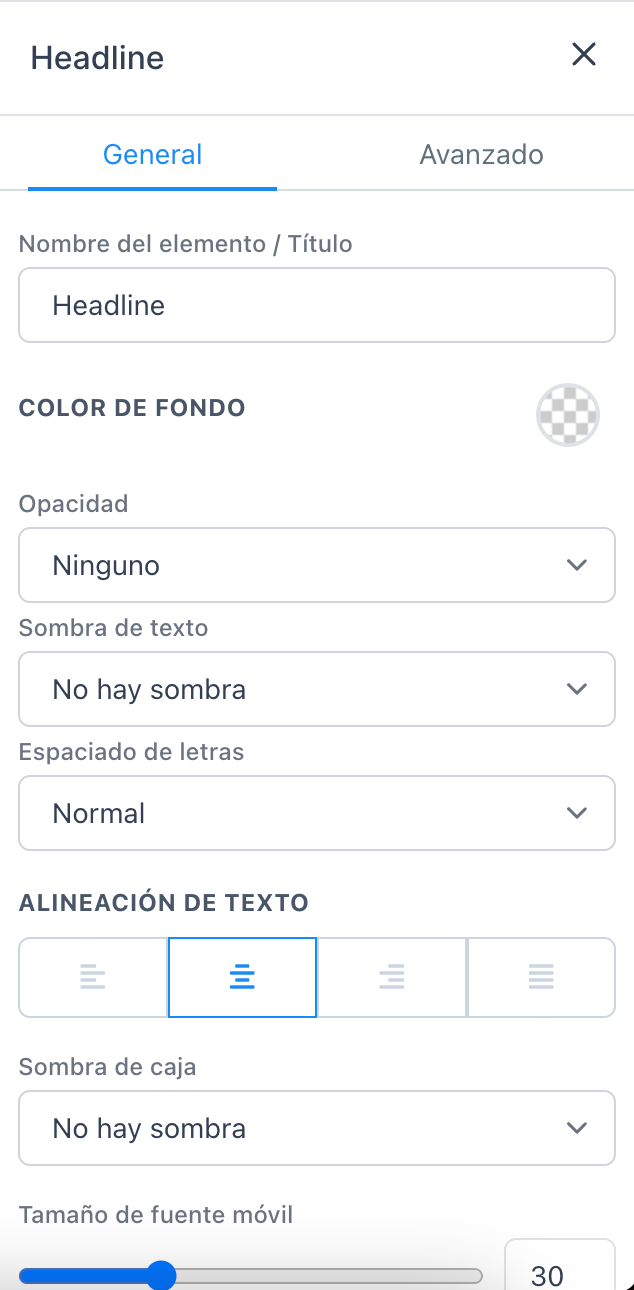
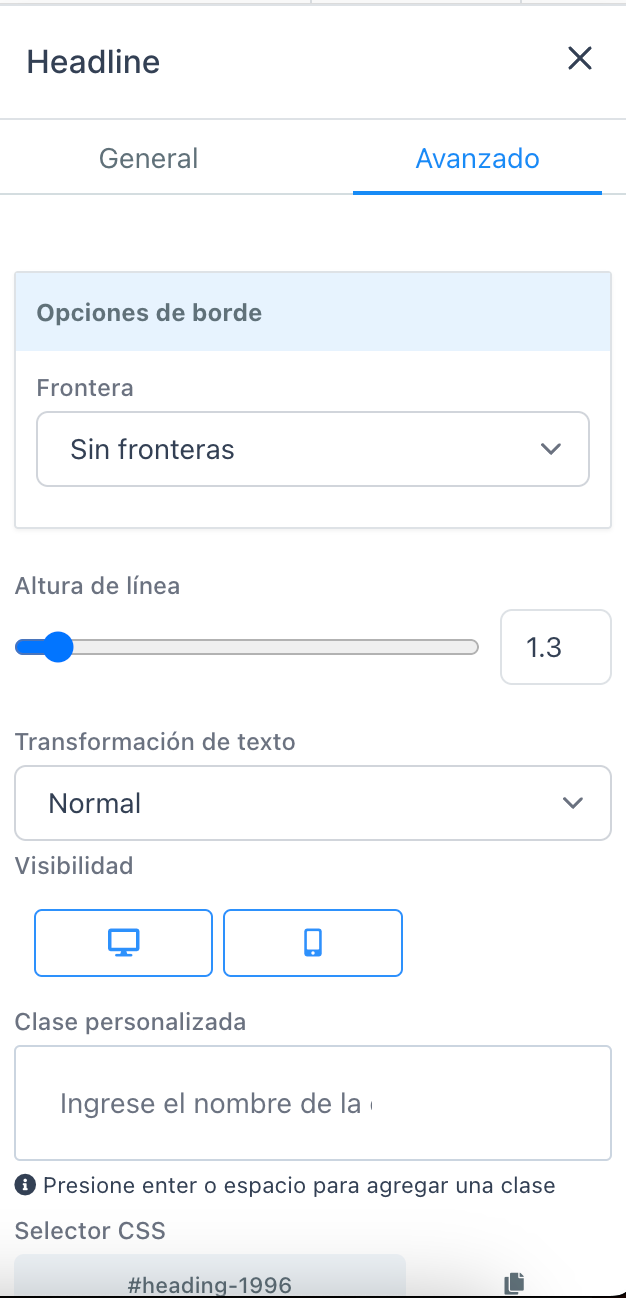
Internationalisation support has been added to the New Funnel Builder, enabling users to use it in their preferred language. This improvement makes it easier and more enjoyable for users who speak languages other than English.
🌍 Our internationalisation support now includes the following languages:
German 🇩🇪
Spanish 🇪🇸
French Canada 🇨🇦
French France 🇫🇷
Dutch 🇳🇱
Portuguese Portugal 🇵🇹
Portuguese Brazil 🇧🇷
Italian 🇮🇹
Swedish 🇸🇪
Finnish 🇫🇮
Norwegian 🇳🇴
The new Funnel builder now lets users pick their preferred language. It will show everything in that language, like instructions and info, to make it better for each user.
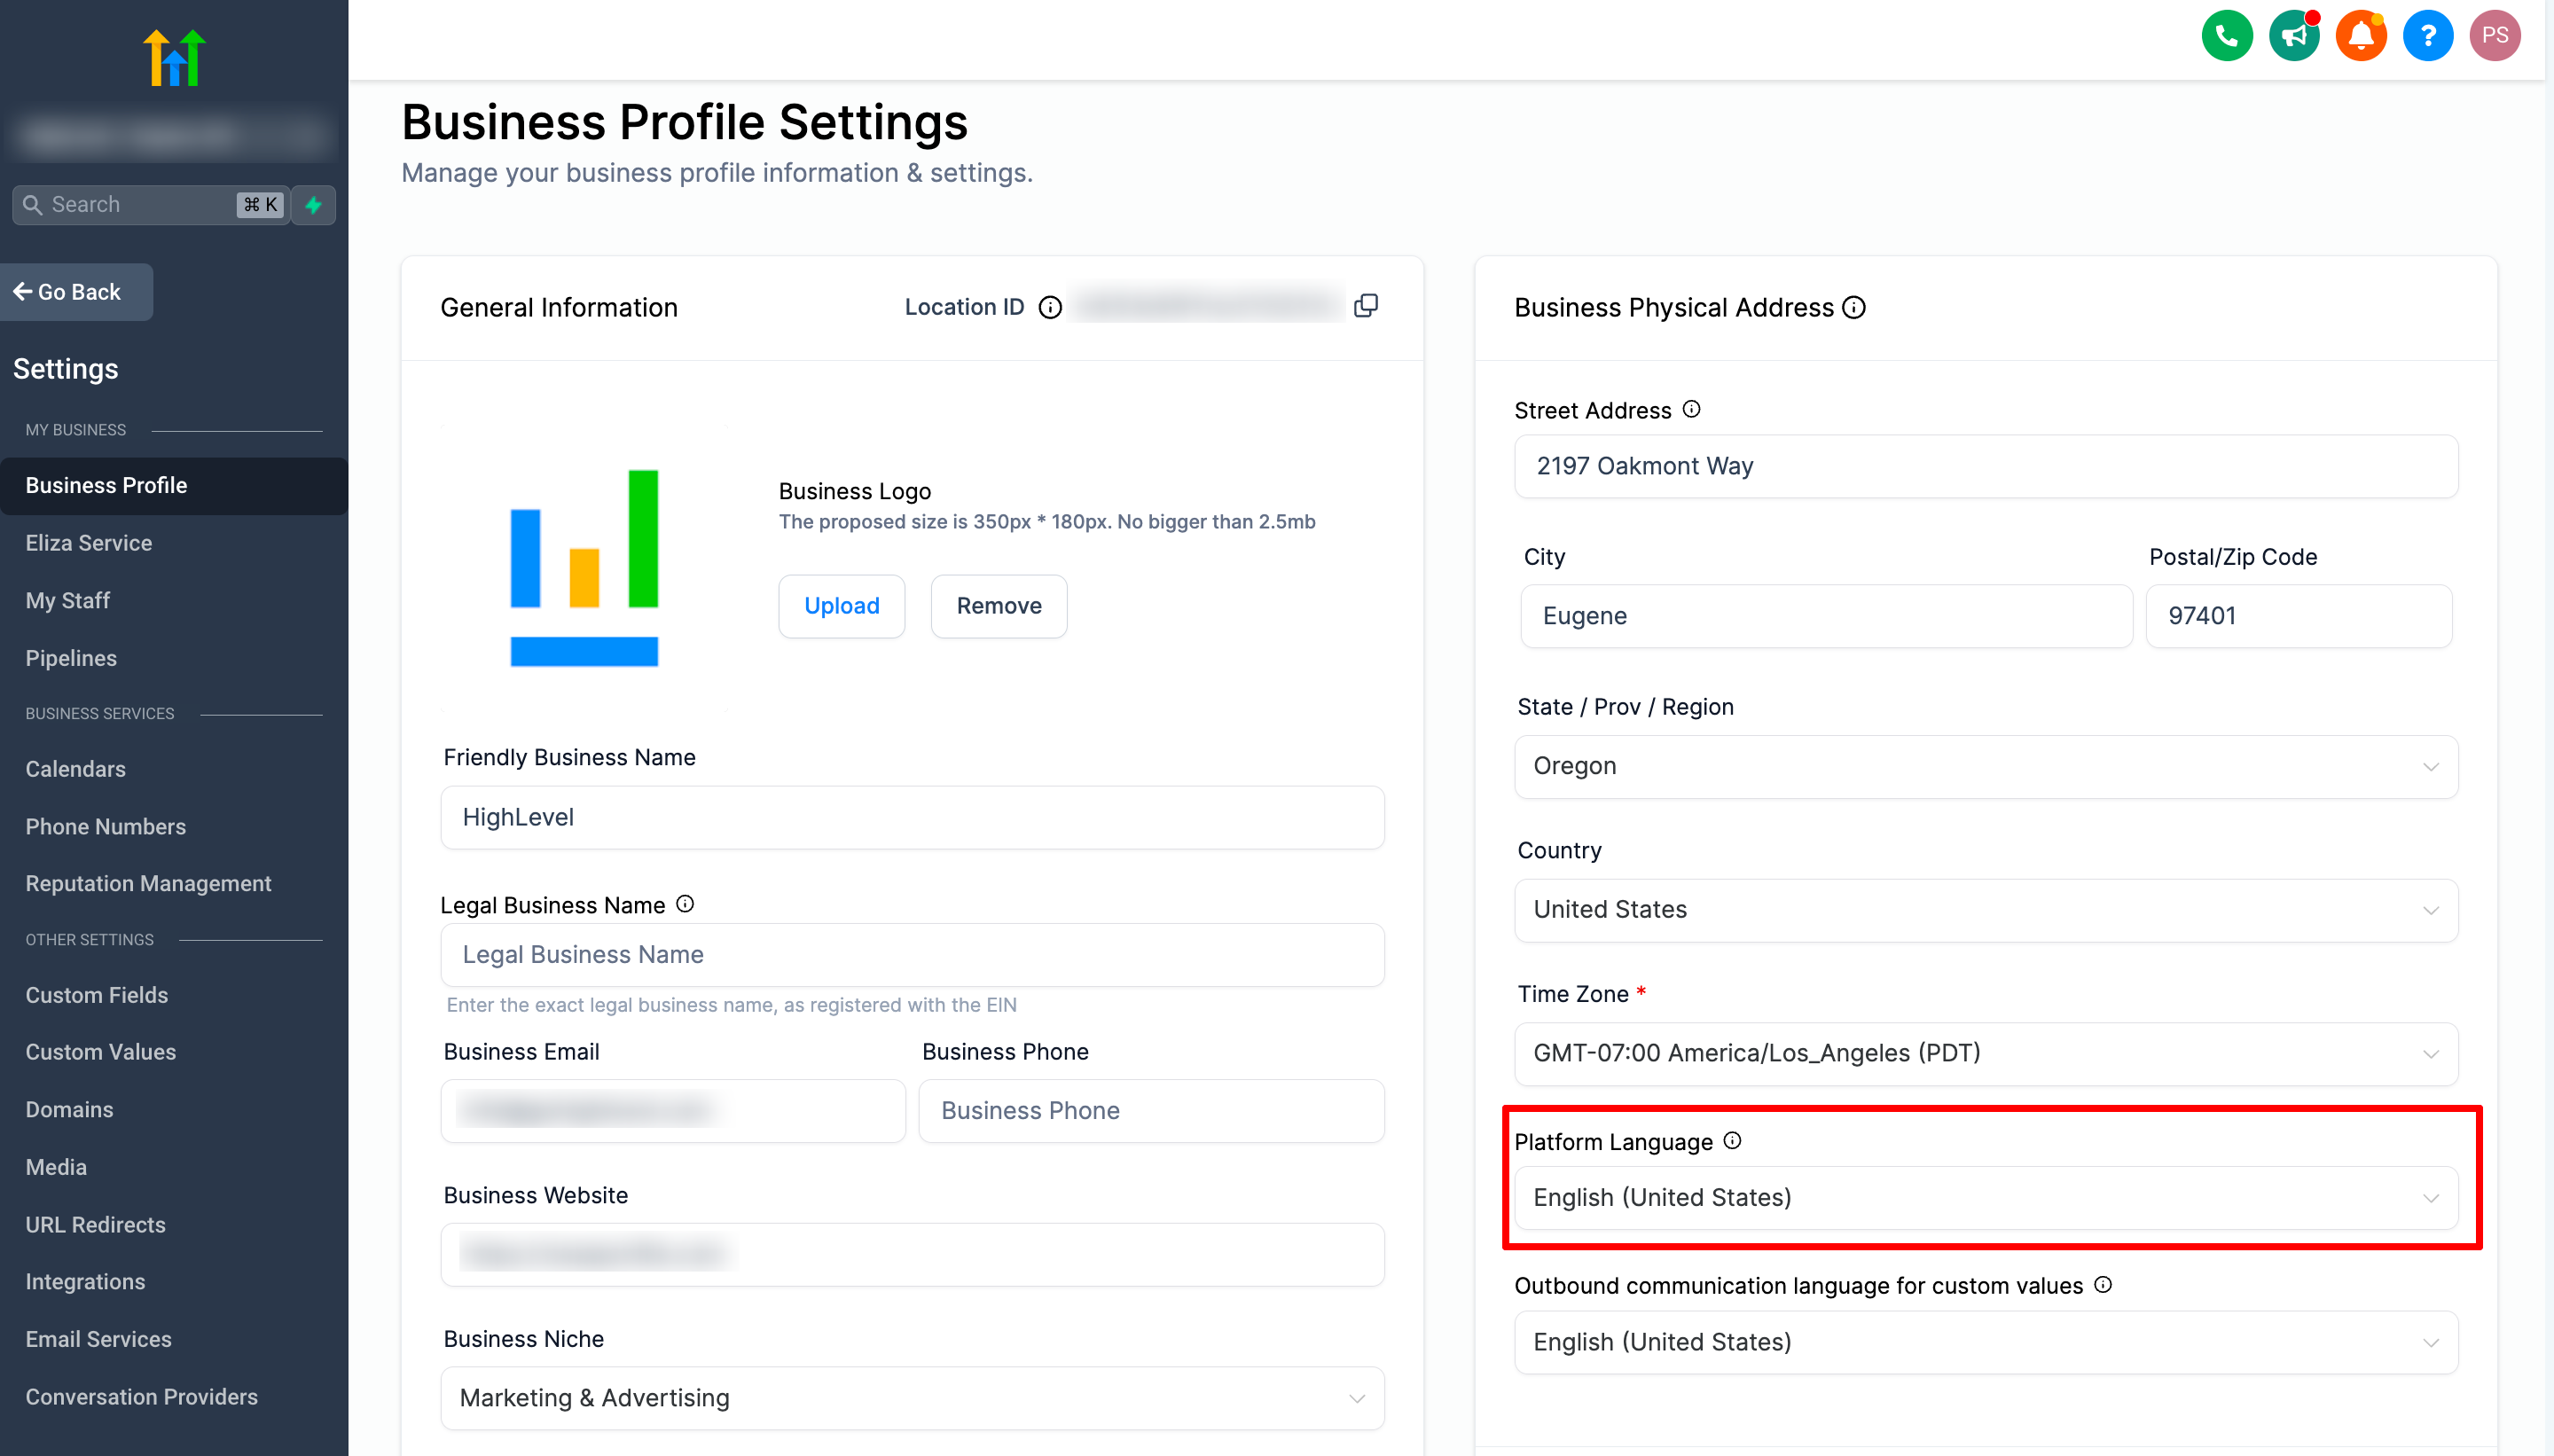
🛠️ How to Enable Language support?
Go to your Sub-Account settings.
Navigate to the Business Profile section.
Select the Platform Language Preference.

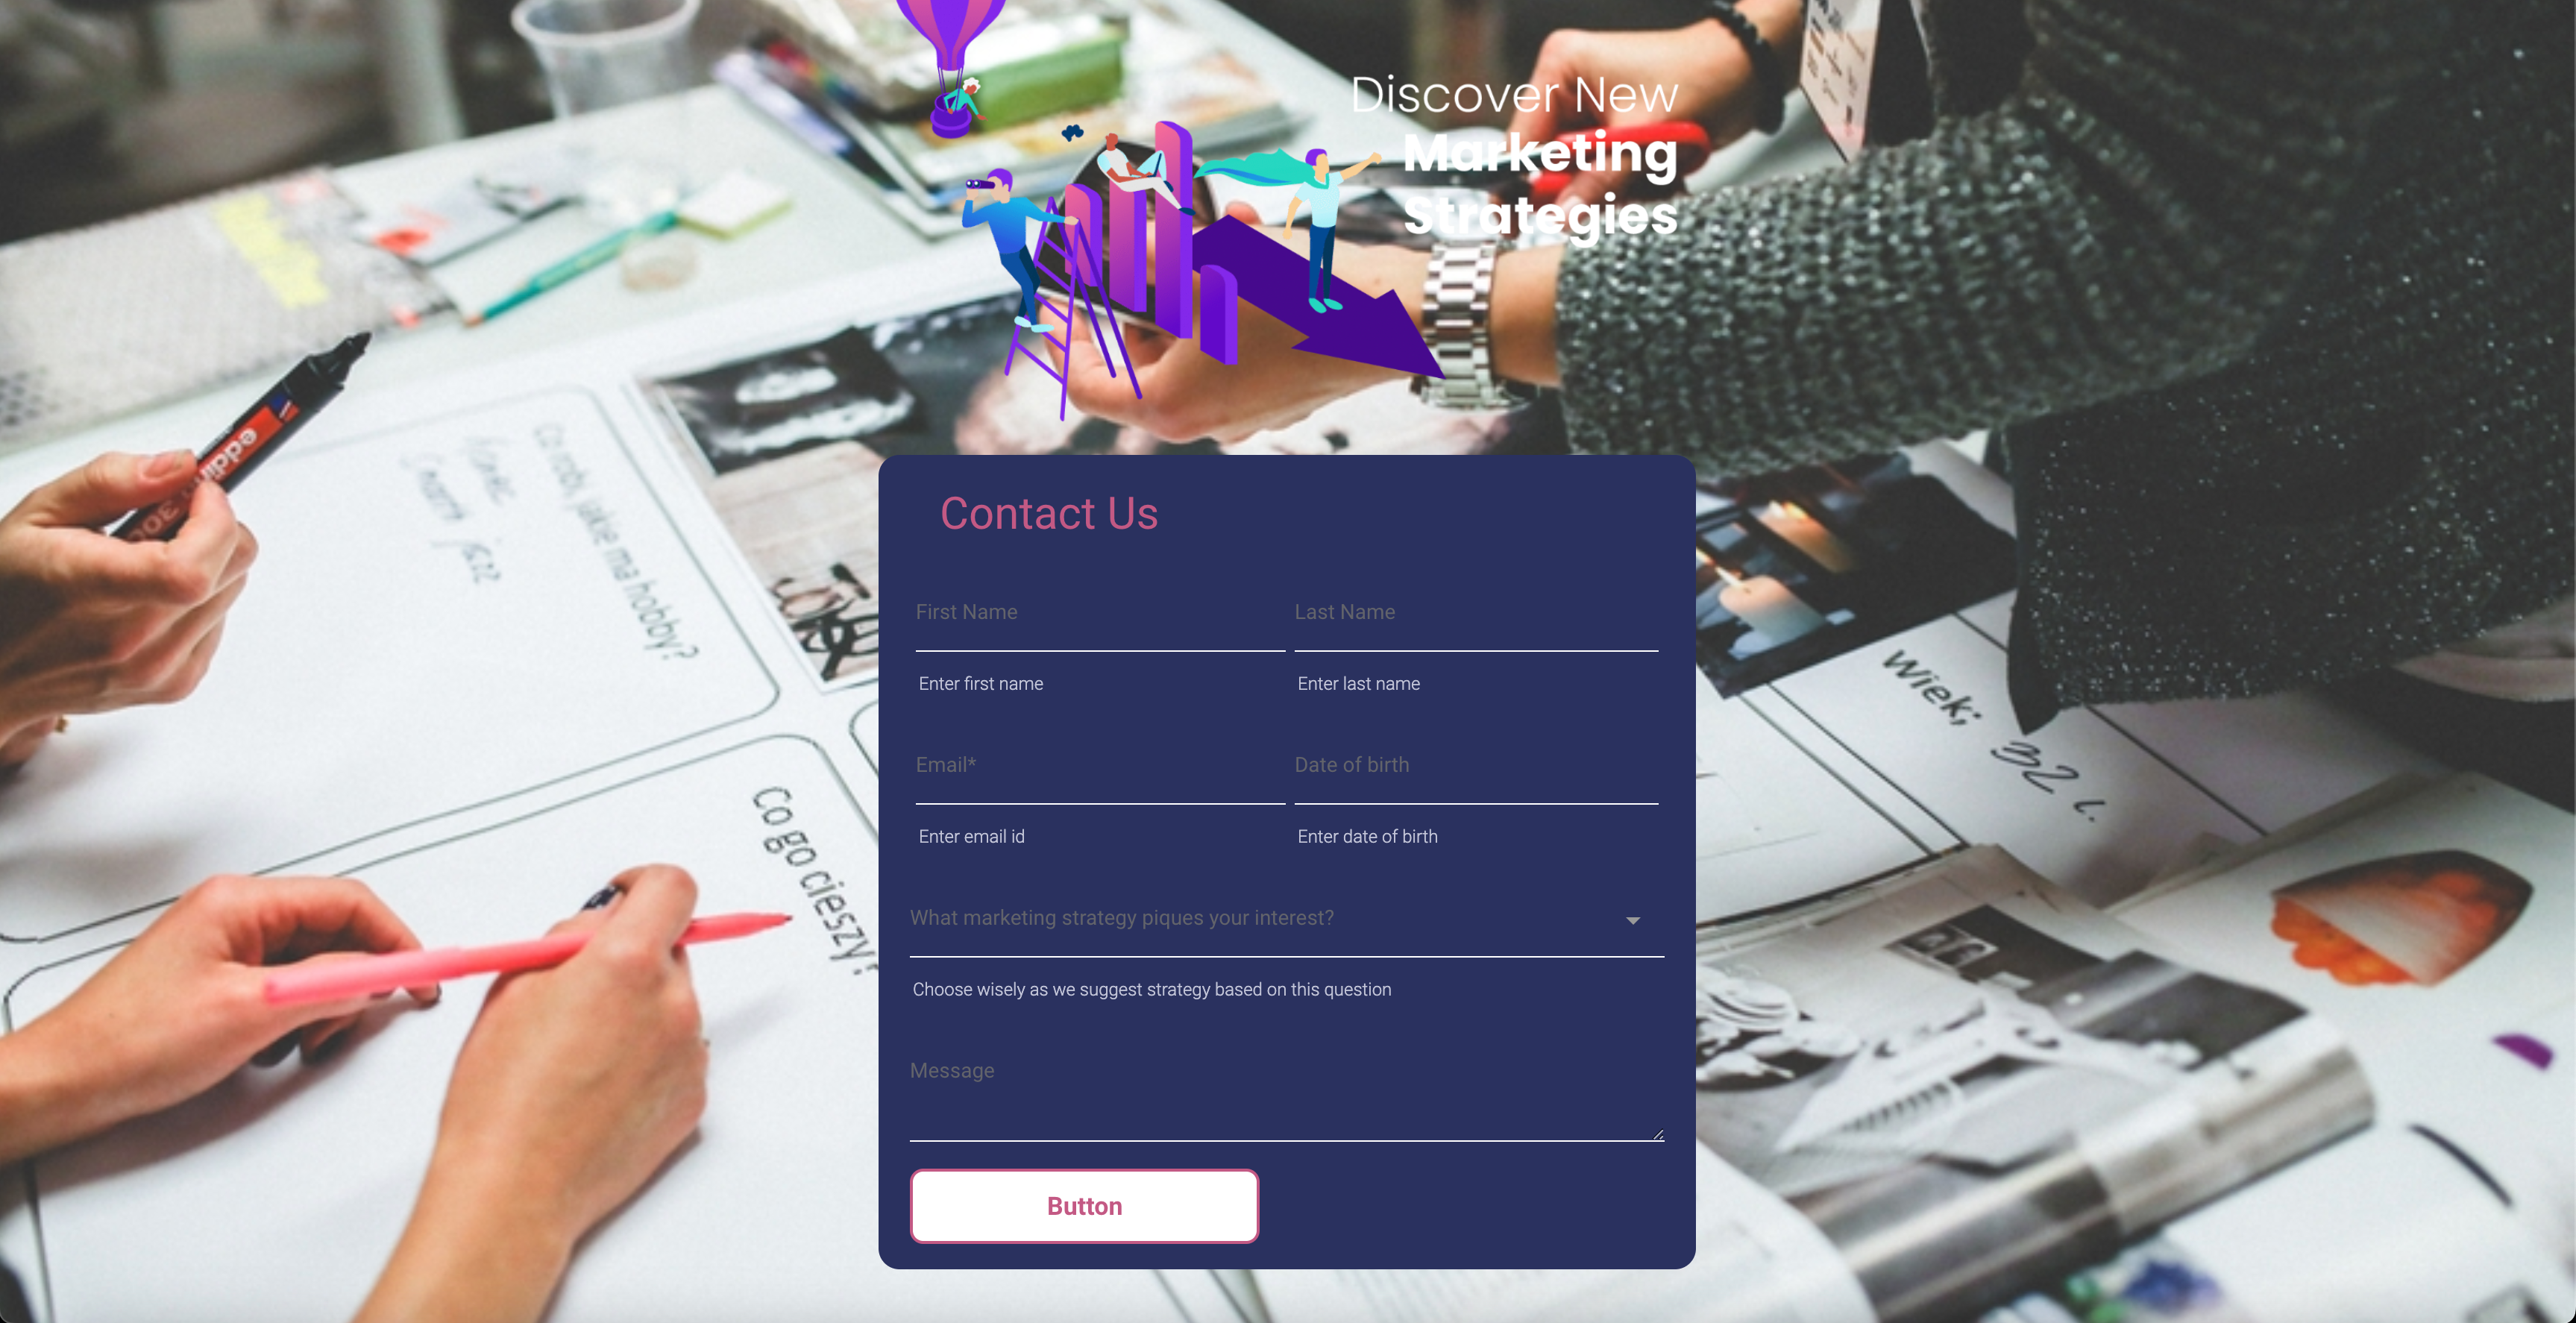
Introducing Short Label in New Form and Survey Builder 🚀
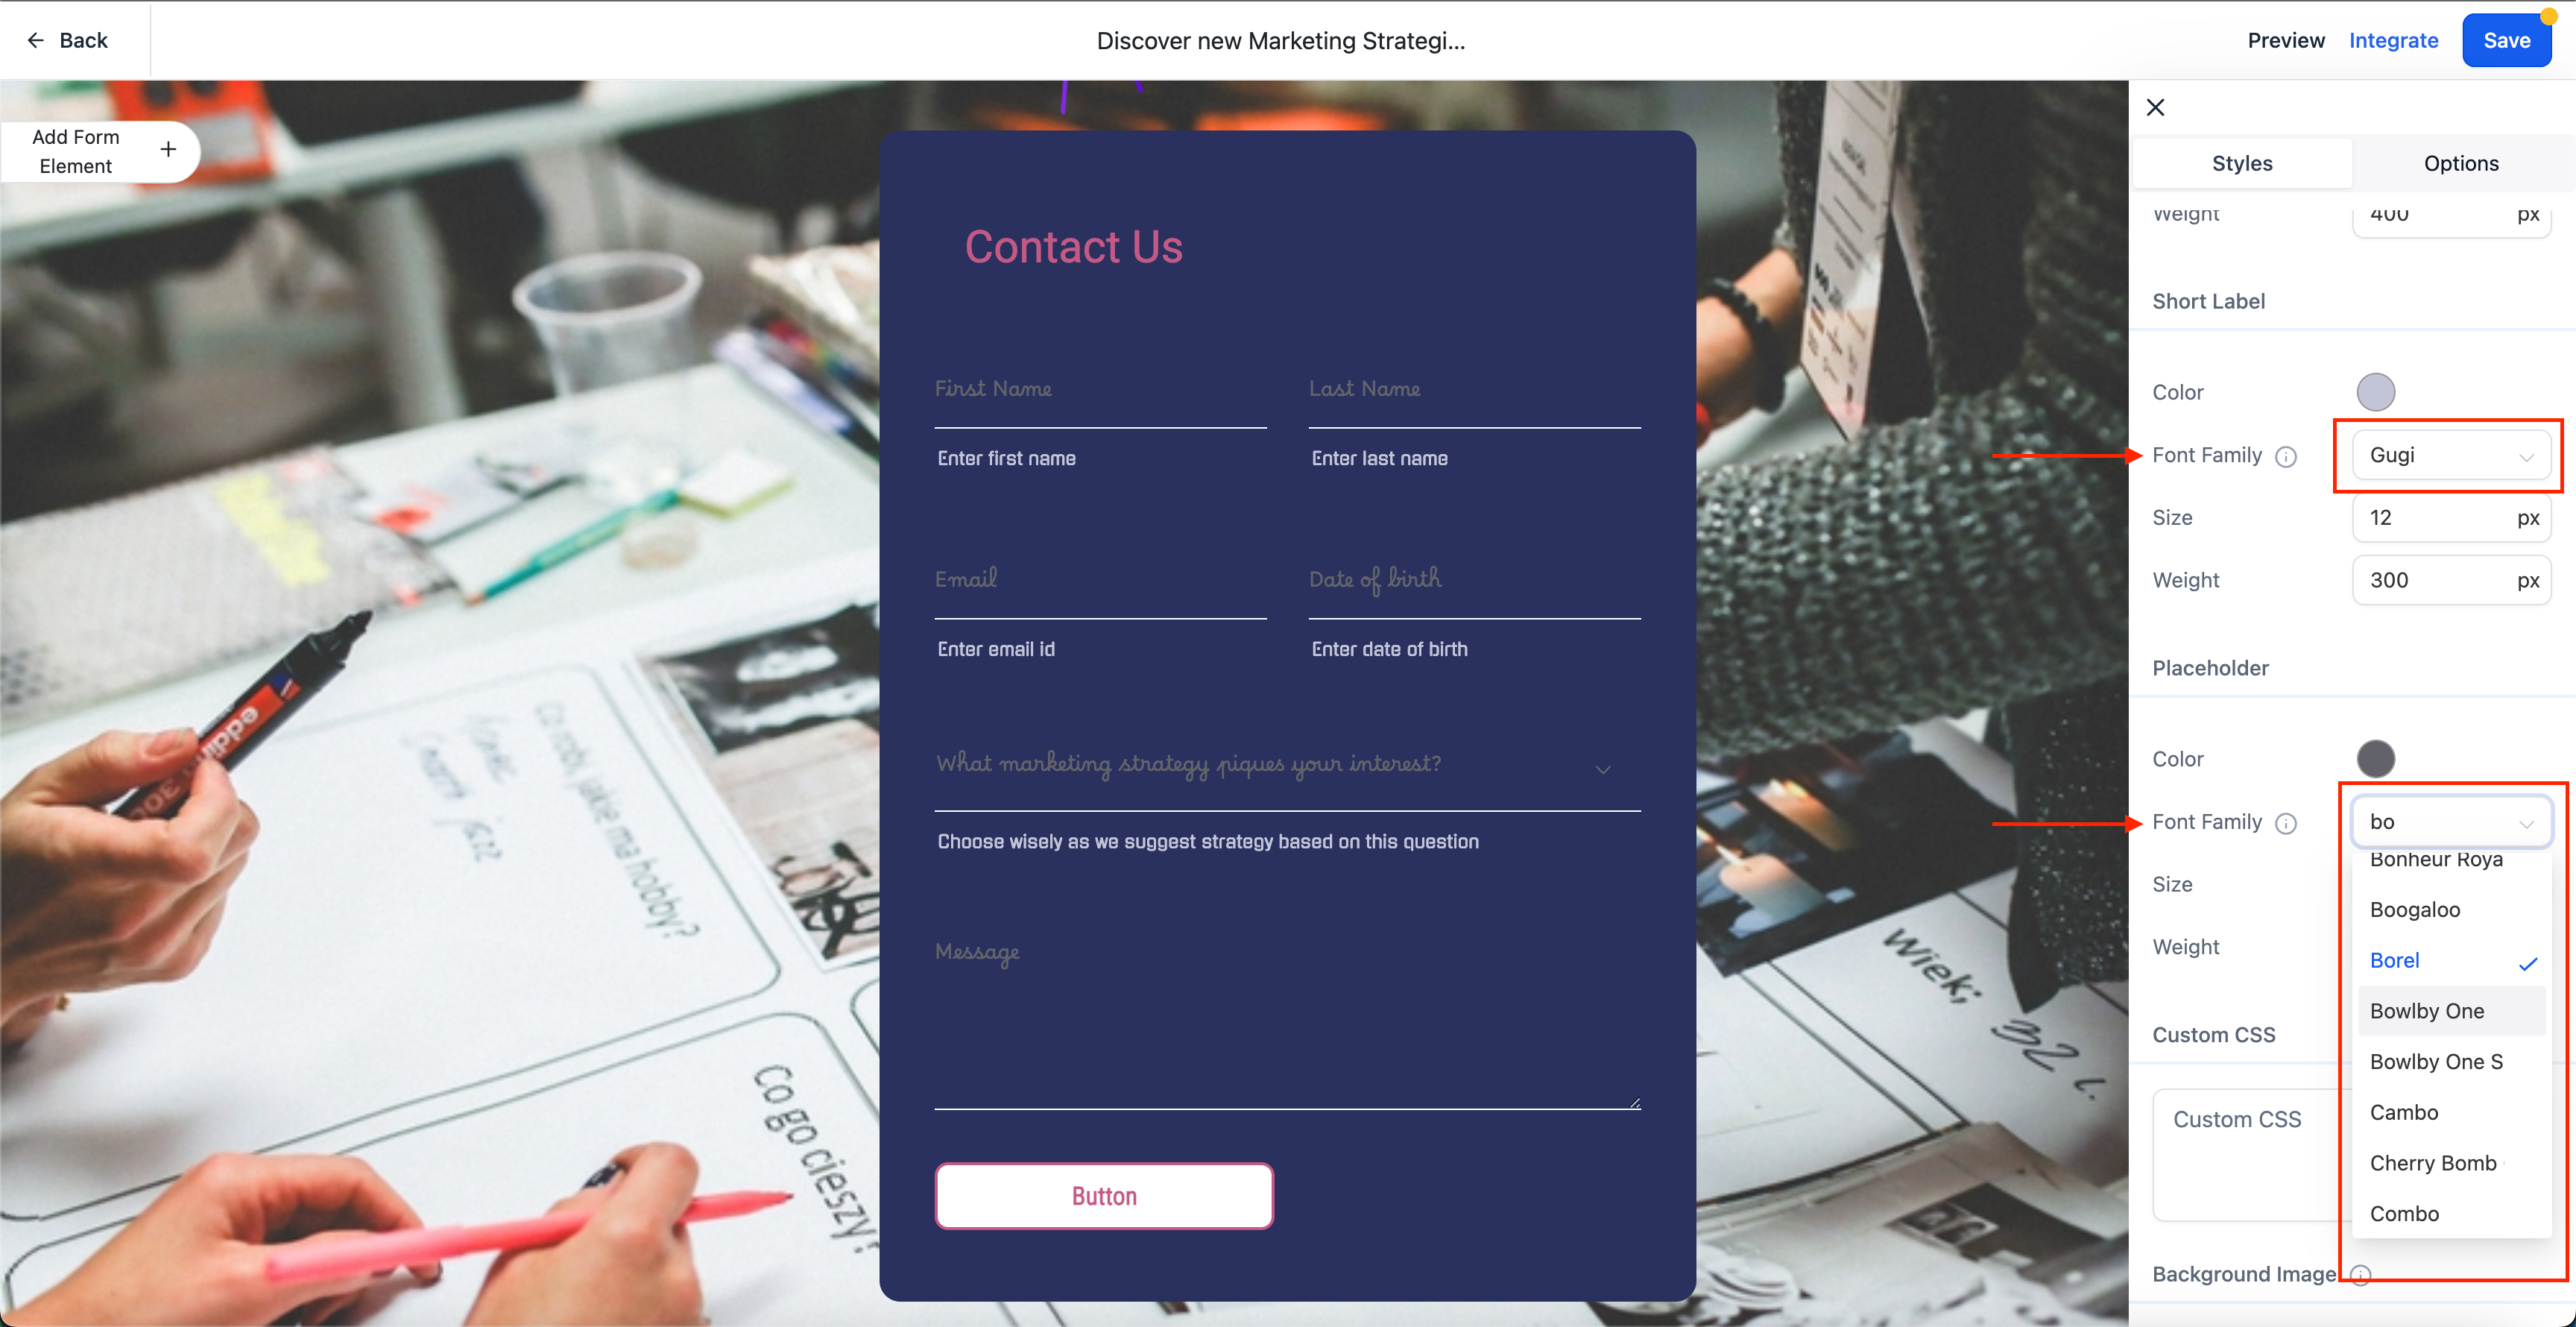
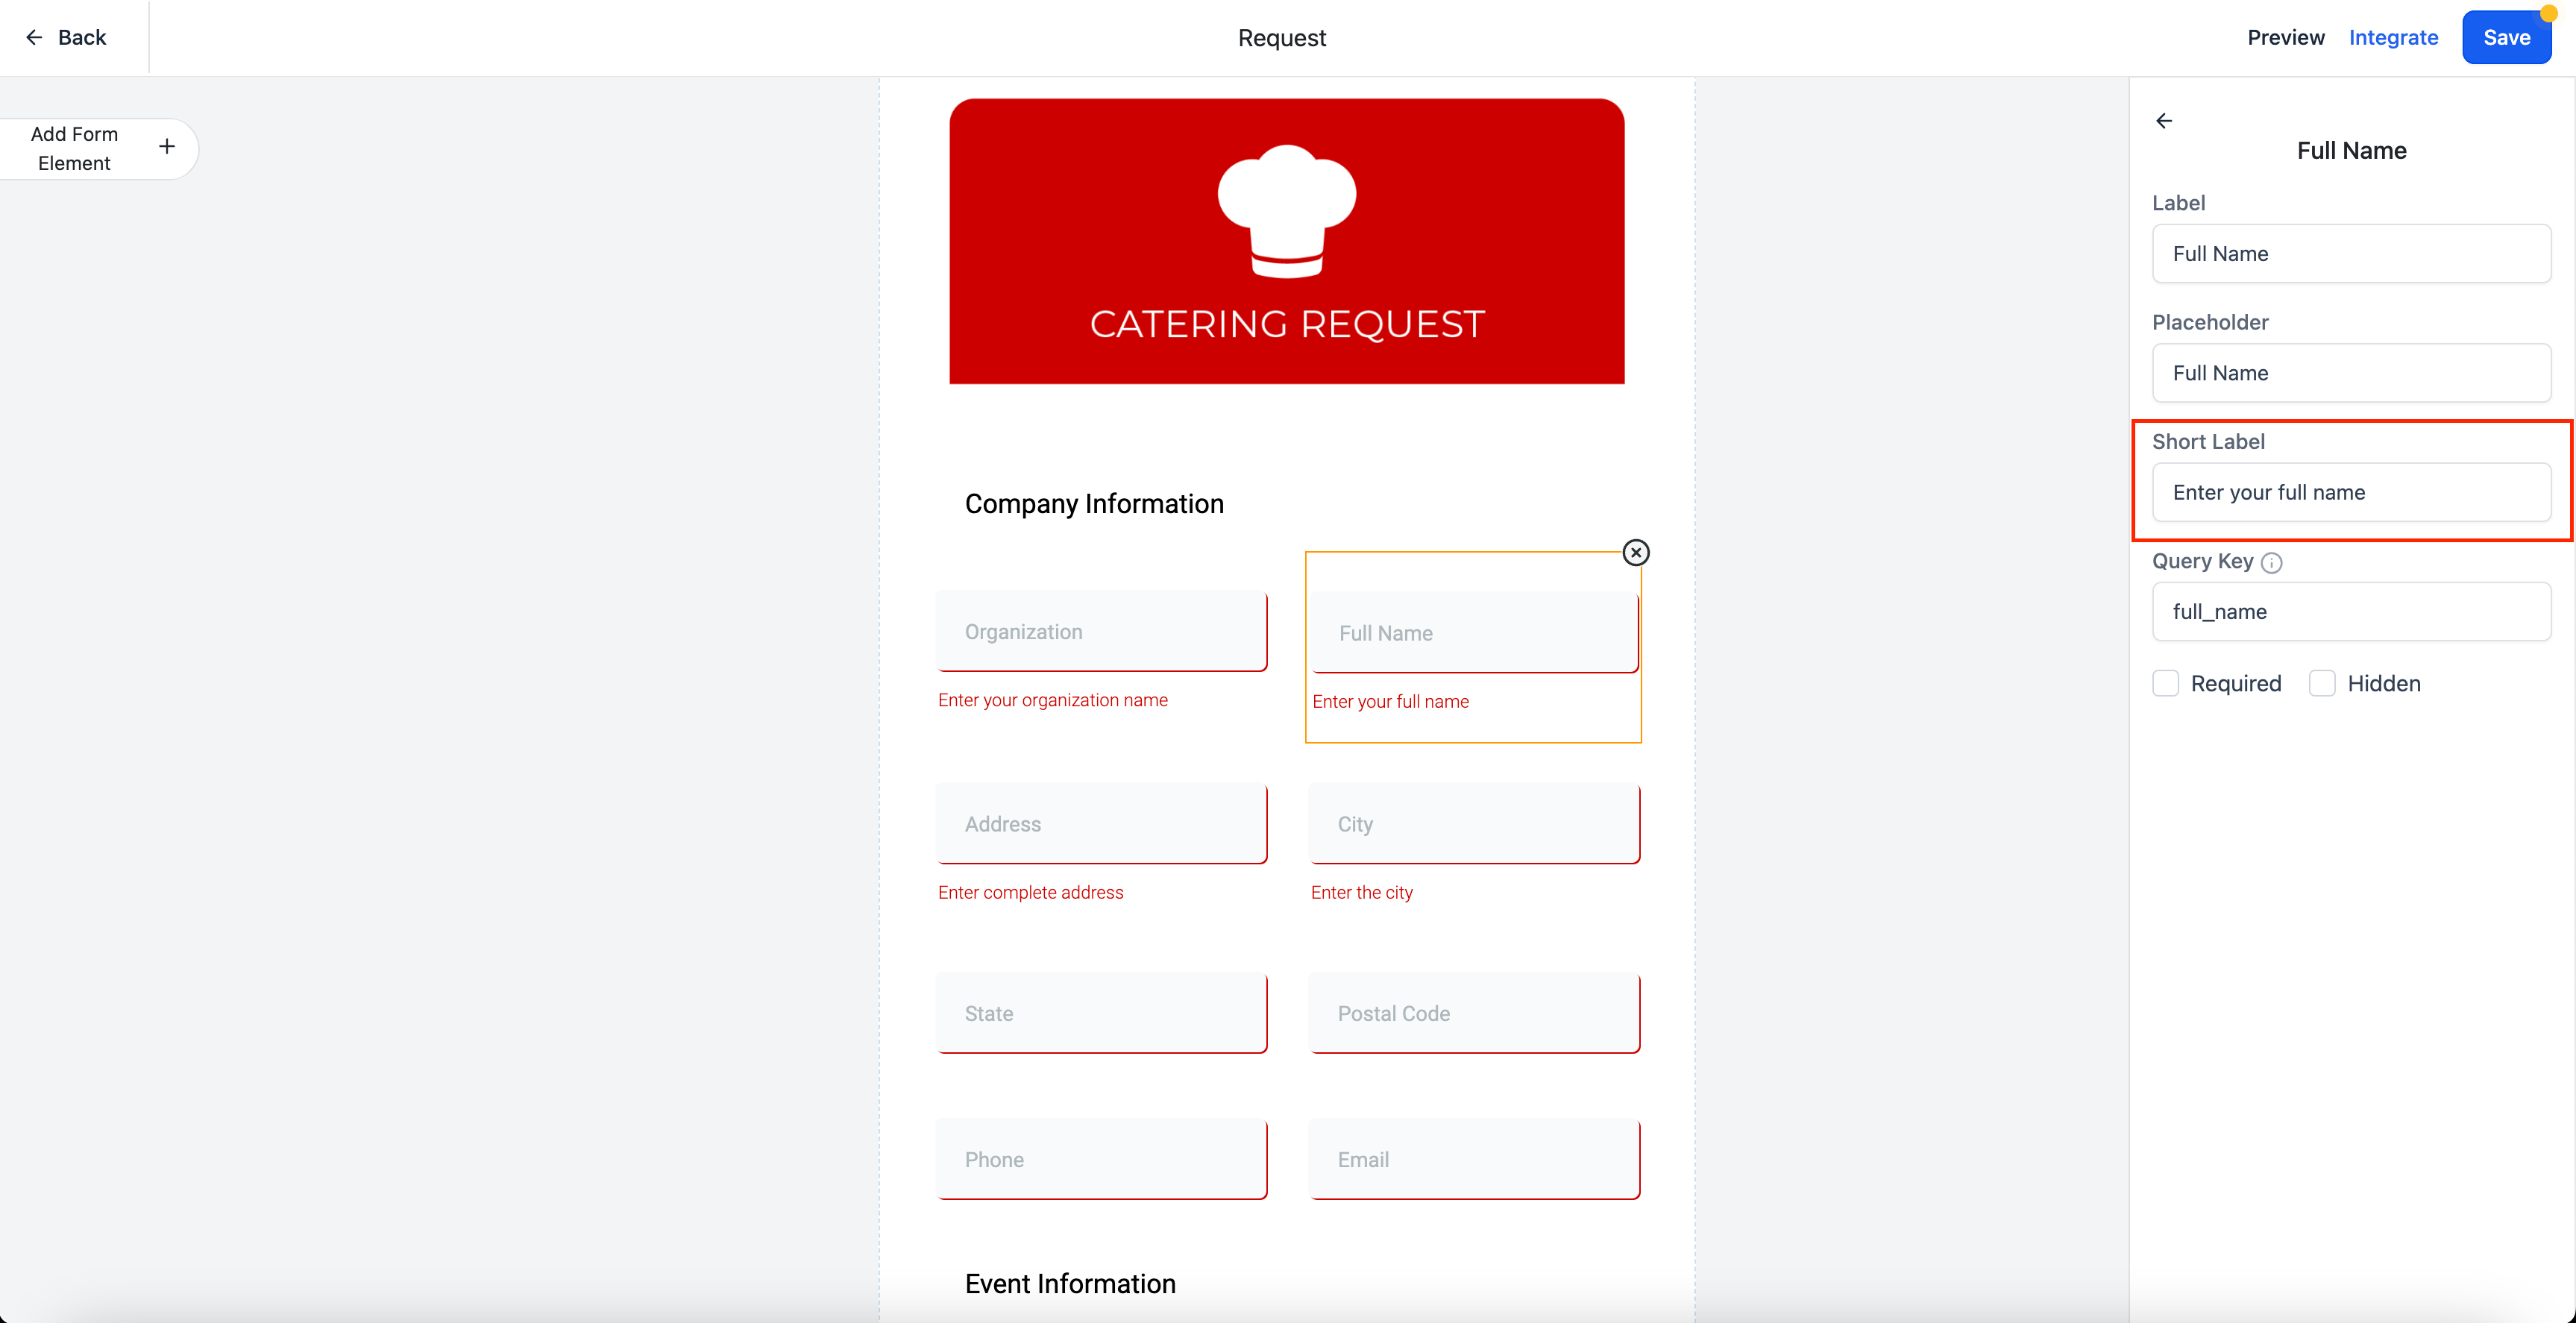
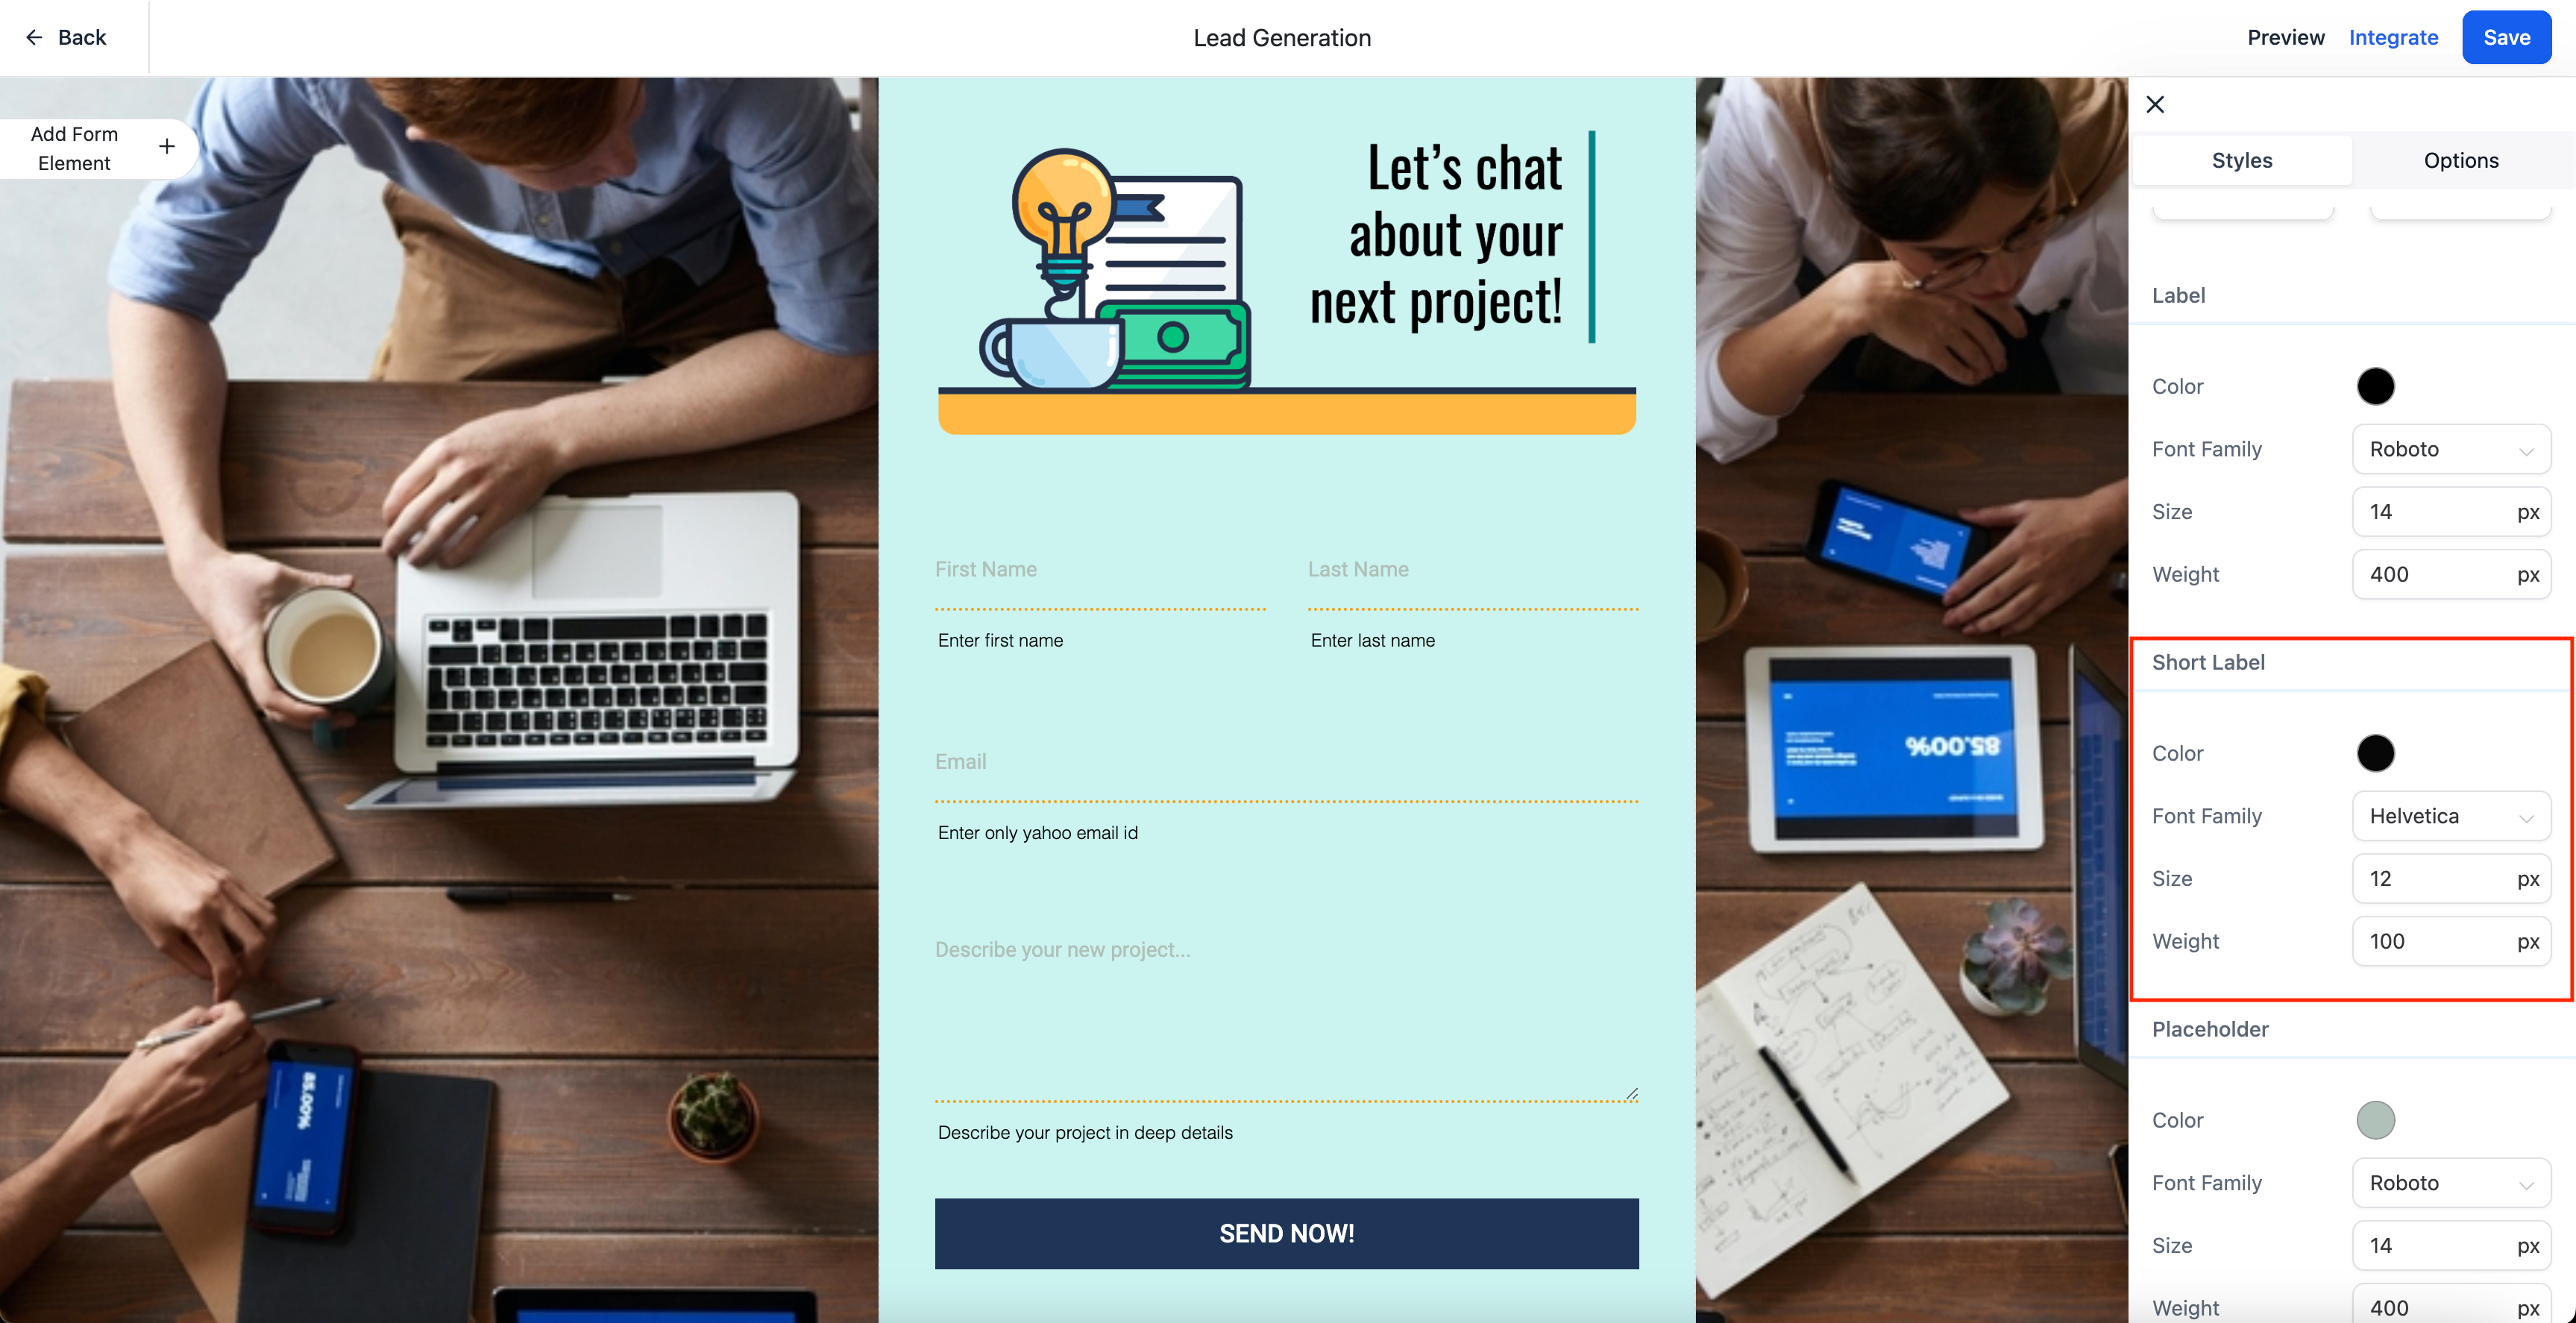
The "Short Label" feature in a new form and survey builder gives a brief and clear name to every part of your form or survey, like questions or sections. This makes your forms and surveys easier to understand and use. Let's see how the "Short Label" feature works and why it's useful:
😎 How It Works 😎
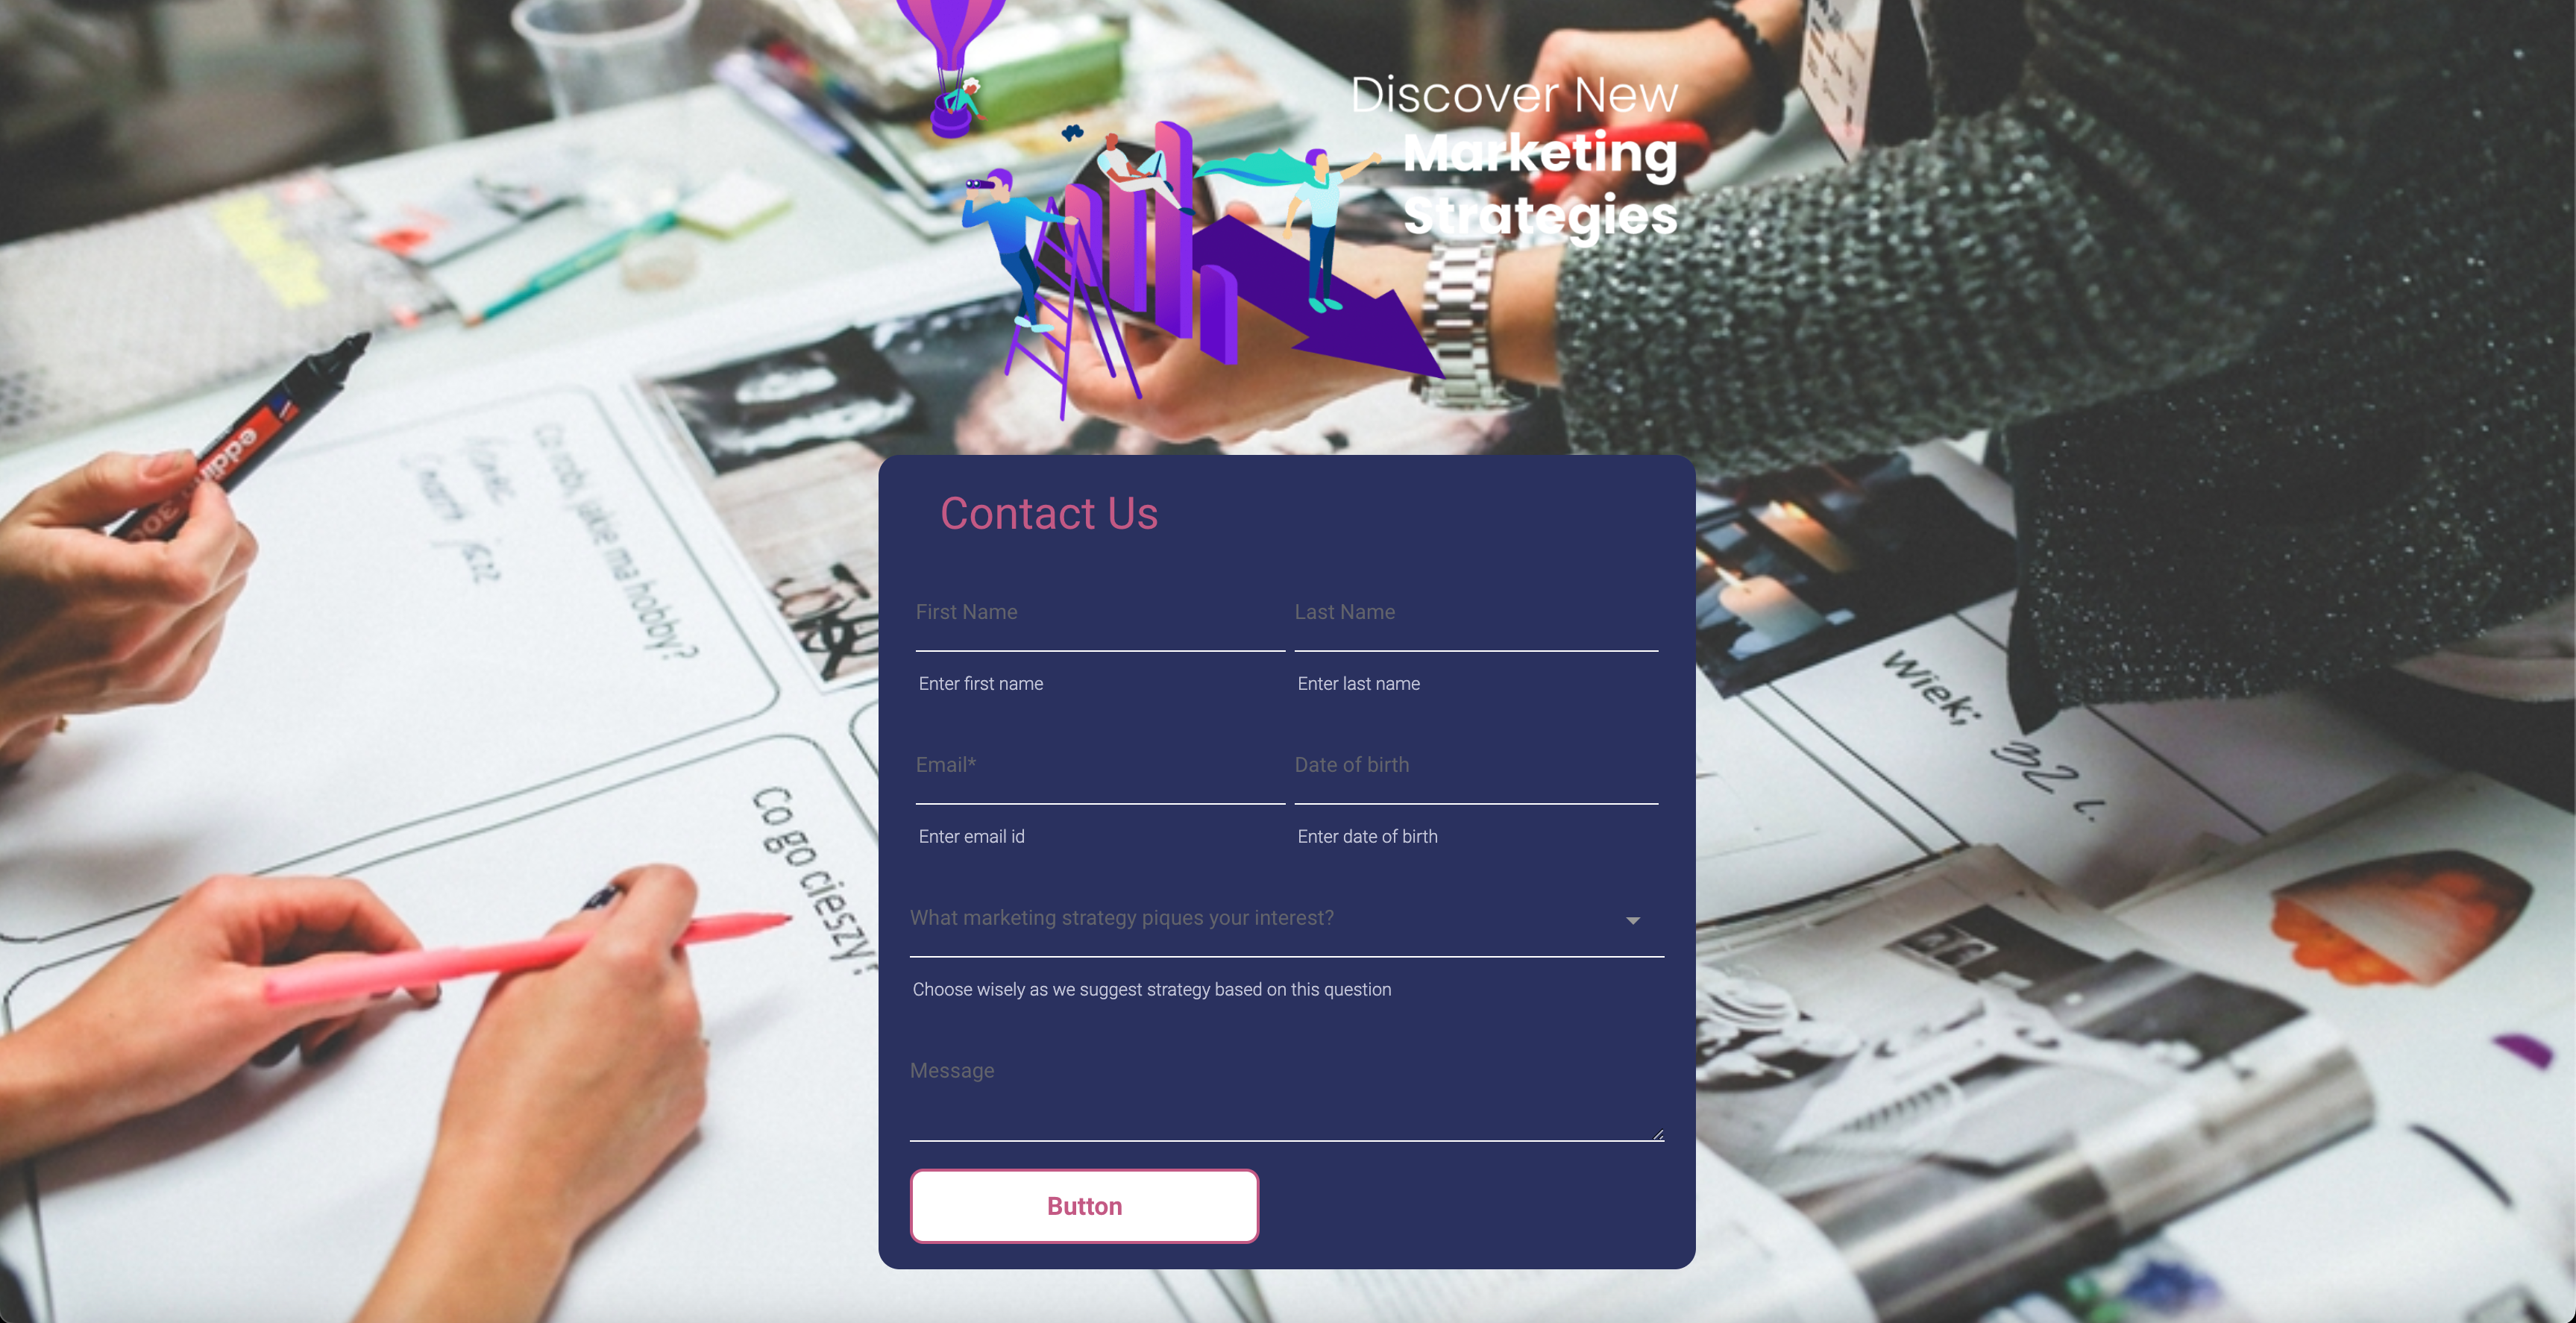
The "Short Label" feature lets you give a short and clear title or heading to every part of your form or survey. This title helps people quickly understand what they should do or answer. It goes under the specific question or place where users need to input information. This way, users can easily see what's expected of them.
🌟 How to Incorporate Short Label 🌟
Enable New builders from Labs
Open Form or Survey and Add some fields
Click on any fields
User will be able to see short label input in right side
Add description inside short label input of selected fields
Additionally, In styles user can change the font size, font family, font weight and color of short label
Multi-Commission Support & Granular Product Commission Details 🚀
Introducing big improvements to the Affiliate Manager. These upgrades give you more power to control and customize commissions for products. Plus, they provide detailed commission info to your customers and affiliates.
What's New?
🌟
1 . Link Commission to Product Variants 🔗
Set unique commission rates for different product variants, allowing a more tailored commission structure.
2 . Fine-Tune Commission Strategies 📈
Customizable commission values for each product variant let you direct affiliates towards promoting specific items that offer higher commissions.
3 . Global & Individual Settings 🌍
Choose to maintain a uniform commission structure or specify unique commissions for different product variants.
4 . Effortless Configuration 🔄
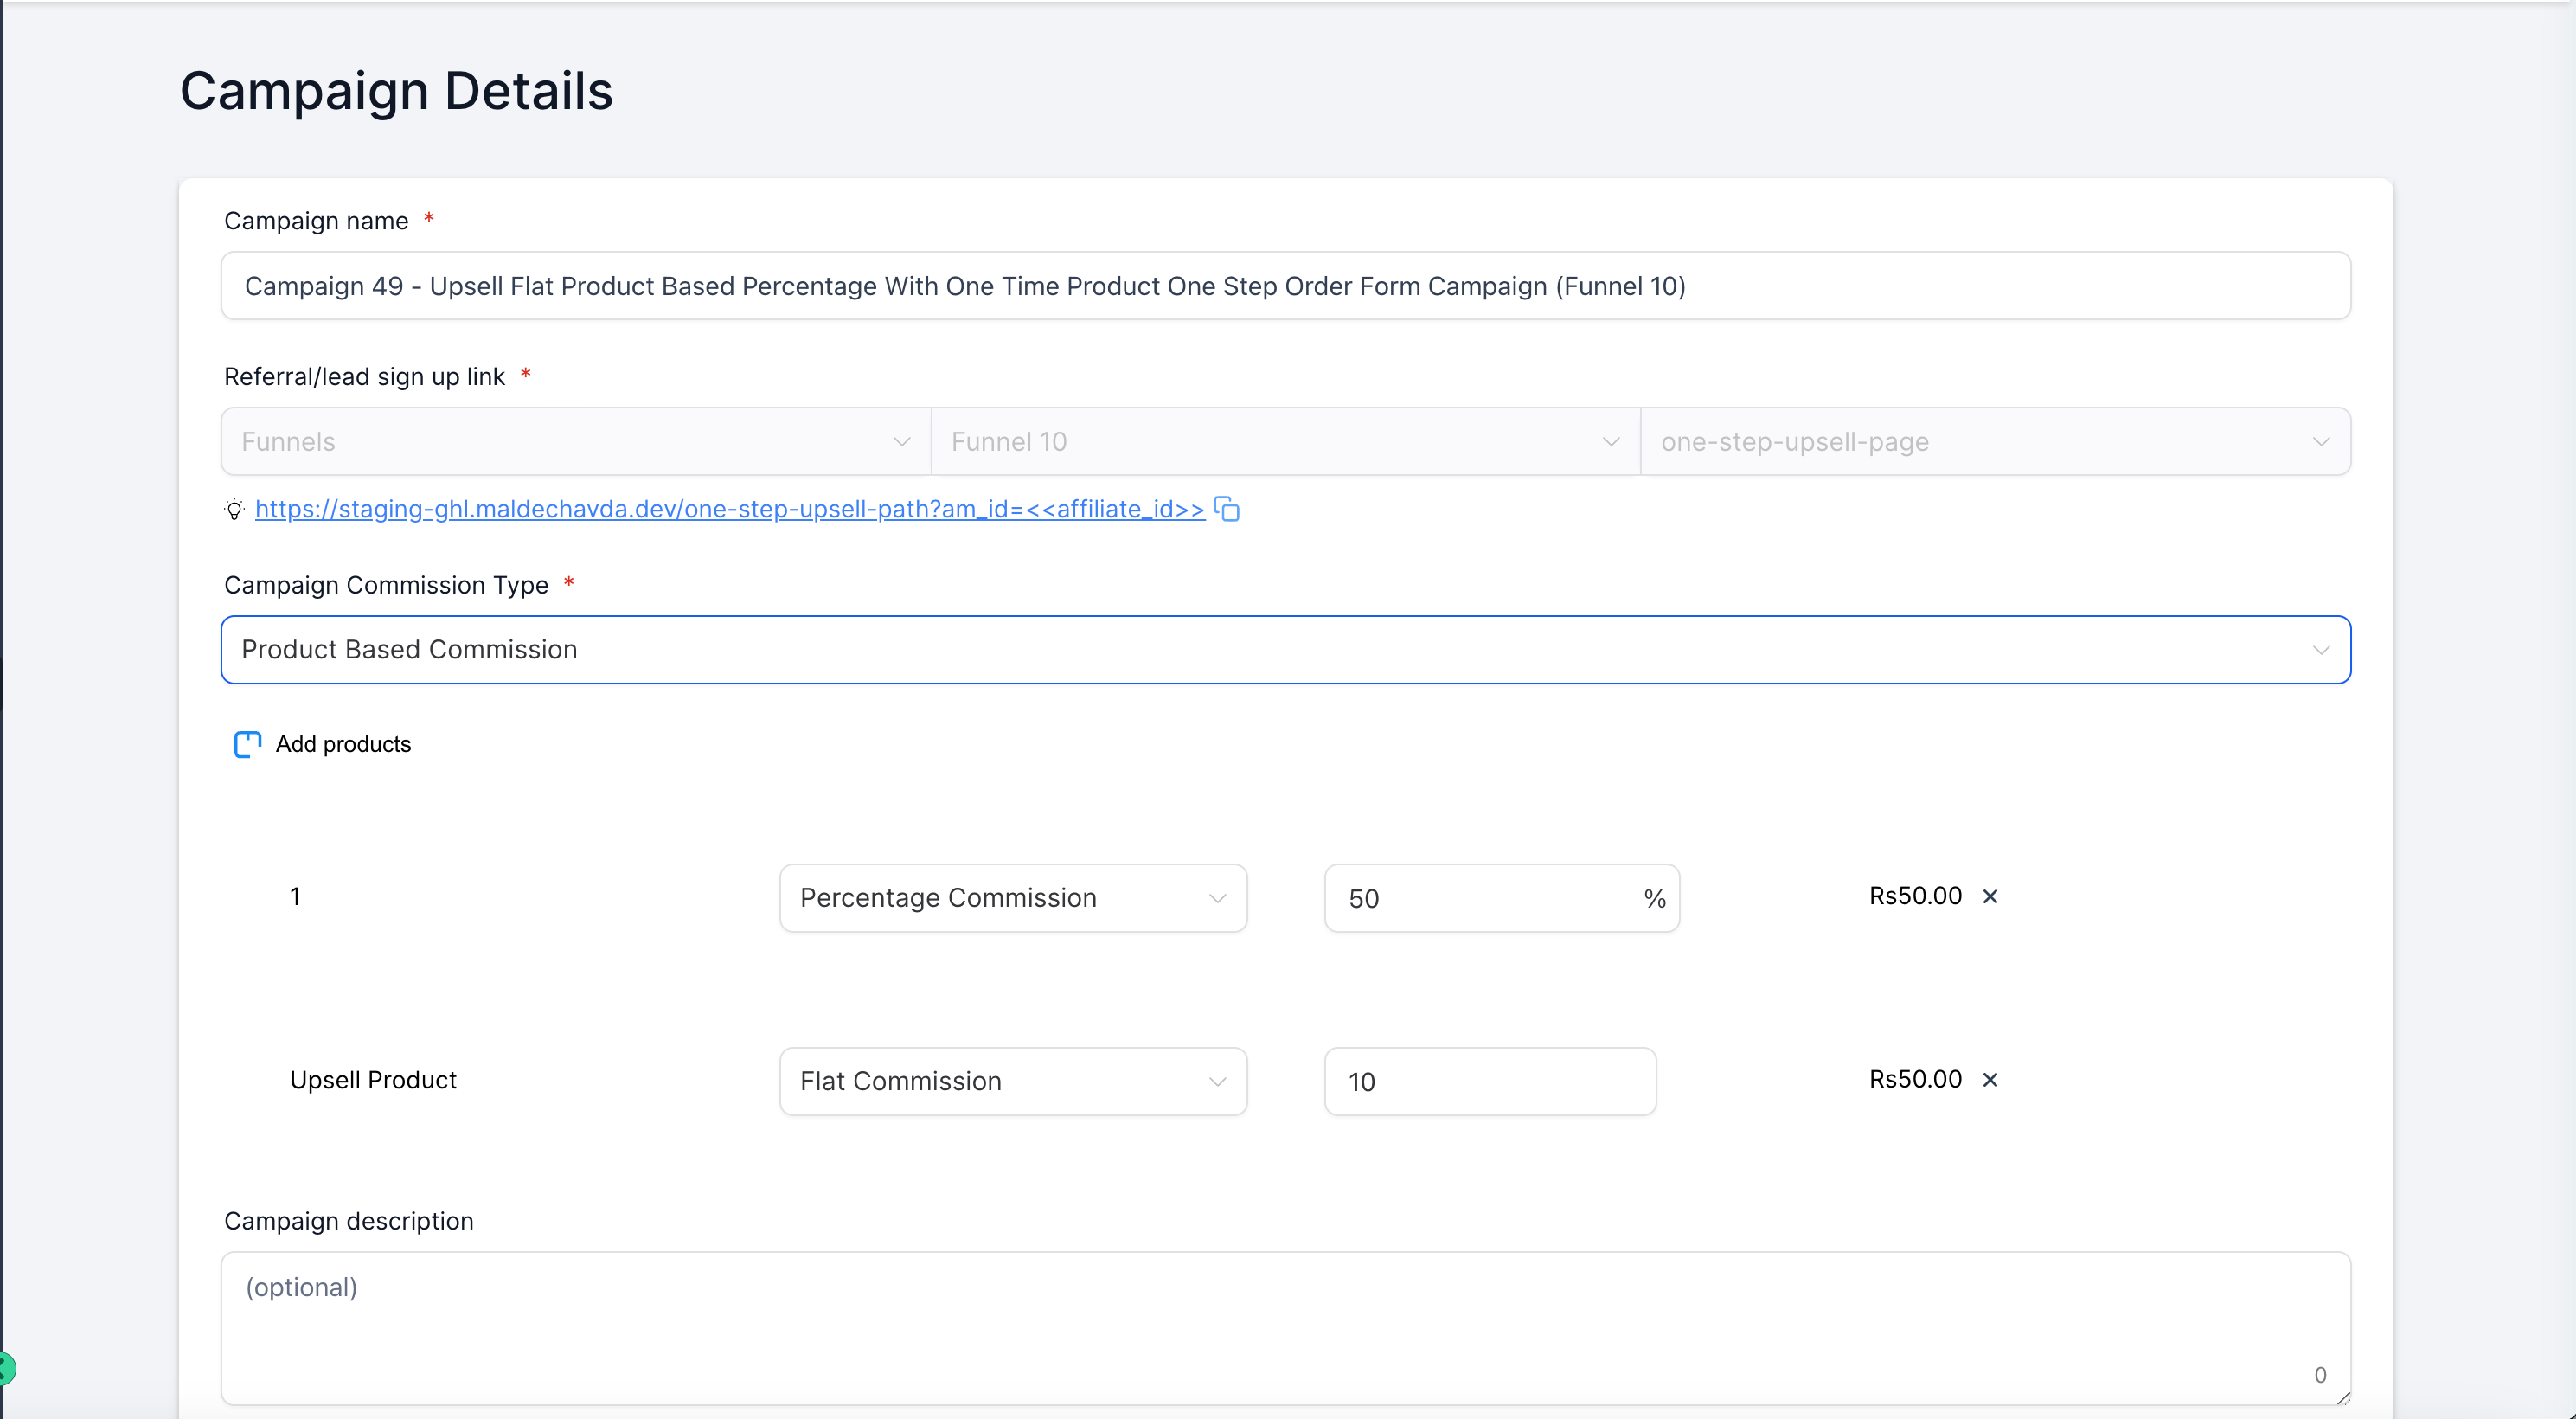
Setting up your product-based commission values is now straightforward and intuitive, accessible from your campaign create/edit page.
5 . Transparent Commission Visibility 🔍
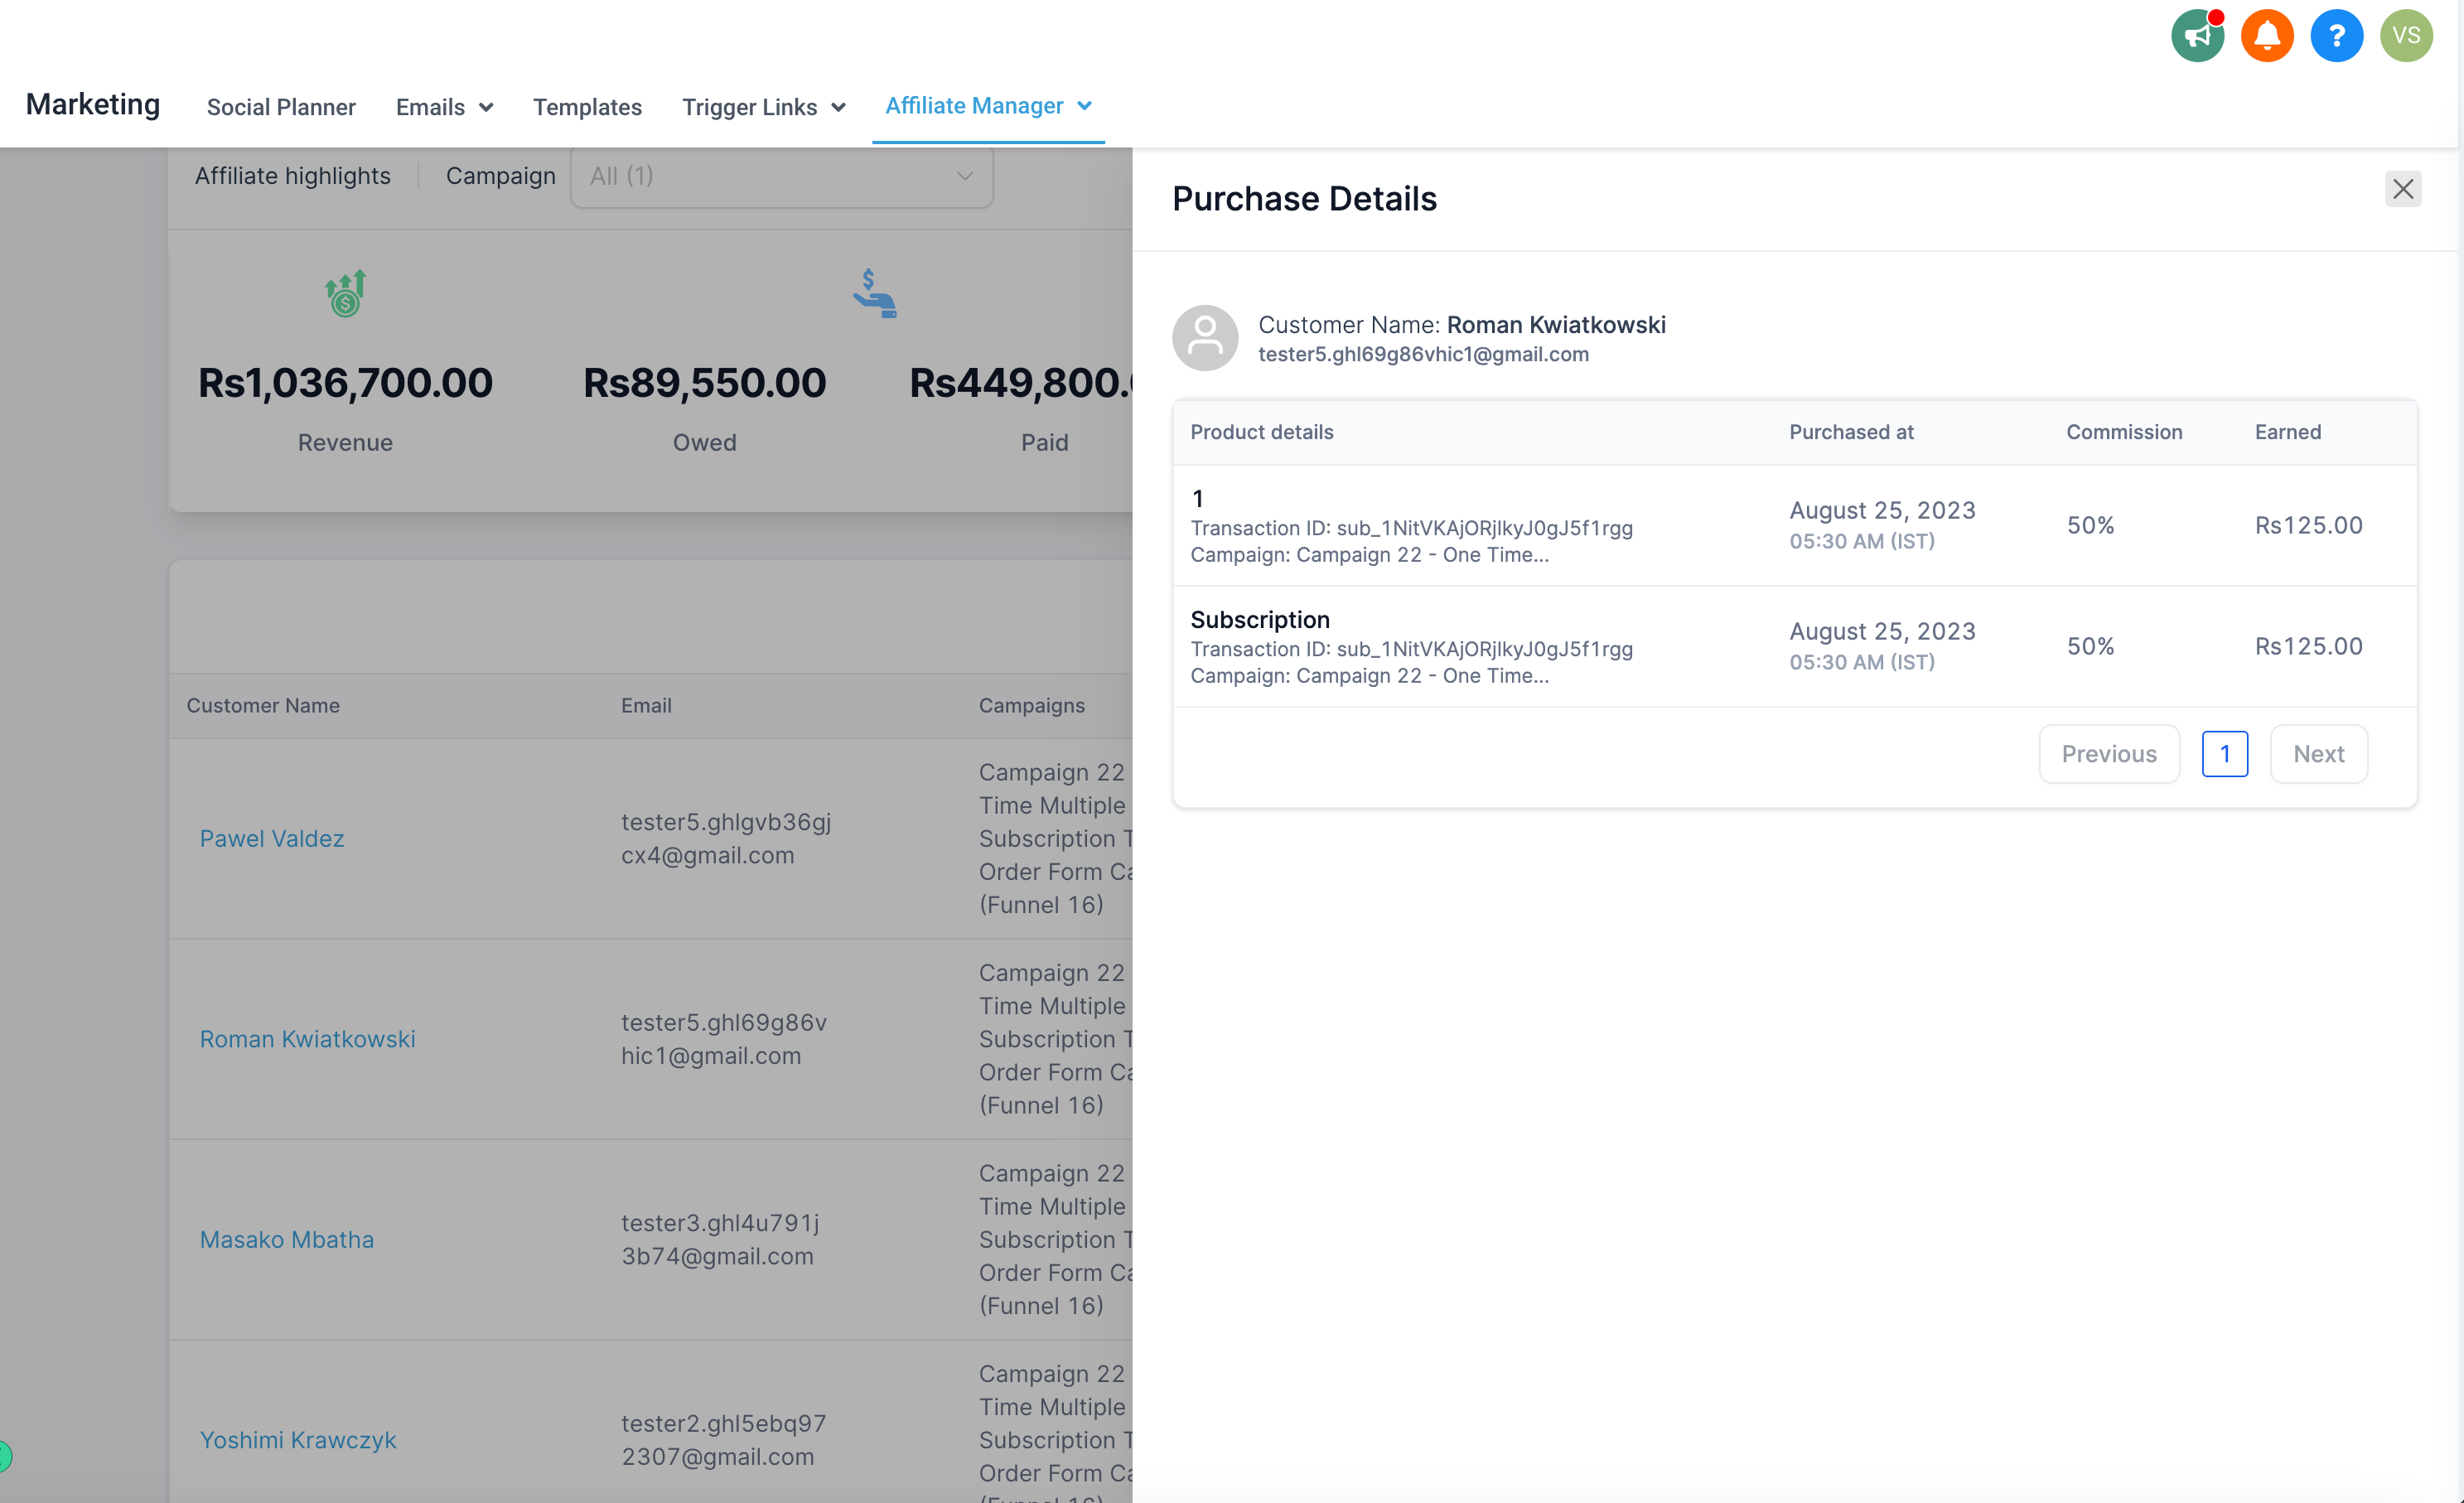
Both customers and affiliates can now see detailed commission information on each product page, including variant-specific commission rates.
6 . Comprehensive Affiliate Dashboards 📊
Affiliates now have a dashboard where they can see their performance metrics for each product variant, including clicks, conversions, and commissions.
How to Get Started
🎉
Navigate to the campaign create/edit page within Affiliate Manager.
Scroll to the 'Campaign Commission Type' section and choose 'Product Based Commission'.
Click on variant options to set or view commission rates for each variant.
Save your changes.
Check out the new affiliate dashboards to gain valuable insights into commission metrics.

Create Sub-Account Access Tokens Using Agency Access Tokens 🎉
Introducing a new feature in the Developer Marketplace to simplify the management of API access for various account levels.
What's New?
🌟
Generate Sub-Account Access Tokens
🔑
Developers can create a sub-account access token from an agency-level access token, making it easier to use the API.
Important Notes
📝
This feature is specifically for Apps with a distribution type marked as "Agency." It's also limited to sub-accounts with scopes 'oauth.write' and 'oauth.readonly'.
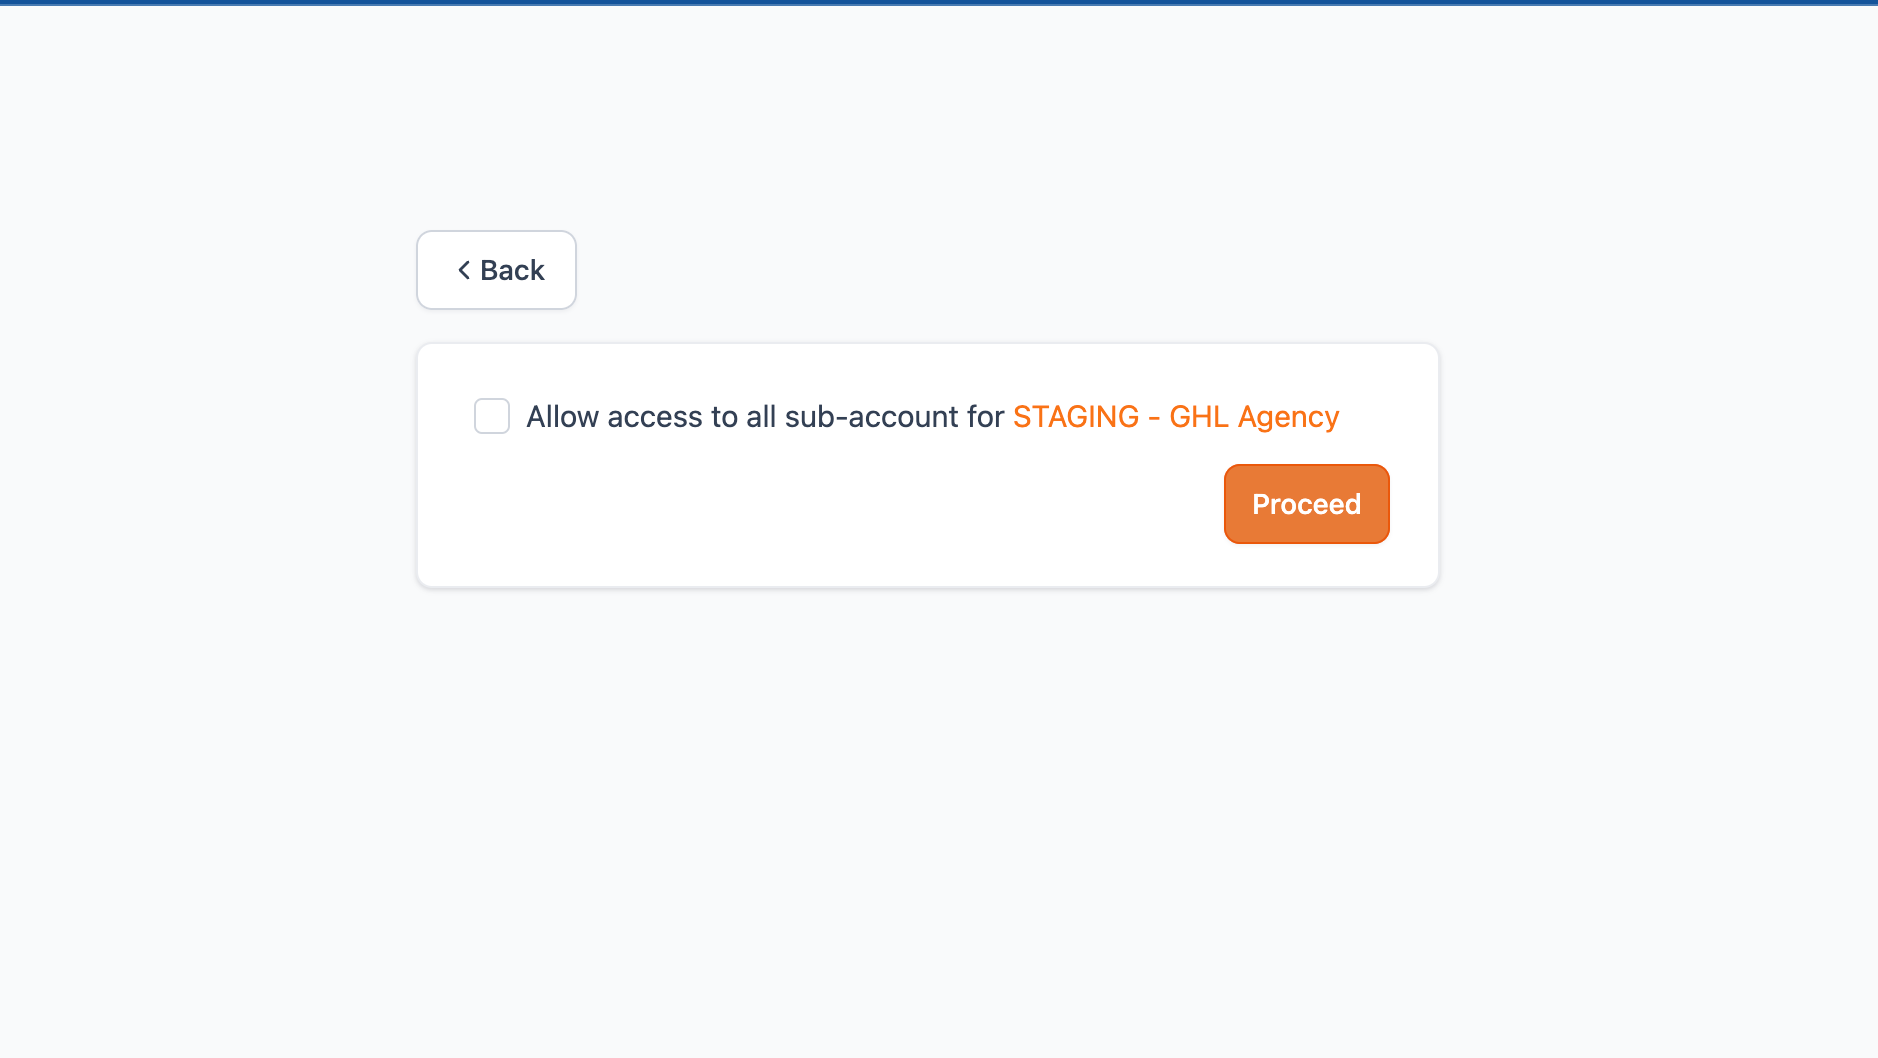
How to Access: To get started, approve the app for all your sub-accountsby selecting "Agency" on the installation page. You'll then receive an agency-level authorization code that can be used to obtain the agency-level access token.
Token Use: Once generated, the new sub-account token will have similar scopes as your agency-level token and can be used to interact with APIs under the obtained sub-accounts.
Next Steps
🛠
For more detailed guidance, please refer to our API Documentation.
PS: Make the Switch to API v2
🔄
If you're still using API v1, there's never been a better time to upgrade to API v2. Don't stay in the past—make the switch now to enjoy all the latest features and improvements!
Communities - Badges and Optimisations 🎖
Exciting updates have arrived to make Communities better. These include new looks and improvements behind the scenes.
What’s New?
🌟
🎖 Badges for Group Owners and Admins
Introducing badges that clearly show who the owners and administrators of groups are. These badges make it easy for members to spot important members with admin rights.
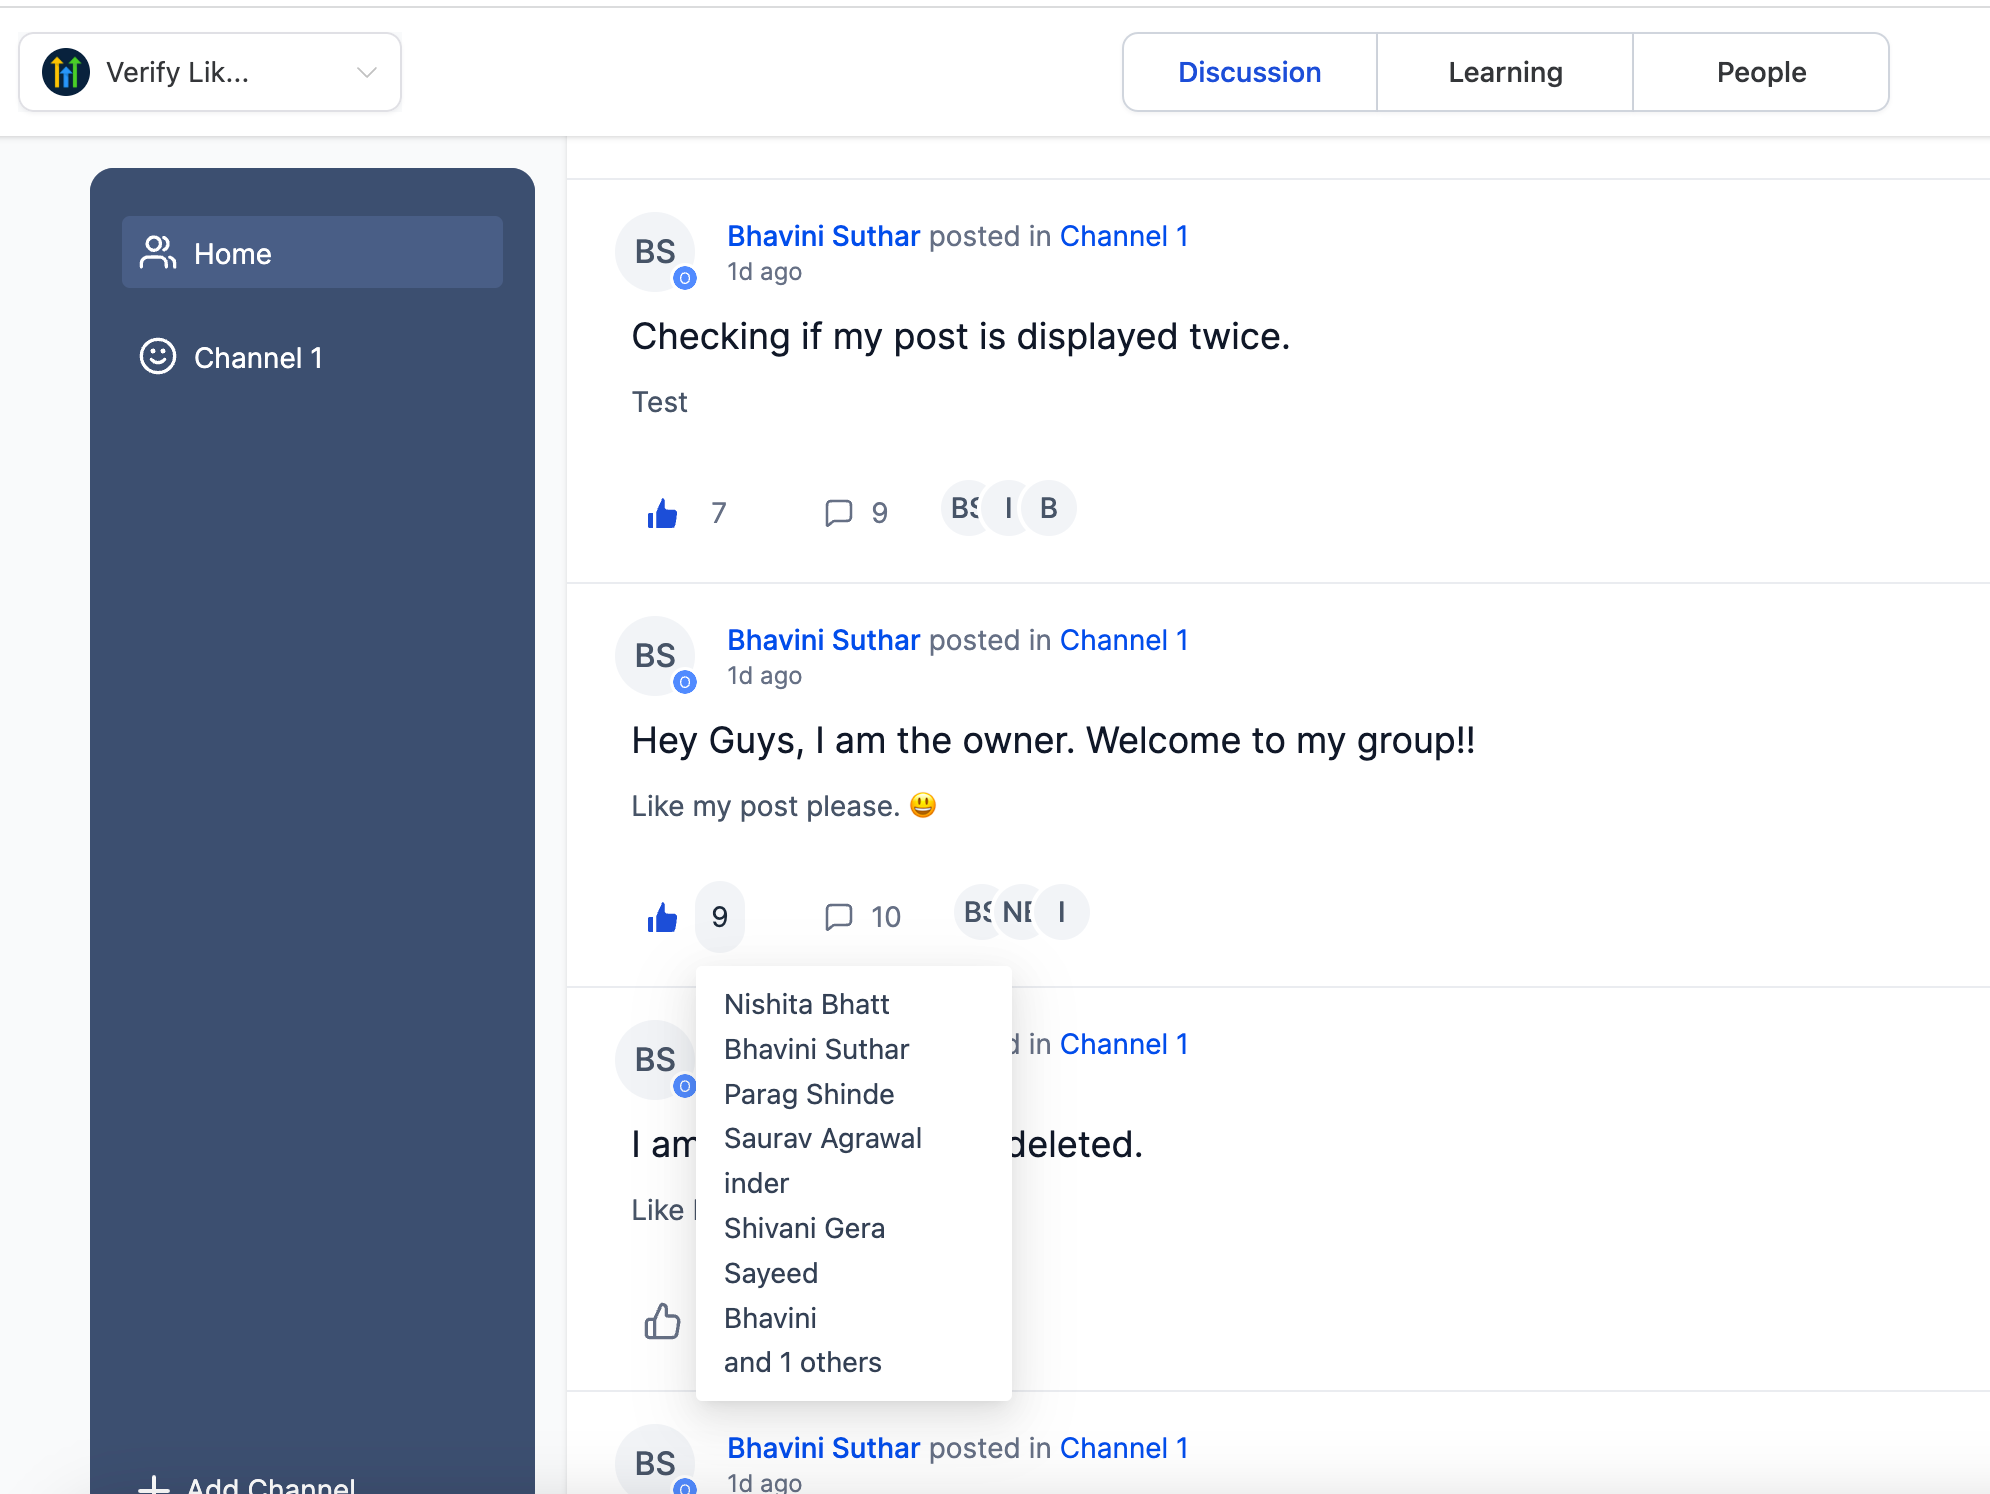
👍 Enhanced Like List Visibility
By clicking the like icon, you can see who liked a post. This helps you understand how much people engage with your posts and connect better with your audience.
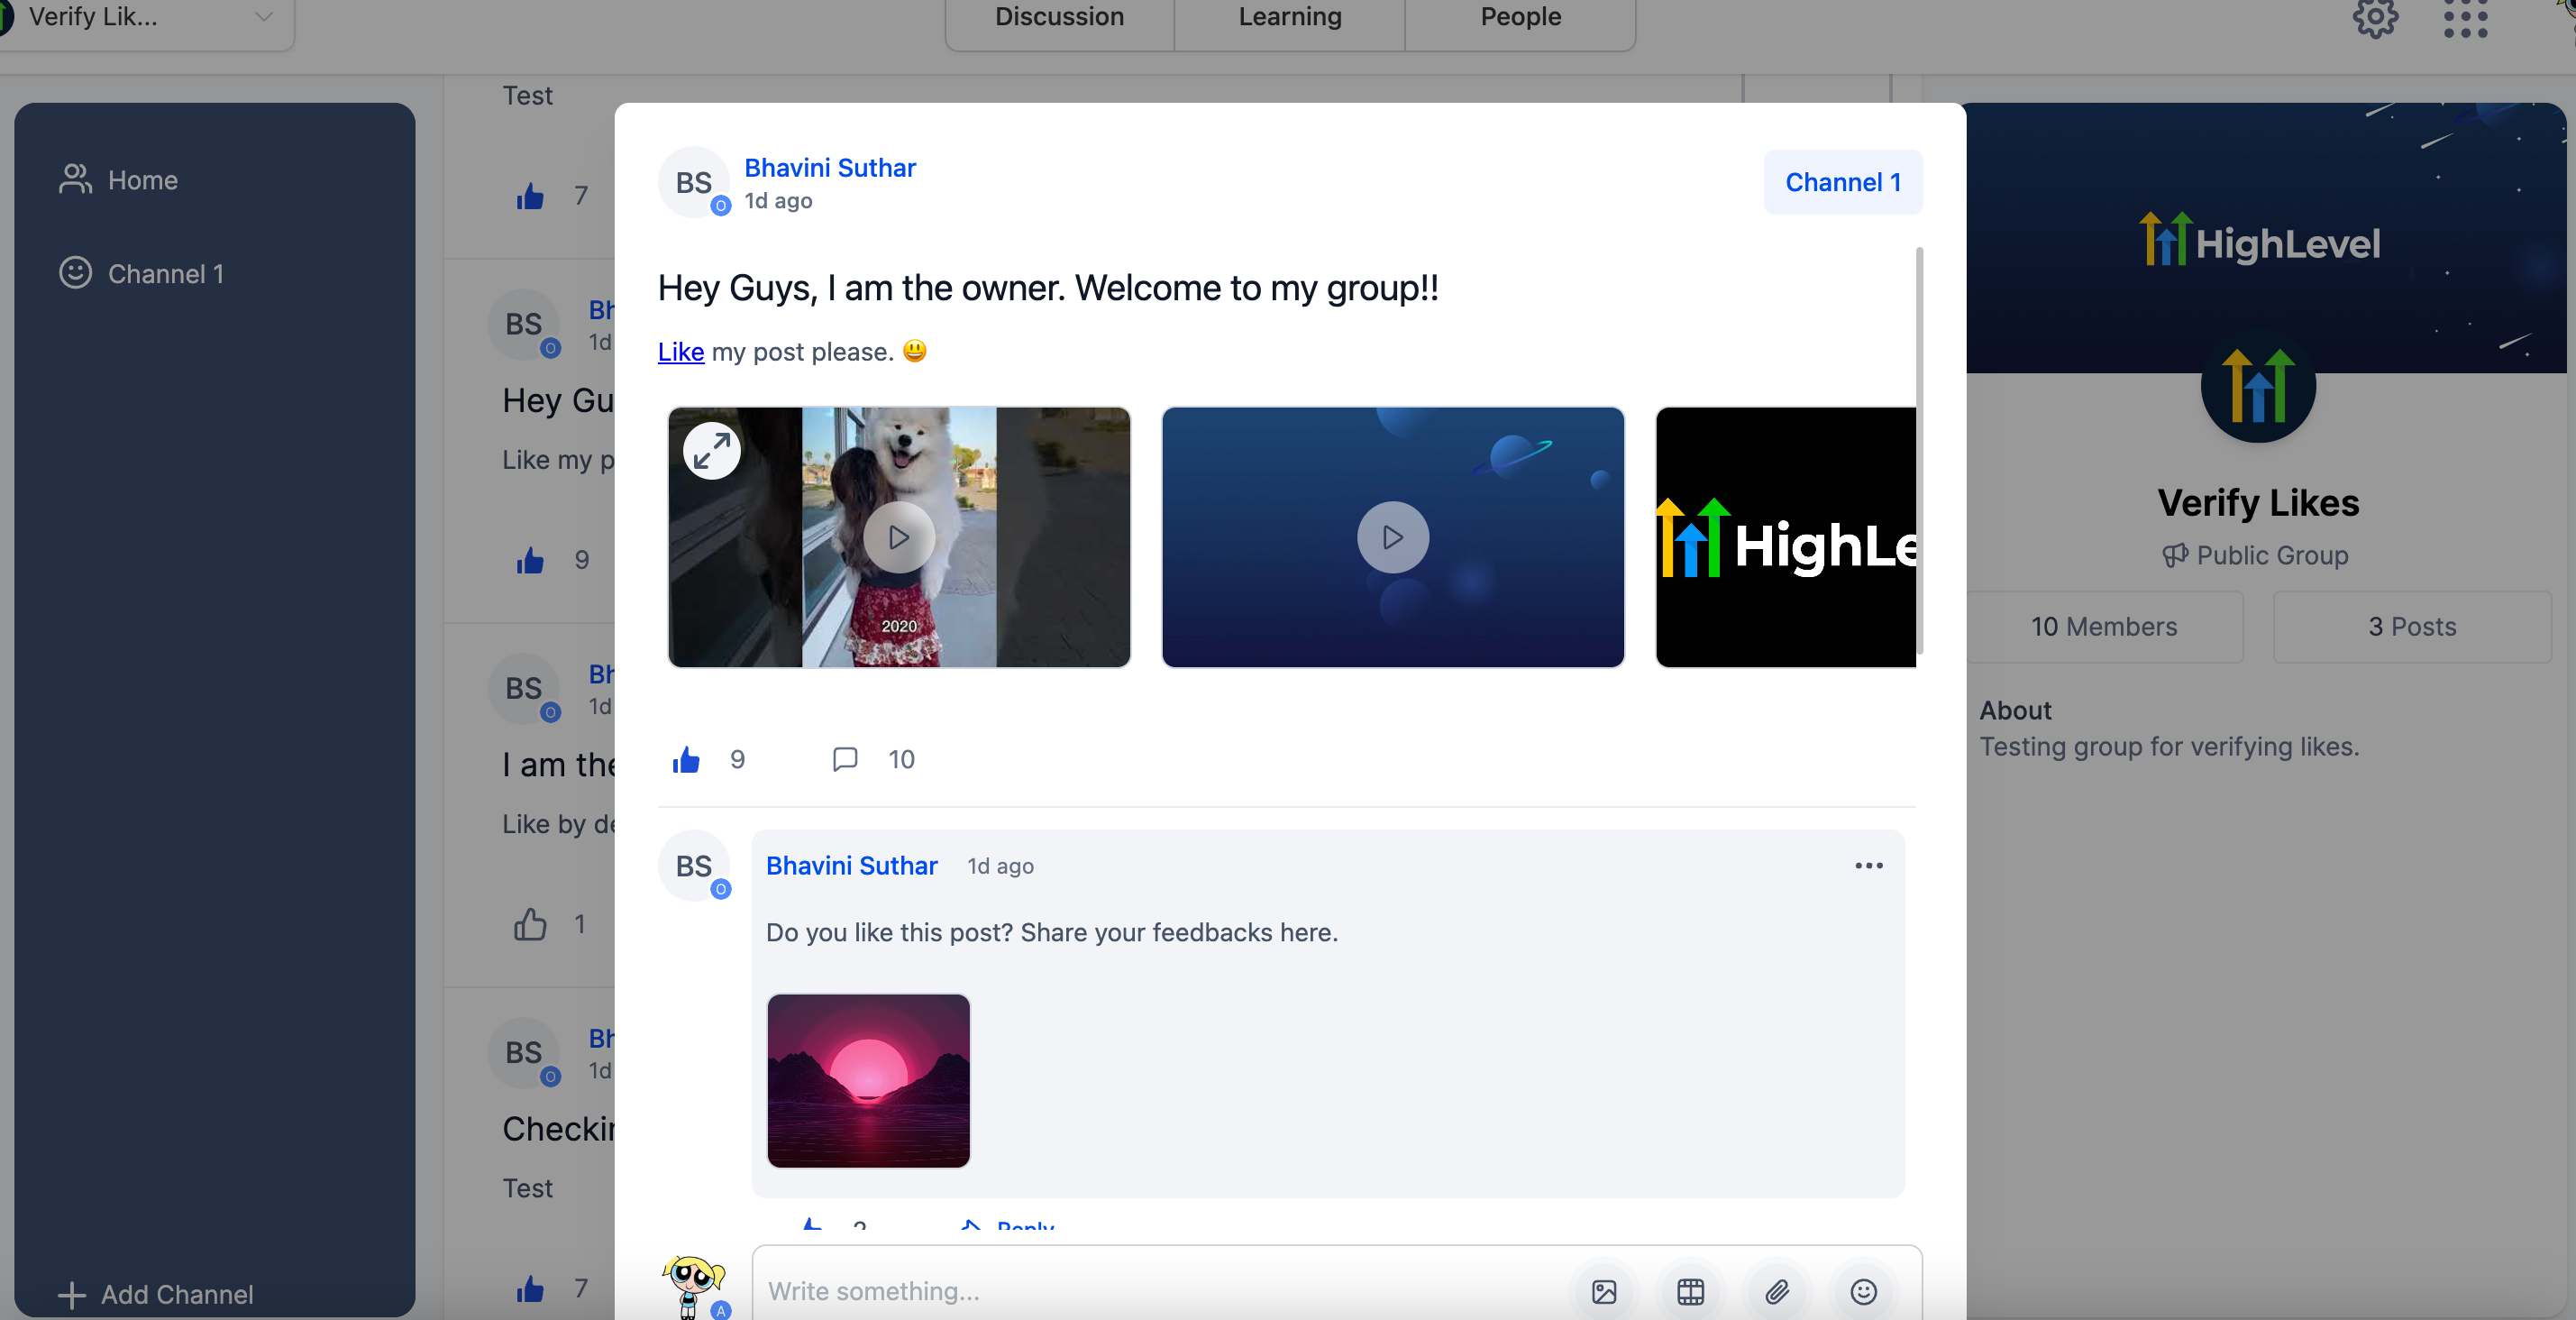
💻 Streamlined User Onboarding
After signing up, you'll be seamlessly redirected to a preview of communities. You get the quick peek right away and start to engage right away.
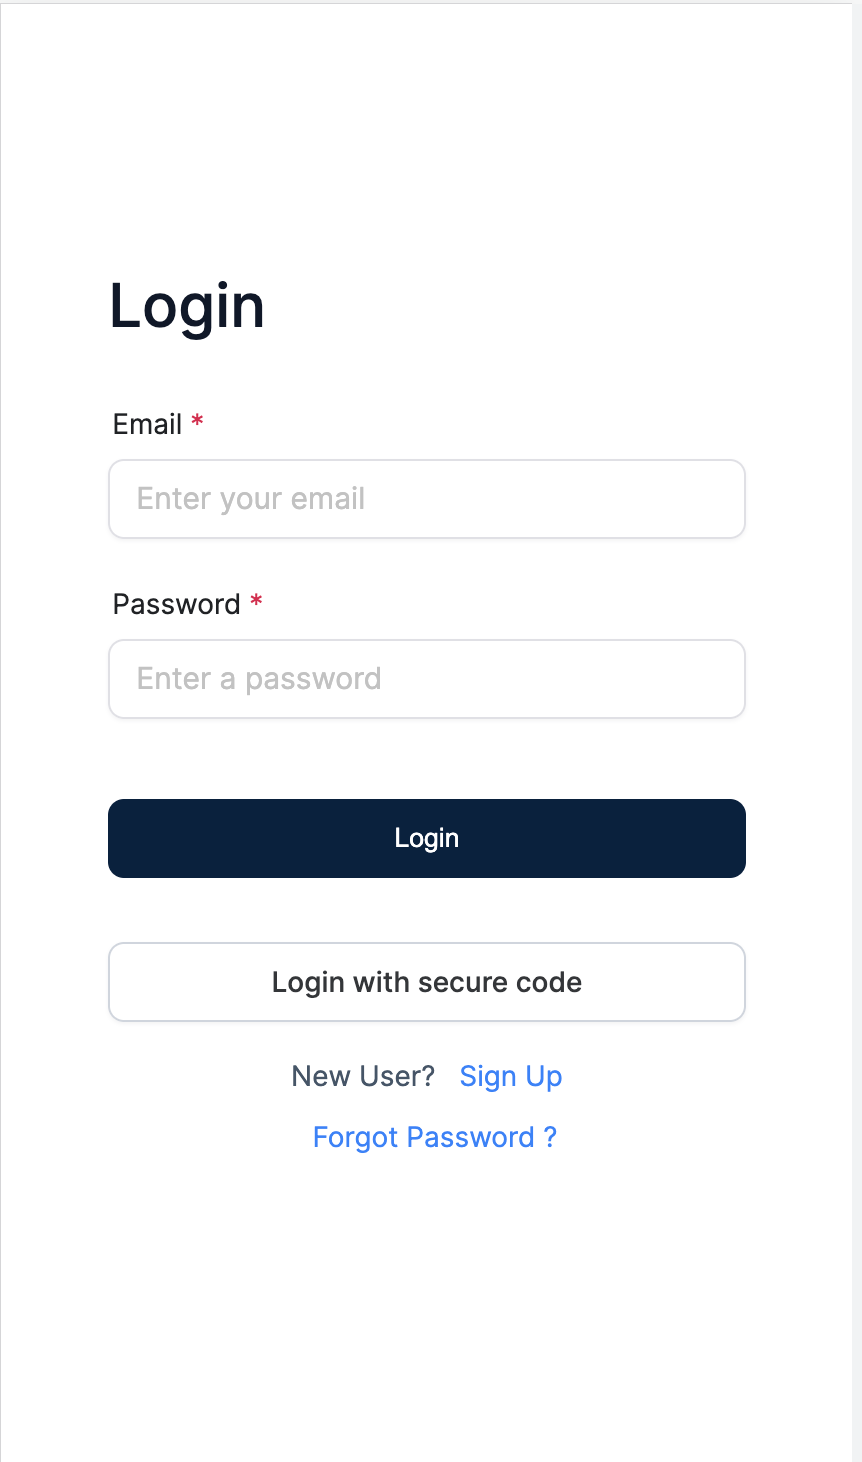
📱Client Portal Login
Logging into your account through the Client Portal is now super simple, even on mobile devices. We've made the login screen work great on mobile, so it's easy to use no matter what device you have.
🔧 API and Database Improvements
Pesky bugs in the reactions APIs and the Mongo database have been fixed. This makes interactions for expressing reactions and using the backend database smoother, resulting in a more dependable and seamless experience.
⚙️ API Refinements and Pagination Validation
Numerous endpoints were refactored, and a common interface was introduced to validate pagination parameters. These changes improve the backend experience by making it more reliable and standardized.
👩💻 Frontend Service and Composition Refinements
A detailed look at the website's front part has been conducted, improving the way reactions, groups, and comments are put together and how they work. This makes the user interface smoother, faster, and more enjoyable.
🐞 Bug Fixes
An issue has been fixed where groups would disappear when the owner's contact was deleted. Now, the groups will always be visible, so you won't lose any important content or connections.
Upload a page background image for Proposals & Estimates
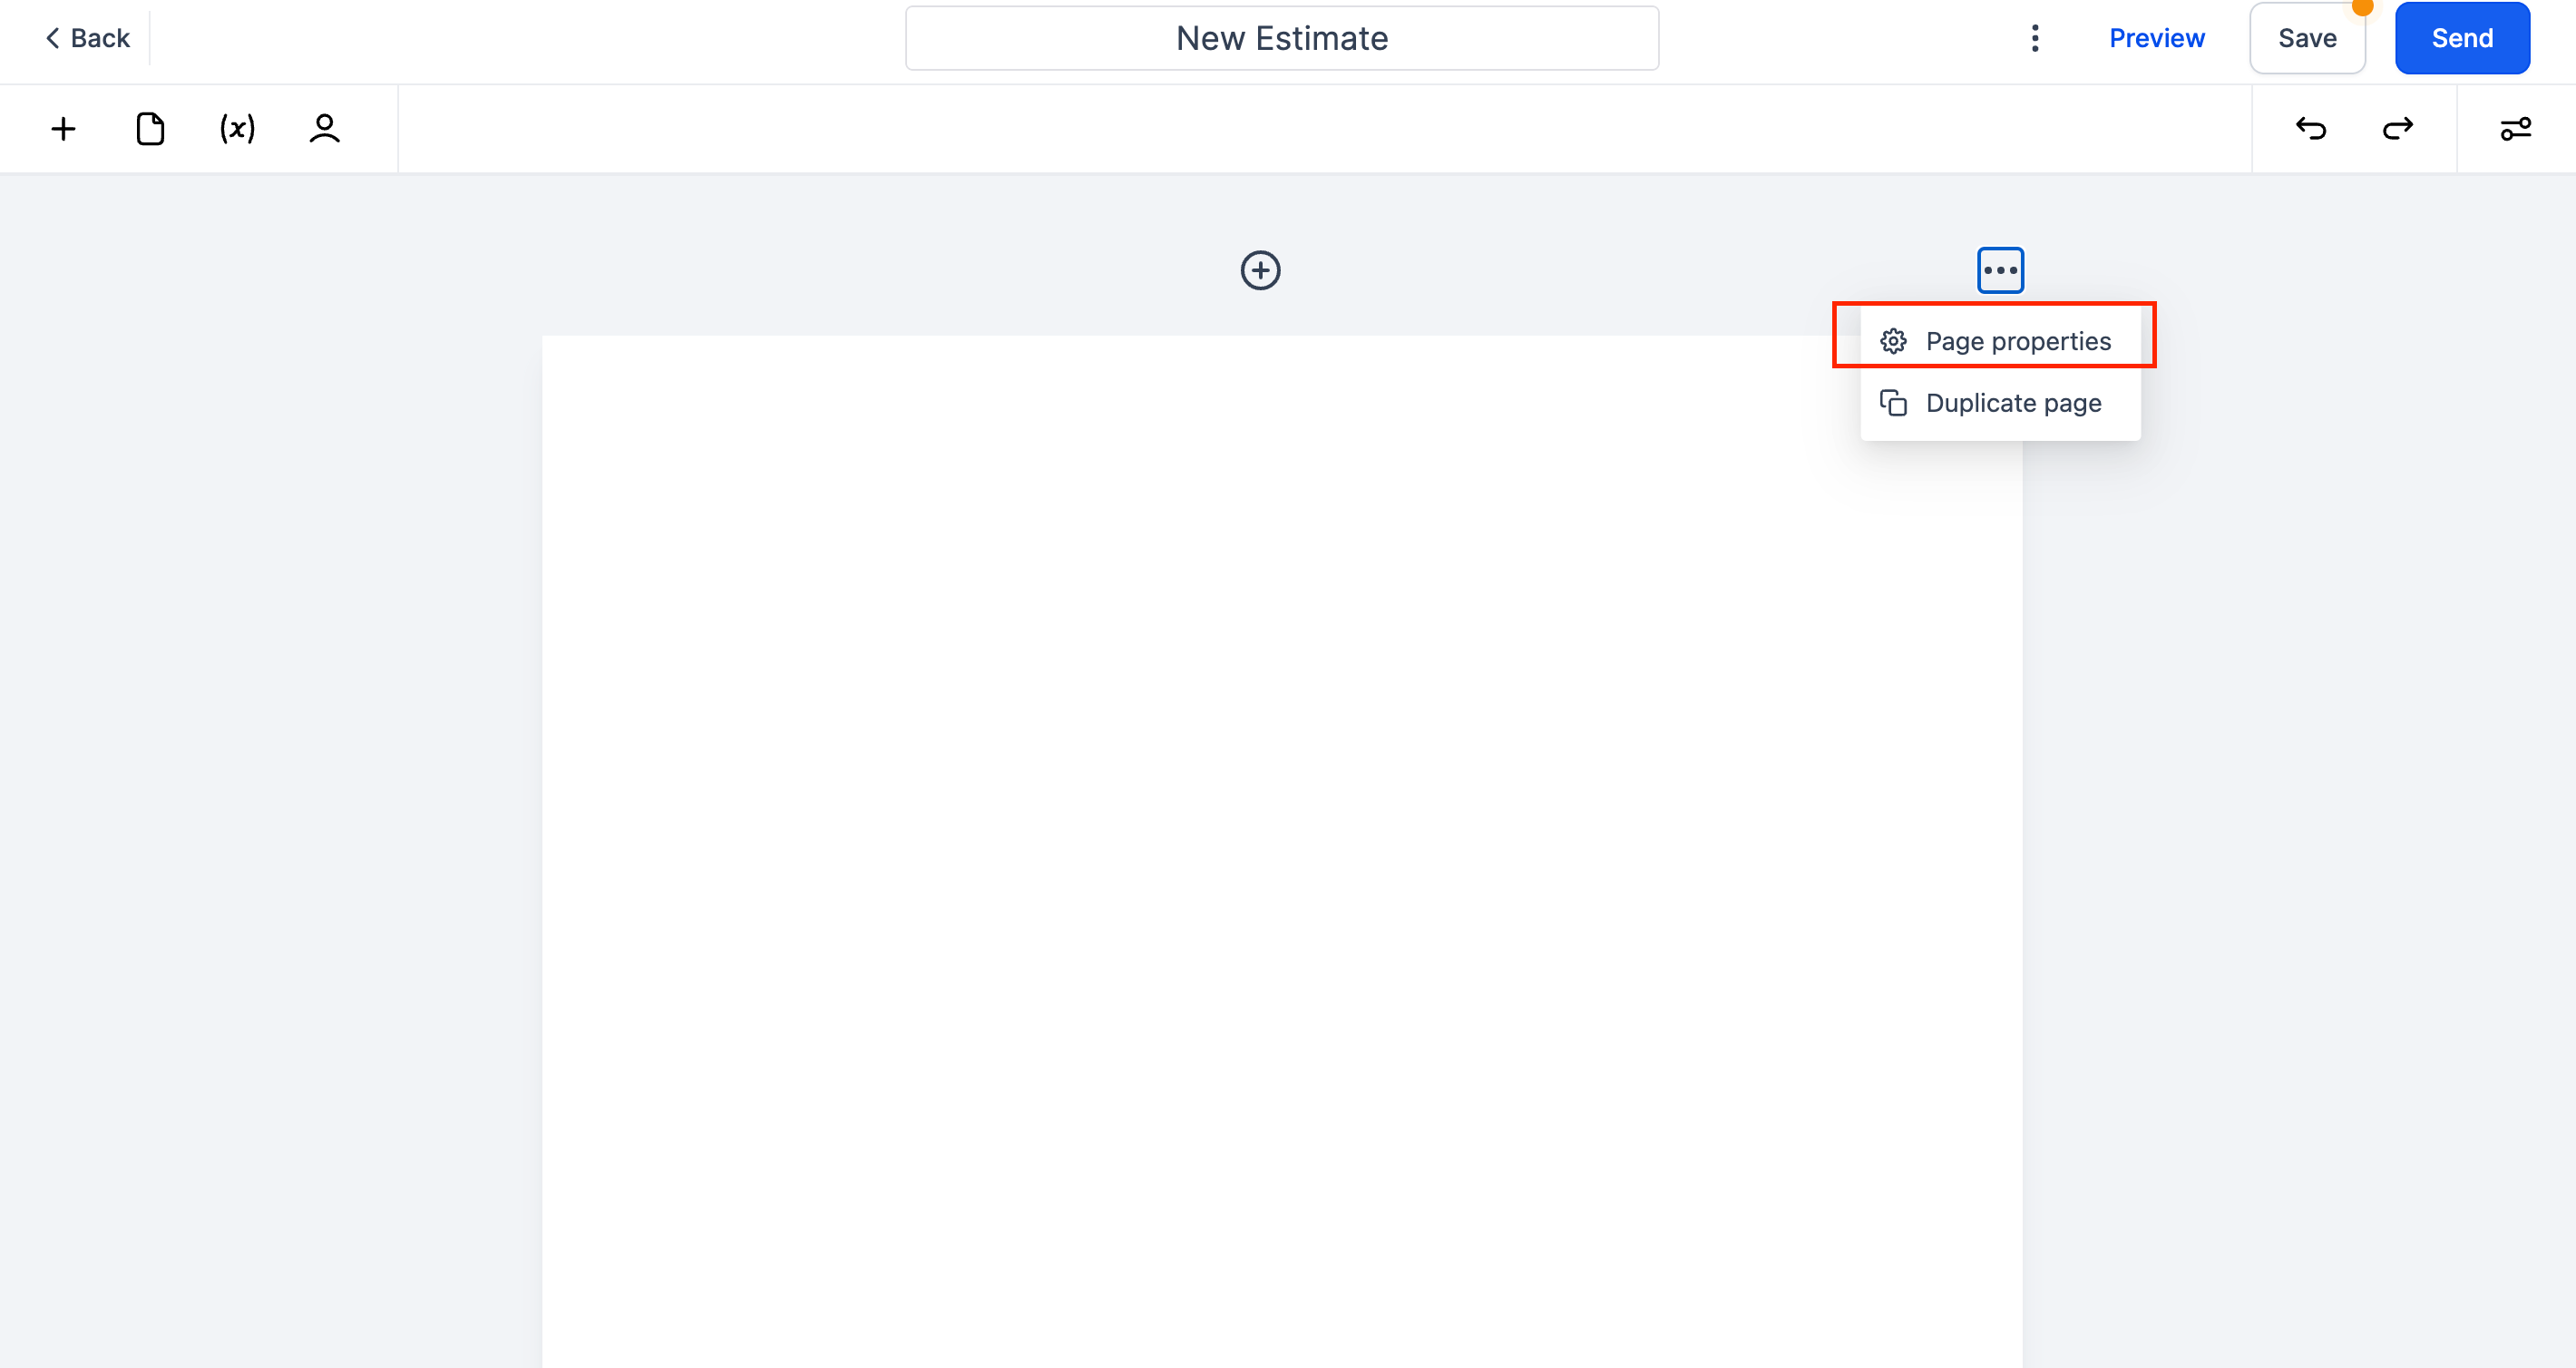
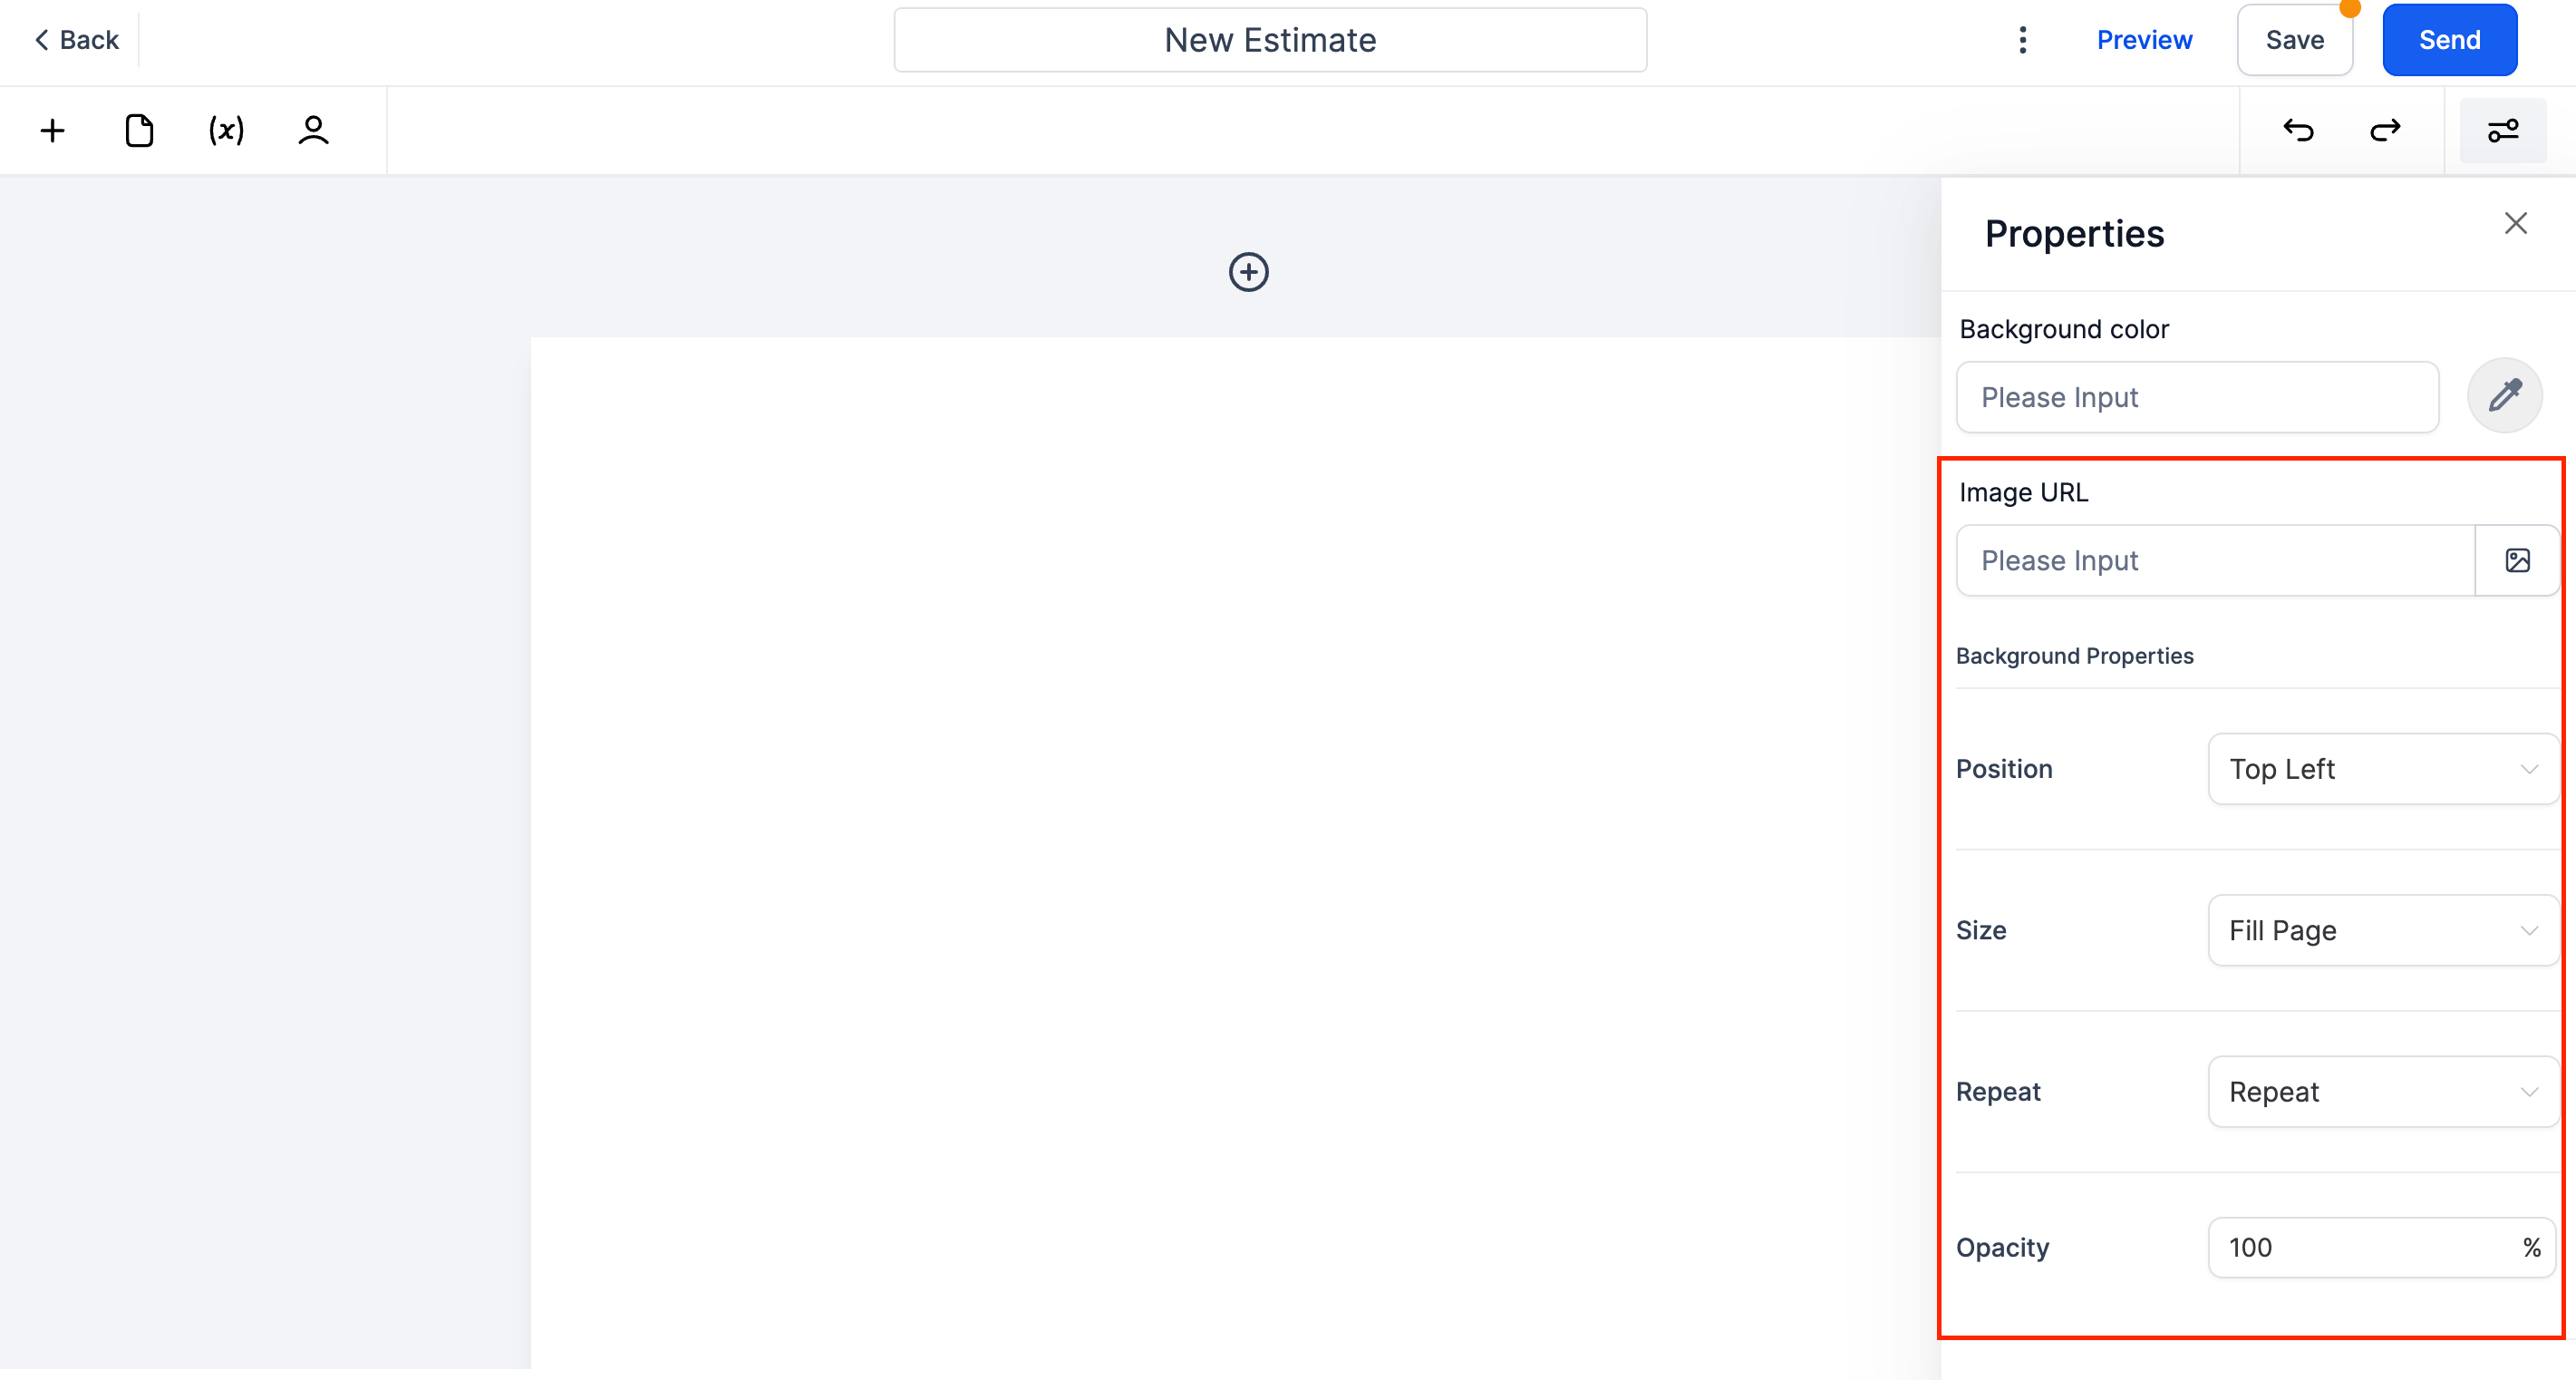
Businesses will now be able to upload a background image for a page using Page Properties
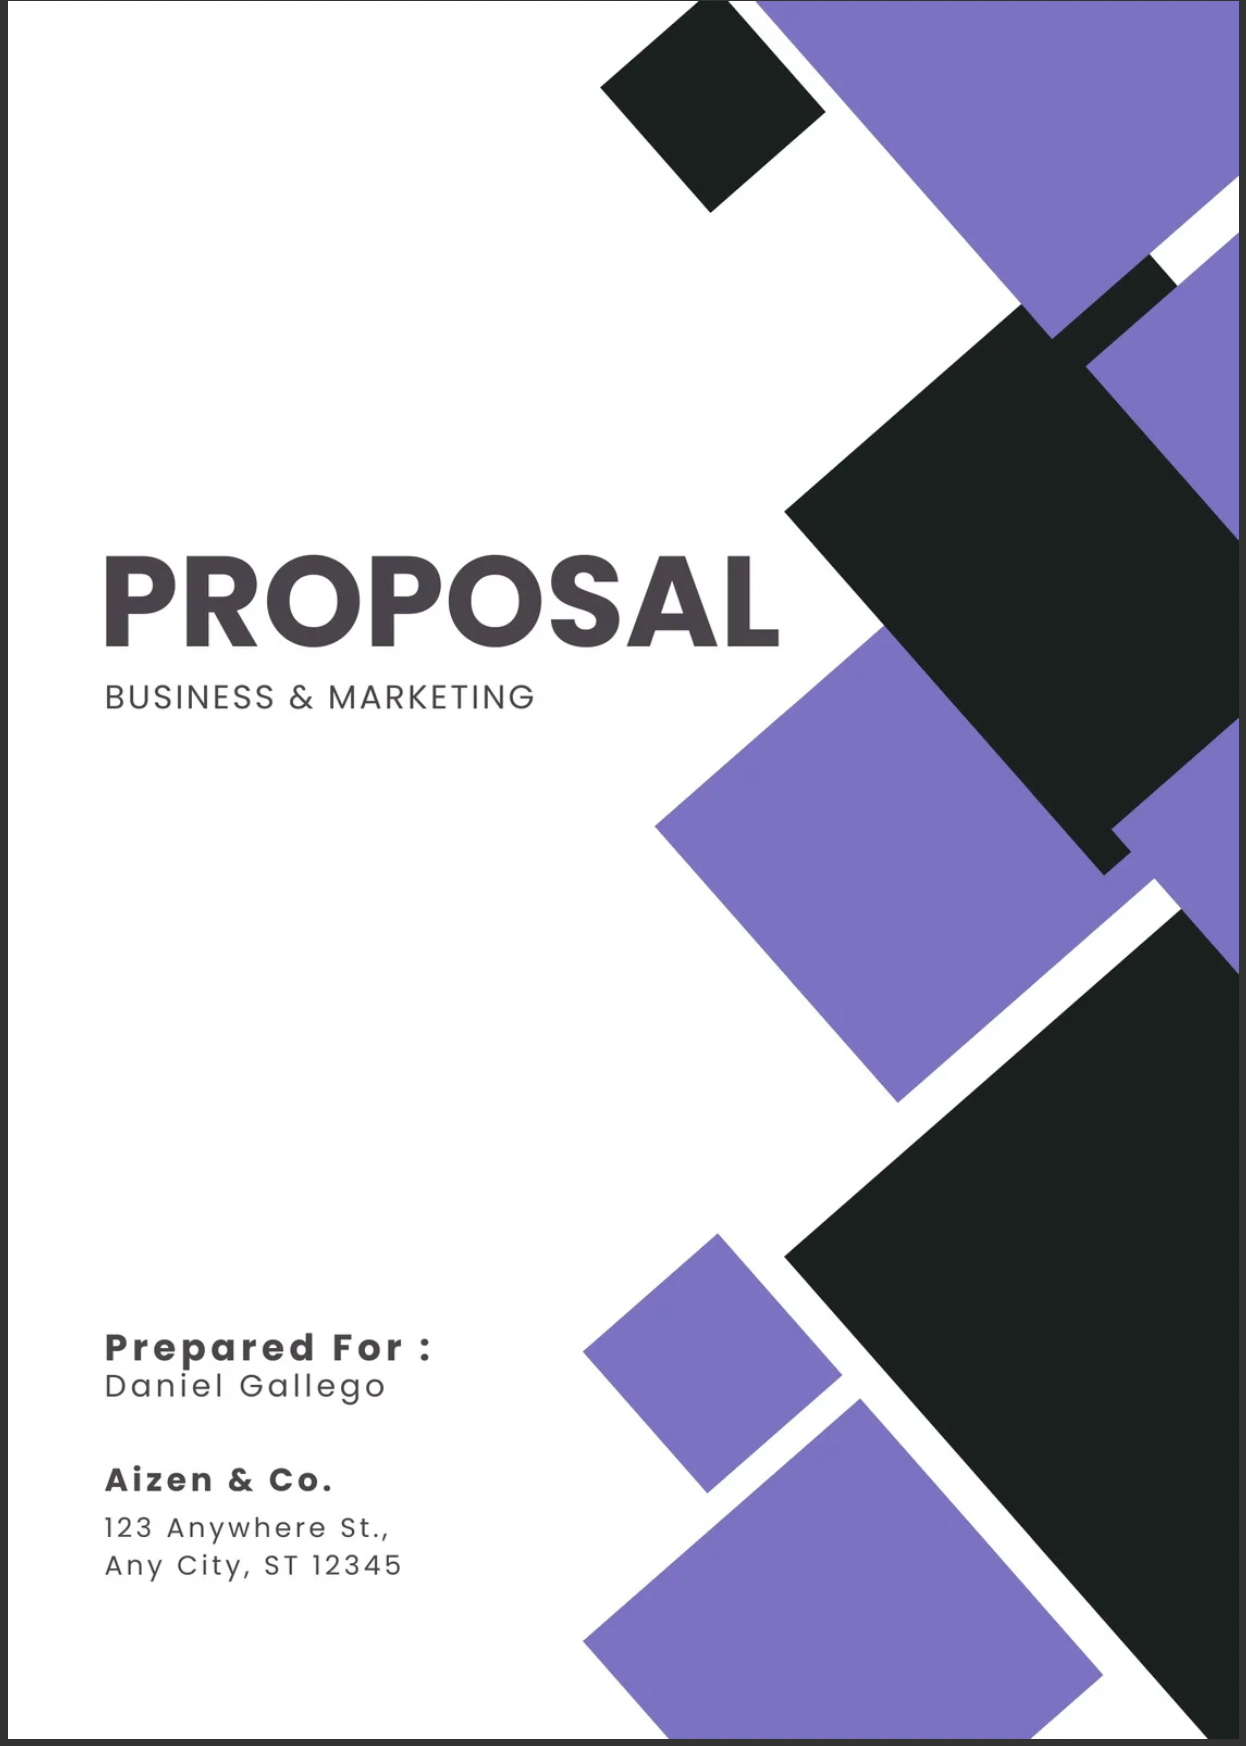
This will allow businesses to define a customized background for their proposals/estimates and lay over any element on top of it
Businesses will also be able to define the image position (center/top/left), size (Fill page/Fit to size), repeat (horizontally or vertically), and set an opacity percentage to the uploaded images
This opens tons of possibilities to use the tool by directly uploading brand-customized images and signing agreements above it
Course Creation Experience with Analytics 🎉
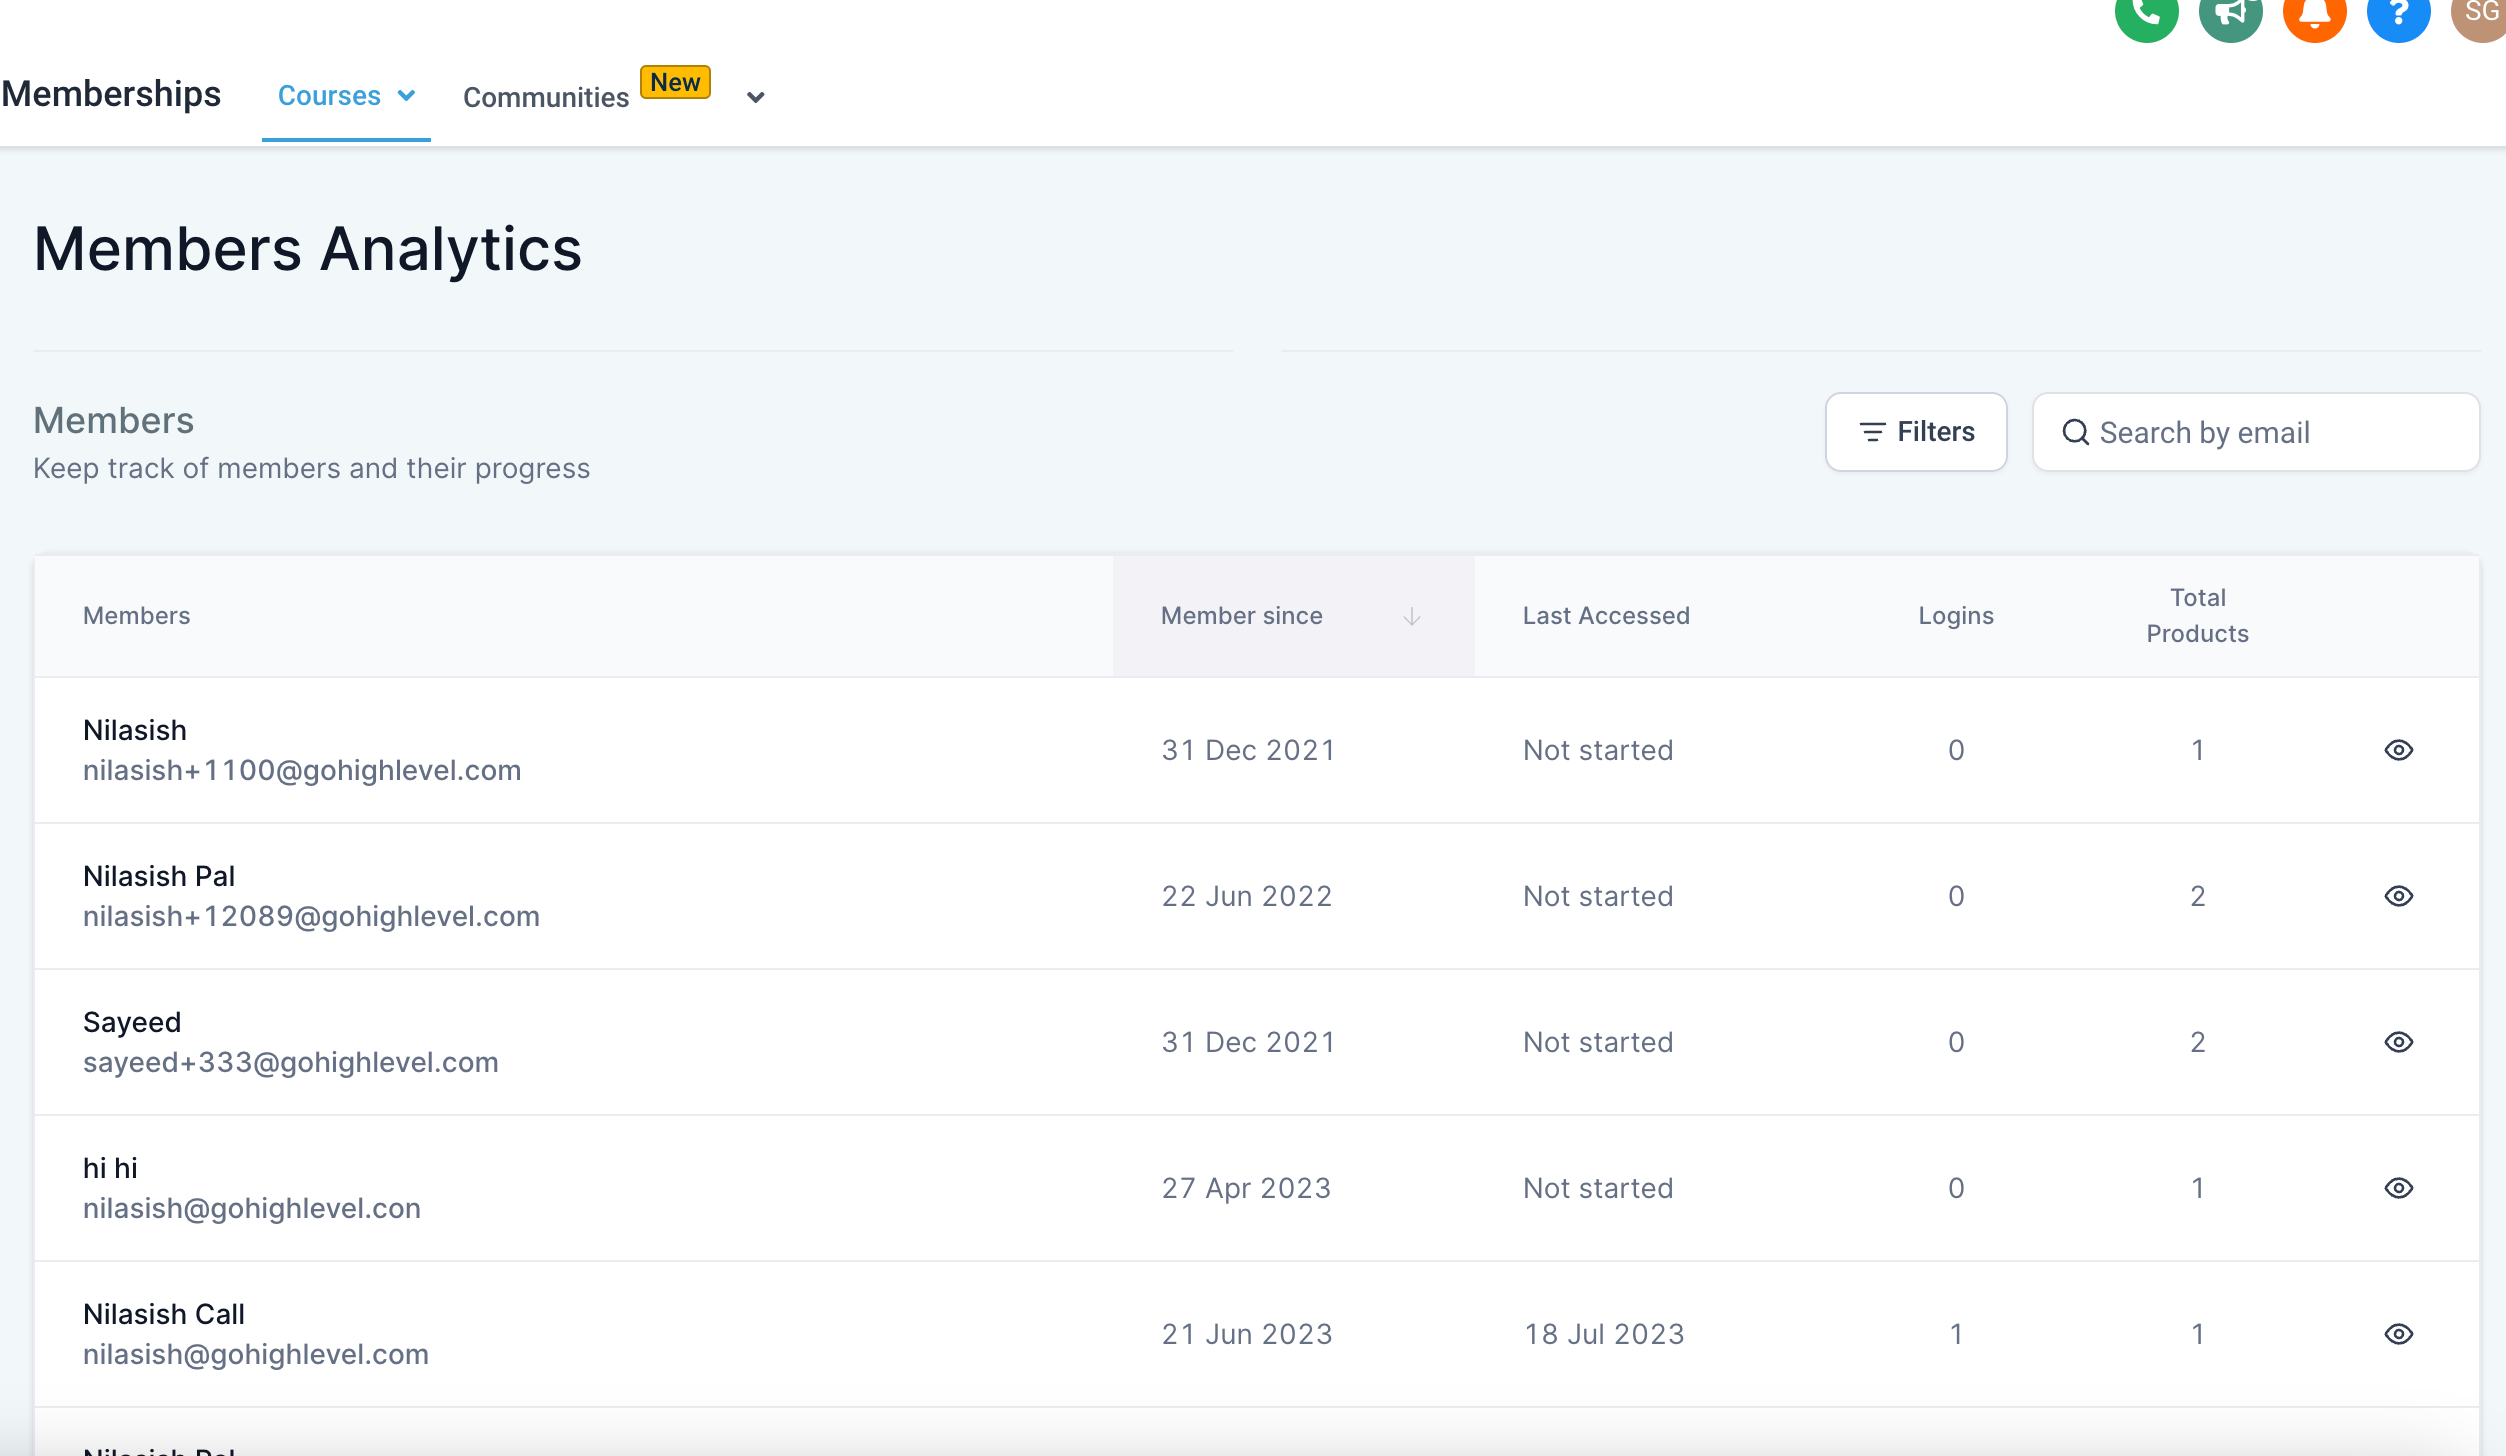
Course creators can now keep track of how every user is doing in their courses.
How to Access 📍
Find this new feature under Memberships > Analytics > Membership Analytics in the main menu.
Features
🔍
📧 Search Options
Now search for members using their email address with the "Search by email" feature.
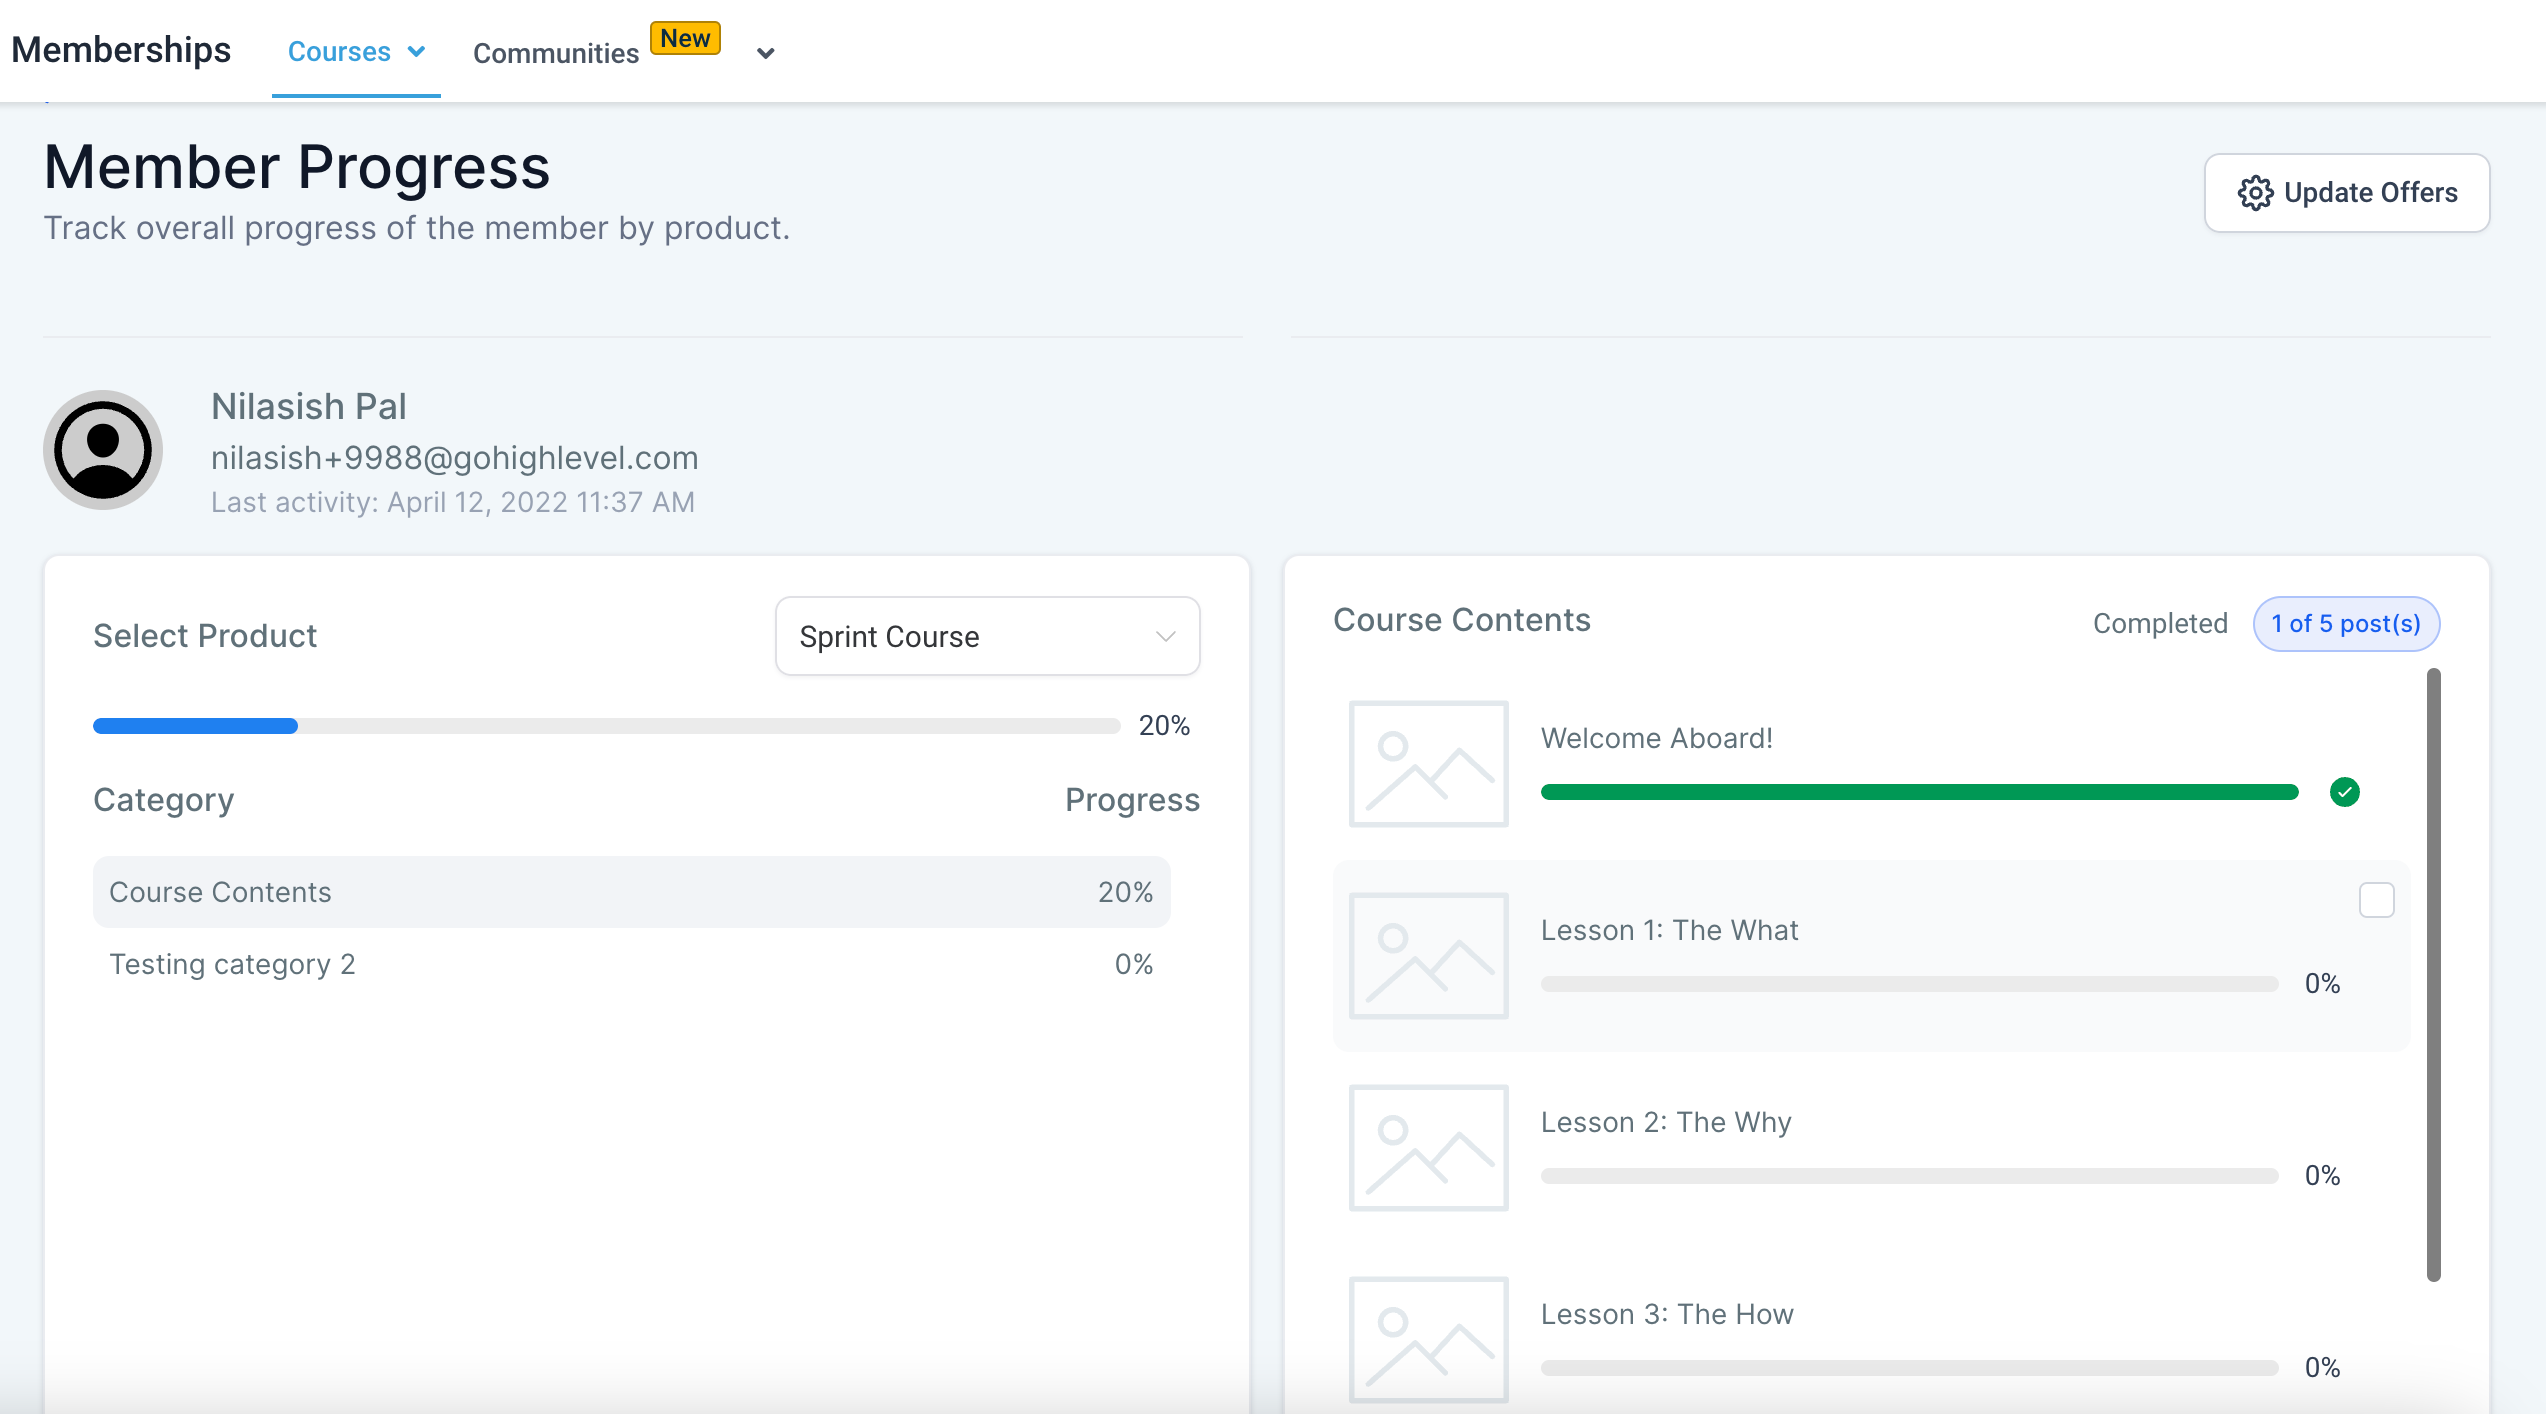
📊 Member Progress
Click on the 'view' icon to see detailed analytics for learner performance, down to each product, sub-category, and lesson.
🔄 Filtering Products
Toggle products and Offers in the Filters. Feel free to choose any number of products or offers that prefers.
📋 Categories Progress
Instructors can view progress at the individual post level, simply by clicking on the relevant category.
✅ Marking Completion
Big update! Instructors can now mark posts as complete, and the progress bars will automatically update to reflect changes.
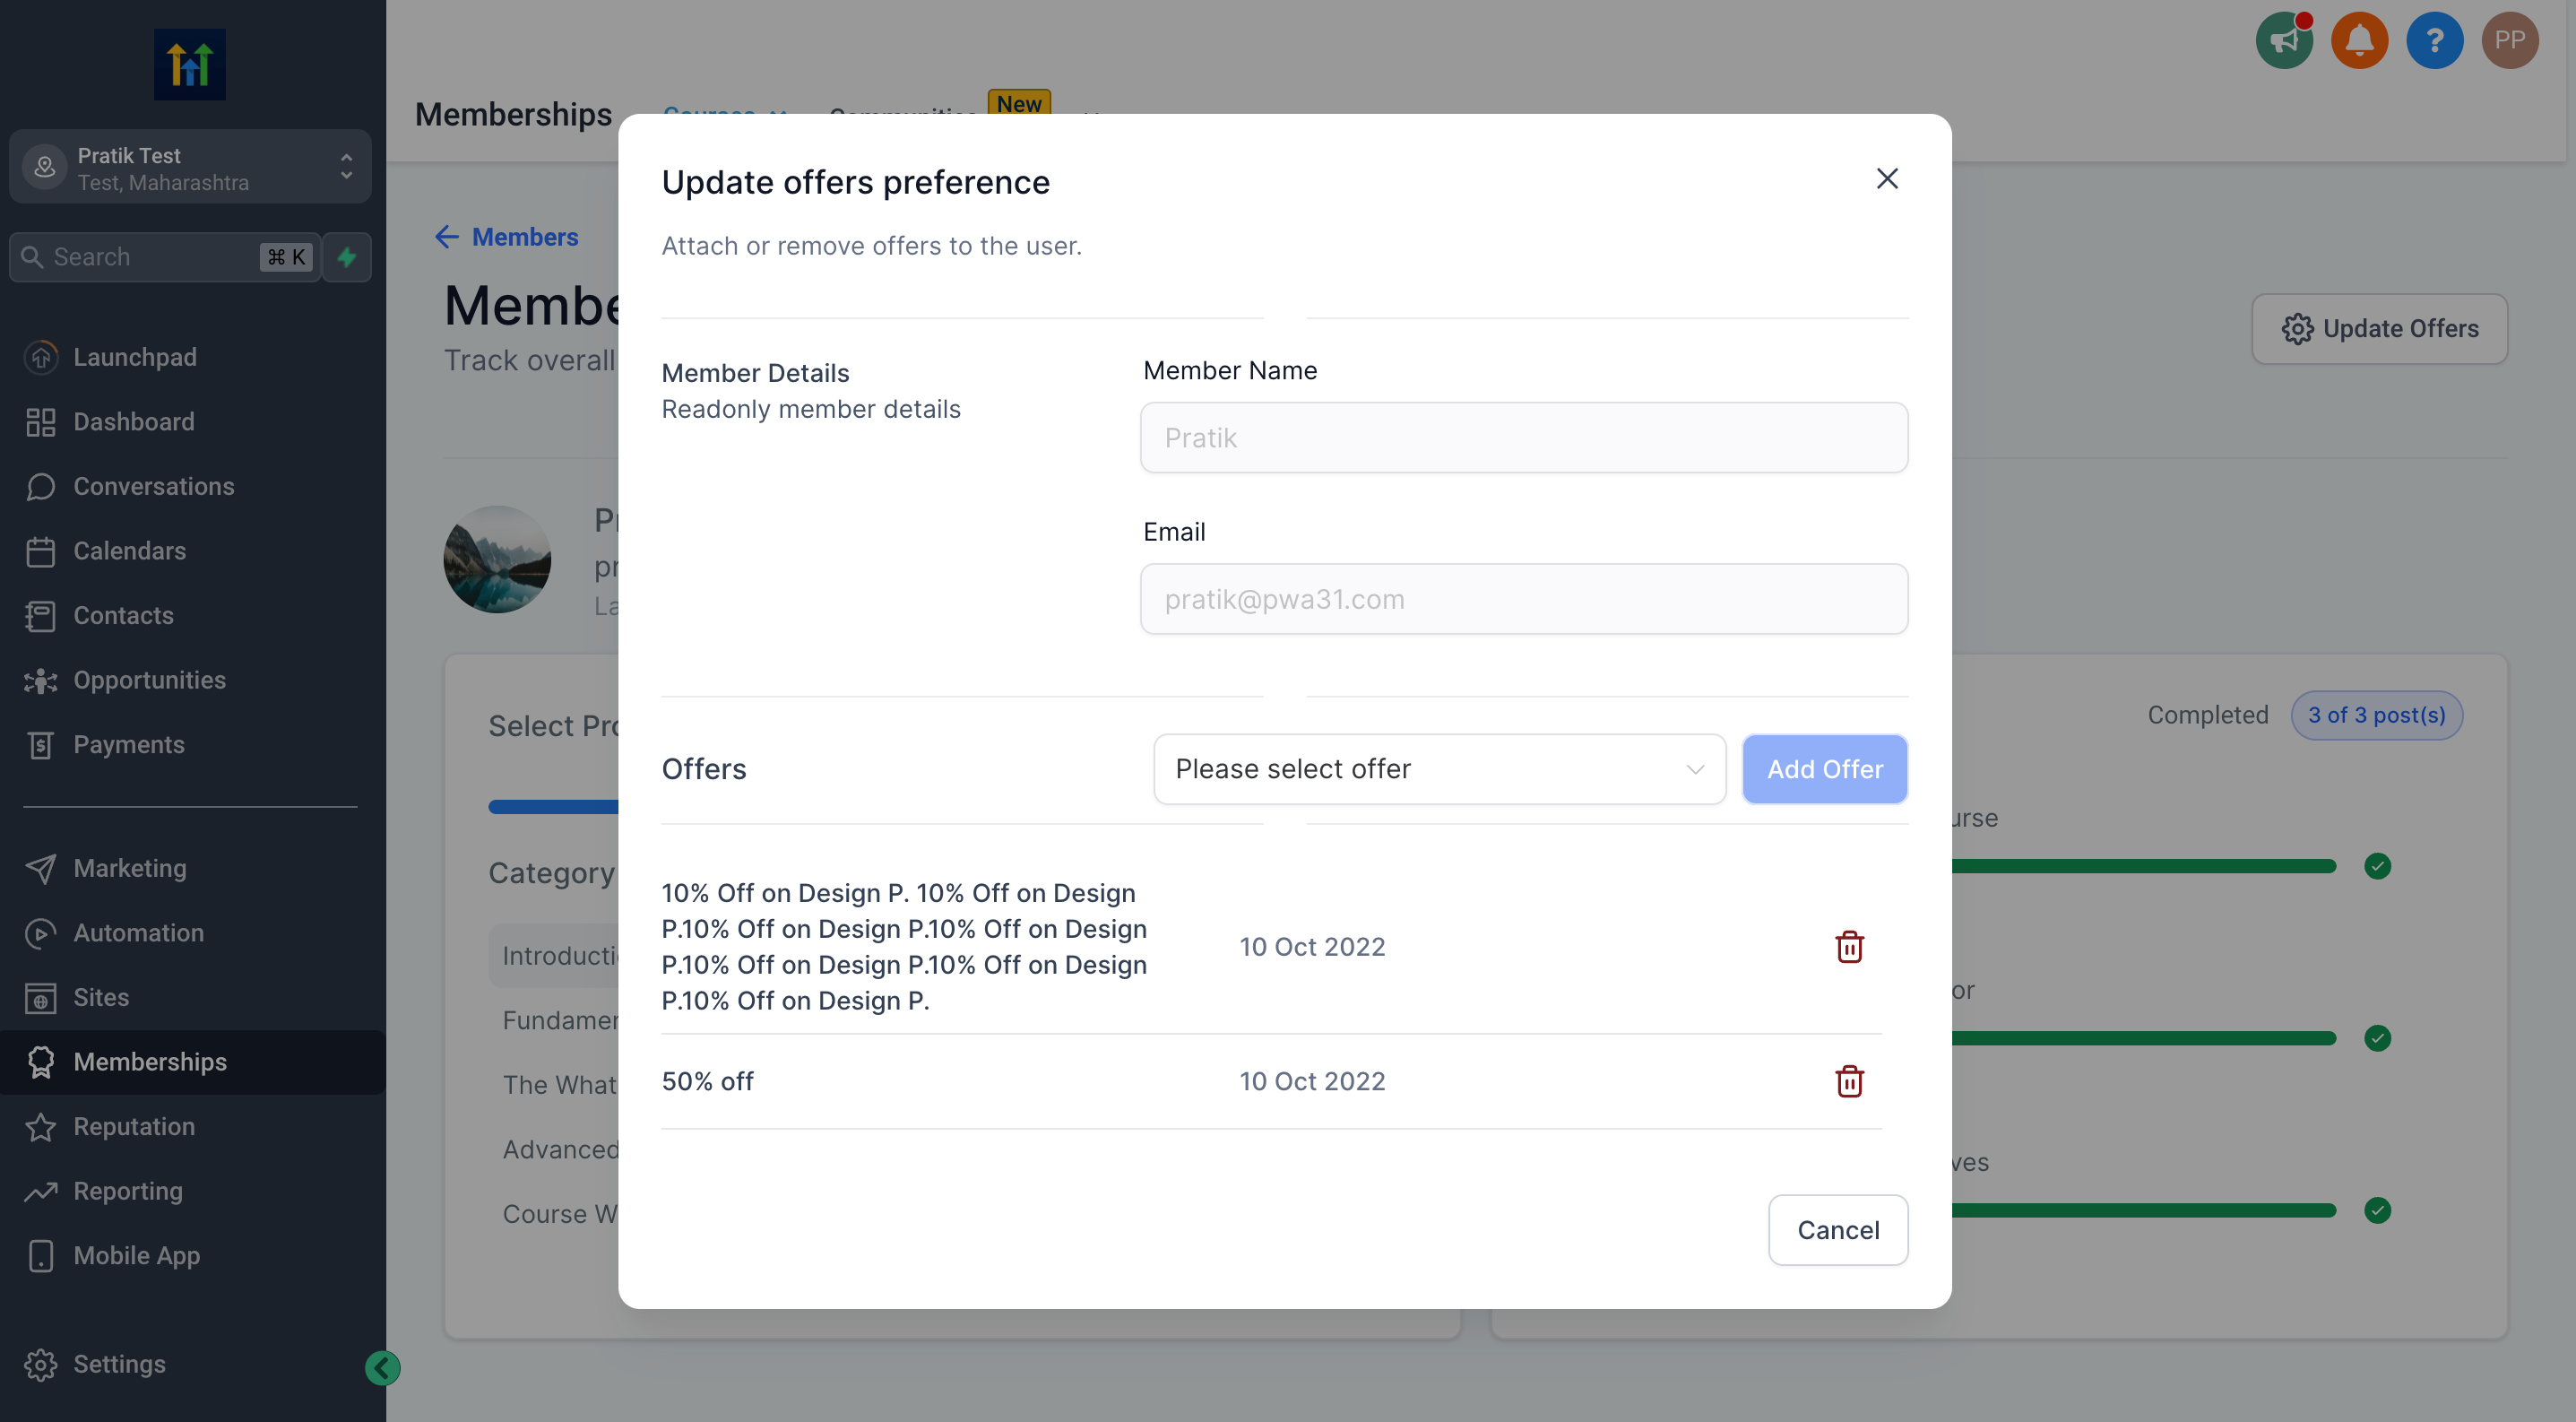
🔵 Manage Offers
Easily make changes to existing offers attached to the courses, whether the user wants to add new ones or remove existing ones.
Other Enhancements 🛠️
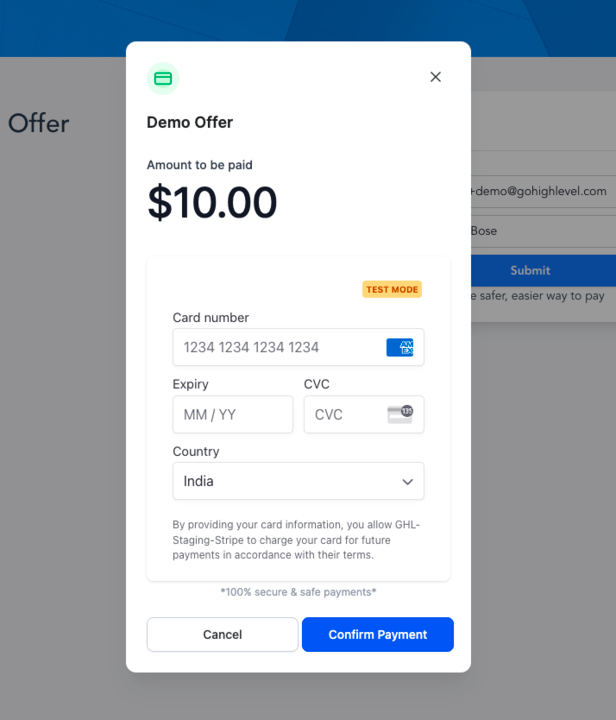
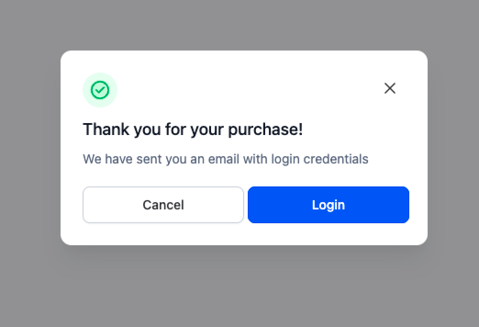
🎨 Revamped Design for Payment Modal
We’ve given the Payment modal within our Preview Side App a complete design makeover.
📚 Explore more about Member Analytics 👈
Staging Environment Access in WordPress 🤩
Introducing the long-anticipated feature in WordPress - Staging Environment Access. This enhancement empowers users with a powerful tool to streamline website development, testing, and updates, ensuring a seamless and risk-free transition to production.
Using the Staging environment you can,
Create a Safe Testing Ground ✅
: Staging environments are like a safe area where you can try out changes to a website without messing up the real one. They're a great place for developers, designers, and content creators to play around and make sure everything works before it goes live.
Isolate Changes 🔐
: Staging environments help you keep your testing separate from your real website. This way, you can try out new themes, plugins, or custom code without worrying about messing up your live site.
Test Before Publishing 🔍
: With Staging Environment Access, you can check and make sure changes, updates, or new stuff on your website look good before they actually show up. This makes it less likely for surprise problems to pop up on your real website.
How to Access the Staging Environment:
Log in to your WordPress dashboard and create a staging environment under staging access. The Staging Environment generally takes about 2-5 minutes to be created depending on the size of your WordPress site
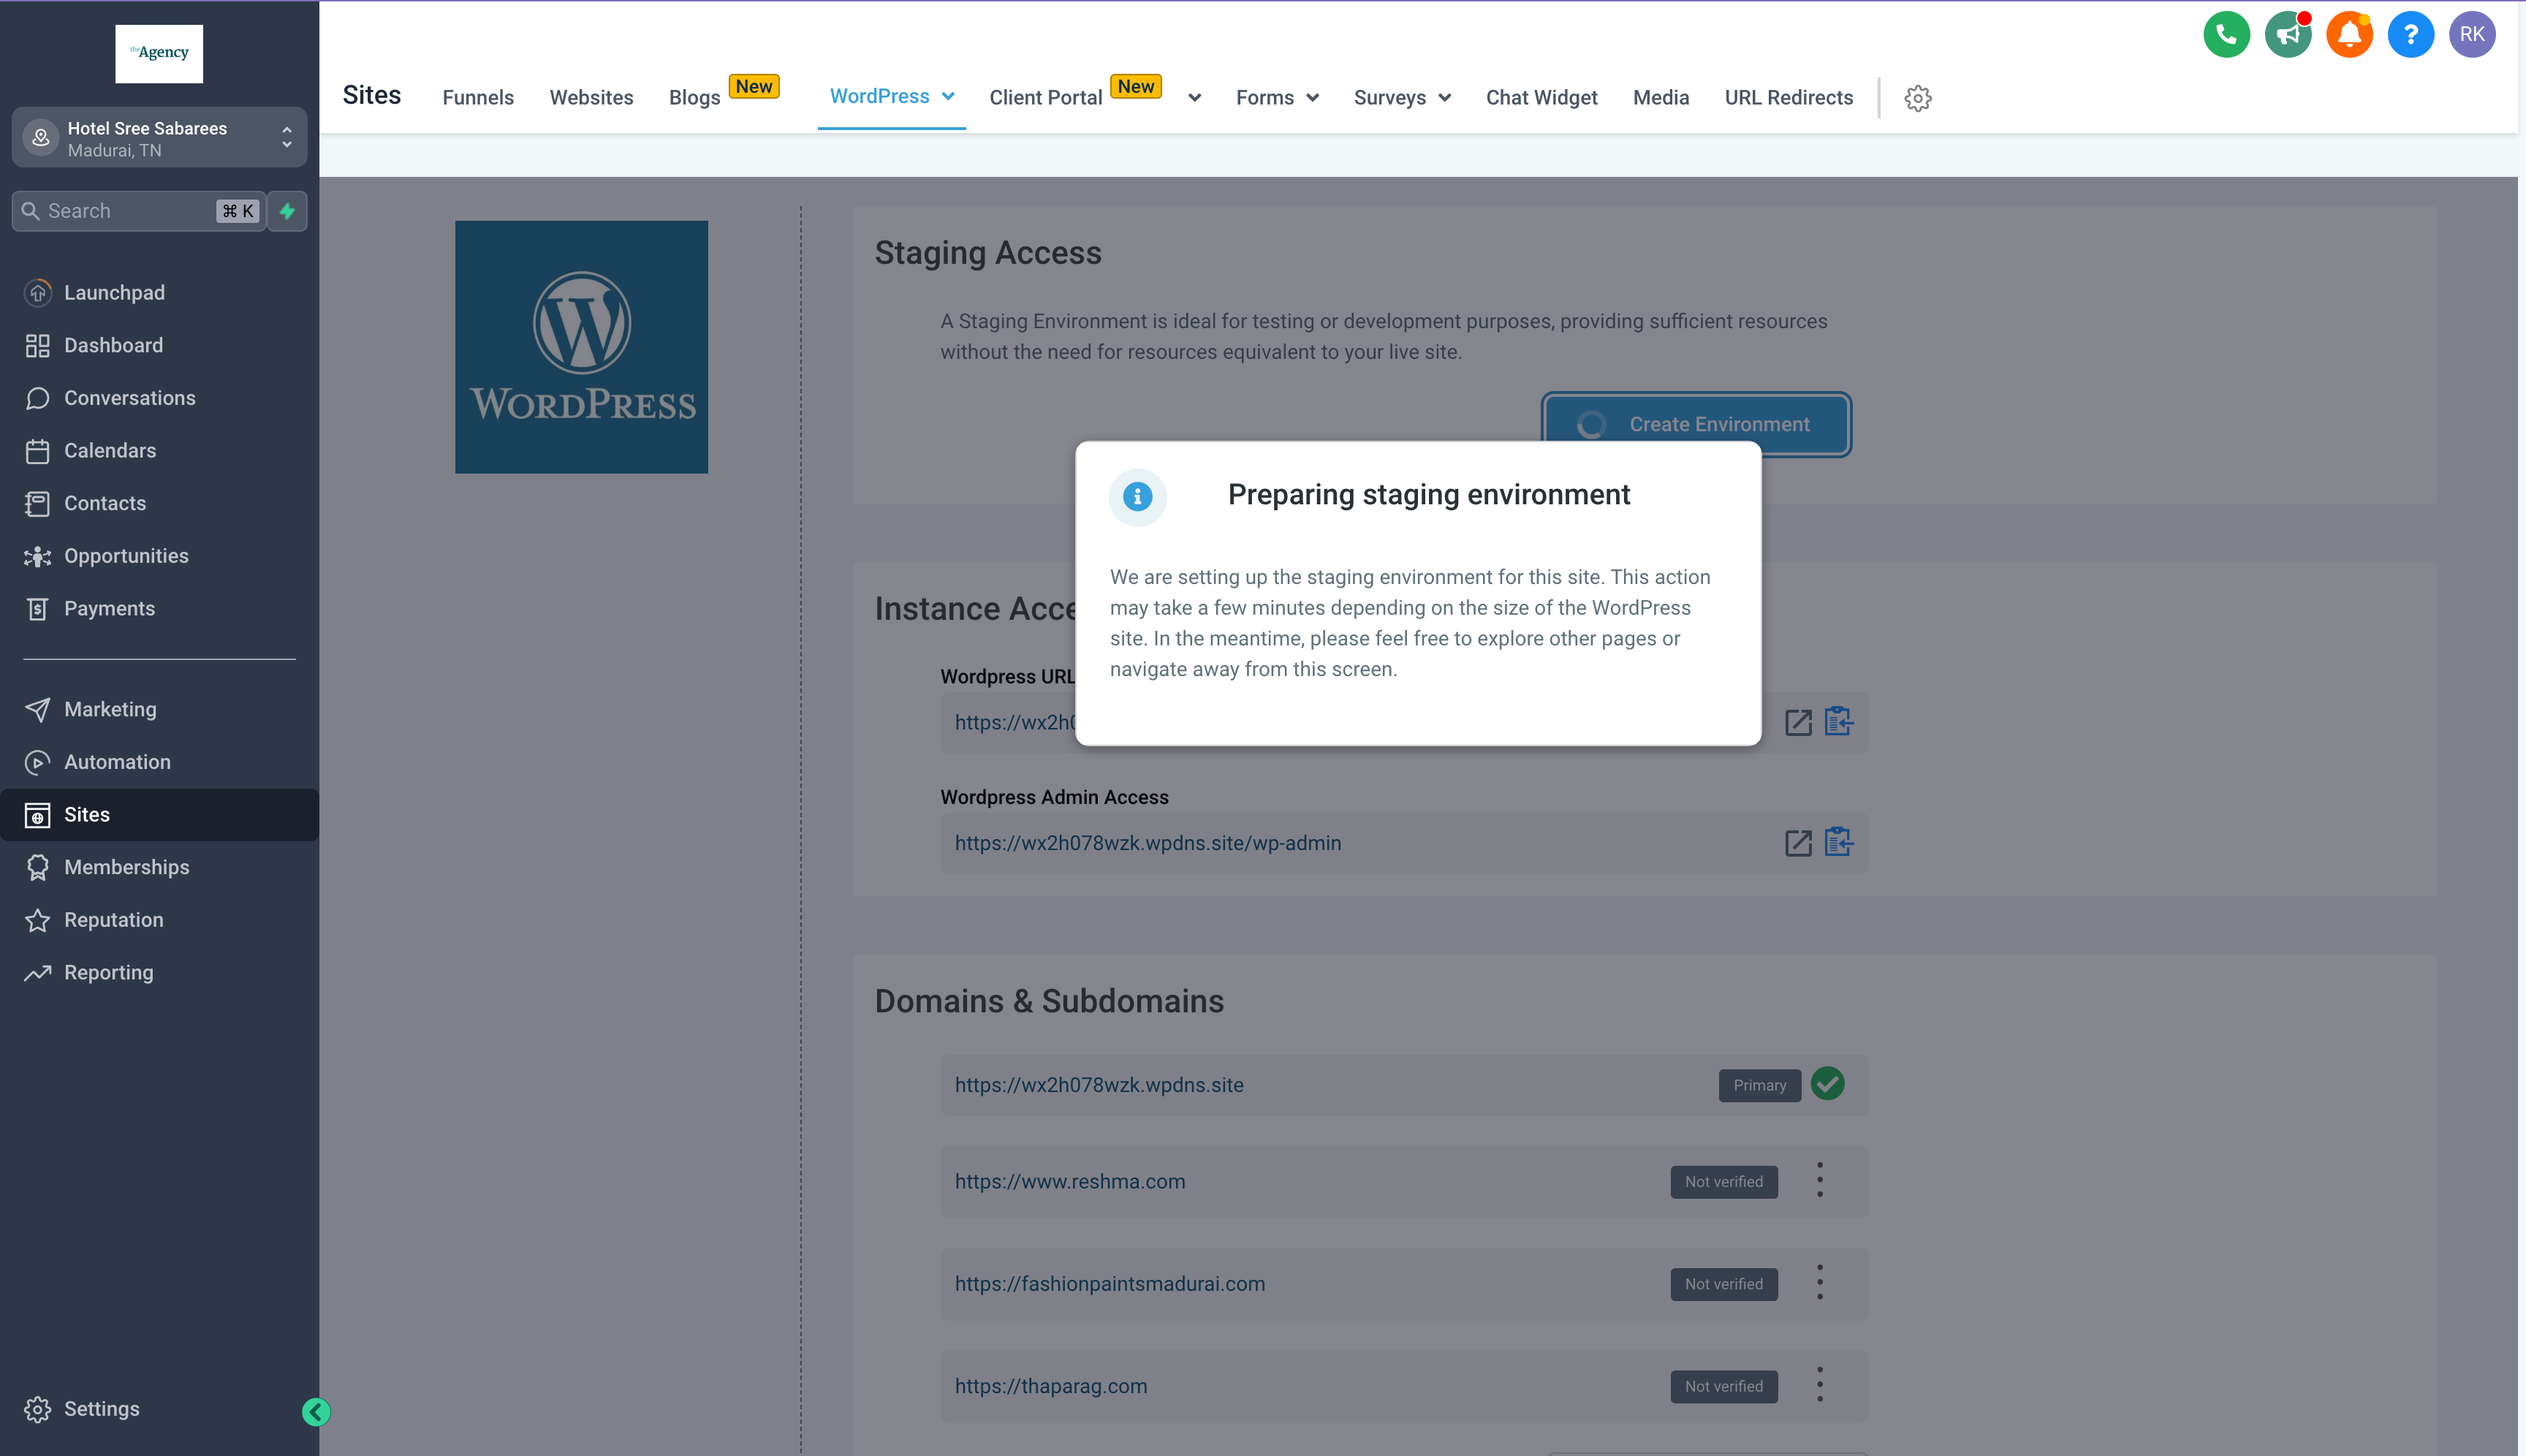
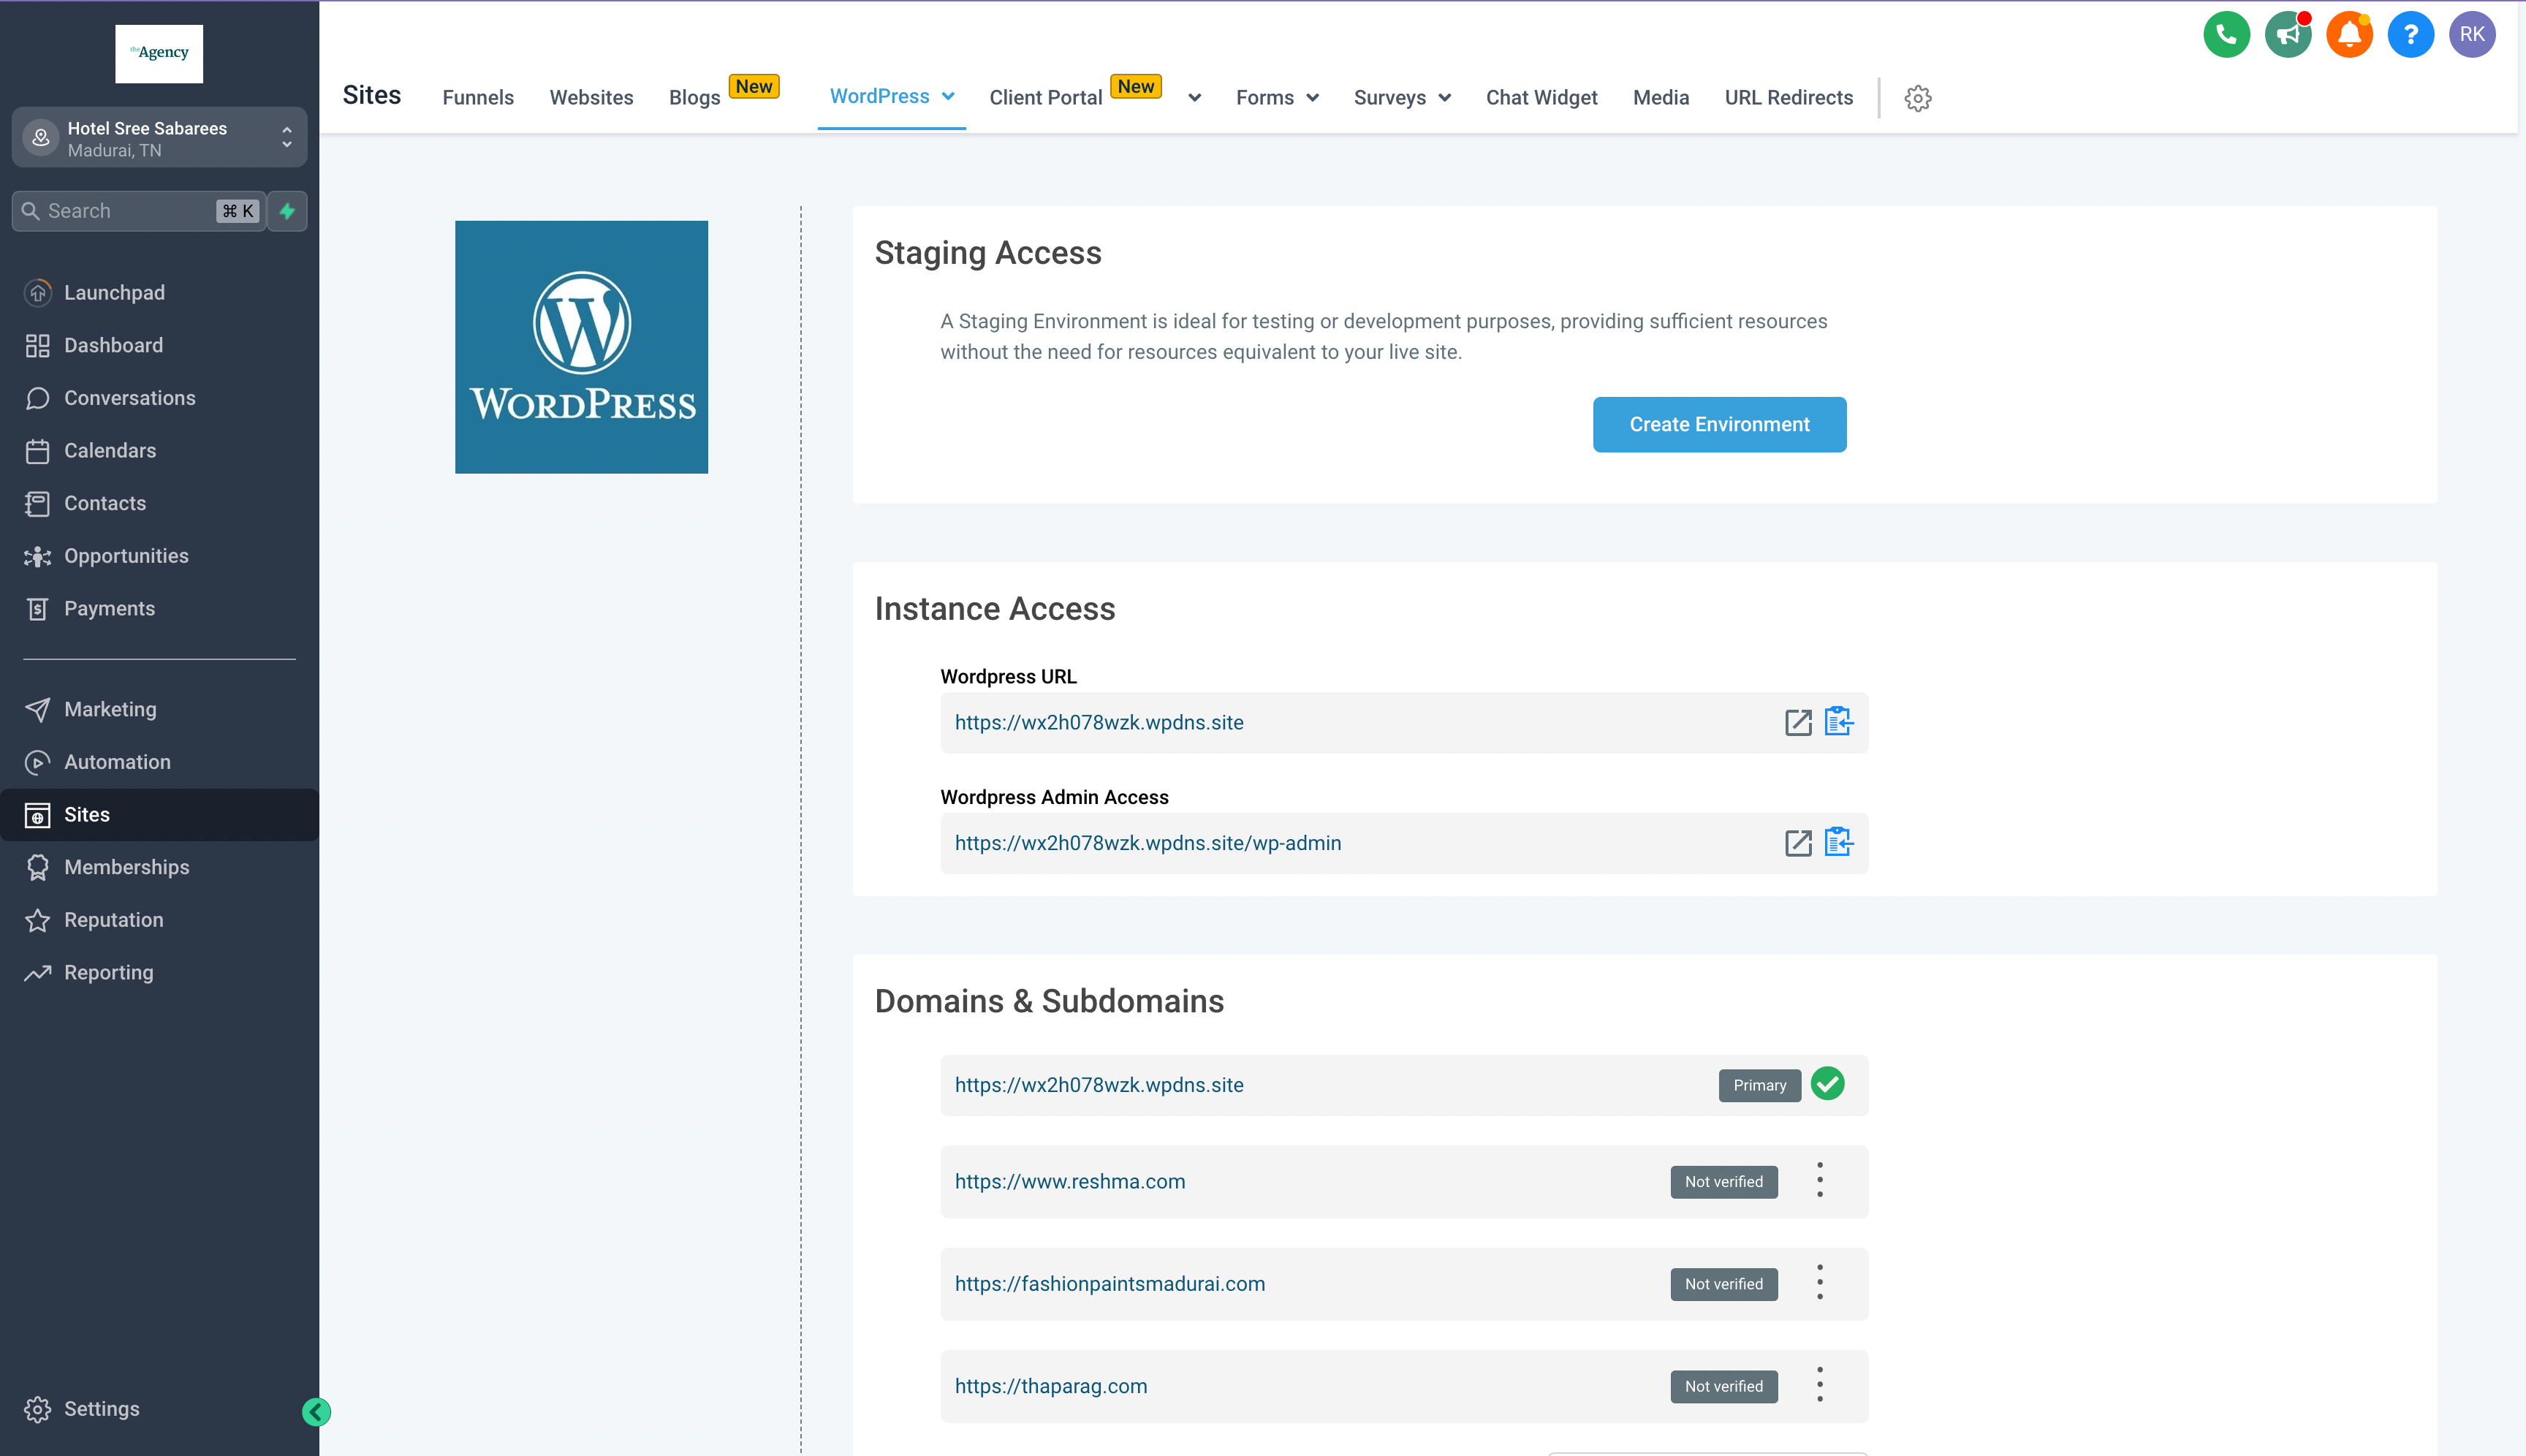
Once your staging environment is successfully created, you gain the flexibility to make any necessary modifications to your website and thoroughly test them before applying changes to your live site.
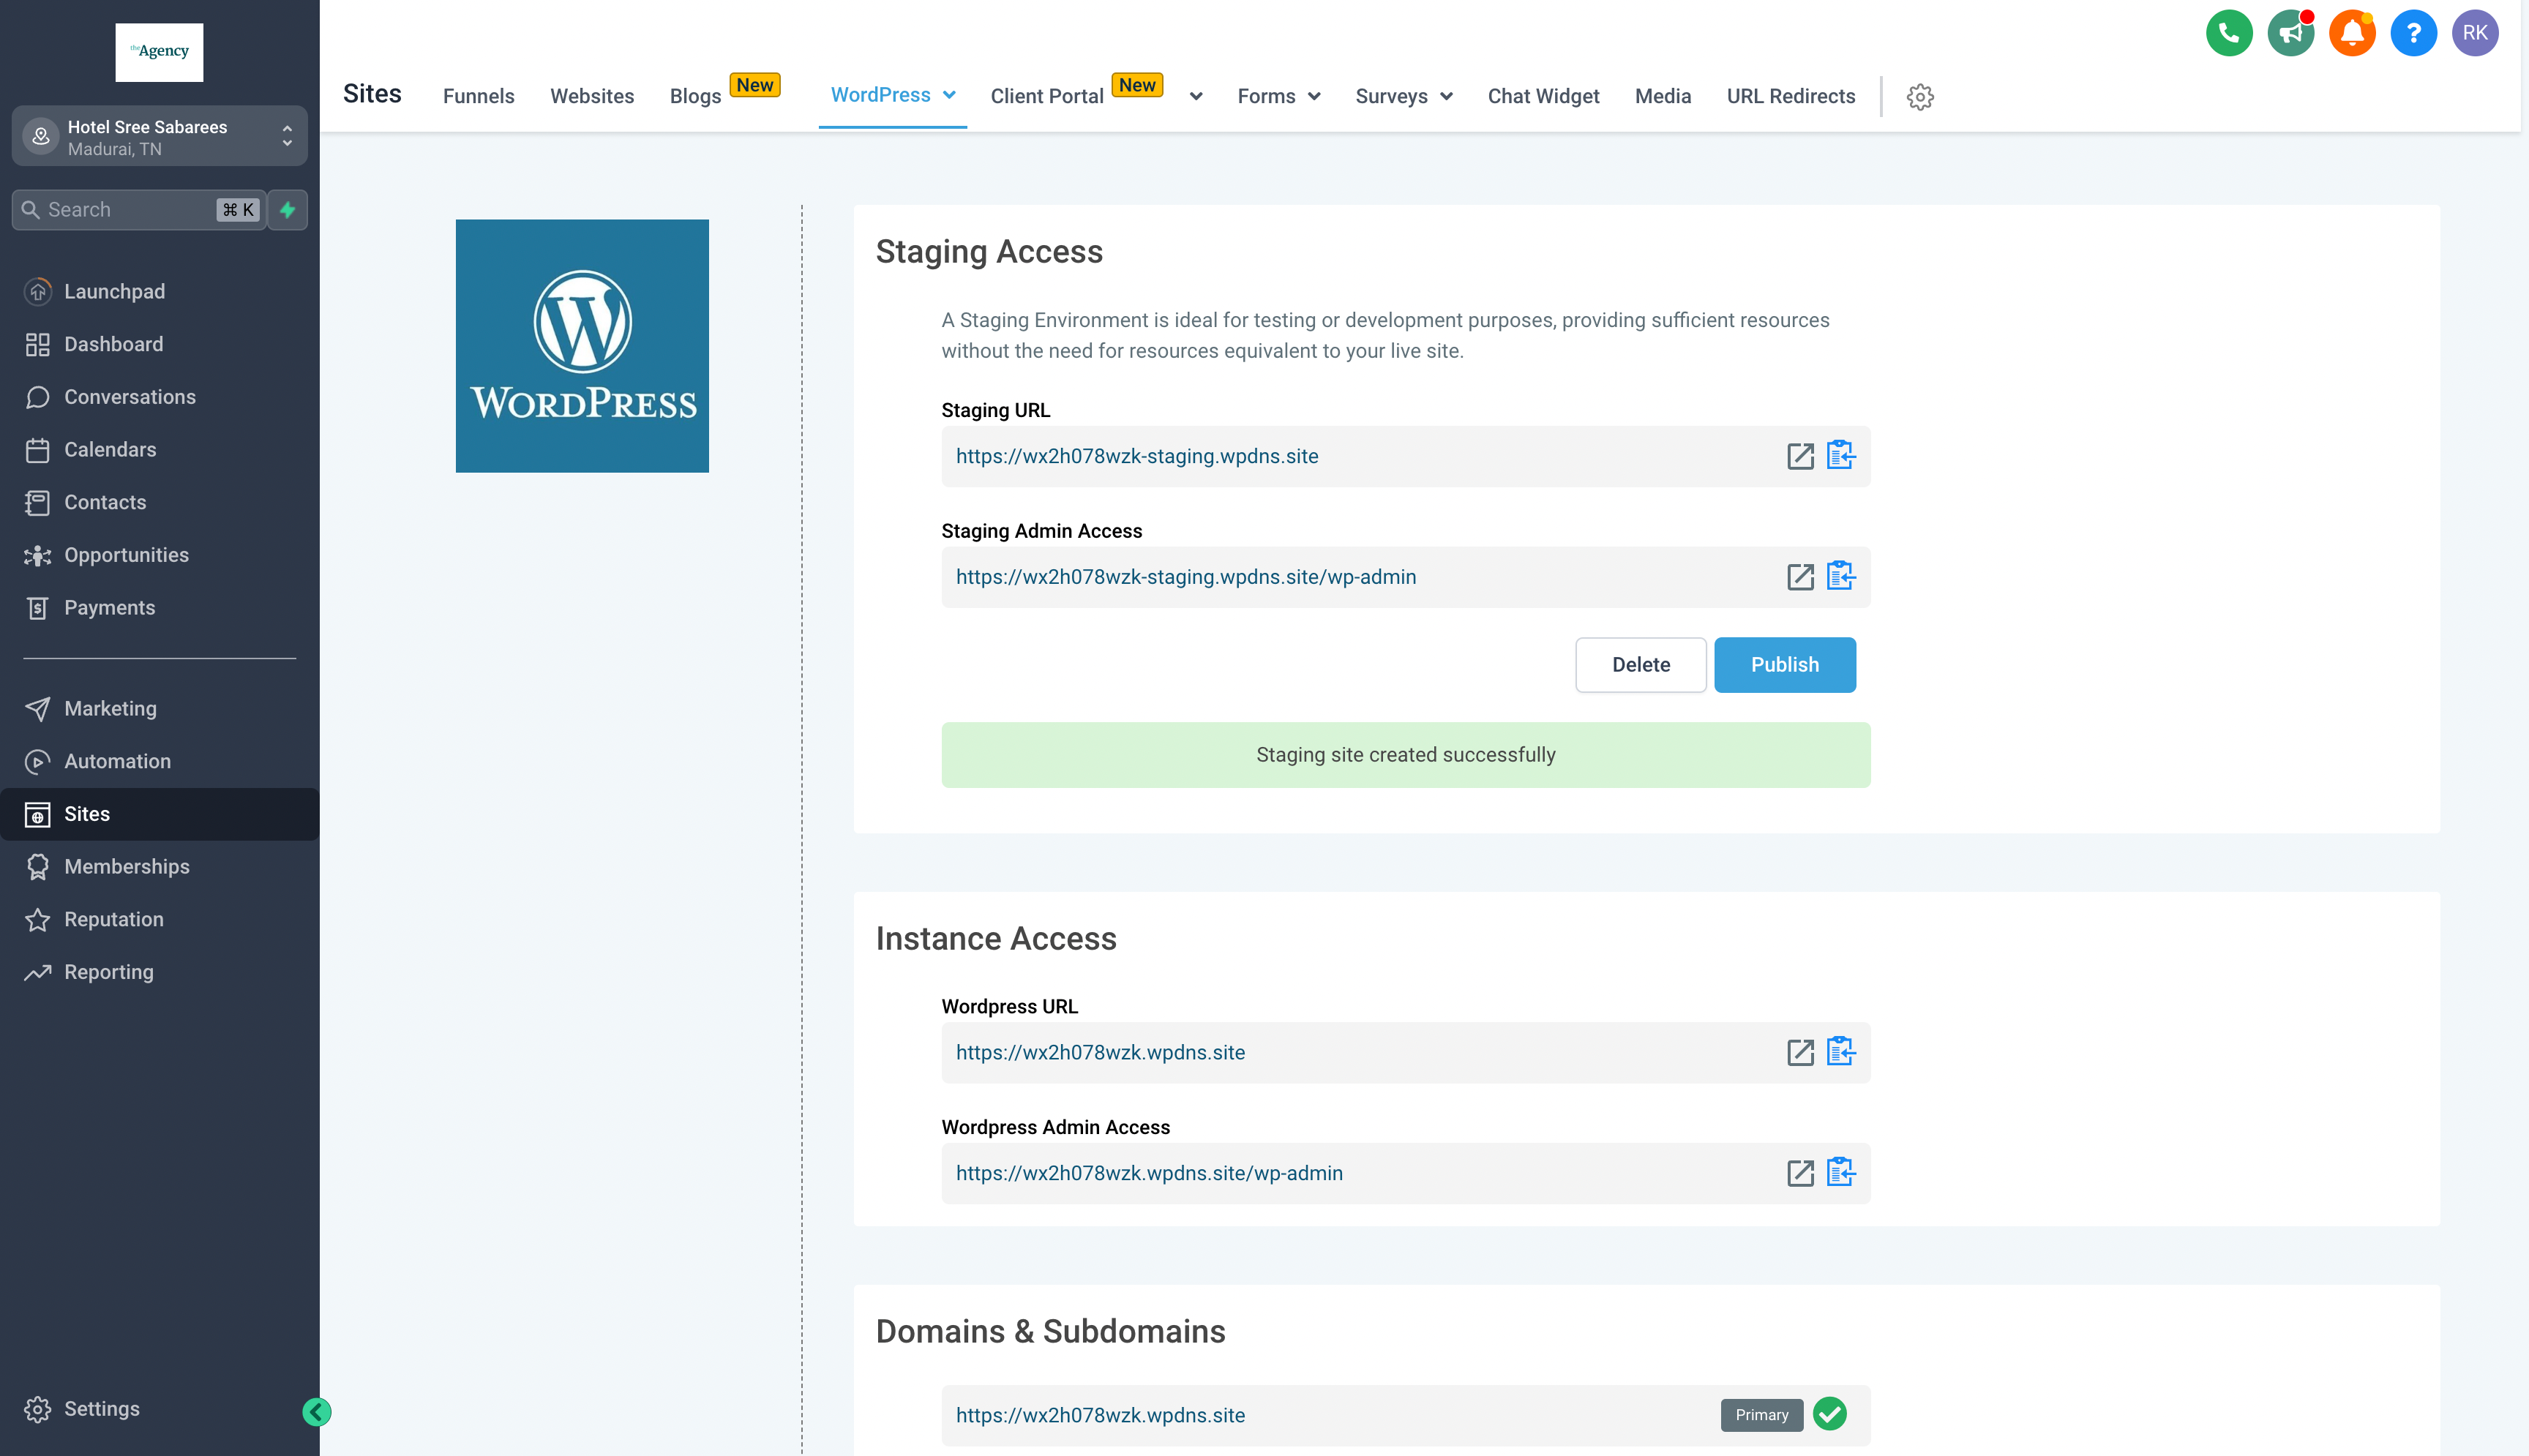
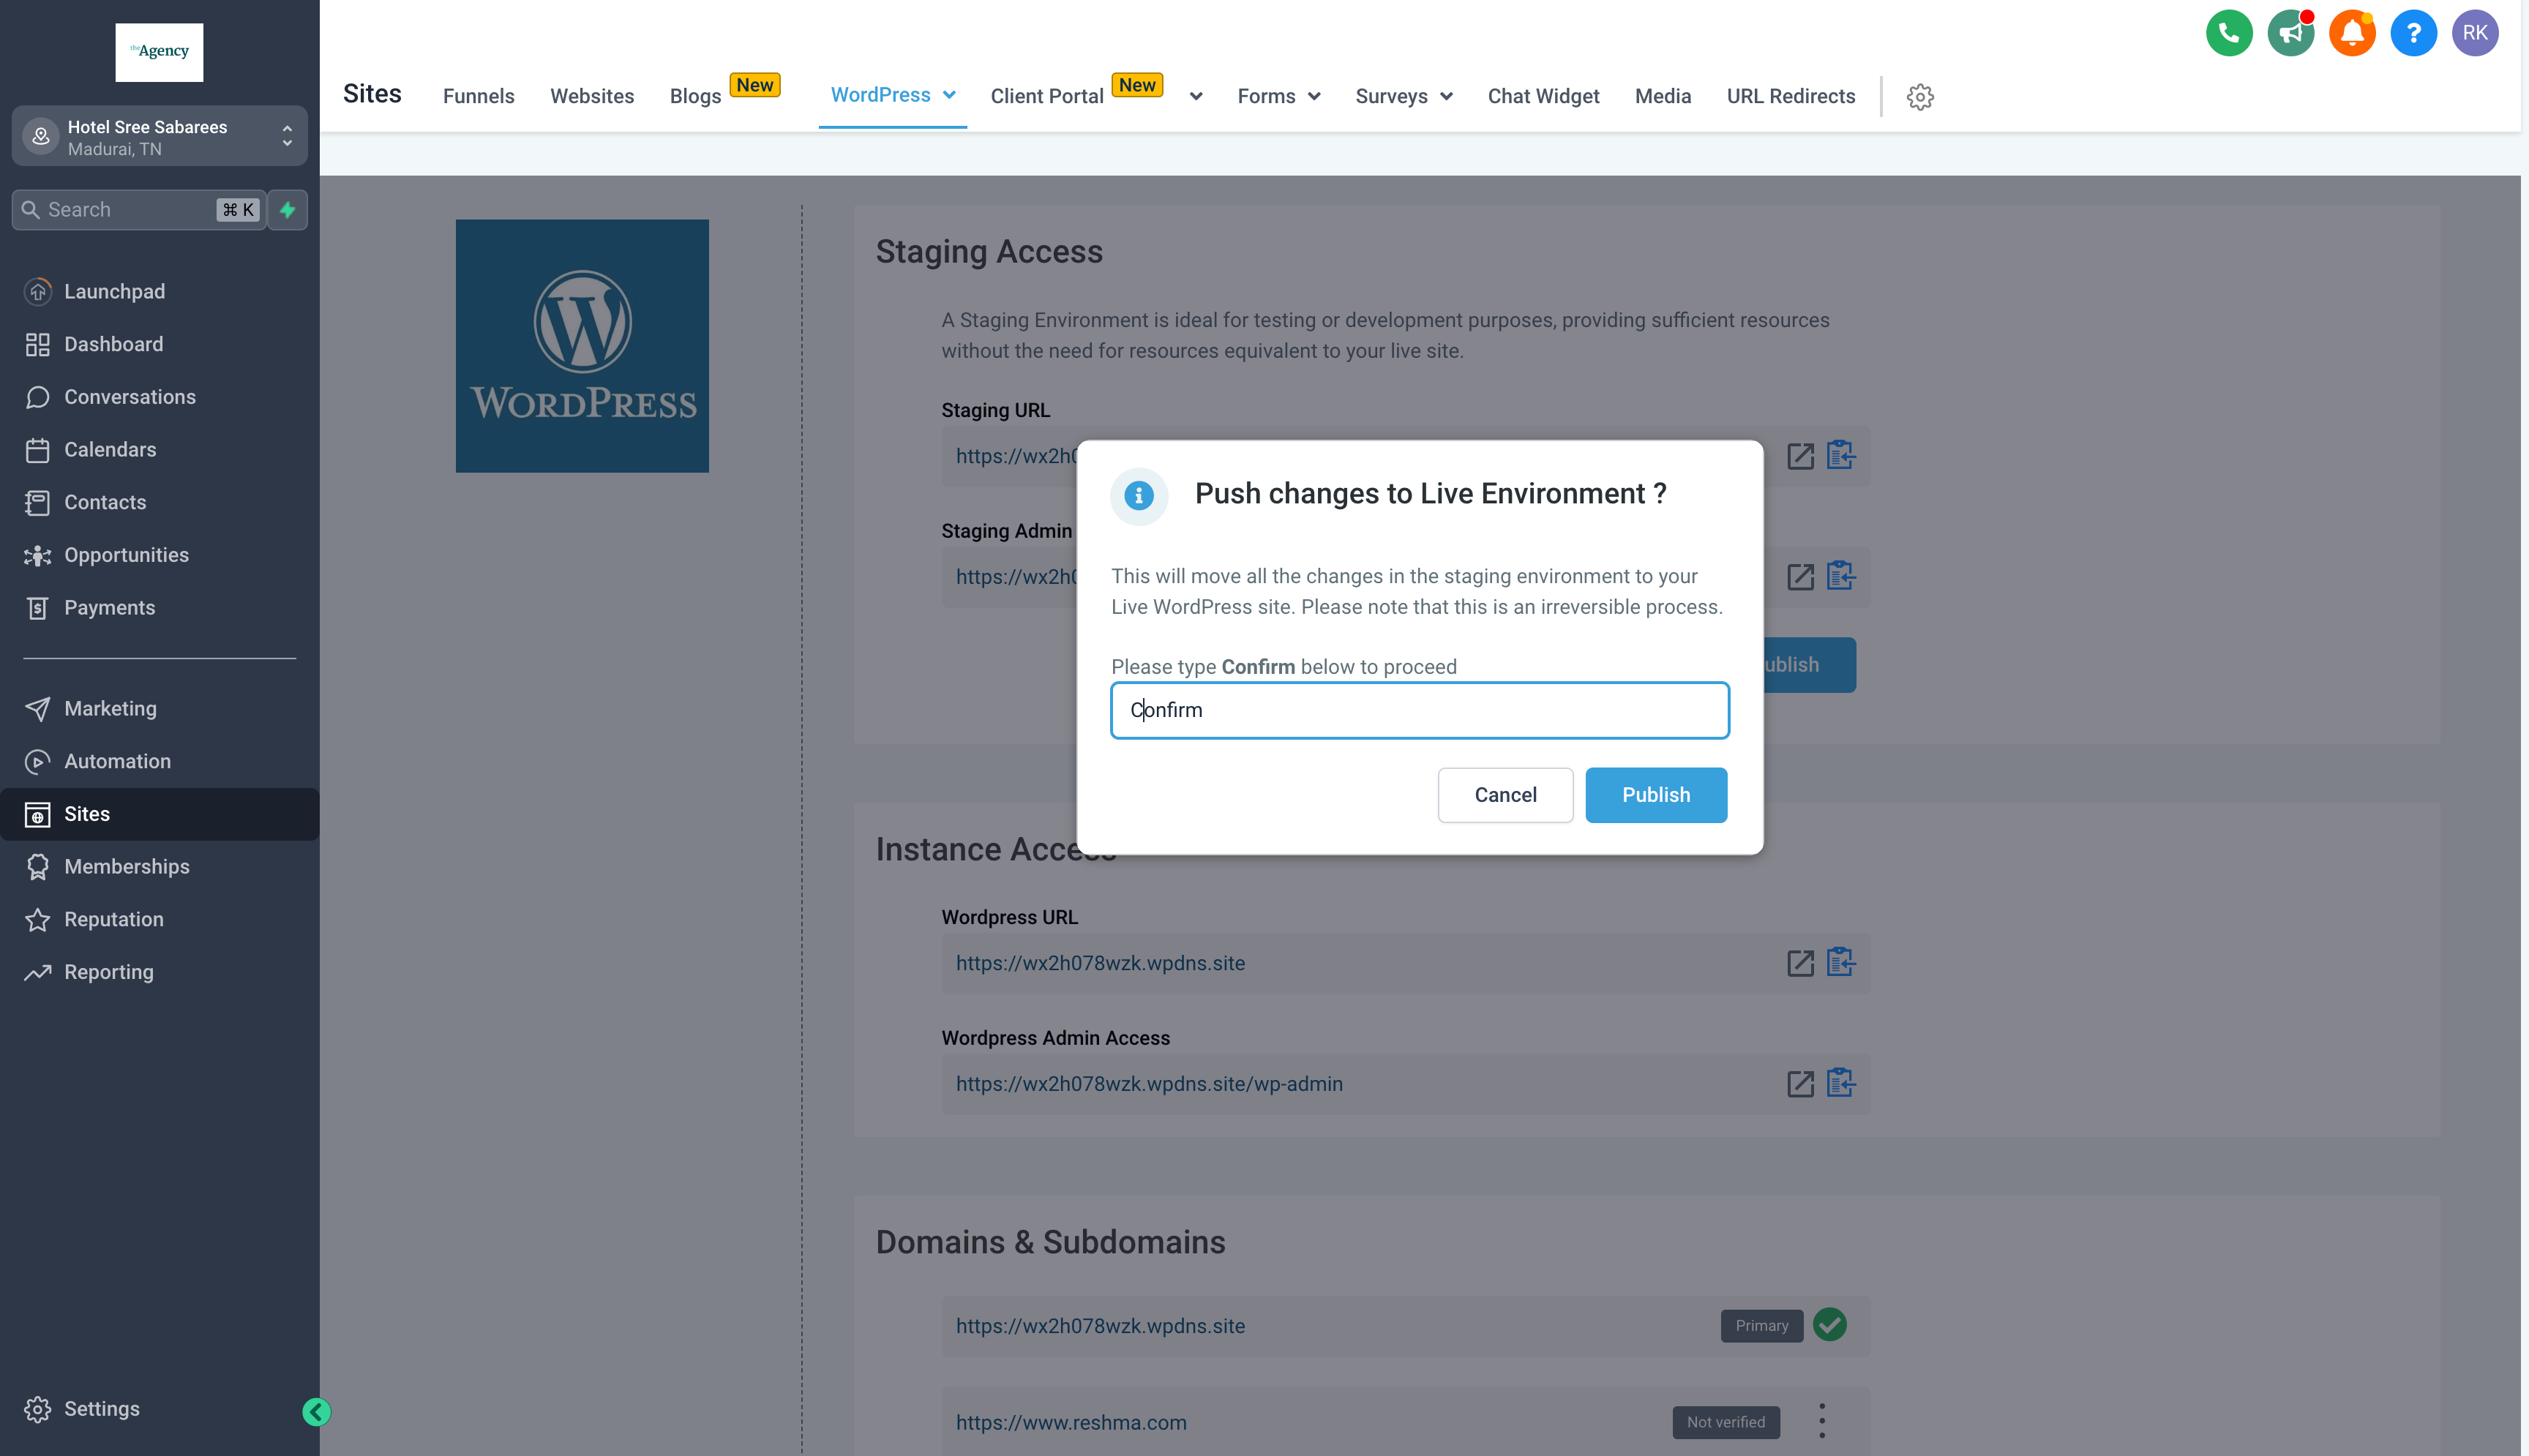
After completing your modifications and testing, locate and click on the "Publish" button. A notification box will prompt you to confirm your decision. Upon confirming, your site will be published within the next 2 to 5 minutes.
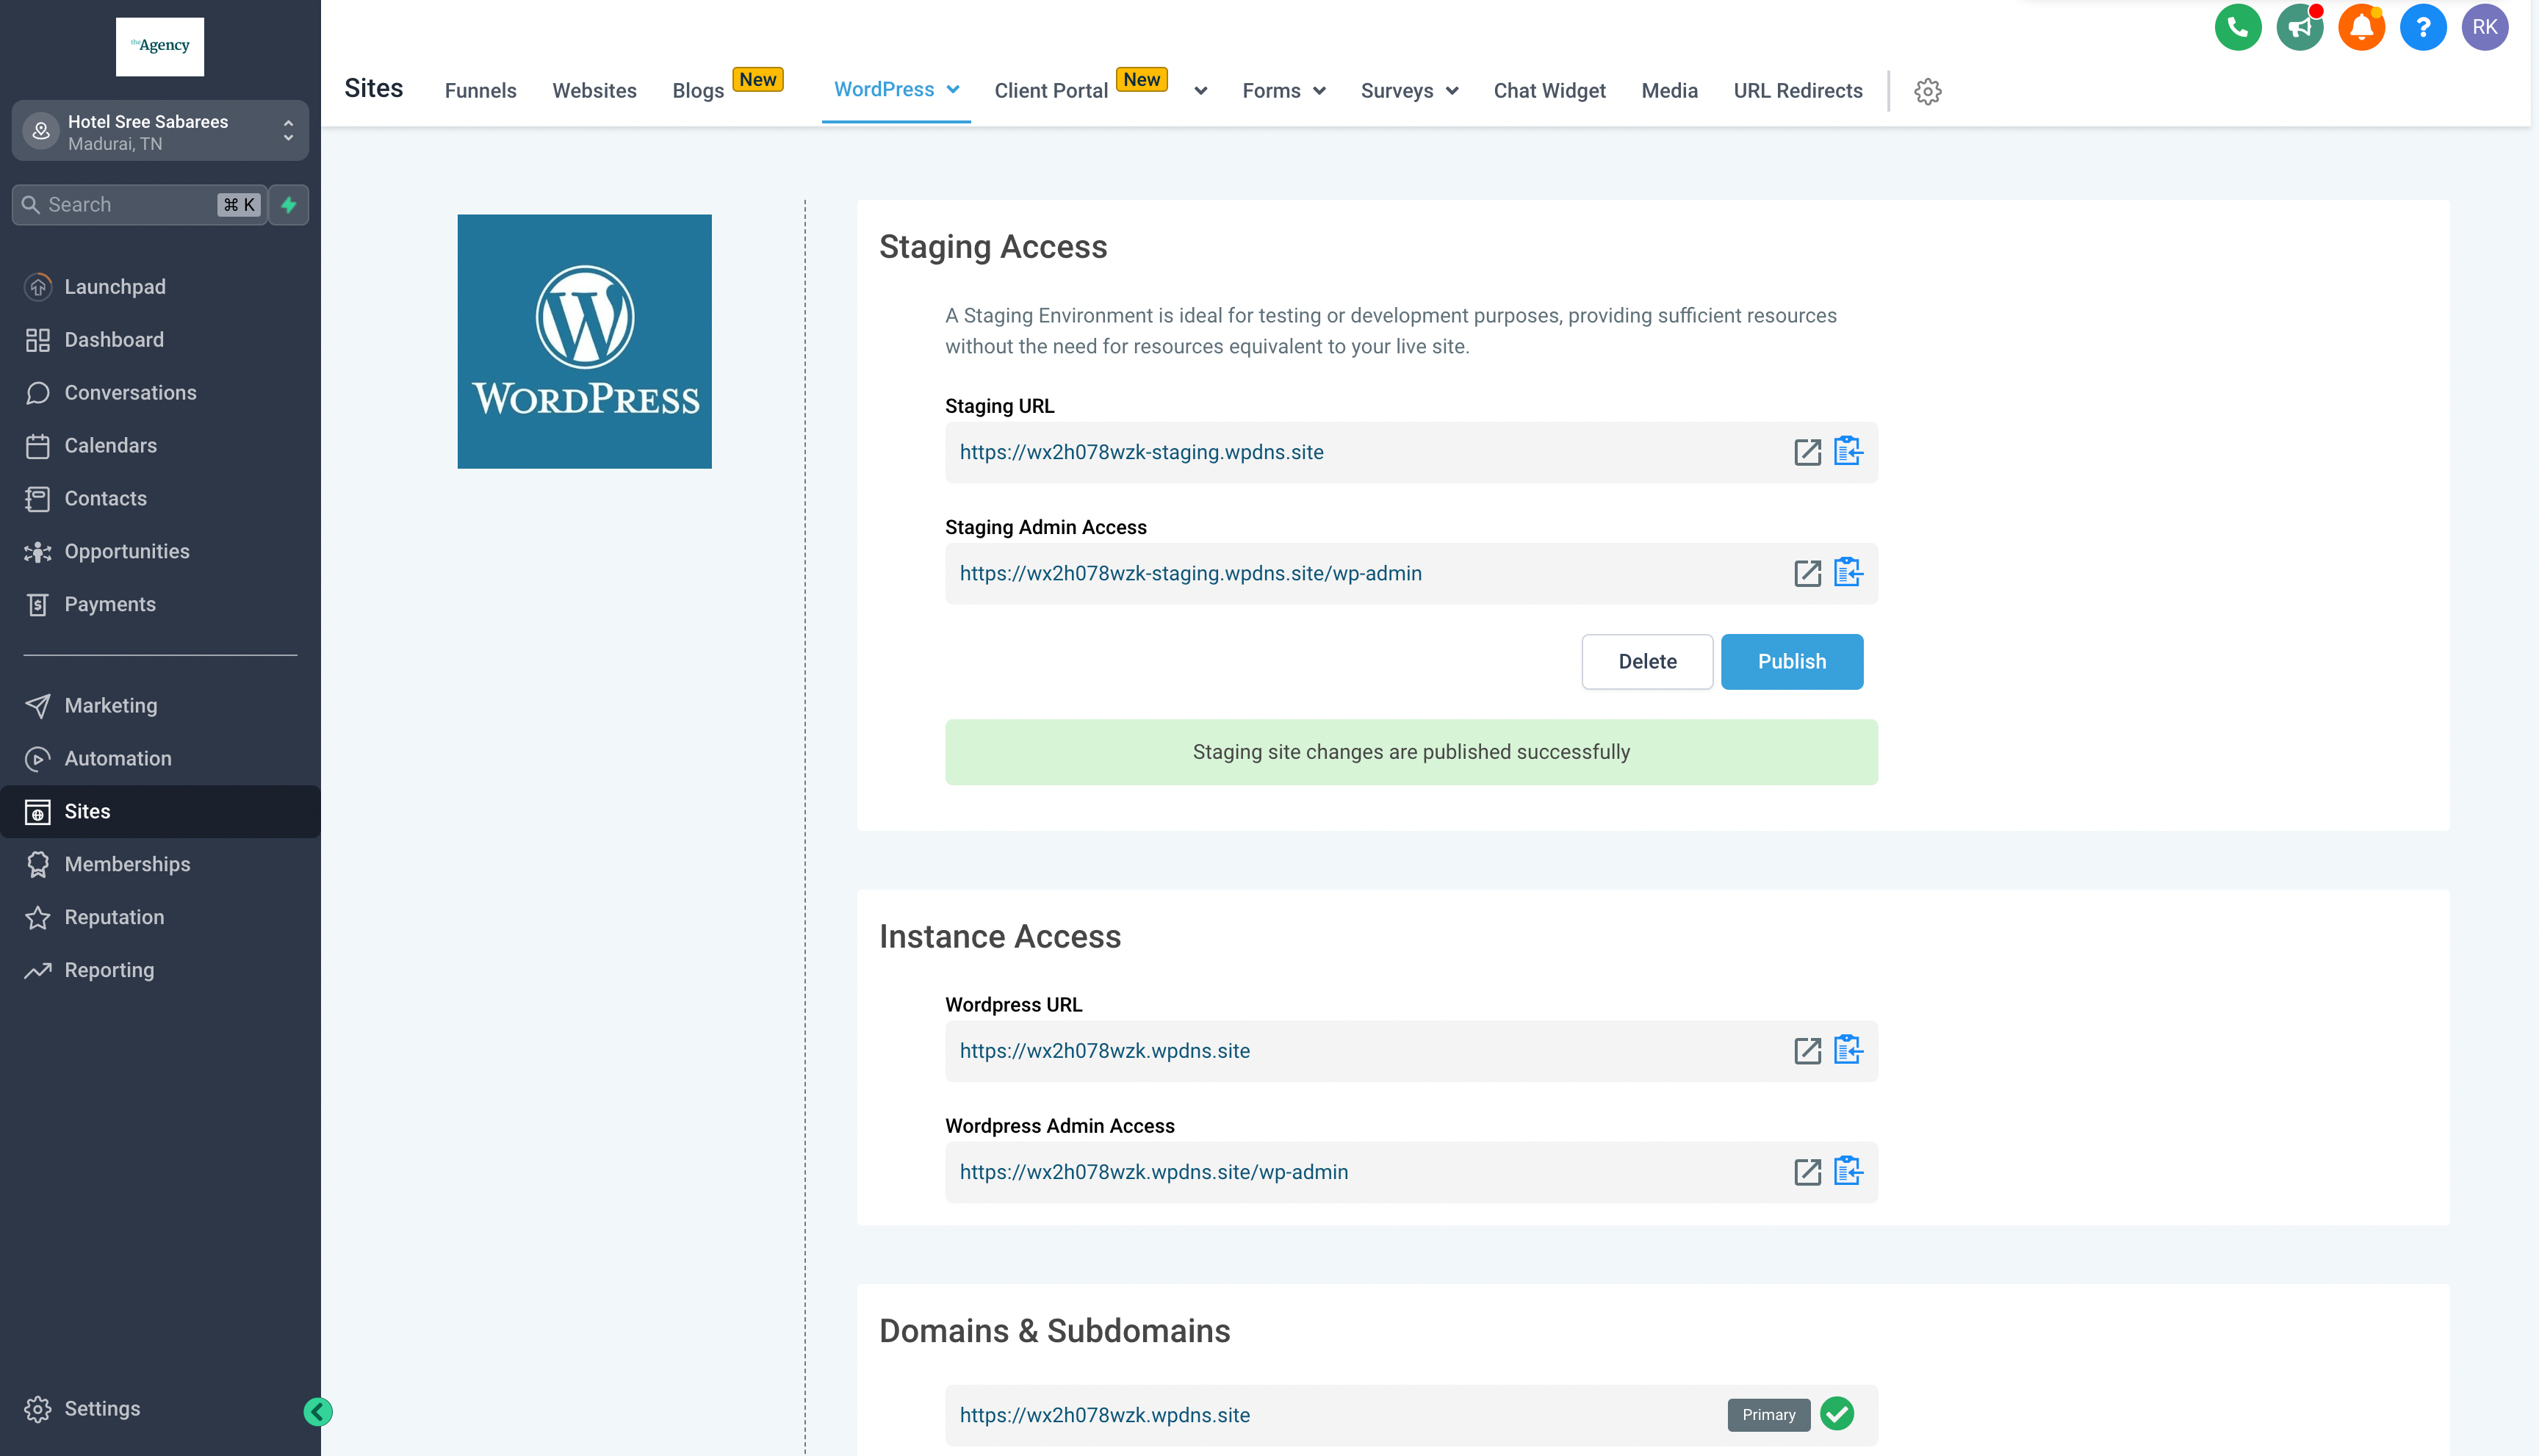
Should you ever need to remove your existing staging environment and start afresh, simply click on the "Delete" button to initiate the process.
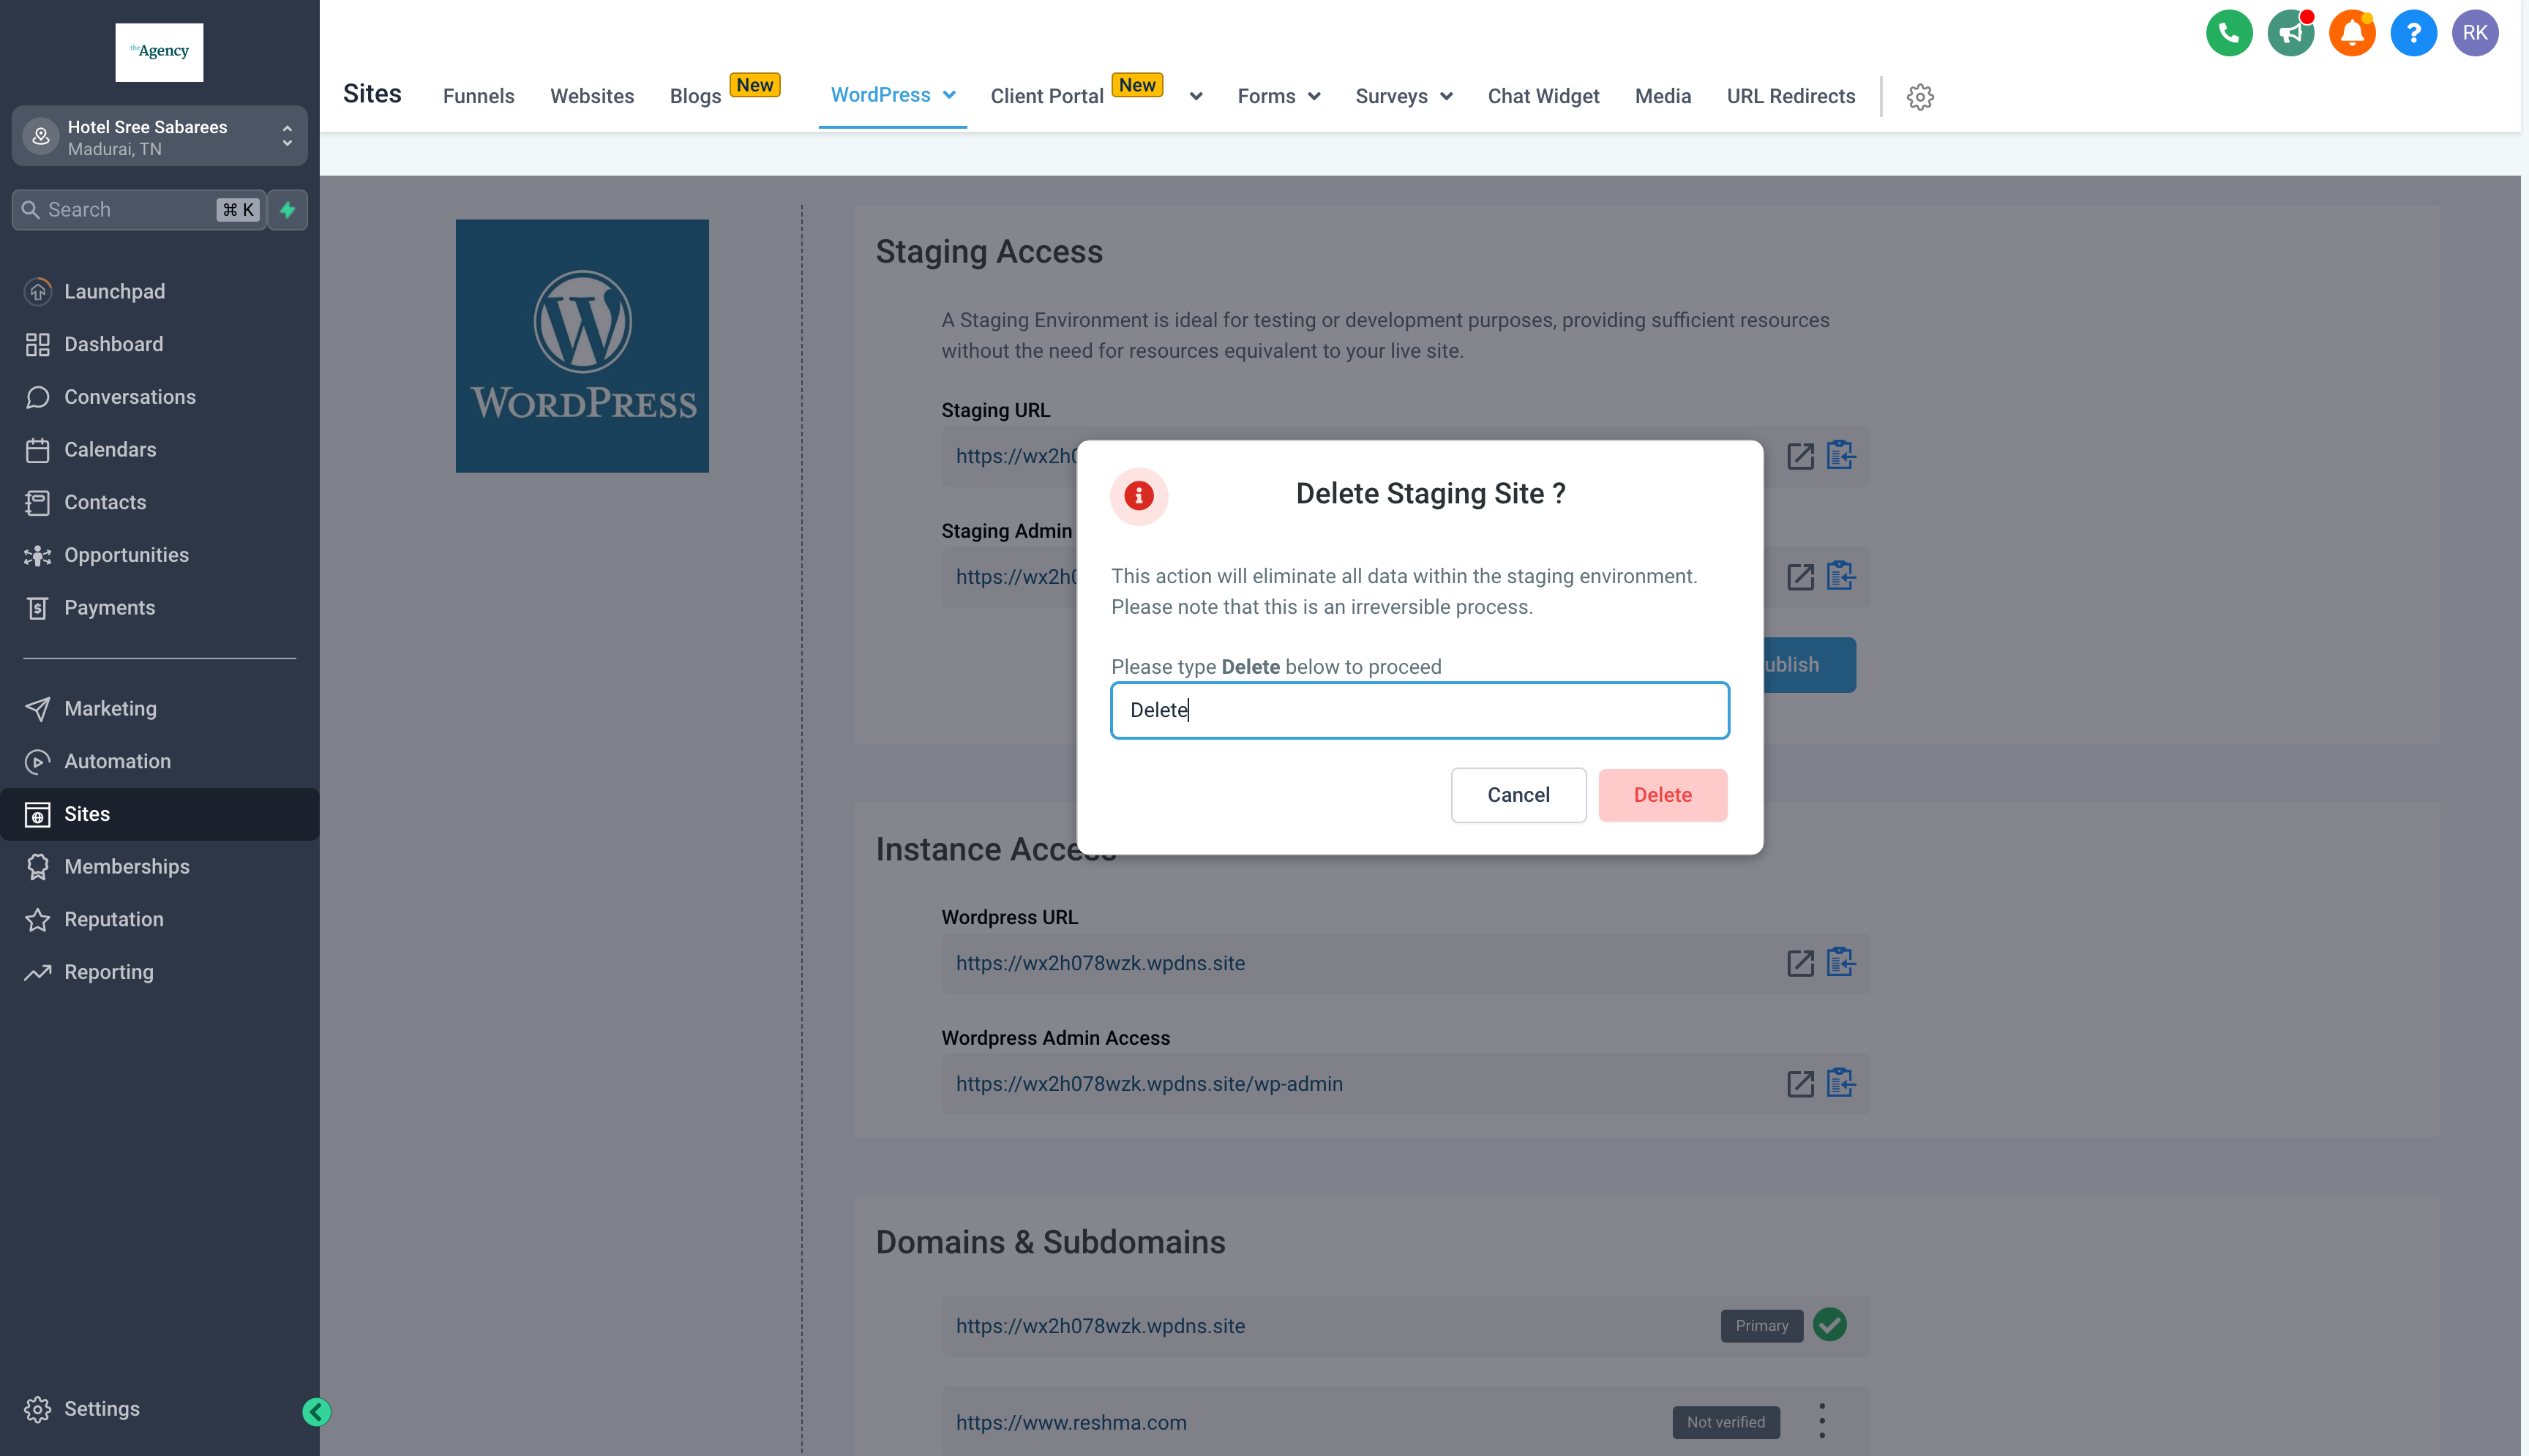
Note:
Remember that changes made in the staging environment will not affect your live site until you specifically choose to publish them.
We believe that Staging Environment Access in WordPress will greatly assist the way you manage your website, enhancing your workflow, and giving you greater control over your online presence.
To know more about using staging environment in Wordpress, click here
Streamlining Collective Booking with Zoom and Google Meet Integration
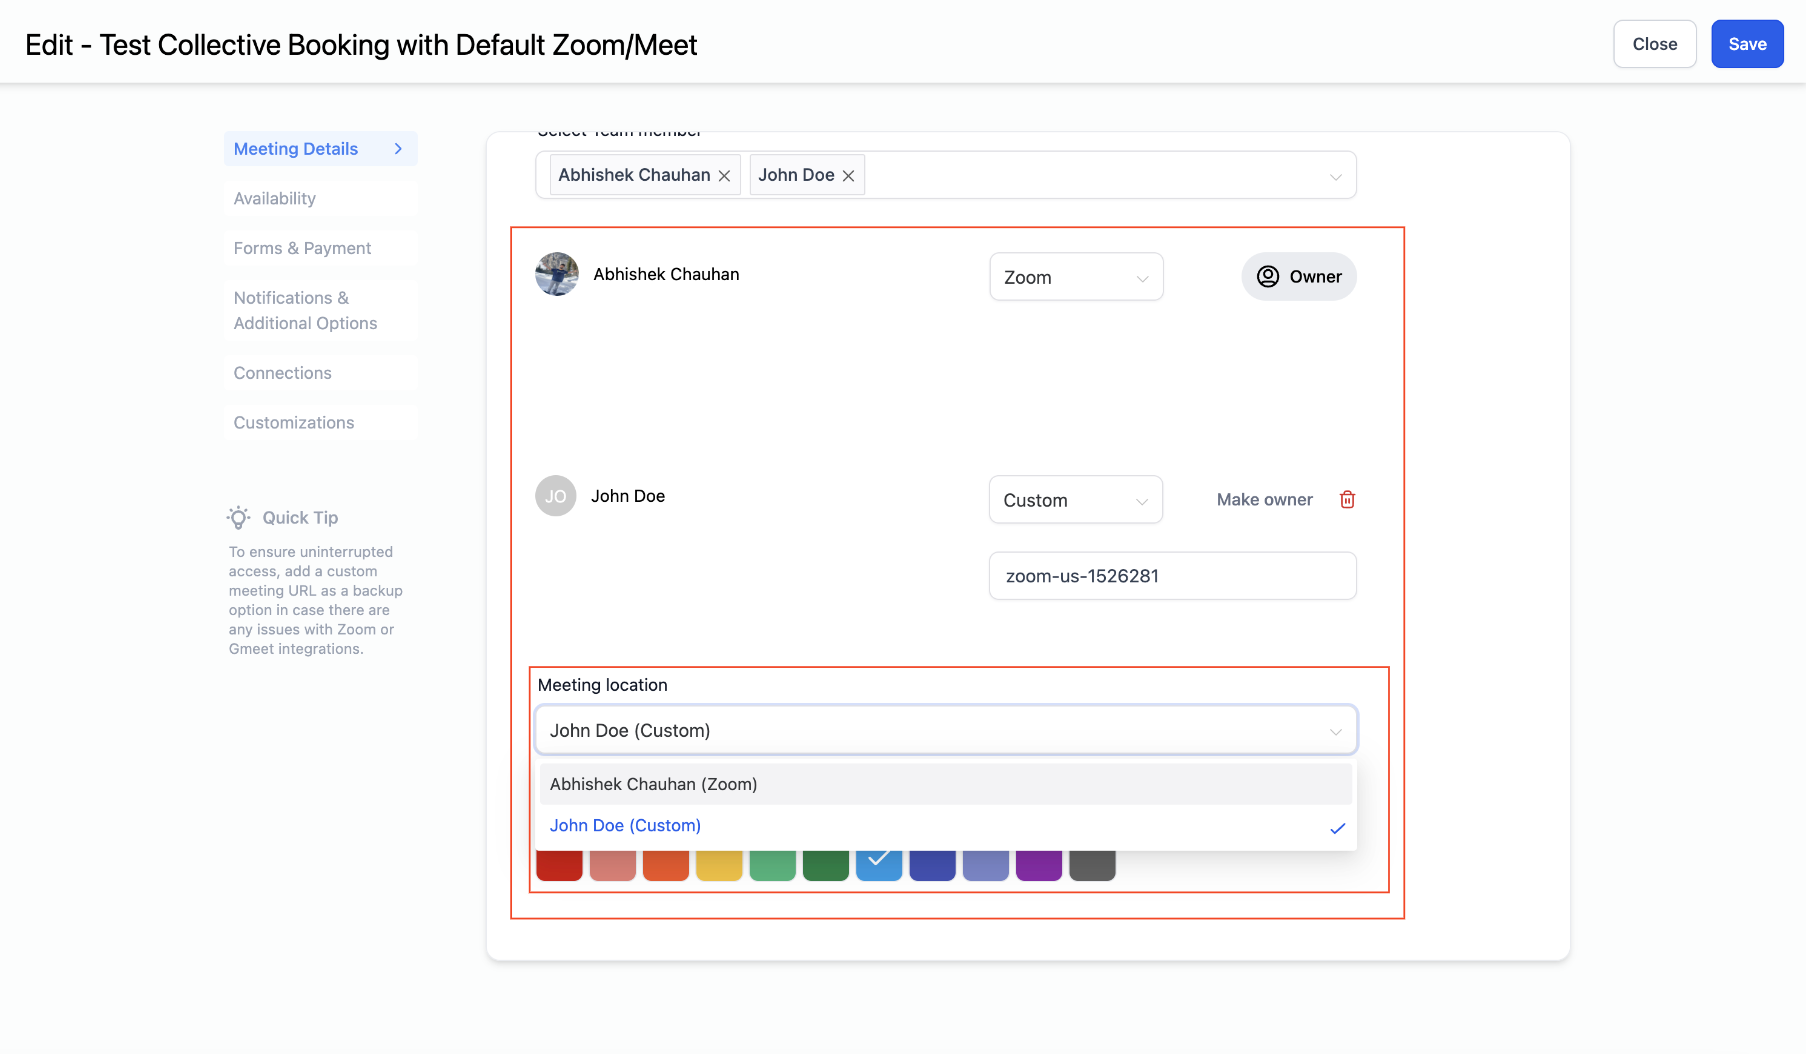
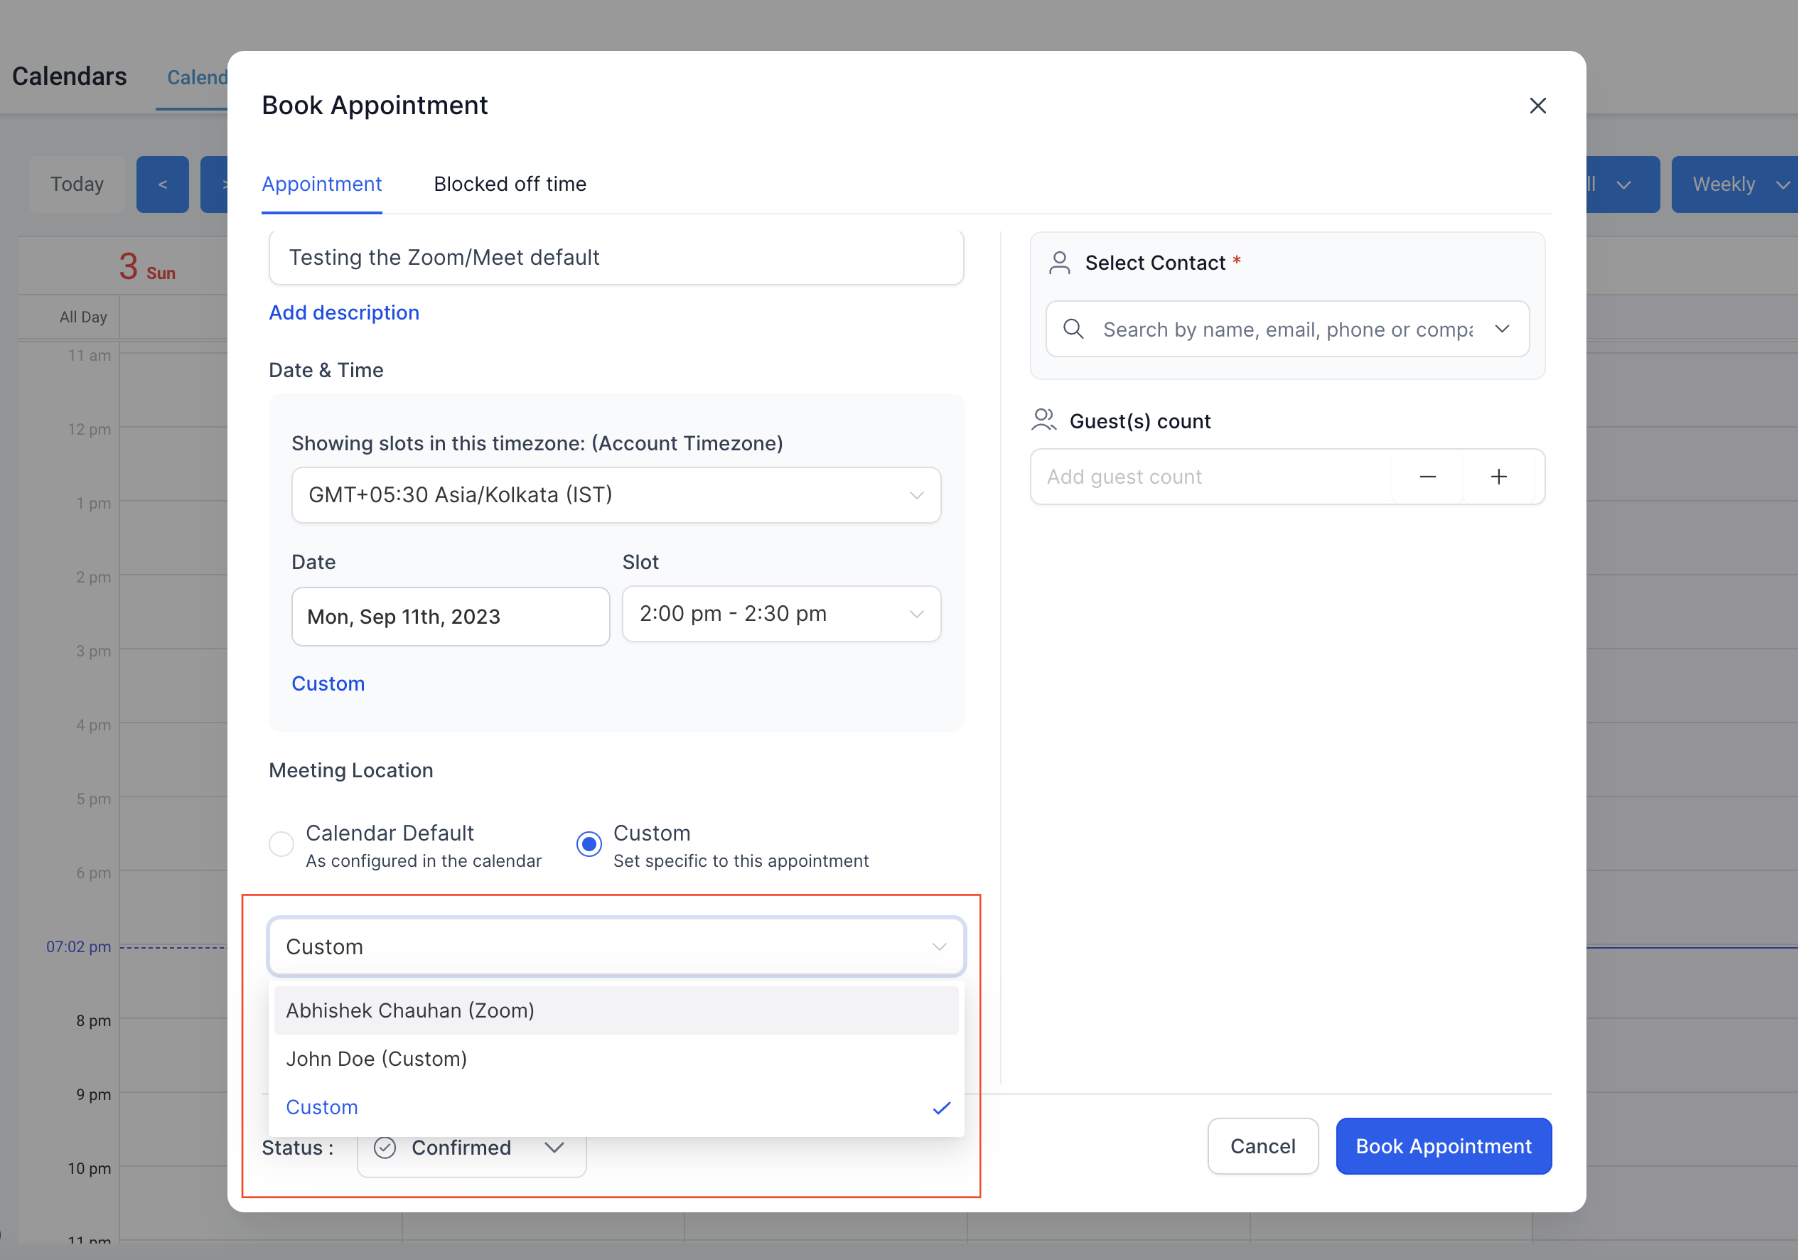
In the Collective Booking feature, users can now pick between Zoom or Google Meet for where their meetings will happen. This means they can easily create links for Zoom or Google Meet whenever they set up an appointment.
Why did we do this?
User suggestions were taken into account during the launch of Collective Booking. They wanted the ability to use Zoom and Google Meet in addition to custom locations, so this feature was added accordingly.
Impact of this enhancement
This update enhances the user experience of Collective Booking, specifically for individuals using Zoom or Google Meet for appointments. Now, the convenience of automatically creating meeting links during appointment booking is available, removing the need for a single, unchanging meeting link.
Copyright Automate Your Hustle CRM 2022 -- All Rights Reserved
We don't want to hustle harder...we want to automate the hustle!